You will need a reasonably good images manipulation program to do this. I recommend using the Gimp. It is a free open source powerful, image manipulation program. It has most of the features available in PhotoShop, but it is free. It isn't as powerful as PhotoShop (but it is gaining). If you don't want to spend a few hundred dollars, this is a good alternative. This tutorial is based on using the Gimp, however other programs should be similar.
The first thing to do with the images is to straighten them up. Generally, when images get scaned they aren't quite straight on the glass, so they come out a little crooked. Rotate the image until it is prefectly straight (it may take a while to get the hang of it, but eventually you will get to the point where you can get it pretty close on the first or second try). This is critical when you have to stitch multiple images together.
| Original image (scaled) | rotated image (scaled) |
|---|---|
|
|
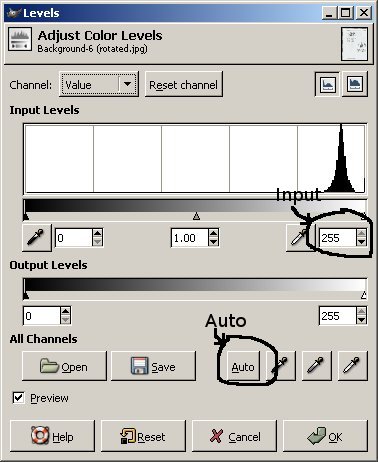
Next thing to do is to use the levels tool (at least that is what it is called in the Gimp, I believe it has a different name in Photoshop), but it is used to modify the color levels of the image. I start with the auto button which goes through the image and darkens some things and lightens others and sometimes just changes colors. I follow that up with modifying the input level. It starts at a value of 255, for images with light shadows, discoloration or bleed through generally going to 240-245 is sufficient to get rid to the stuff you don't want. For images that doesn't work for you may need to be more aggress and go to somewhere closer to 200. Going much more than that can cause the image to start noticeably degrading.
| Levels dialog | After auto button (scaled) | input level seto to 225 (scaled) |
|---|---|---|
 |
 |
 |
The next thing to do is to get rid of the edge shadow lines, or rust spots or finger prints or whatever else didn't get cleaned up previously (I sometimes do this step prior to adjusting the input levels, but after the auto adjustment). This is done by either selecting the area and using a color fill to fill it with white or using the eraser tool to erase the lines or something similar. Once this is done, you should have a straight, correctly colored clean looking image.
The last thing to do is to size the images. The FSMs are generally scaled to 980xwhatever size for the standard images. MTSCs are generally scaled to 600xwhatever for the standard size images. Generally we use three sizes on the website, 150x200 for thumnails, 980xWhatever for the standard size and whatever it scanned as for the large, printable images. We don't use thumbnails for the FSMs or the MTSC manuals (the MTSC manuals usually have a thumbnail of the front and back cover). Generally the images are saved as .jpg files, though sometimes .gif files are acceptable and yield a smaller size. In general .jpg files are better for photos and things like photos, and .gifs are better for drawings (cartoon type) and text. You should save it as a .bmp or a .xcf (gimp format), .psd (photoshop file) or some other lossless type before playing with making it a .jpg or .gif though, since those are lossy formats (each time you save it you lose information, so after you save it a few times the images starts becoming noticeably less clear--this is especially true for .jpgs).
You will need to create a table of contents page (this is used as the index.htm page, though it is a table of contents). This is done by taking the the contents page (the one at the beginning that lists the sections) and creating an image map of it (more to come on image maps will probably come later, or at least a link to a tutorial on them). I also like to create an index page as well (this is an index in a traditional sense, this isn't the index in an html sense). Go to the 1964 FSM index for an example. This was done by manually creating going through the index in the FSM and putting it into an electronic format with links back to the appropriate pages. Not all the FSMs have the indexes built in. I generally try to create at least a minimal one if there isn't one (I don't go through all the details that I would otherwise do if it doesn't already exist).
I have a script that will create the webpages from the images. It needs to have the files named in a format of xx-yyy.jpg, where xx is the section number (use a preceding 0 if necessary), and yyy is the page number (use preceding 0s as necessary). For the early sections that don't have a section number use either 00 as the section number or __ (__ comes before 00 in ordering). The script will read the the list of files, get their sizes, build html along with the links for the sections, and pages etc. There is another script available and I am not sure what kind of format it requires for the naming, though I think it isn't as strict in its requirements.
Below is a second example, this time using a color selection to clean up the background.
| Initial Image (shrunk down for quicker loading) | Here is the straightened image |
 |  |
Rotating image:
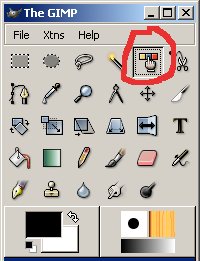
choose the rotate tool
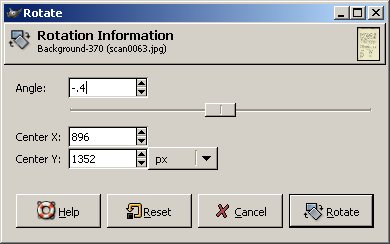
Click on the image and choose the number of degrees to rotate the image to get it straight (in this example I used -.4 and that got it pretty straight). I find that in most images I don't have to do more than -1 to +1.
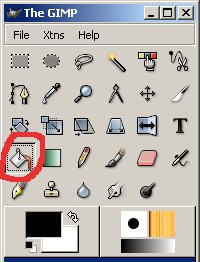
Next I want to make the background white. Since the image is very discolored, I choose to use a white fill. This is fairly different from the method used in the example above. To do the fill, I start by zooming the image. This isn't necessary, however I have found in the past that when I select by color on some images it really slows my computer down as it tries to display the selected area (on some images it can take 10 minutes to make the selection, and another 10 to do the fill, and another several minutes to unselect the image), so by zooming in, I minimize what it is trying to show and don't slow my computer down as much. I then choose the select by color tool.
I click on a background area of the image to select that color. In this case most all the background gets selected with only a few areas that don't since the color was fairly uniform. On other images where the background isn't so uniform these steps can be repeated again--however if there is a picture on the page be cautious about doing this multiple times as it can make the images look really bad. Once the color is selected, then I select the bucket fill tool
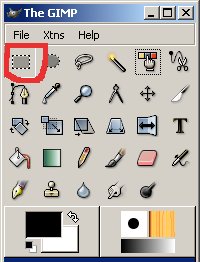
and click on the image (first make sure the the background color is white). The selected area is now made white. To unselect the color area, go back to the rectangular select tool
and click on a non selected area (you can see the mouse pointer change when you are over a selected vs non selected area). Zoom back out and see what the image looks like.
You can see that there is still a fair amount of discoloration around the edges. I can either repeat the previous process or just do rectangular selections and fill those. Since it will be fairly straight forward to do the rectangular selections, I will do those. This is done by selecting the rectangular selection tool, then going to one corner, clicking the left mouse button and dragging (with the button still down) to the opposite corner of the rectangular area you want to select. Once you have the area outlined, then switch to the bucket fill tool and click on the image. Repeat for each of the other areas you want to clean up.
In this case that is all that is necessary.