|
b. Installation
Refer to Figure 18.
Inspect the thermostat as-
sembly and thermostat helix coil
guard for disattaching
screws.
Viewing
the thermostat from micro-switch end, connect green wire
to the upper terminal and white wire to the lower terminal
(Fig. 19). Carefully insert helix coil portion of
thermostat into heater housing (cable clip up) and install
retaining screws. Install control cable, but do not
tighten screw. Move temperature control (on instrument
panel) to the fully open position. Move thermostat control
linkage downward to fully open position and tighten swivel
NOTE:
When thermostat cable is properly installed, the
temperature control level should move the thermostat linkage
from one extreme to the other, without interference with
the cable housing.
|
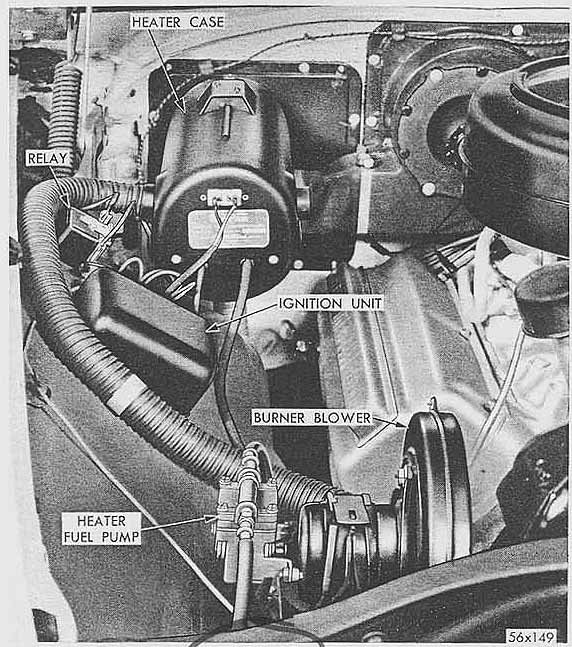
a.
REMOVAL AND INSTALLATION OF IGNITION UNIT
Refer
to Figure 18. Disconnect the two wires at front end of heater
(Fig. 19). Remove the three screws holding the upper half of
heater case. Raise front end of heater case. Disconnect and
remove spark plug wire and grommet from lower half of case.
Disconnect the wires from ignition unit.
NOTE:
The ignition unit is sealed and serviced as
an assembly only. If inspection or
tests indicate unit
to be faulty, replace the assembly.
b. Installation
Install
ignition unit assembly on fender shield. Connect wiring harness
at ignition unit and heater case (Fig. 19). Connect spark plug
wire to spark plug, insert grommet in lower half of case, and
install upper half of case and attaching screws. |