
Imperial Home Page -> Repair -> Body -> Replacing a broken hinge door stop ( 1960 to 1966 Imperials )
|
Thank you for allowing me to share this information with fellow Imperial owners. My Name is Dan Traynoff and I own two 1963 Imperials. The following is the step by step procedure for replacing a broken hinge door stop for 1960 to 1966 Imperials without removing the door or hinge from the car. It is common for the original door stop to break. The photographs are numbered to match the steps in the repair procedure.
Click on photos to see larger versions
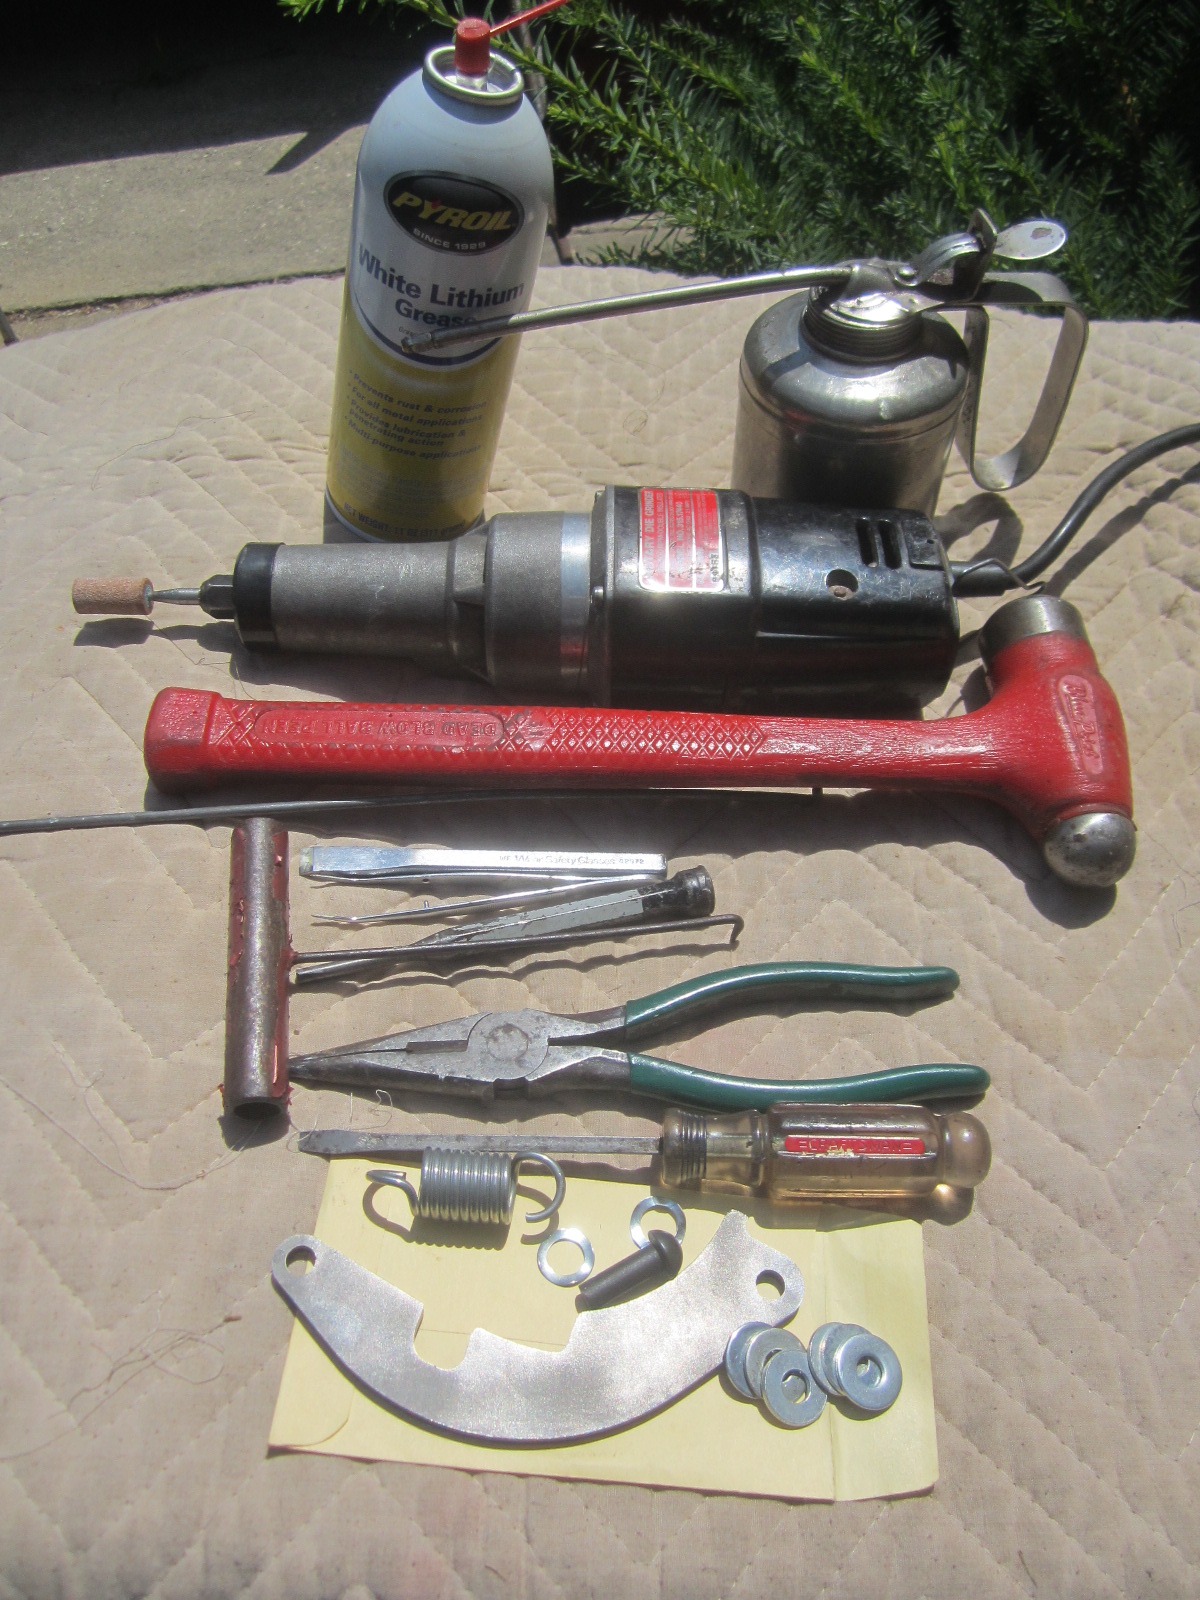
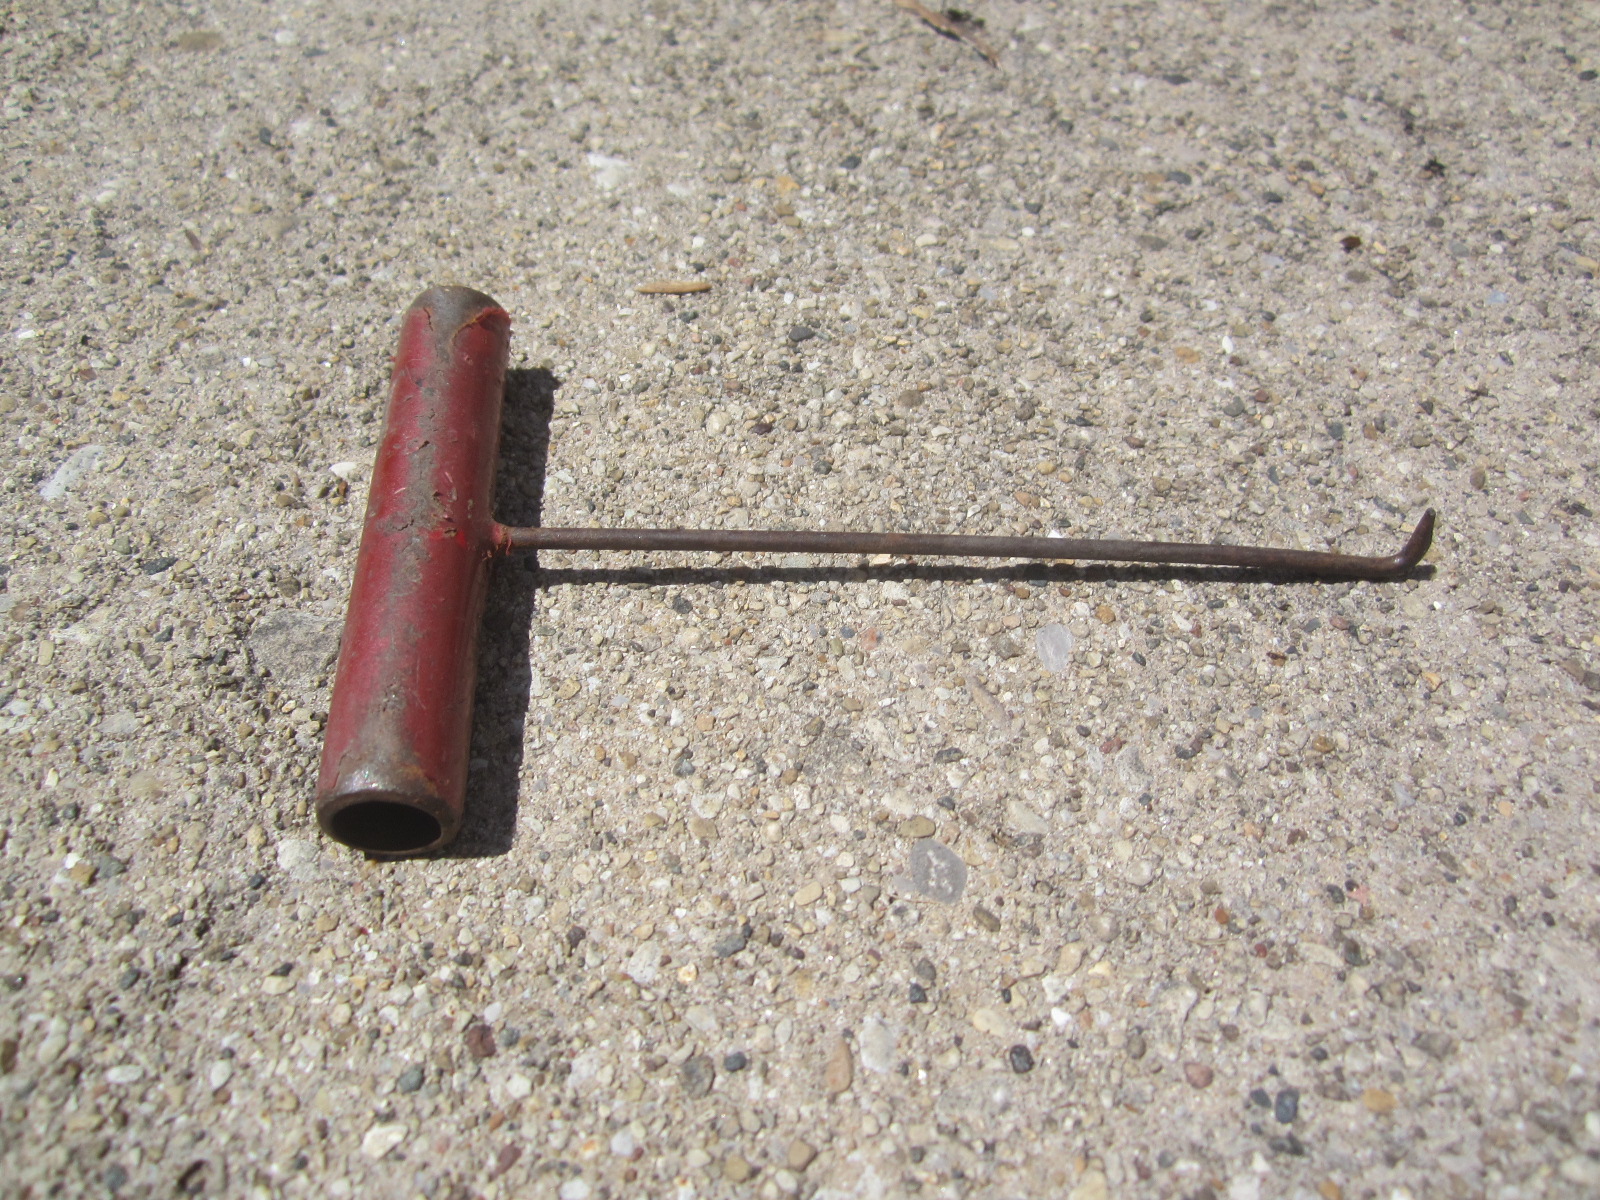
Step 1. Here are the tools that I used. A die grinder with a grinding wheel that will reach the rivet. This is a Craftsman brand die grinder but any kind of high speed die grinder will do. A hammer and cold chisel for removing the old rivet. A screwdriver for prying the old rivet out. Needle nose pliers for removing the old rivet. Tweezers for inserting the new wave washers. A hook tool for installing the new spring. A punch for deforming the end on the new rivet. Some grease and oil.
***************************************************
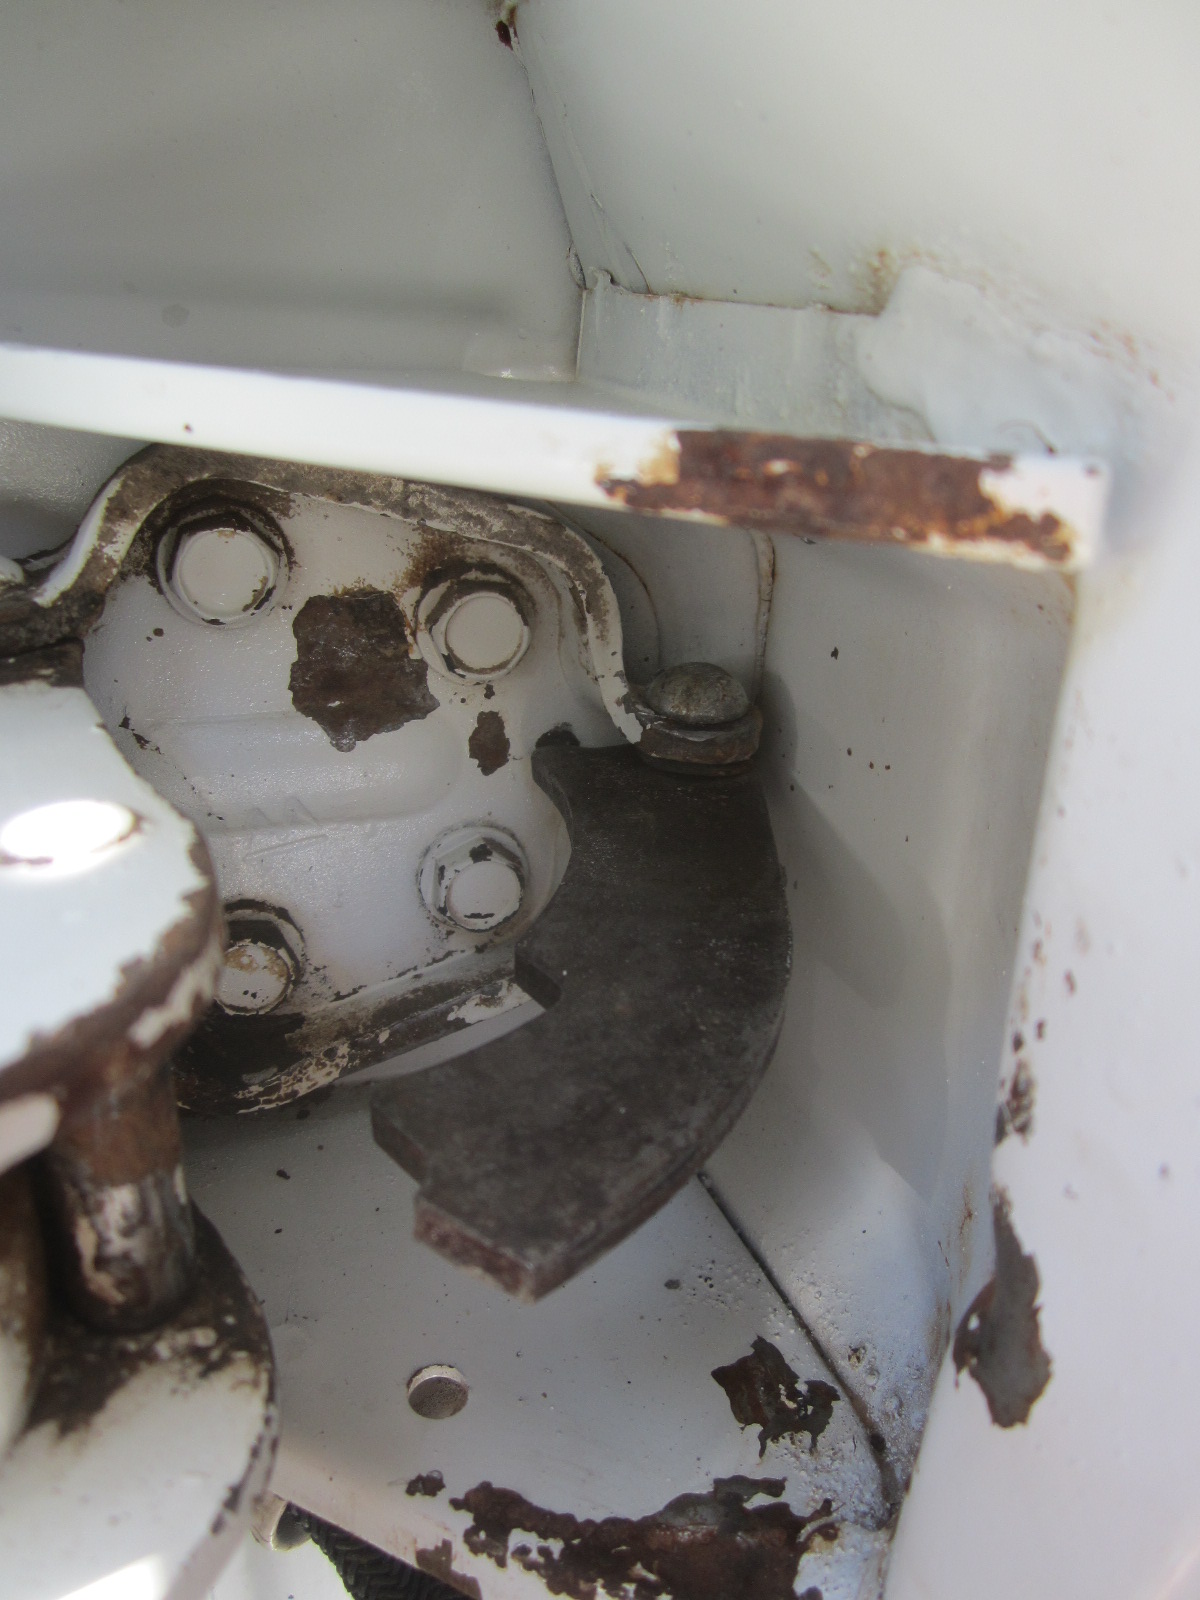
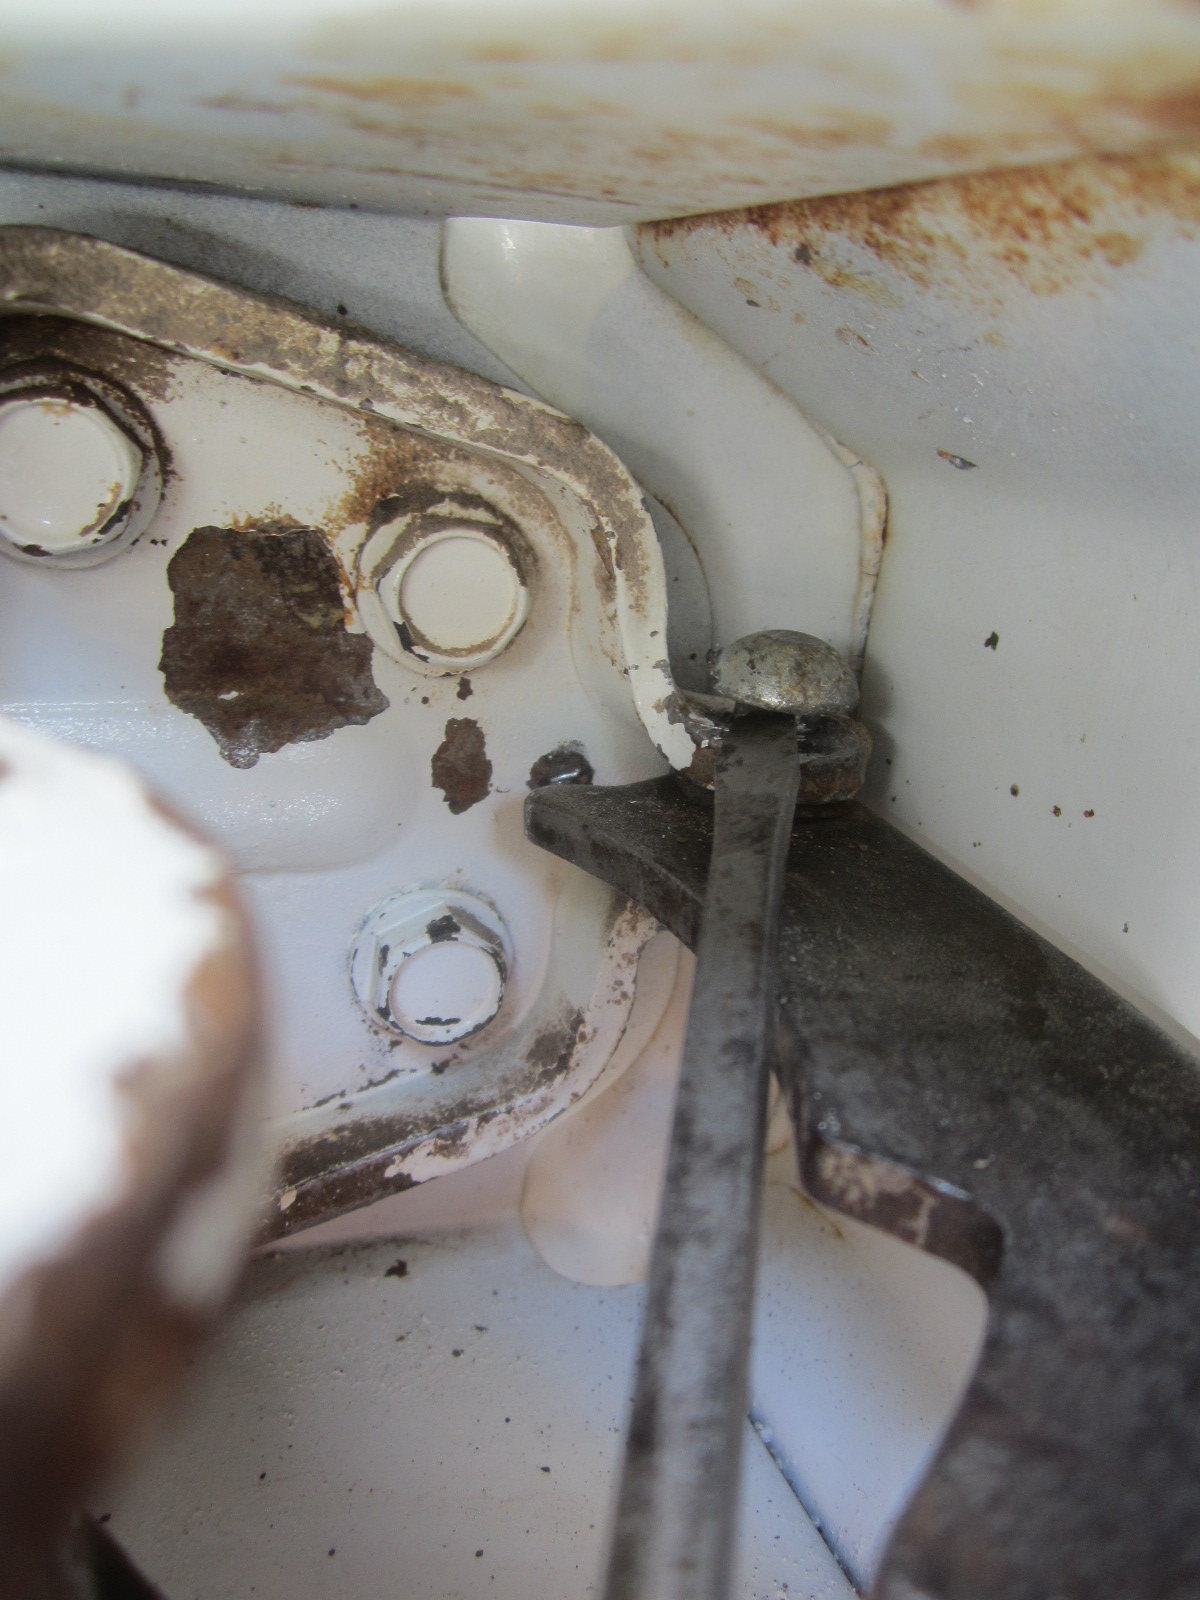
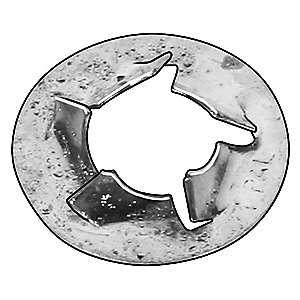
Step 2. The old broken door stop. The peened end of the old rivet will need to be ground off and the rivet removed.
***************************************************
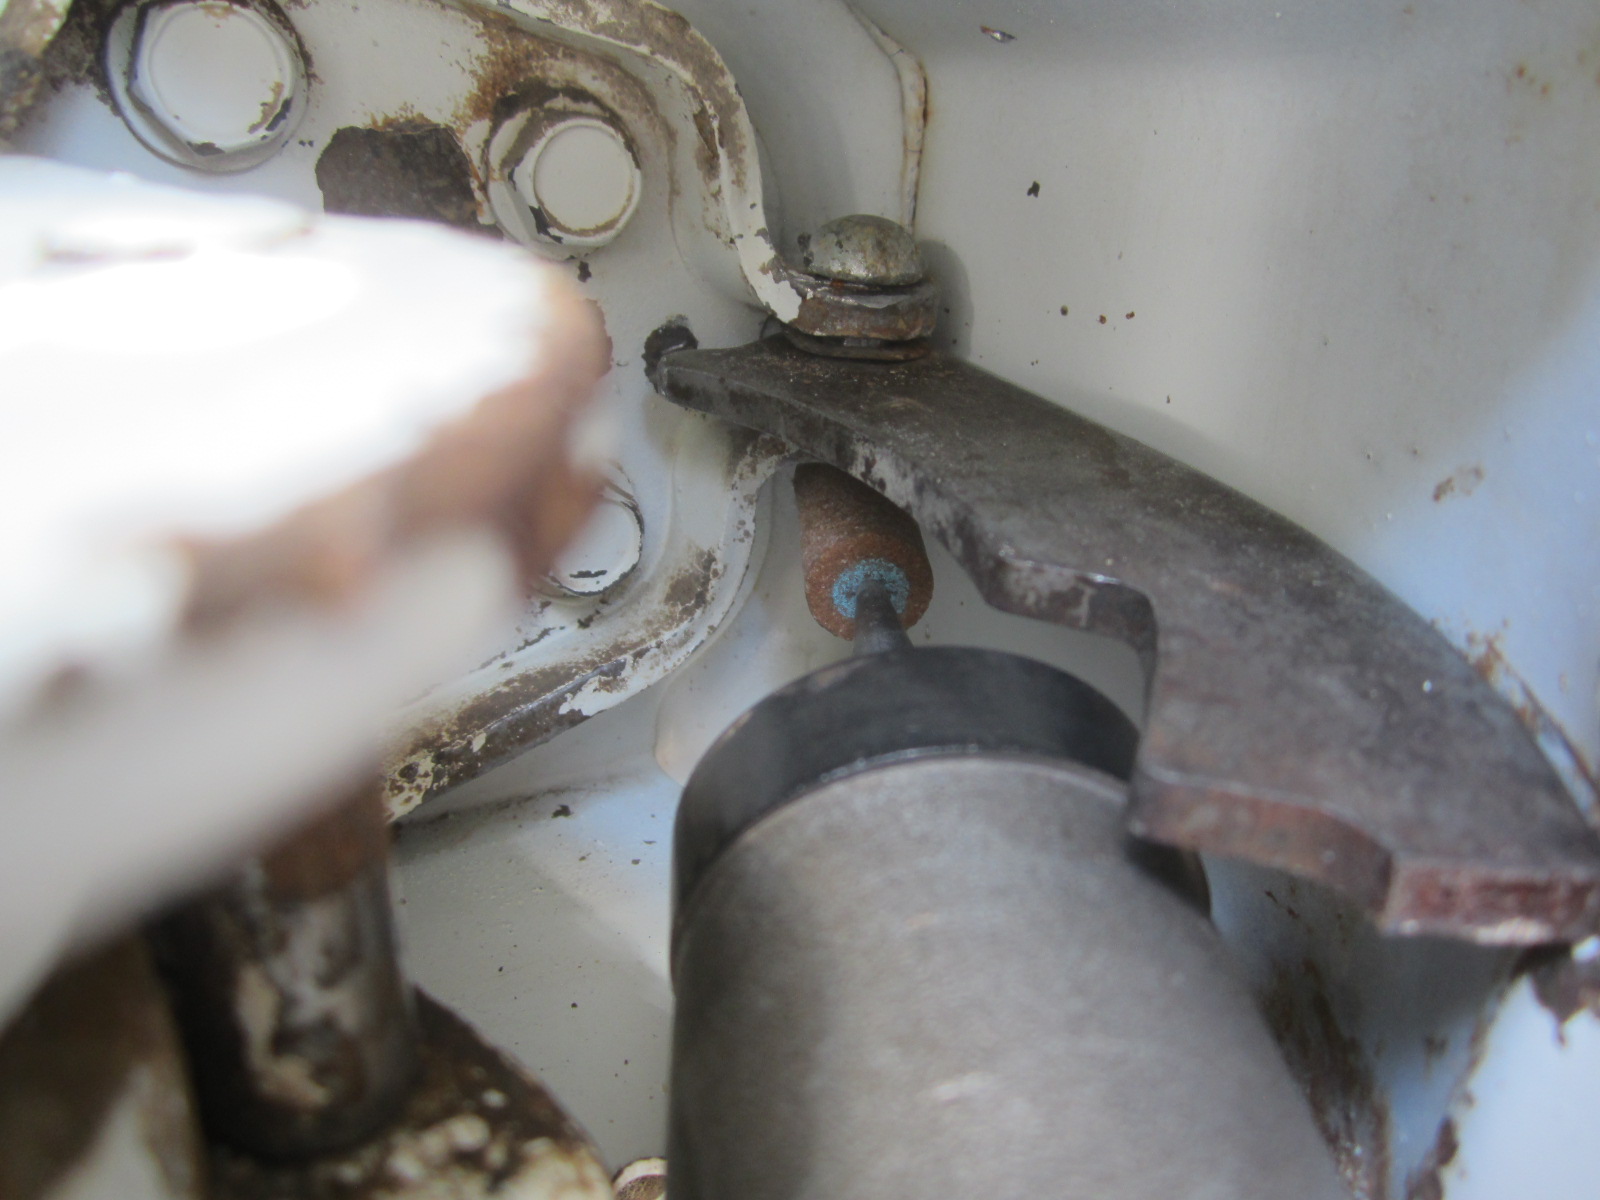
Step 3. Grinding the rivet. Either the head end or the peened end (bottom) of the rivet can be ground off. I chose to grind the peened end because there was less material to remove.
***************************************************
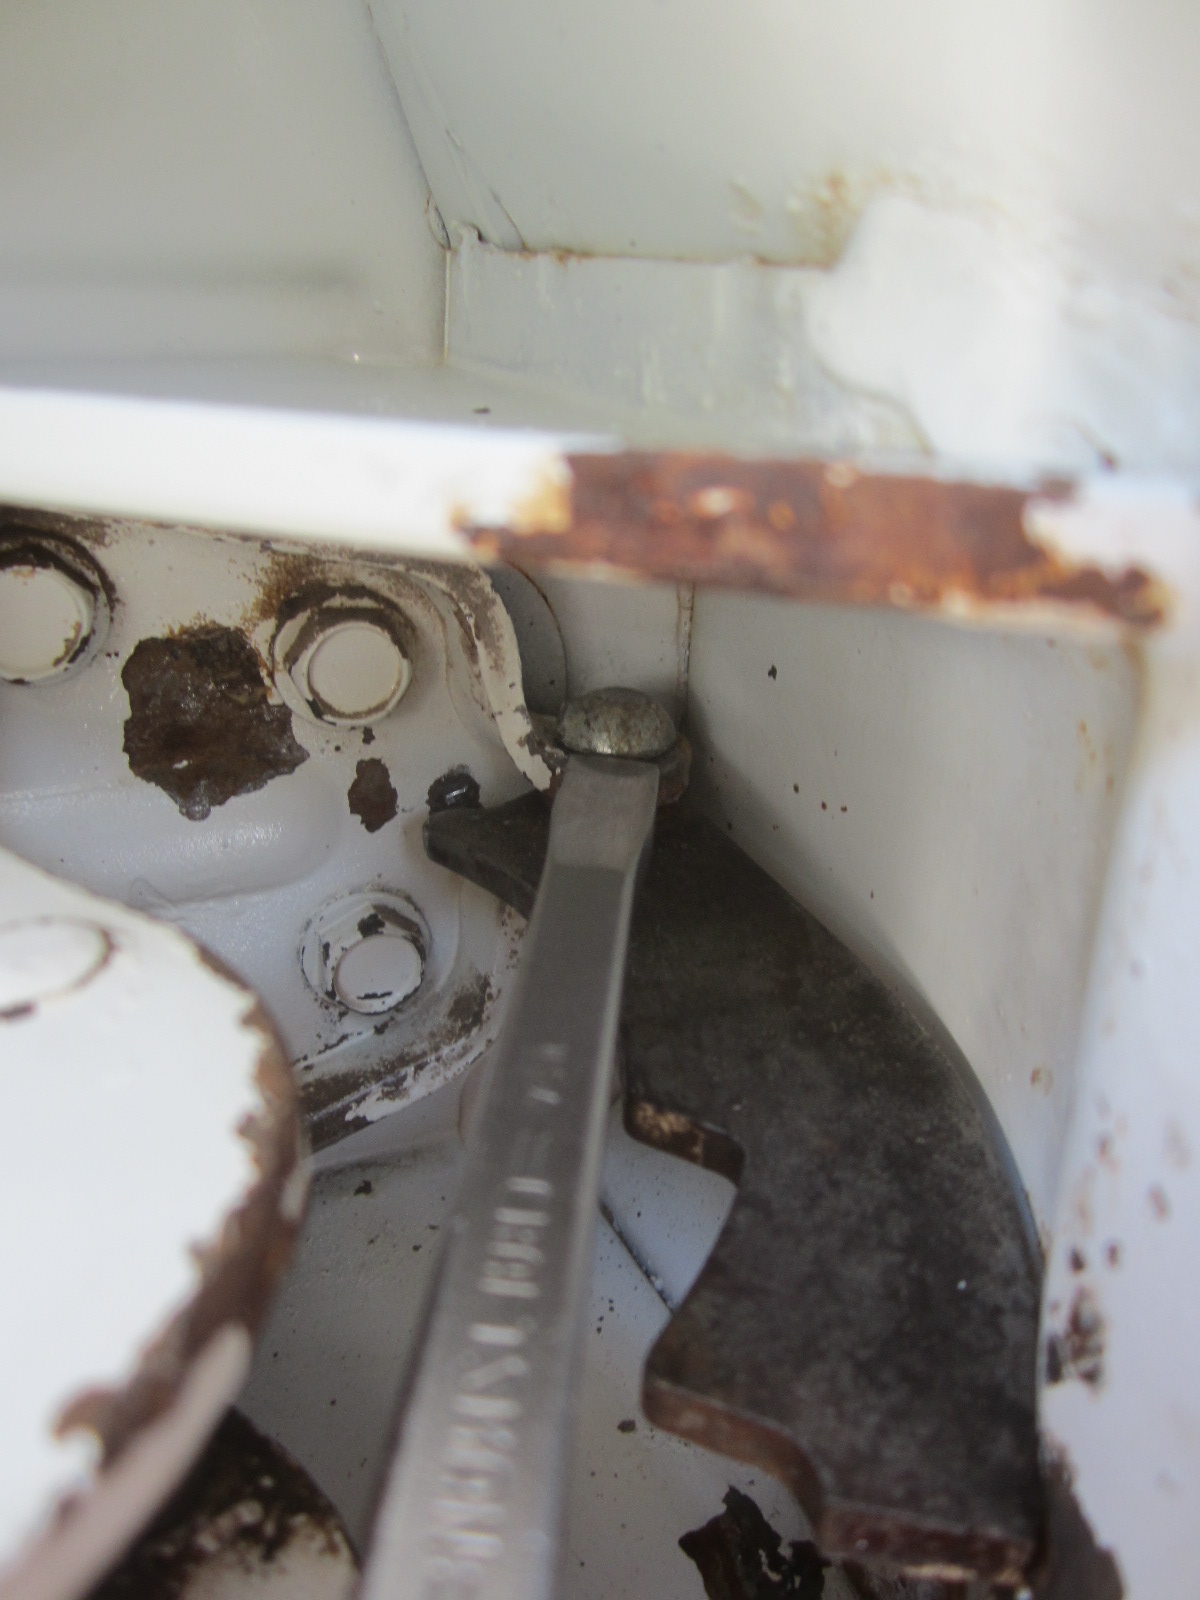
Step 4. The next step is to get the old rivet out. Sometimes they are slightly deformed and can be a little difficult to remove. Here I use a chisel and hammer to wedge the rivet out.
***************************************************
Step 5. I'm using a screwdriver to pry the rivet out further. Needle nose pliers come in handy here too.
***************************************************

Step 6. The old rivet and stop plate have been removed.
***************************************************
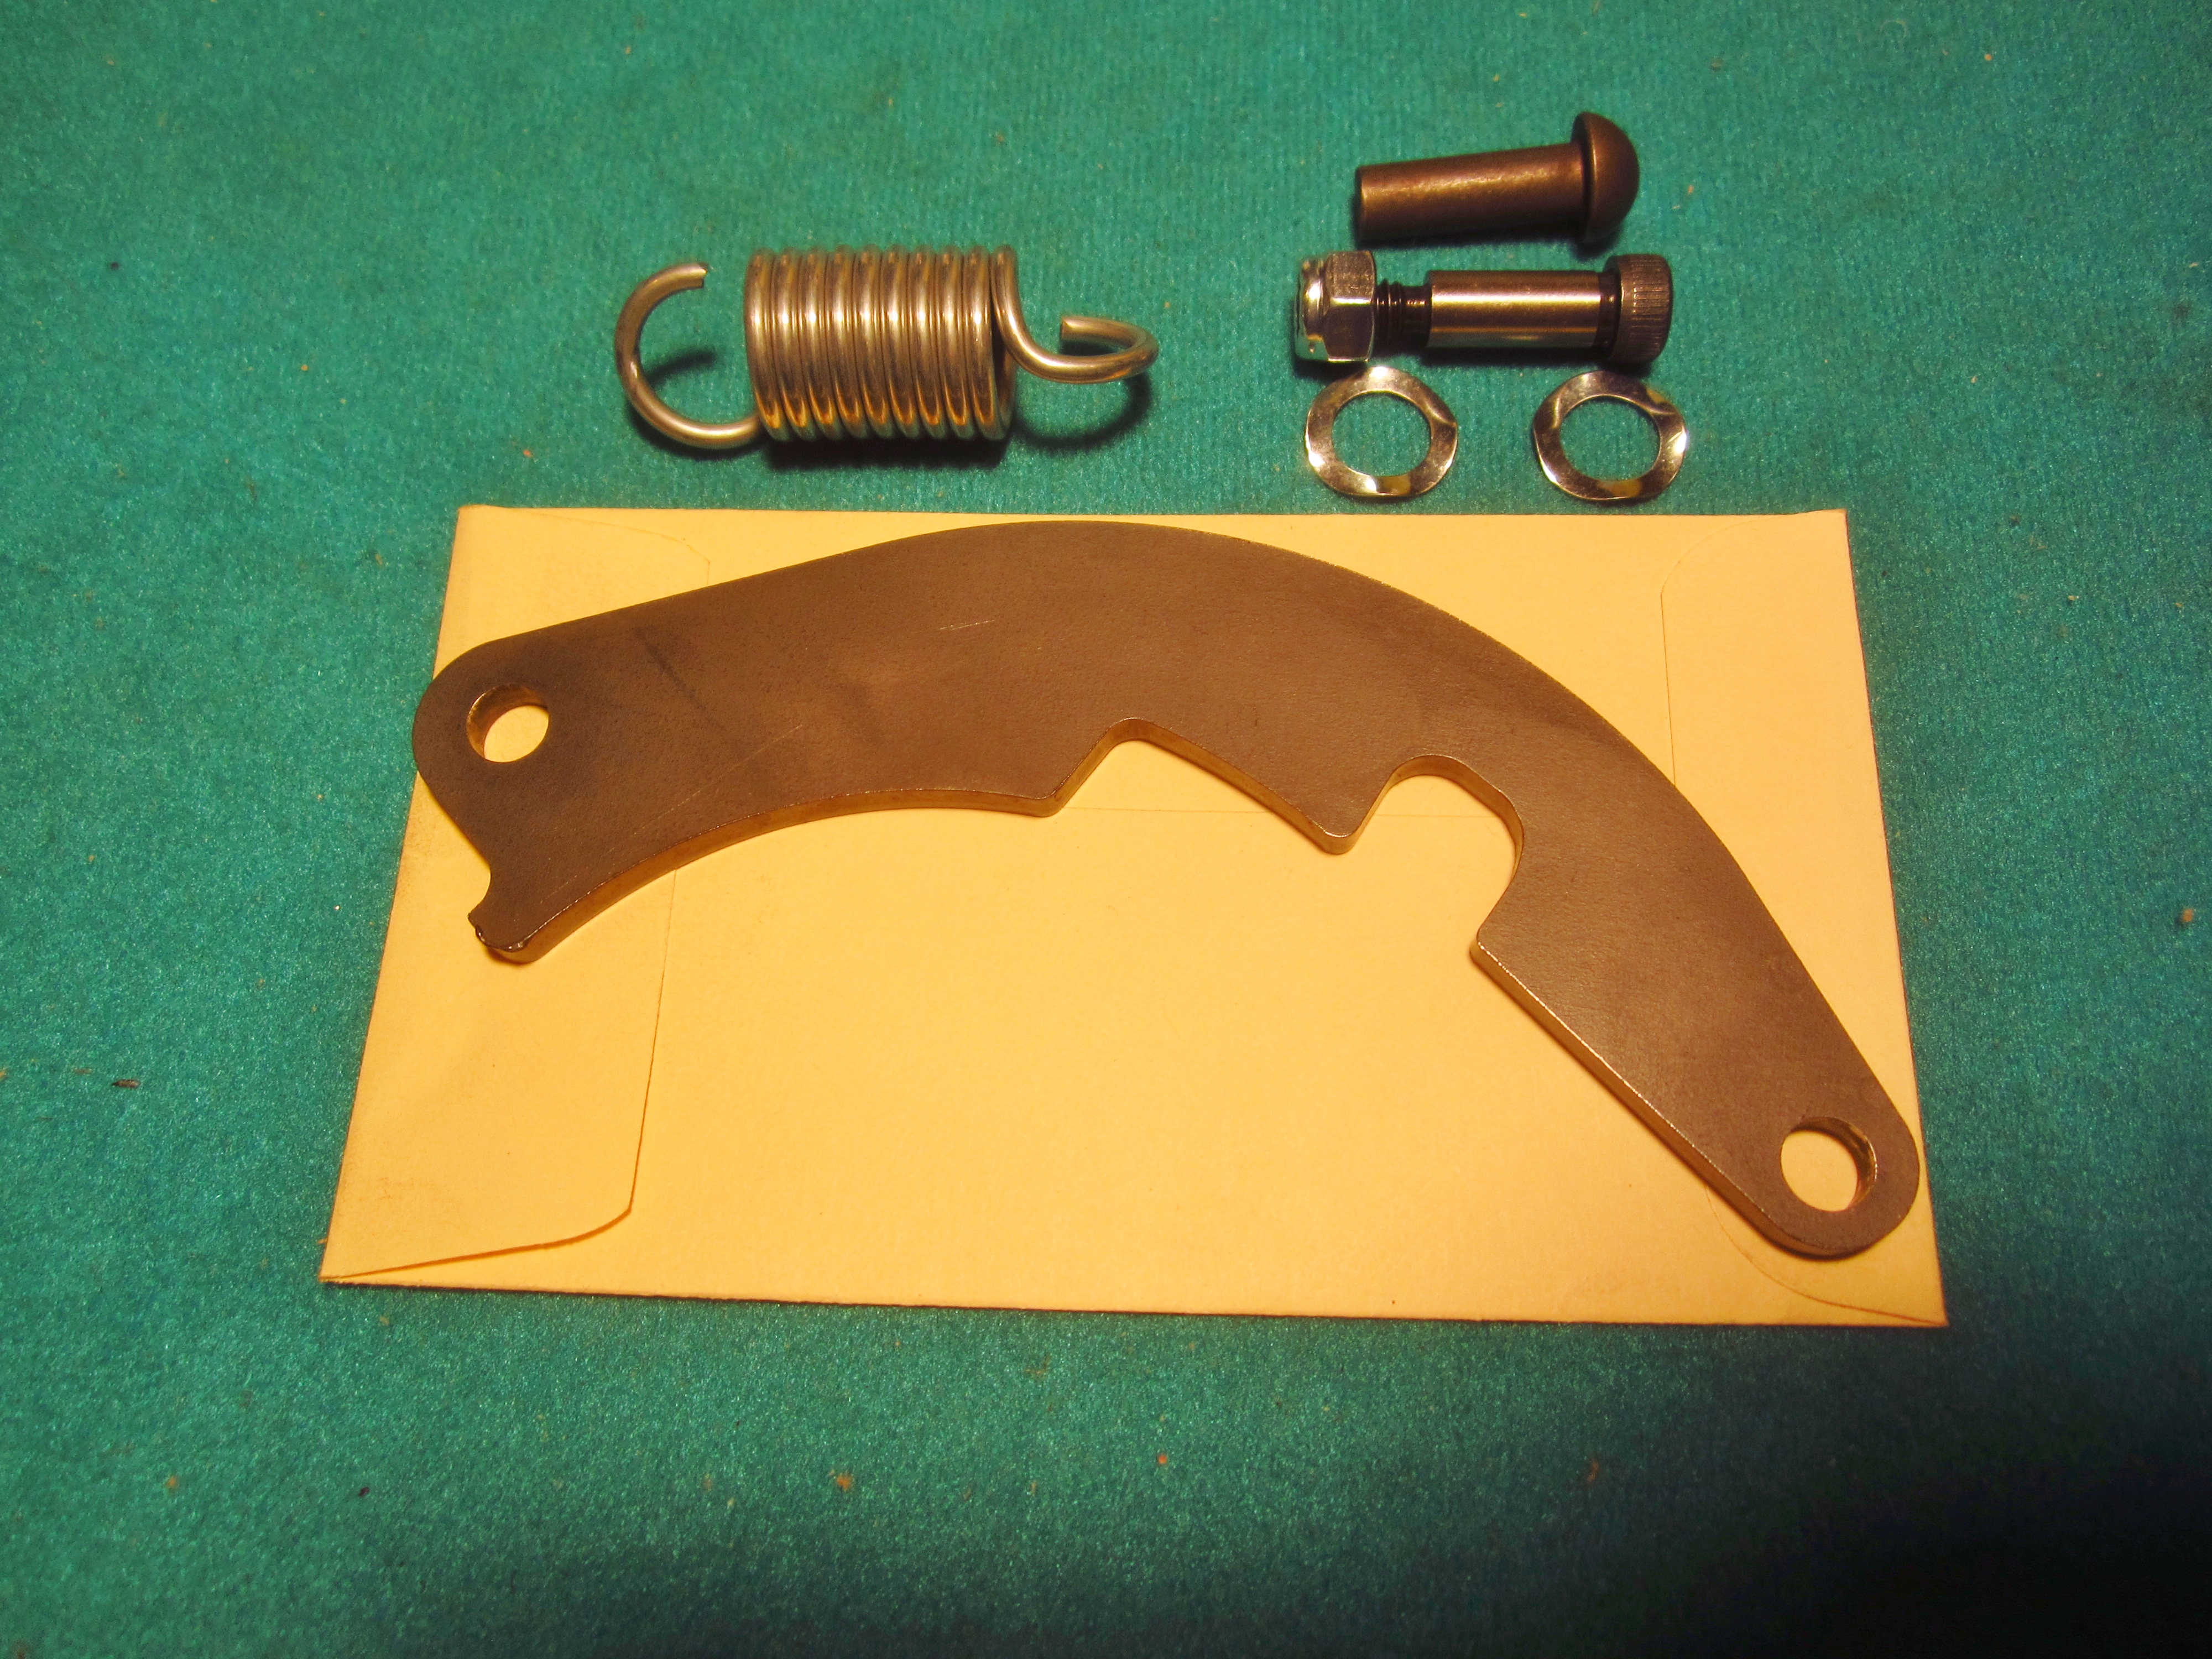
Step 7. This is the repair kit that I make. The plate is an exact reproduction of the original and is made of high carbon alloy steel.
***************************************************
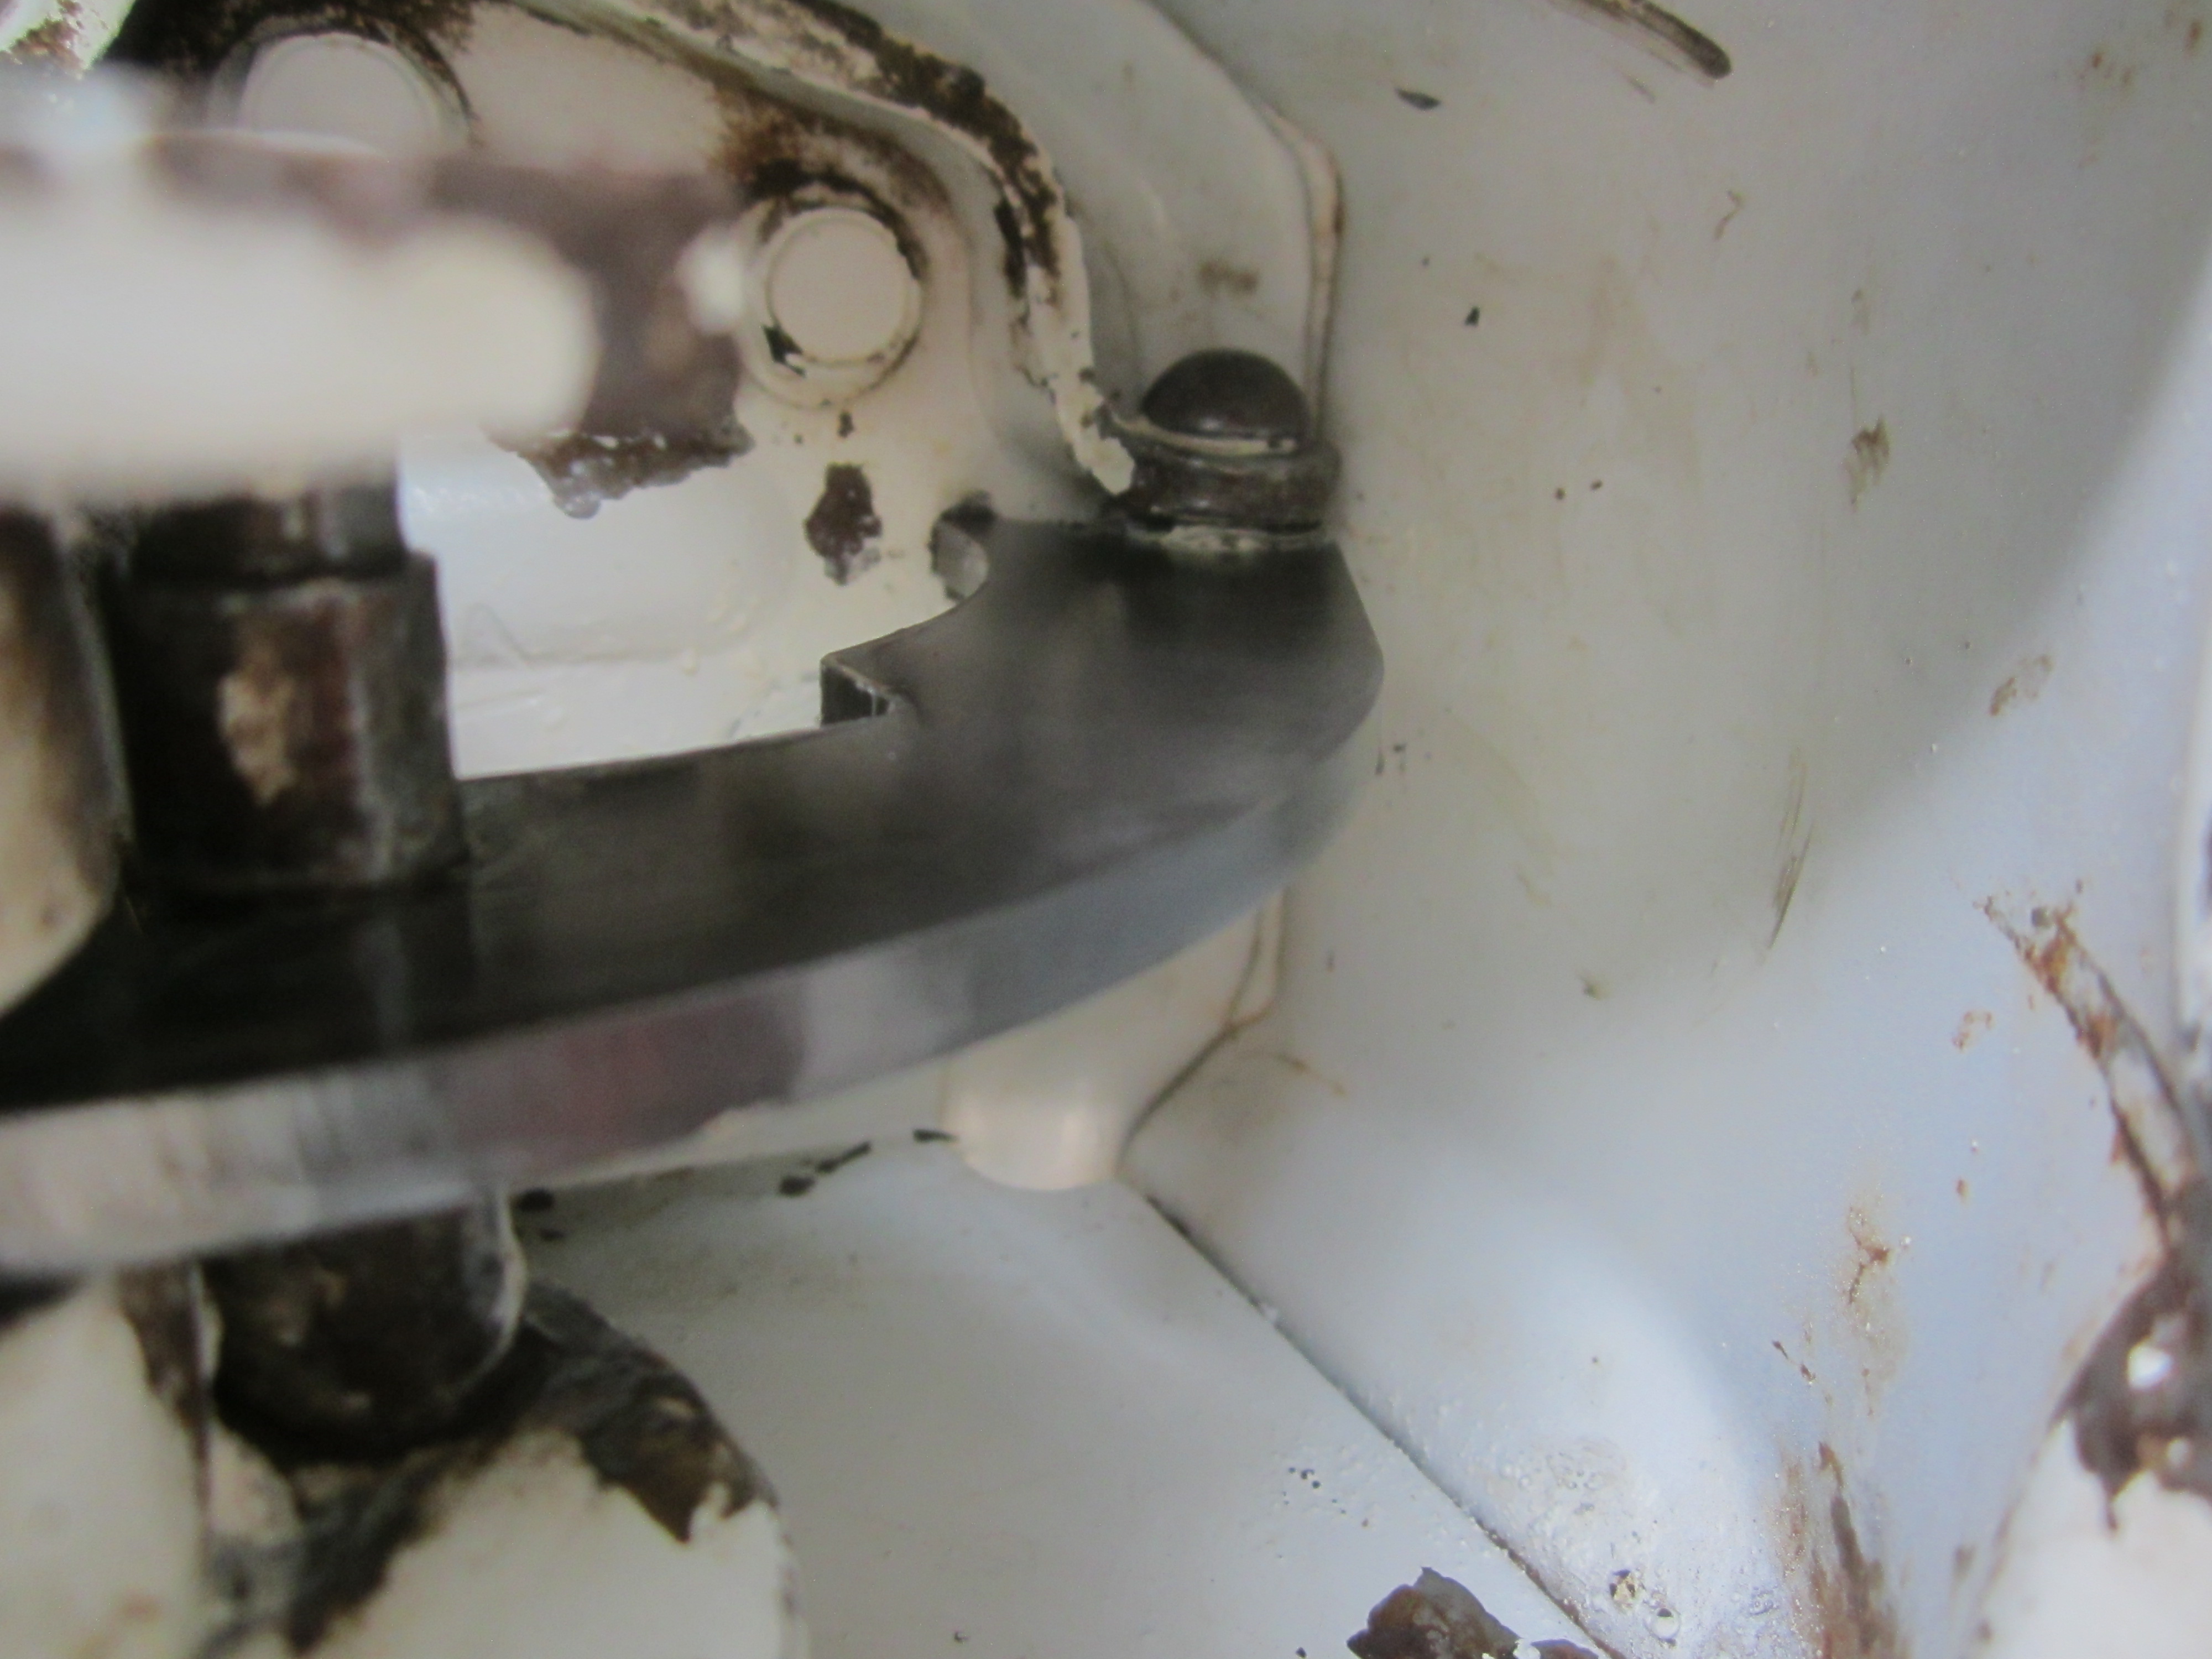
Step 8. Install the new door stop plate, the two wave washers and the rivet onto the hinge. Apply grease to all of the parts before assembly. It's a good idea to check the fit of the rivet in the two holes on the hinge before assembling the pieces. One wave washer goes on top of the stop plate and one goes under it. The tweezers come in handy for inserting the wave washers. It can require a little patience to align all the holes so the rivet goes in place. After all of the pieces are in place use the punch and the hammer to deform the end of the rivet so it won't fall out. It only needs to be deformed enough so it can't fall out. An air chisel with a dull bit also works good for this procedure. For this particular repair the roller and long rivet were still good and were not replaced. They just needed to be cleaned with a wire brush and lubricated. In my experience this is usually the case. It's important that the roller spins freely on the long rivet and is well lubed. If the roller and long rivet need to be replaced then use the die grinder to grind the end of the rivet off and use the hammer and punch to remove the rivet. Grease the new roller and rivet, install it and then peen the end of the long rivet to secure it in place.
***************************************************
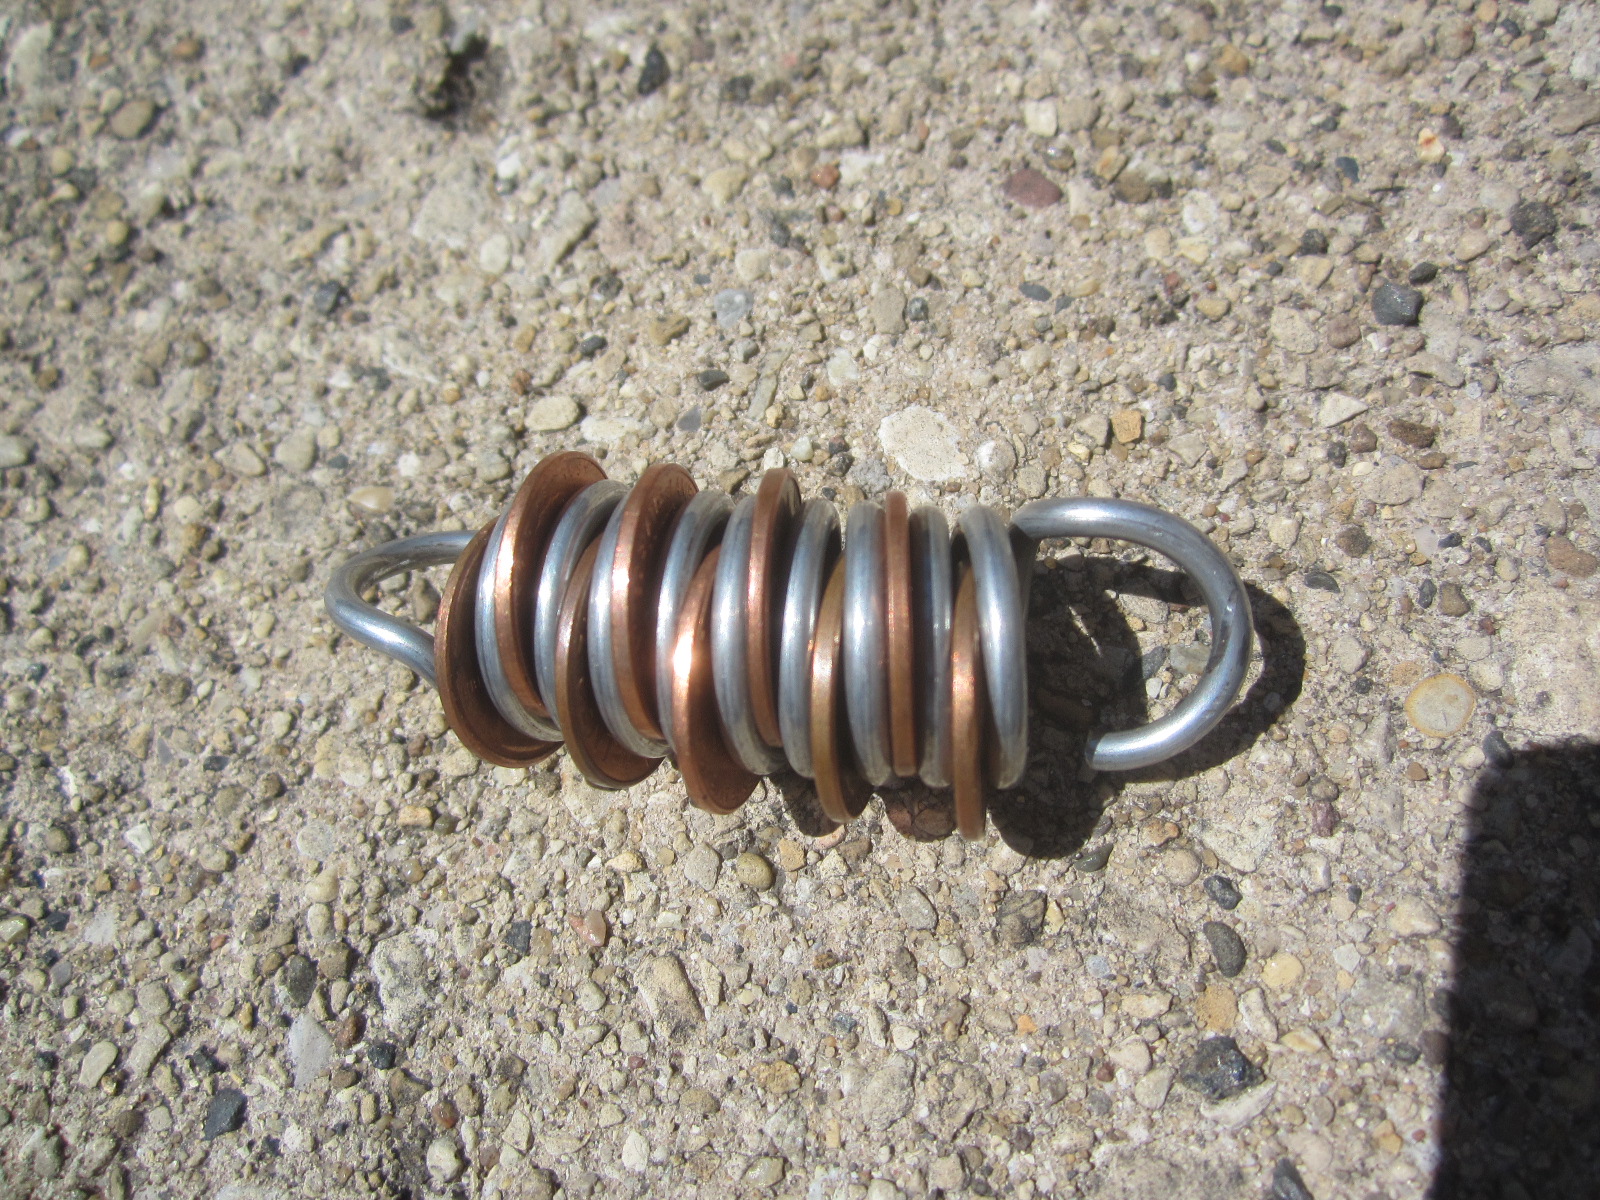
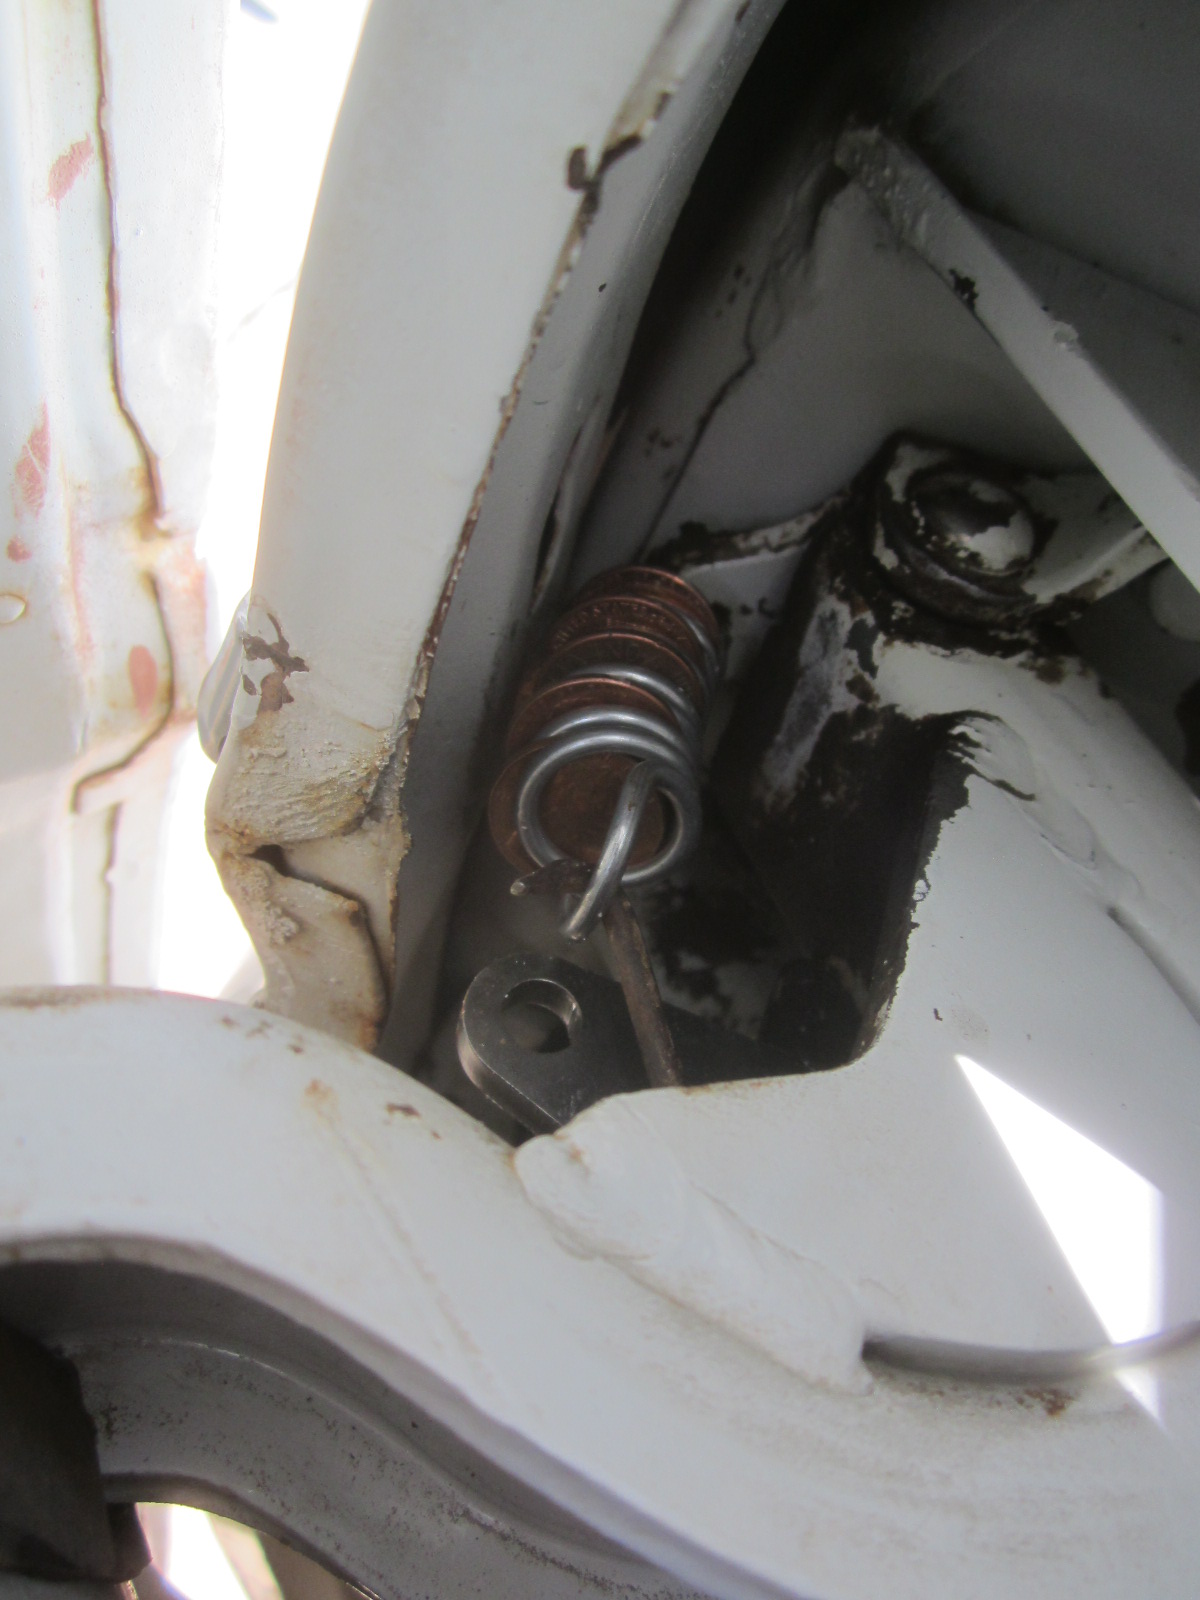
Step 9. This photo shows a spring that has been expanded by inserting spacers between the coils. This is an important step. The strong spring would be difficult to stretch into place without using spacers. I used pennies here but thick steel washers are a better choice because if they fall in a crevice when the door is shut they can be retrieved with a magnet. A bench vice comes in handy at this point to help stretch the spring and insert the spacers. I held one of the hook ends of the spring in the bench vice and slipped a steel rod under the other hook and stretched the spring open while inserting the spacers. Also be sure to check the fit of the hook end of the spring where it will attach through the hole in the hinge base. If necessary, the opening in the hook end of the spring may need to be opened up a little so it will fit. The hook end of the spring can be carefully bent open a bit using a bench vise and pliers or the very end of the wire ground off a little with the die grinder and a cutoff wheel to make the opening larger.
***************************************************
Step 10. This photograph shows the hook tool that I used to pull the spring into place. This tool is normally used for auto body dent pulling but works good for this purpose.
***************************************************
Step 11. Using the hook to pull the spring into place.
***************************************************
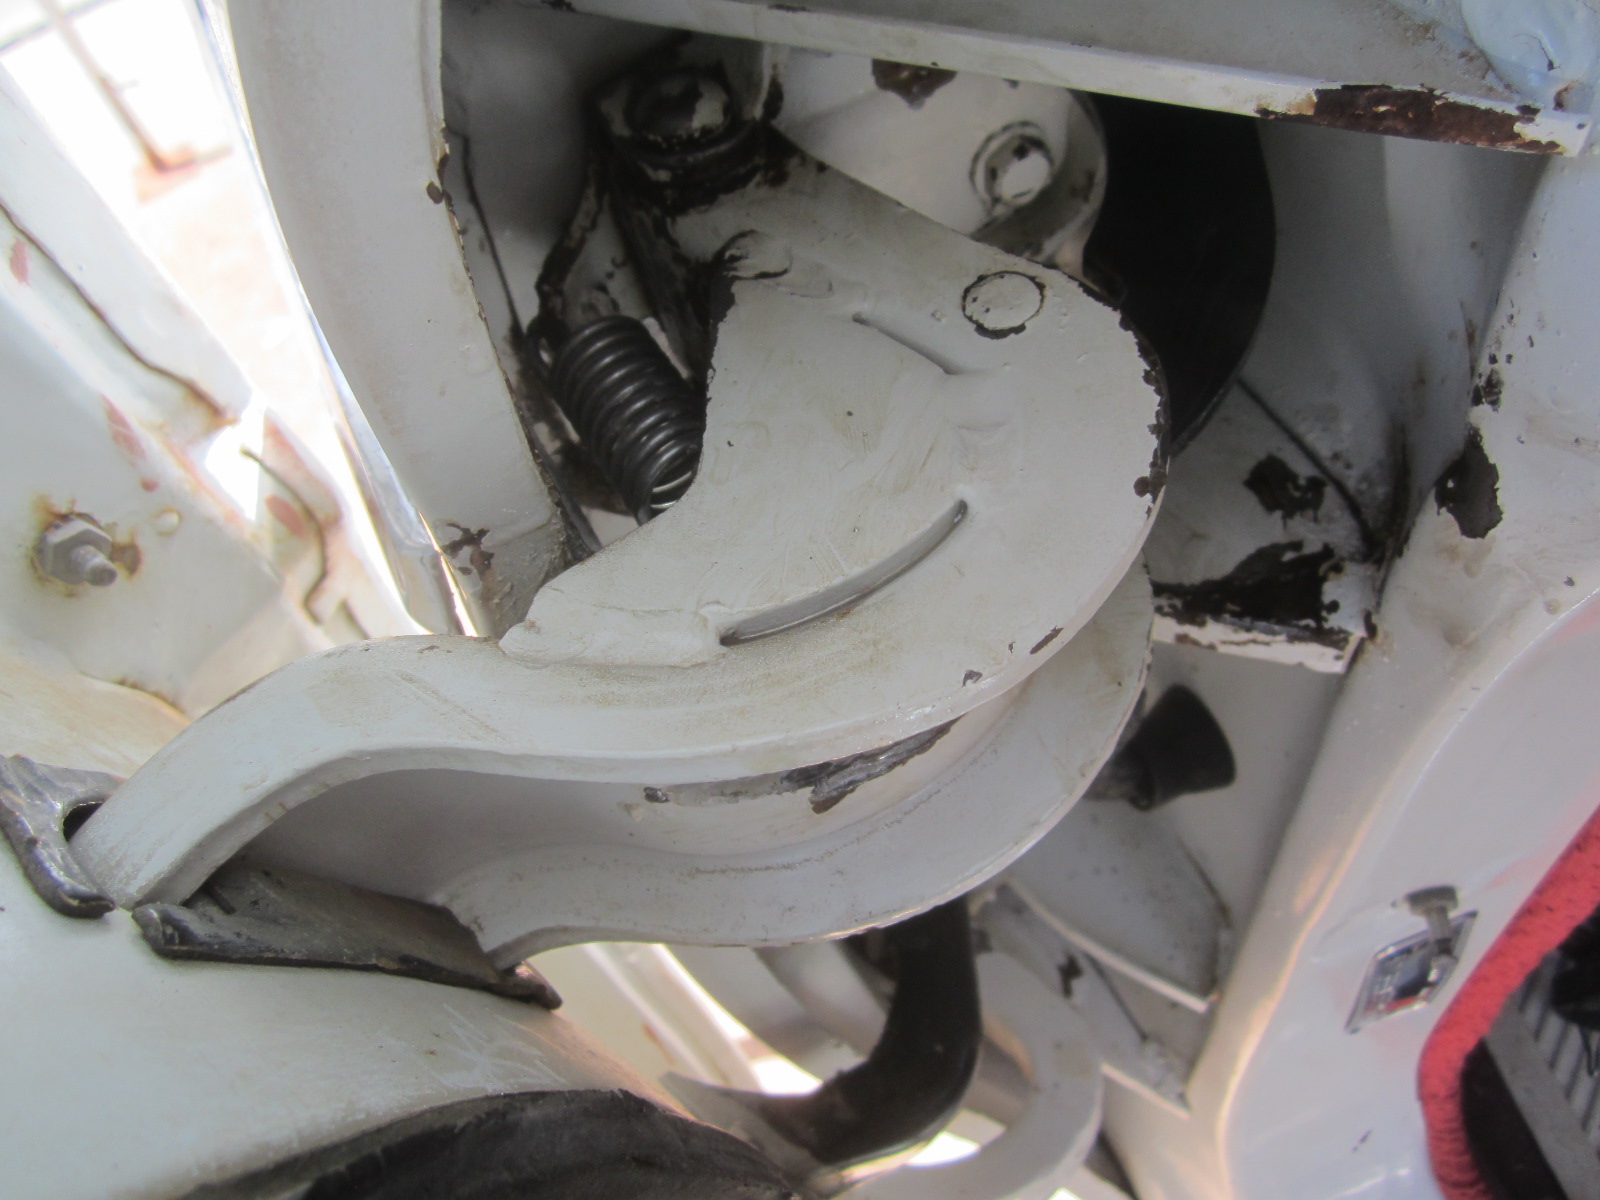
Step 12. The spring has been installed. Slowly close the door. The spring will stretch and the spacers will fall out. Add a little more grease where ever there is metal to metal contact and the repair is complete. Test the repair by slowly closing and opening the door a few times.
Text and Photos by Dan Traynoff
If you would like to contact Dan Traynoff to order his repair Kit:
****************************************************************************************************** ******************************************************************************************************
Another Imperial Club member, Dick Timberlake, has a suggestion to secure the rivets using push nuts. He used Dan's repair kit and installed it a little bit differently:
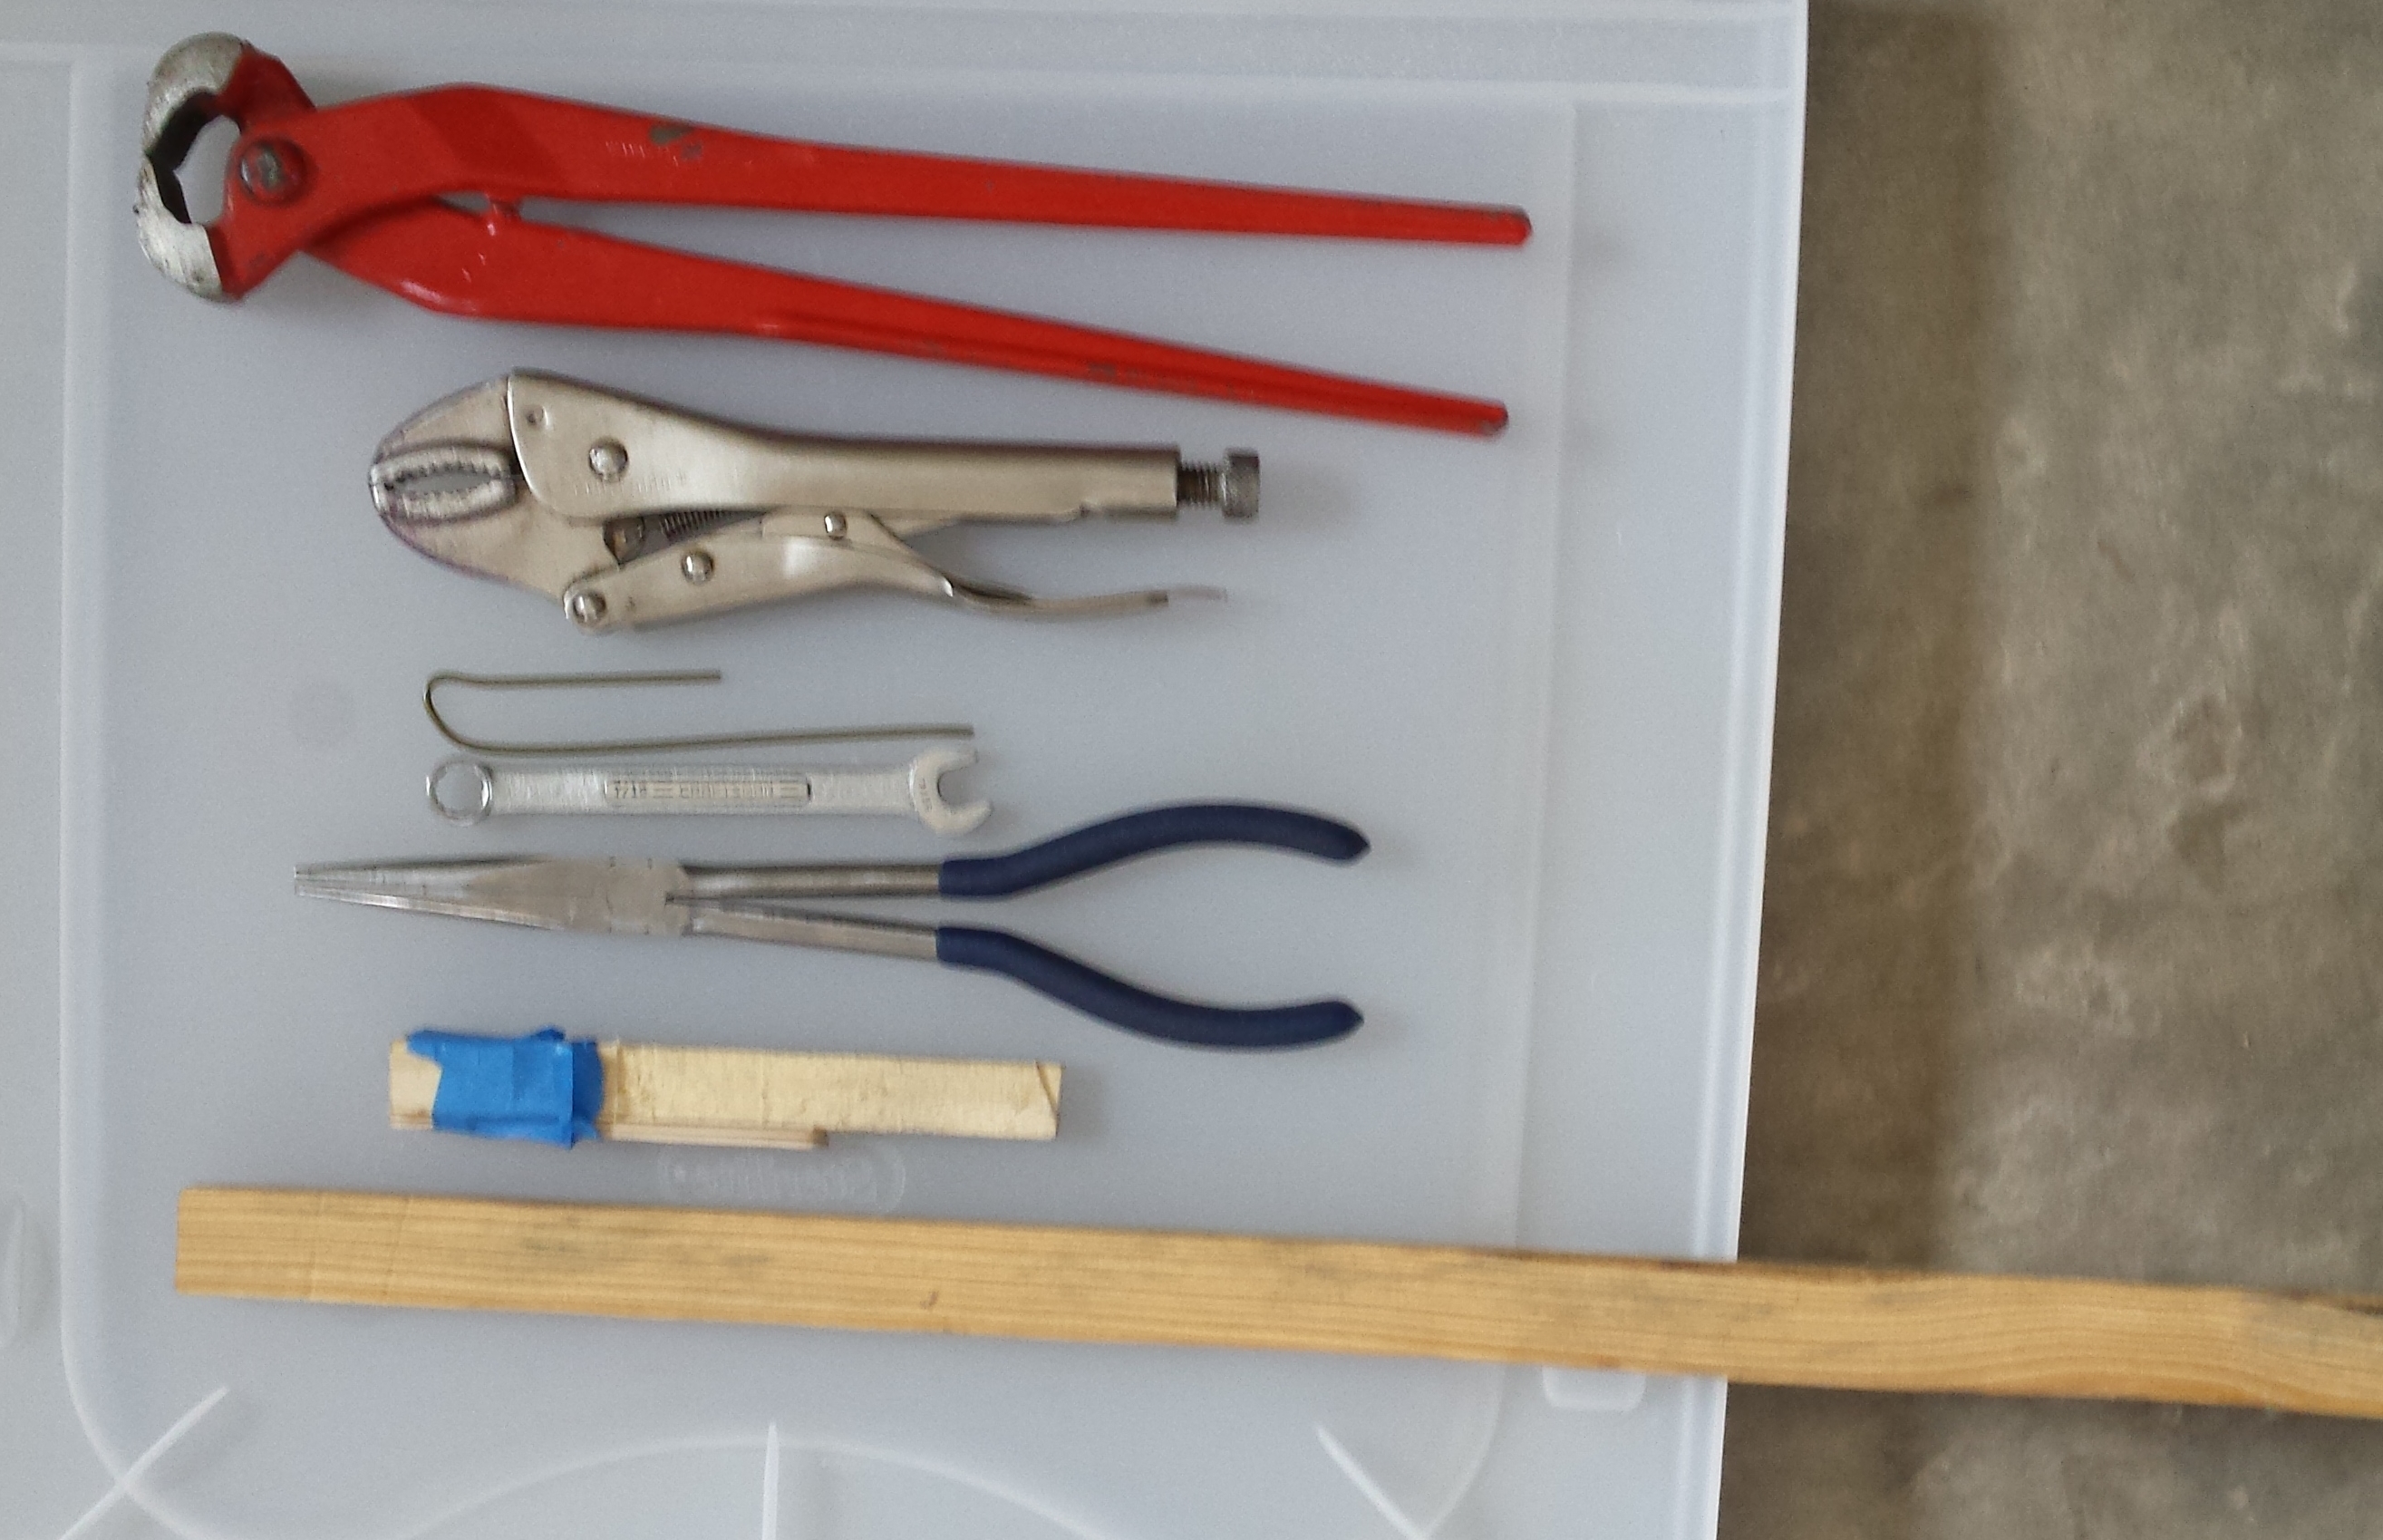
Here are the tools I used.
***************************************************
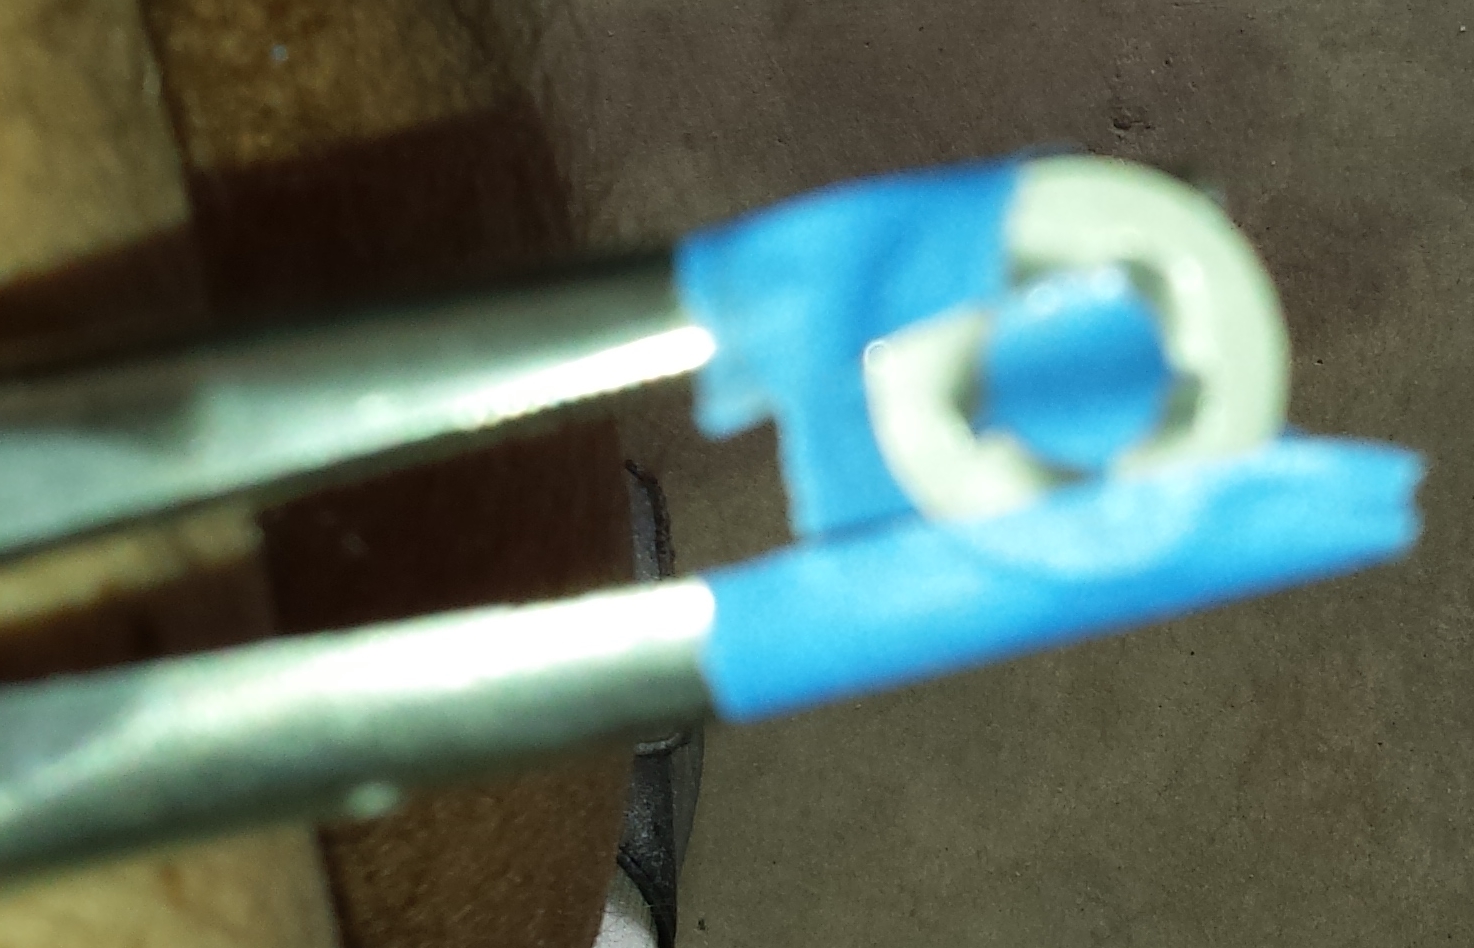
After grinding out the rivet, clean out the metal dust as much as possible. My passenger door's rivet had the head at the bottom.... Instead of a shoulder bolt (which wasn't in the earlier run of repair kits), I used the new rivet, To install the rivet, Use blue painting tape to secure the wave washers in place on the hinge bracket. Be sure the tape doesn't cover the centers of the washers. No need to remove the tape - it will just grind away after a while. Insert the rivet, wiggling as necessary to get through the wave washers.
***************************************************
Here is a picture of the push nut.
***************************************************
Once the rivet was in, I used more blue tape to secure the push nut to some extra-long-nose pliers, keeping the jaws open enough to let the rivet into the hole. I used a block of wood on top of the rivet to keep it in place, then carefully got the push nut lined up with the bottom of the rivet. I used another piece of wood as a lever to force the pliers up and move the push nut onto the rivet. Once the nut was started, I used the closed end of a 7/16" combo wrench to push the nut the rest of the way on, still using the wooden lever to push the tool. The advantage of the combo wrench is that it presses evenly all around the nut. I don't recommend putting washers into the spring to make it spread out temporarily. I don't think it is necessary. Especially don't use washers thicker than a dime, which were the only ones I had on hand. The washers impeded my line of sight when I was trying to connect the door-jamb end of the spring. I ended up with a stretched spring, which I'll replace some day when I get around to it. To install the spring, I started by making a puller out of a piece of wire coat hanger, which I used Vice Grips to handle. I just hung the spring it from its hole in the rivet mount. Then I carefully inserted the wire tool into the slot in the hinge where the door stop goes, carefully hooked the spring, and pulled with my Vice Grips to get the free end of the spring into the hole in the door stop. Text and Photos by Dick Timberlake
|
This page was last updated July 2016. Send us your feedback, and come join the Imperial Mailing List - Online Car Club
