Imperial Home Page -> Repair -> Interior -> Stainless Steel
Dinged-up stainless or aluminum trim on your car looks ratty, especially after a fresh coat of paint. The quick and easy solution is to swap the beat-up stuff for new replacement parts, or get them professionally restored. While both of these routes are sound solutions, there are a couple of things you need to consider. First, most replacement parts are nowhere near the quality of factory OEM trim. Second, professionals charge a lot.
For another option, we met up with Gary Turnau of Mothers in Huntington Beach, California, who was gracious enough to show us how to restore stainless trim ourselves. To straighten the trim, he uses everything from small punches, hammers, and pliers, to oddities like the back end of a file and scrap steel stock. He then goes over the trim with several different grits of sandpaper and a buffing wheel to polish it to the brilliant luster you see here. Yes, the selection of tools might seem crude to some, but we like to call it Car Craft engineering�because it works. Gary�s best advice is to spend the time and money assembling the best set of trim you can find before starting the job. So, if your trim isn�t shaped like a pretzel, you�ll be happy to know the only limitation to reaching show-quality levels is the amount of patience you have.
|
|
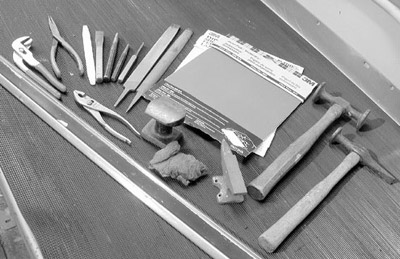
| 1. Restoring your own trim doesn�t mean
you have to invest in a lot of tools. Aside from a clean work area, you
should at least have a mini anvil or scrap steel stock, wood to cushion
hits, pliers, and the almighty hammer. You�ll also need sandpaper
ranging from 50- to 320-grit to smooth out the surface you work on.
Although not shown, a small, 6-inch bench grinder will polish the trim
to a better-than-factory shine.
|
|
|
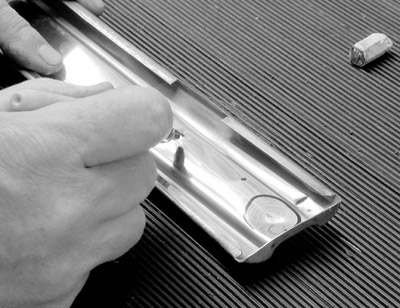
| 2. Thoroughly clean both sides of the
trim with steel wool; this helps reveal dings you probably didn�t
notice. Since most of the work is on the reverse side of the trim, use a
felt pen to circle the areas to focus on. Small dents are easy to knock
out, but sharp creases (arrow) will be a little more time consuming.
|
|
|
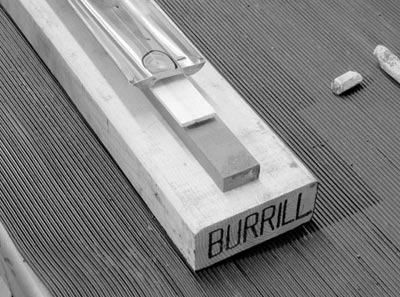
| 3. To create a flat surface area, Gary placed a 2x4 under the trim. To
make the trim sit as flush as possible, he found a scrap piece of steel
stock to fit the center of the trim perfectly. Now all he needed was
something to cushion the blow, and the answer was a small paint mixing
stick that almost fit. A quick stroke with sandpaper brought it to the
right size.
|
|
|
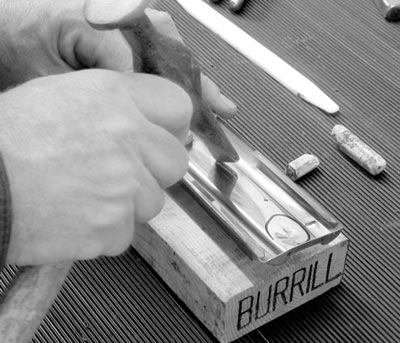
| 4. The key to taking out a shallow dent is to use the corner (or
sharpest angle) of your hammer and gently tap around the area in a
circular pattern. Since this isn�t a direct crease or dimple, you don�t
have to worry about pushing a dent out; instead you�re trying to
smooth out the surrounding area.
|
|
|
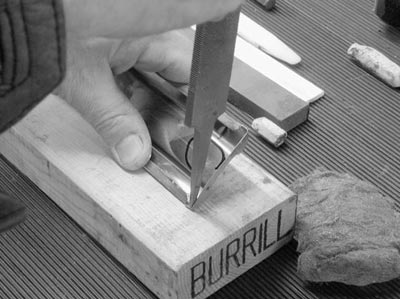
| 5. Unlike shallow dents, you need to punch out creases and dimples.
Given the awkward angle of this particular crease, Gary found the back
end of a file very useful. With the wood underneath to soften the blow,
it only took a couple of taps to bring it back to normal. Depending on
the material you�re working with (aluminum, for example), you may be
able to push out a crease by hand.
|
|
|
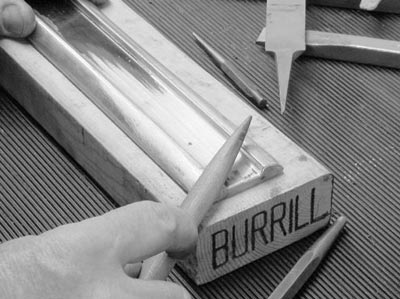
| 6. The trim may appear to be straight to the naked eye, but to be
certain, run your fingers across the repair area to feel for distortions
and bumps. Next go over it with 50-grit sandpaper to reveal high or low
spots. Then use a combination of 150-grit and a smooth diamond file to
fix minor imperfections. Just don�t go too crazy with the file or you
may find yourself trying to weld up holes.
|
|
|
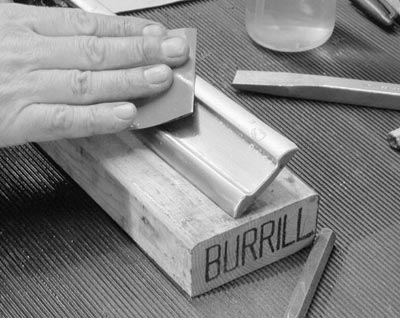
| 7. Once Gary was satisfied with the work, he sanded the trim with 220-
and 320-grit sandpaper. At this point the trim is pretty smooth, but he
went further by wet-sanding with 400-grit along with some soapy water to
act as a lubricating agent. If you want, you could go all the way up to
1,000-grit wet, but Gary says the end result would be the same.
|
|
|
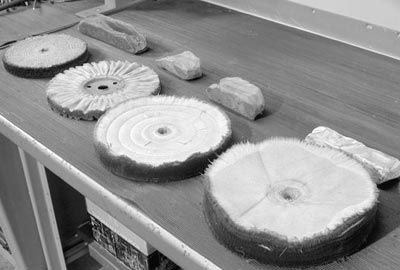
| 8. With the sanding done, Gary used several grits of polishing compounds and buffing wheels on a Baldor buffer to create the final finish. The metal compounds come in a block-like mold in several colors, each representing a different level of polishing. The first compound is a gritty aluminum oxide, the two middle ones are made of chromium oxide, and the last is a white compound of a non-gritty aluminum oxide. Be sure to use a different wheel for each compound; mixing compounds on the same wheel can lead to a dull finish. |
This article originally appeared in "Car Craft Magazine."
This page last updated on February 8, 2003. Send us your feedback, and come join the Imperial Mailing List - Online Car Club.