
Many thanks to Johan Wildhagen for contributing this wonderful article!
Ever find yourself loping down the highway, slightly above the speed limit (no really, only slightly), windows down, crooning along with Bobby Darin about "Mack The Knife" and realize you can't tell (or hear) what gear your in?
I fixed this problem in a day (including picking up the materials).
The gear indicator is attached to a cable that is attached to the steering column shift lever and is located along the right side of the column. It works much like the break\gear shift cable mechanism on a 10 speed bicycle and less like the Hubble Space Telescope-not scary.
There are two solutions to a malfunctioning gear indicator.
1.) If the needle is simply not pointing to the right letter at the right time, the fix is adjusting the small adjustable bracket found underneath the steering column.
A piece of cake man, about an hour if your one of those really relaxed people that walk around barefoot. Much less time if your one of those folks that has to get everything done right now and bothers to put on underwear in the morning.
The bracket has a swatch of red paint on it and is behind a plate (4 screws) underneath where the steering column meets the dash. The picture is with the plate removed and the top of my head against the break pedal looking up, feet hanging over the back of the seat
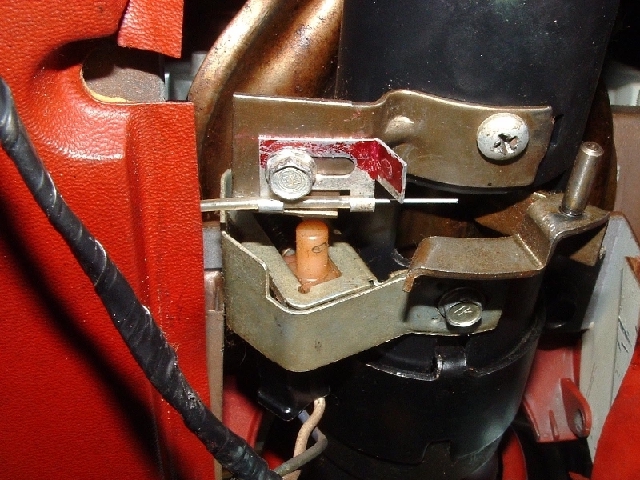
Gear indicator adjustment
You can see that the wire points to the post it should be wrapped around. The camera didn't catch the little stars that began to twirl after a while in this position, very cool.
2.) If the needle on the indicator doesn't move at all then the cable needs to be removed and replaced (the wire within the cable can be replaced with piano wire as some one on the IML suggested to me but I couldn't locate anyone who would sell me some(a horrible story and I daren't tell it). I simply manufactured a completely new cable mechanism
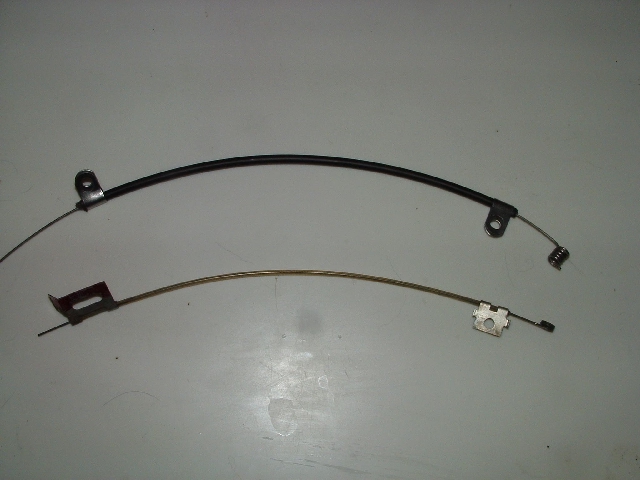
Gear indicator cables
More on that later. The picture shows the new one above the original.
Dropping the steering wheel is necessary to remove the instrument cluster frame, cover and fascia. Two bolts at the same spot that Iv been talking about, its easy. I did it once without dropping the wheel and now I have small unsightly gouges on the column and I have no clue as to how Im going to match the patina of the paint there to fix it (Imperials accumulate patina not grime).
WARNING WILL ROBINSON (big metal arms flailing wildly...): If you drop (lower) the steering wheel by removing the two bolts on the bracket you must first remove this cable bracket that Iv been talking about under the column or this cable wire will break!
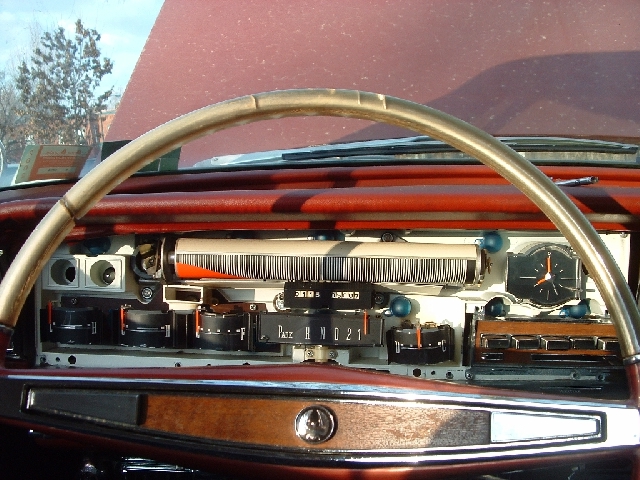
Instrument Fascia
Now that the instrument cluster has been exposed and you've recovered from the dust inhalation (They say it was the infectious dust and mold that slowly killed the Owens expedition when they opened King Tut's Tomb you know) the cable attachment to the indicator is located above the steering column and below the indicator(Pic: Gear indicator fascia attachment).
So that's it man, one screw below the indicator (un-hook the cable wire) and one bolt under the steering column (un-hook the cable wire here too) and pull it out above or below the column depending on what life dealt you.
Here's what I used to replace the original cable mechanism with: two cable brackets (one buck),
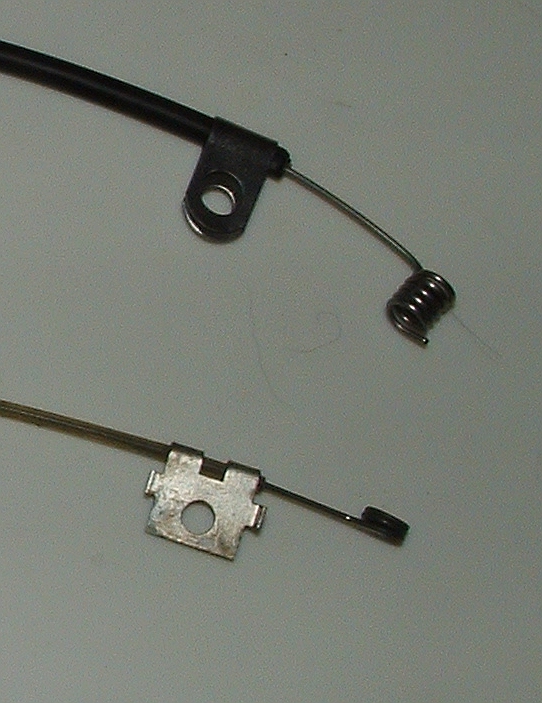
I used flat mirror hangers and removed the ring. Make sure the clearance between the outside edge of the cable and the screw hole match the original. Its a tight fit up in there.
A foot of bicycle(break\gear)cable (two bucks), the narrower the gage (smaller) the better, then cut close to size at the bike shop with special bike shop type cable cutters. This cable has a teflon or similar inner lining that eases friction within the cable and is much sturdier than the original cable.
20 gage stainless steel wire (4 bucks, but you get like 20 feet of it in the roll!).
Once everything has been assembled. Wire in cable. Cable in brackets. Pig tail about 5 times around a philips head screwdriver, the end of the wire that hooks to the indicator (up top). Hook it up (here's where you find out if you've got the right size bracket with the cable in it) and string the other end to the spot under the column. Screw this bracket in.
At this point you need to play with the wire from the other end and make sure it moves the indicator needle freely and is secure. Then put the instrument paneling and frame back on the dash and re-bolt the steering wheel back up.
Eye-ball the other end where it meets the column shift attachment and pigtail this end and bolt on the bracket. you can adjust the exact position of the needle here by tweaking the wire with needle nose pliers.
Im sure there's someone out there who has access to a Star Trek replicator and can come up with the exact materials, gadgets and widgets to duplicate the cable mechanism exactly to scale (You know who you are. Your probably wearing underwear) But for me this is a much more dependable mechanism and a day off well spent.
