Imperial Home Page -> Imperials by Year -> 1967 -> Dick B's Refurb Project
| Contents: Chapter 1 Chapter 2 Chapter 3 Chapter 4 Chapter 5 Chapter 6 |
|---|
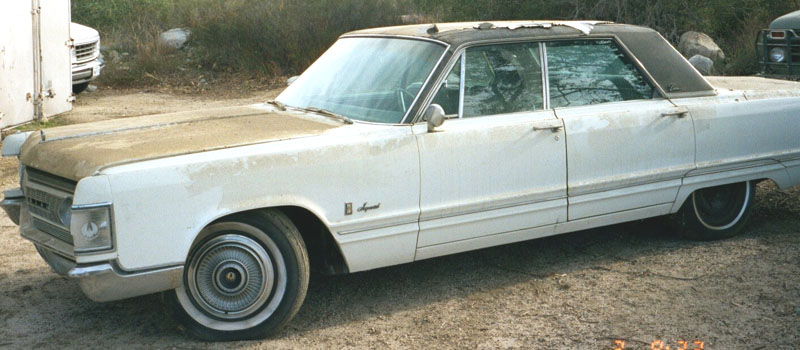
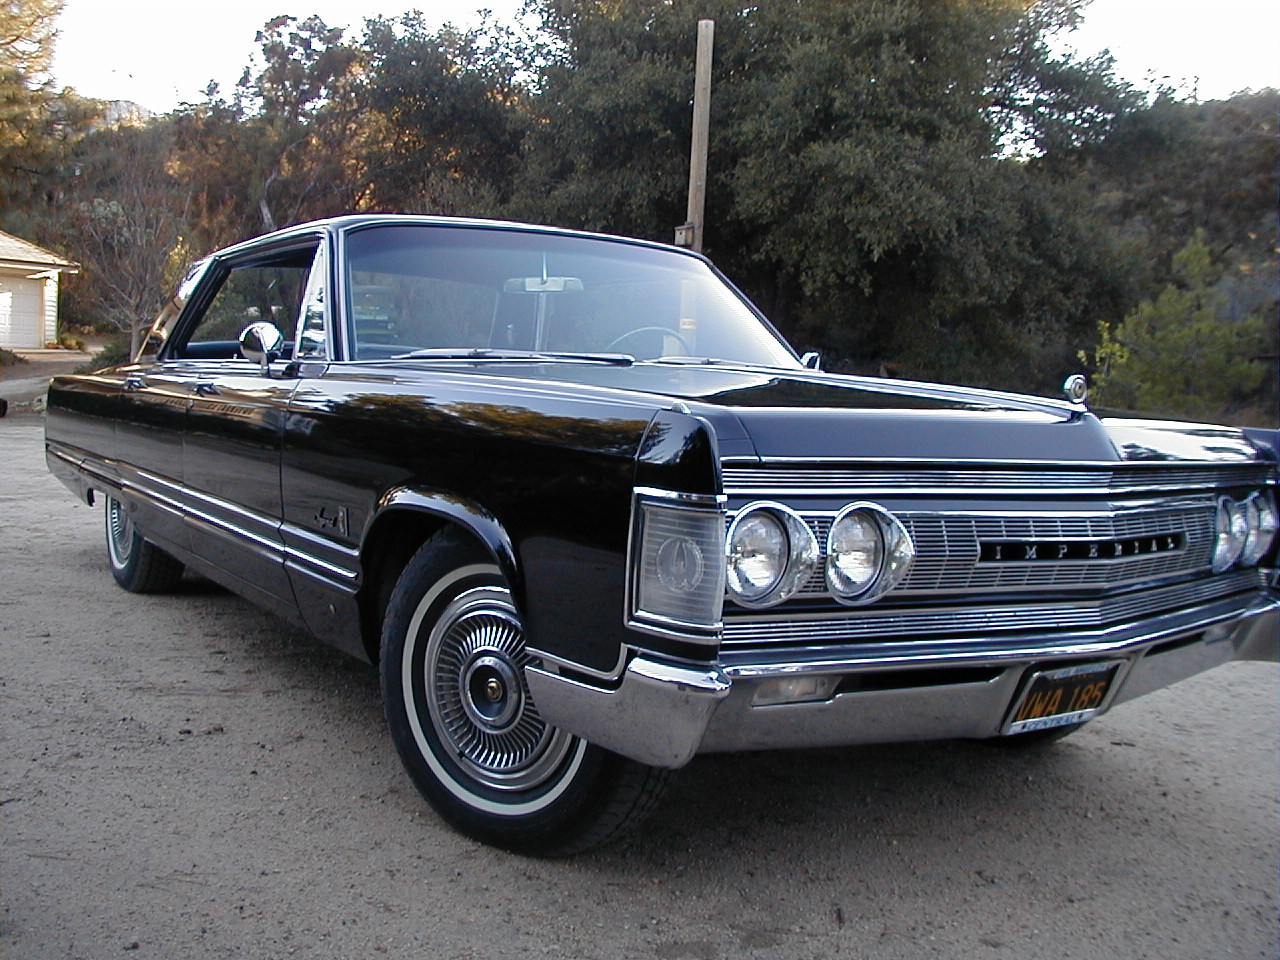
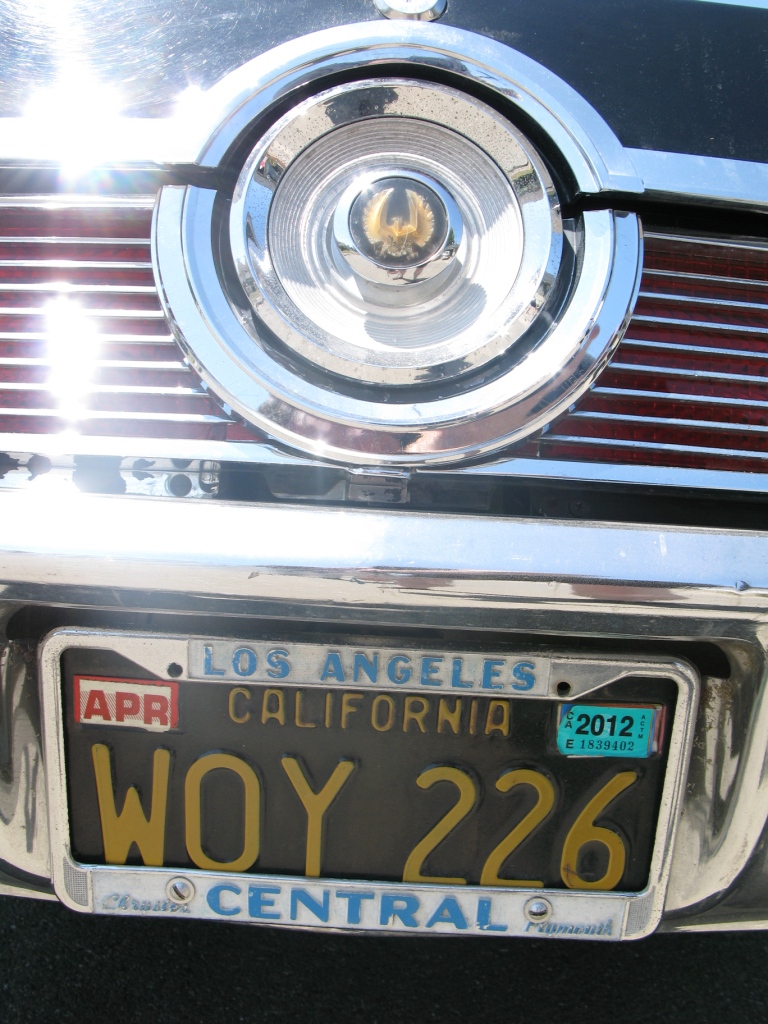
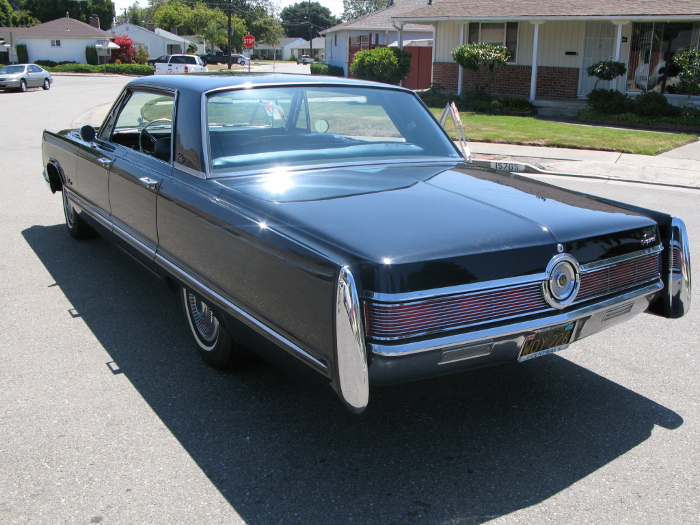
This 1967 Crown 4 Dr HT is a 35,000 Mile car which has not been driven since 1978. It, and its near twin, a 1968 Crown 4 Dr HT with 68,000 Miles, were stored from 1978 to 1992 in the upscale Hancock Park area of Los Angeles.
Both cars were retired in 1978, and not moved until they were given to me in 1992. Unfortunately, the cars were stored in the back yard of the home of the original owners, a wealthy lawyer and his wife. They were parked under a very large eucalyptus tree, and not protected in any way from the leaves and debris.
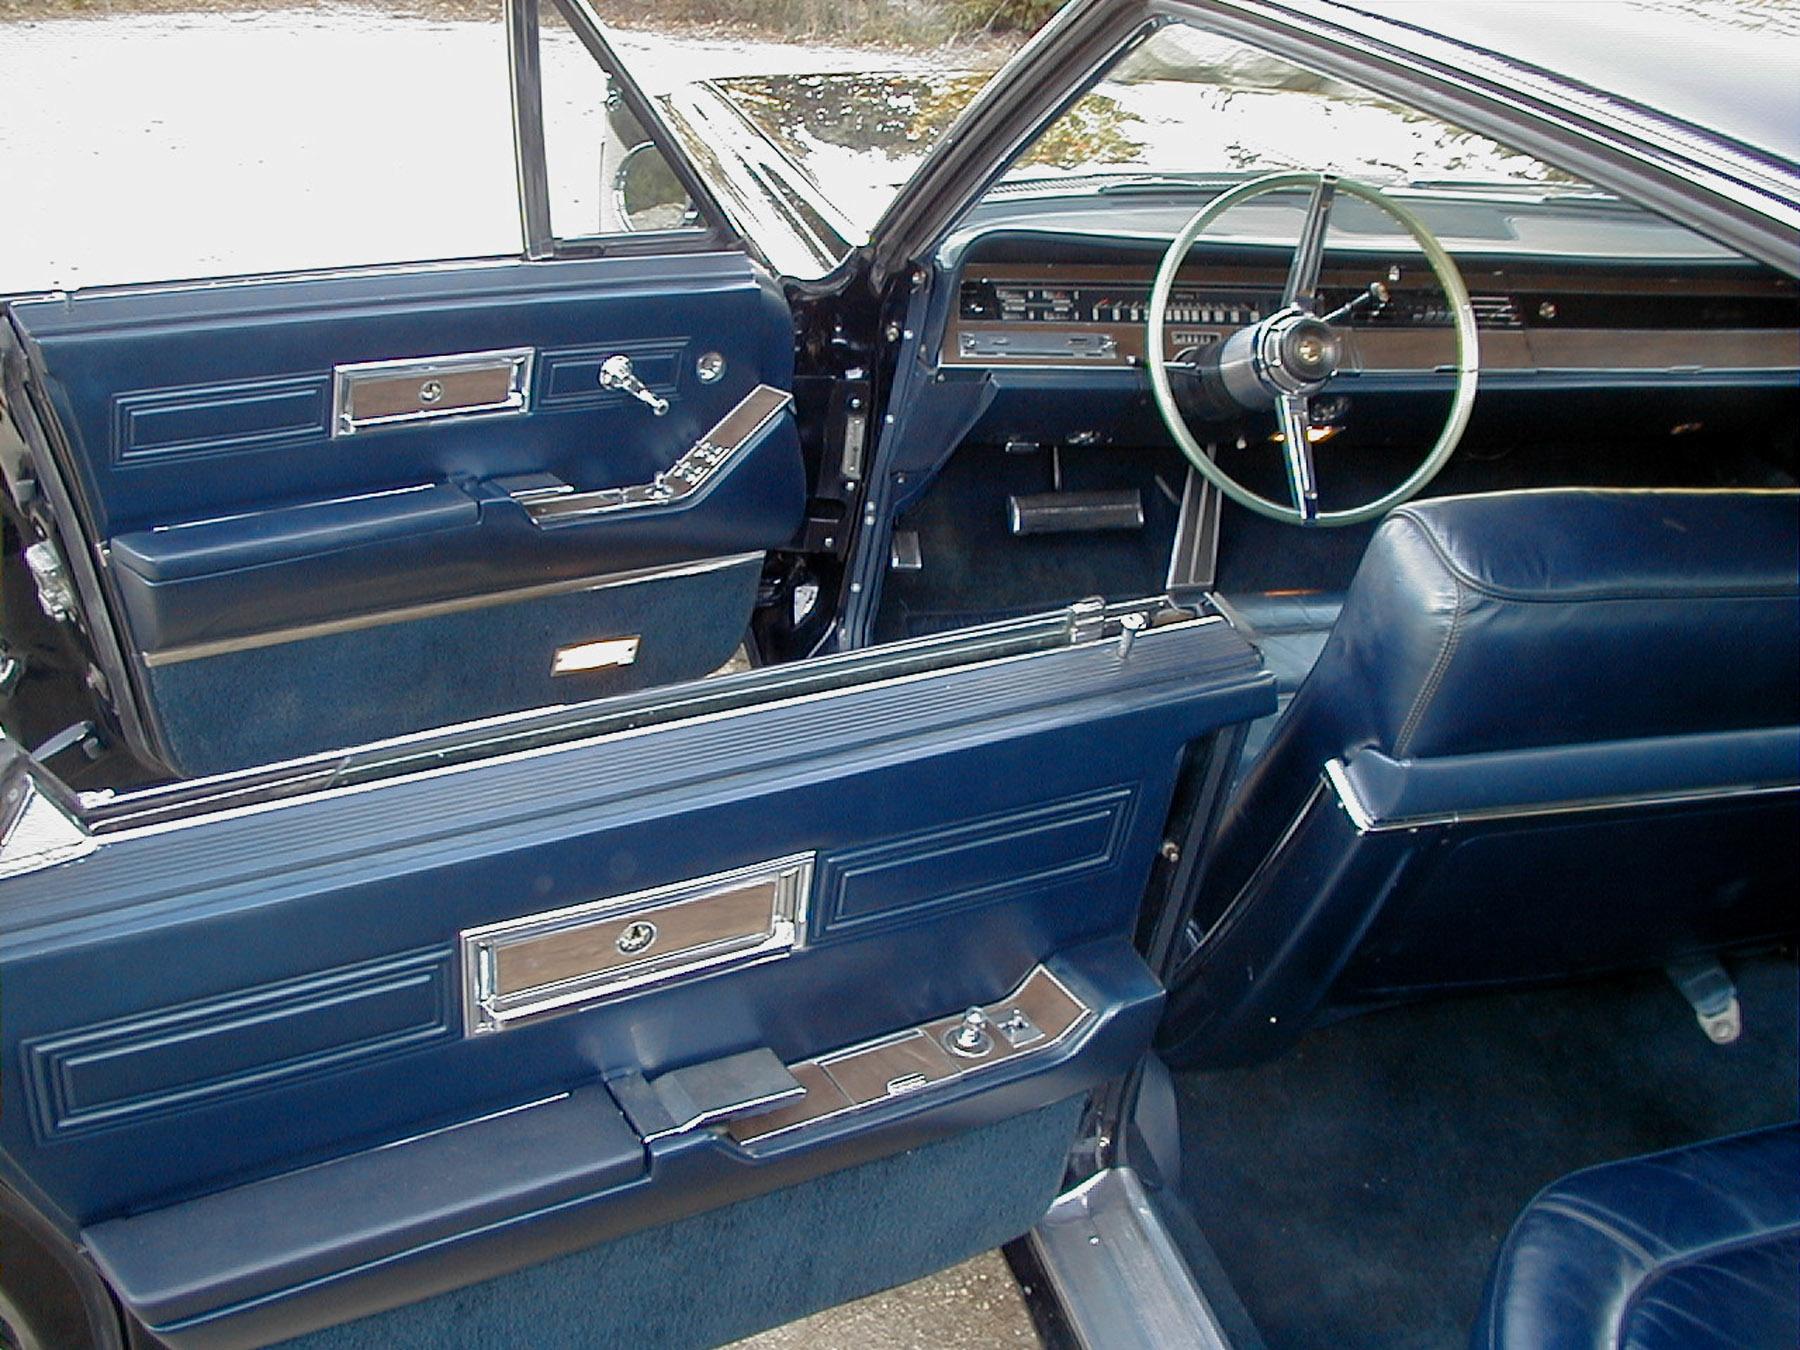
When I acquired the cars in 1992, I moved them to my home in the high desert, and stored them under covers in my barn. In January of this year, I started to refurbish the 67, as I prefer that style, and I especially like the perfect dark blue leather interior of this car. The 68 is in nearly as good condition, but has a red leather interior, which I do not like as well.
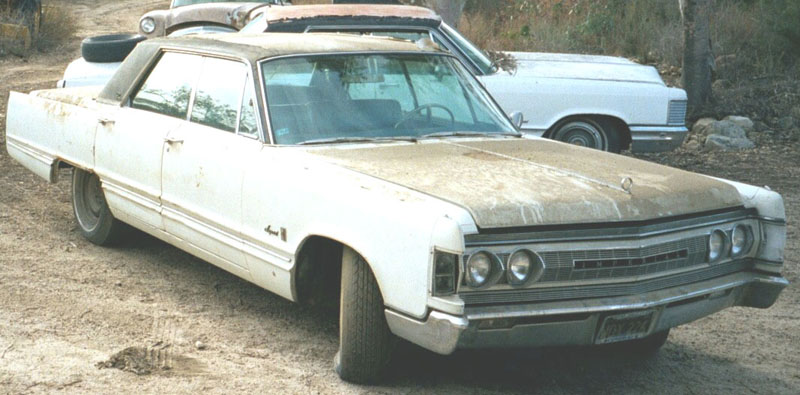
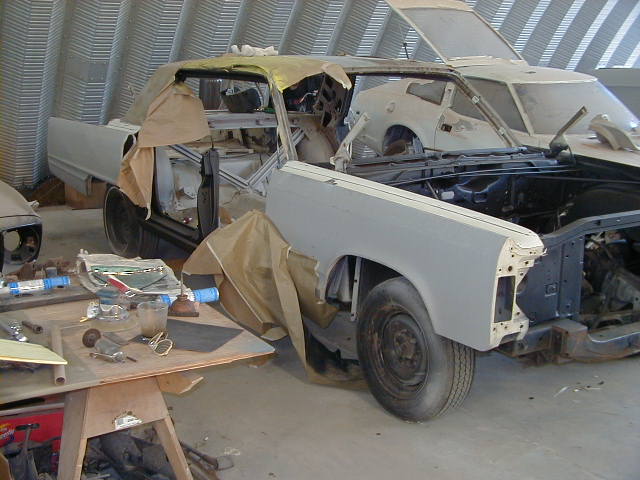
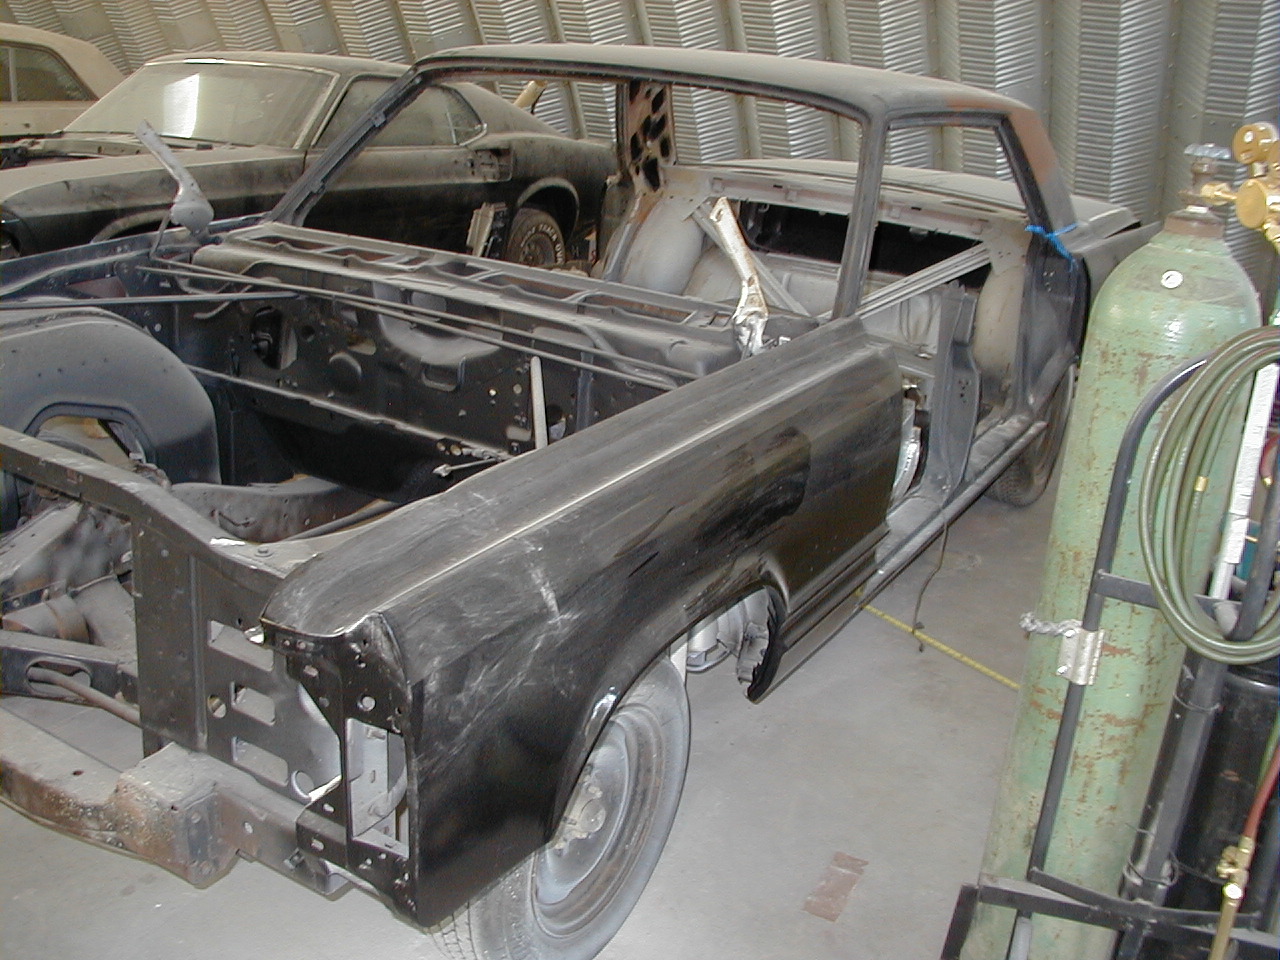
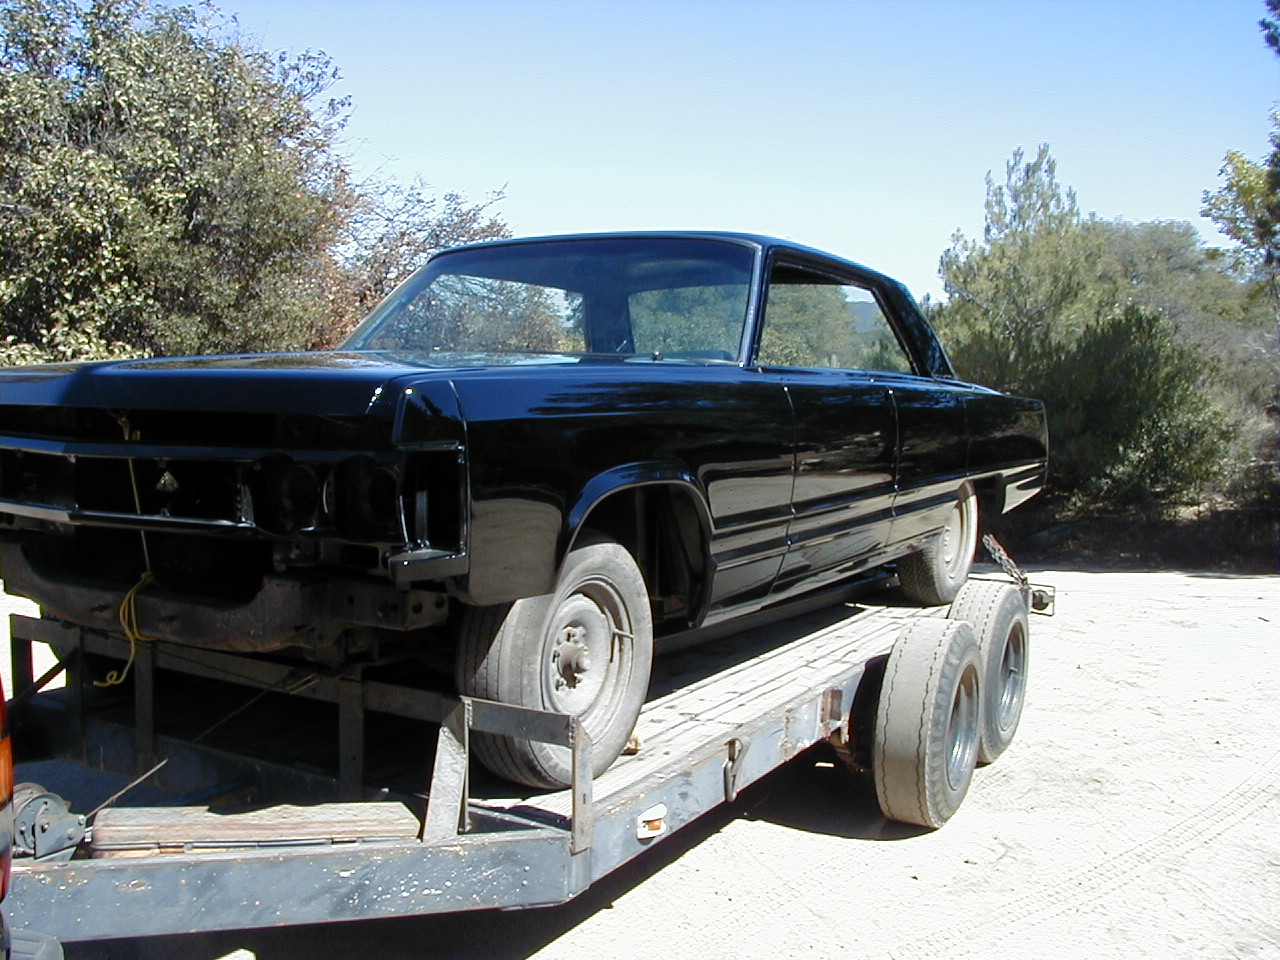
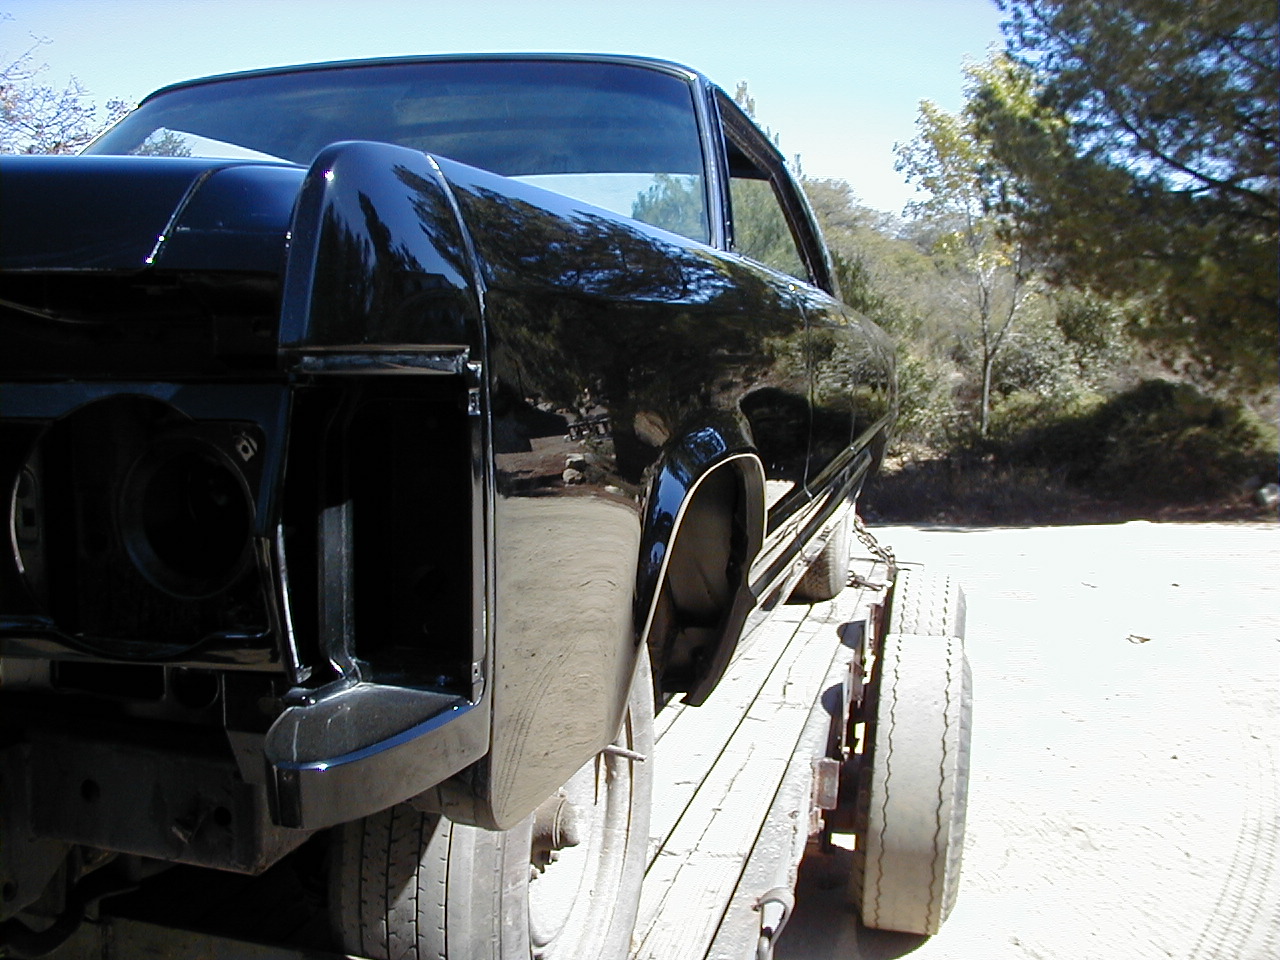
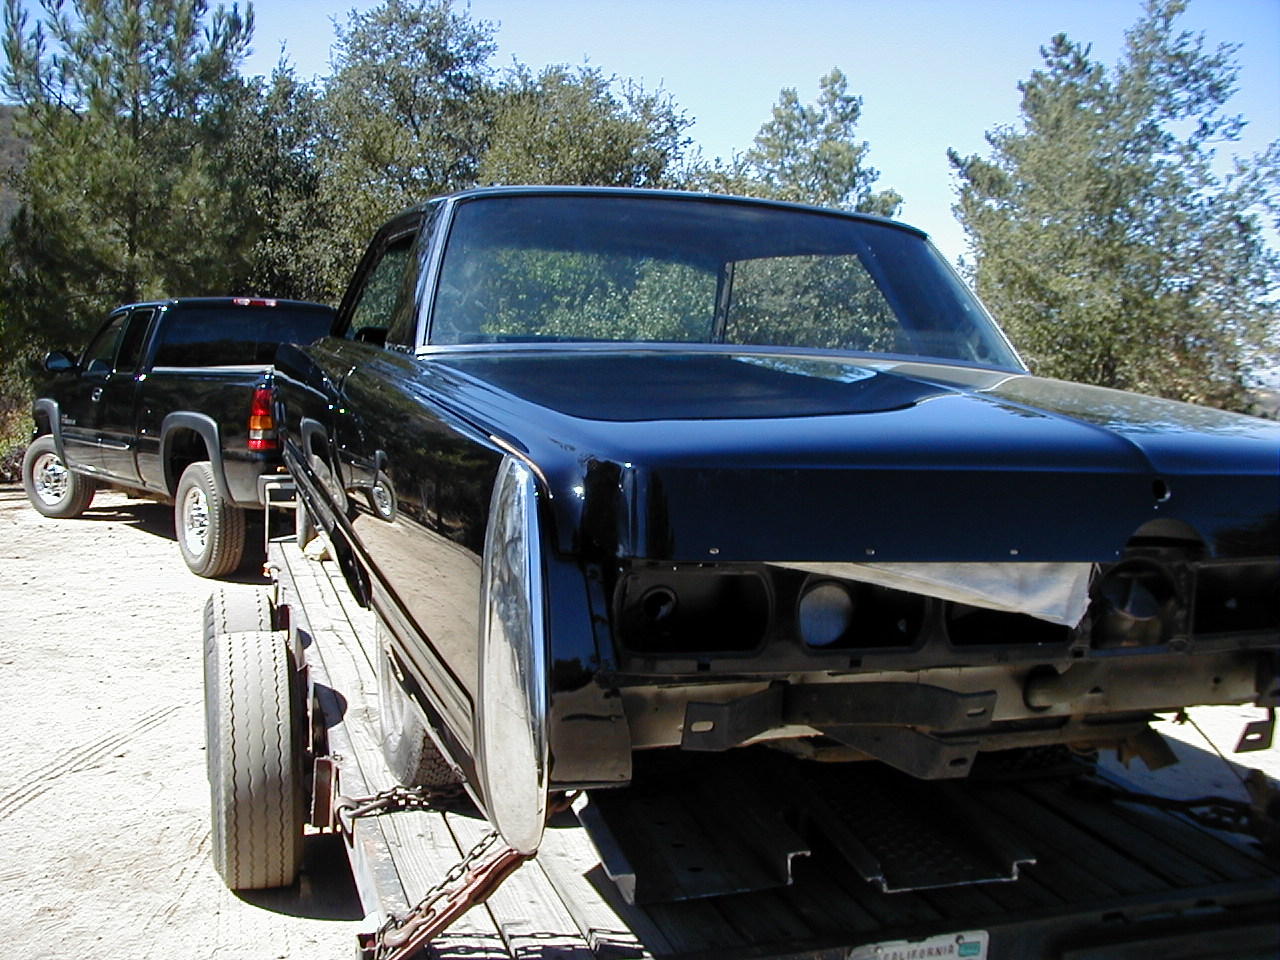
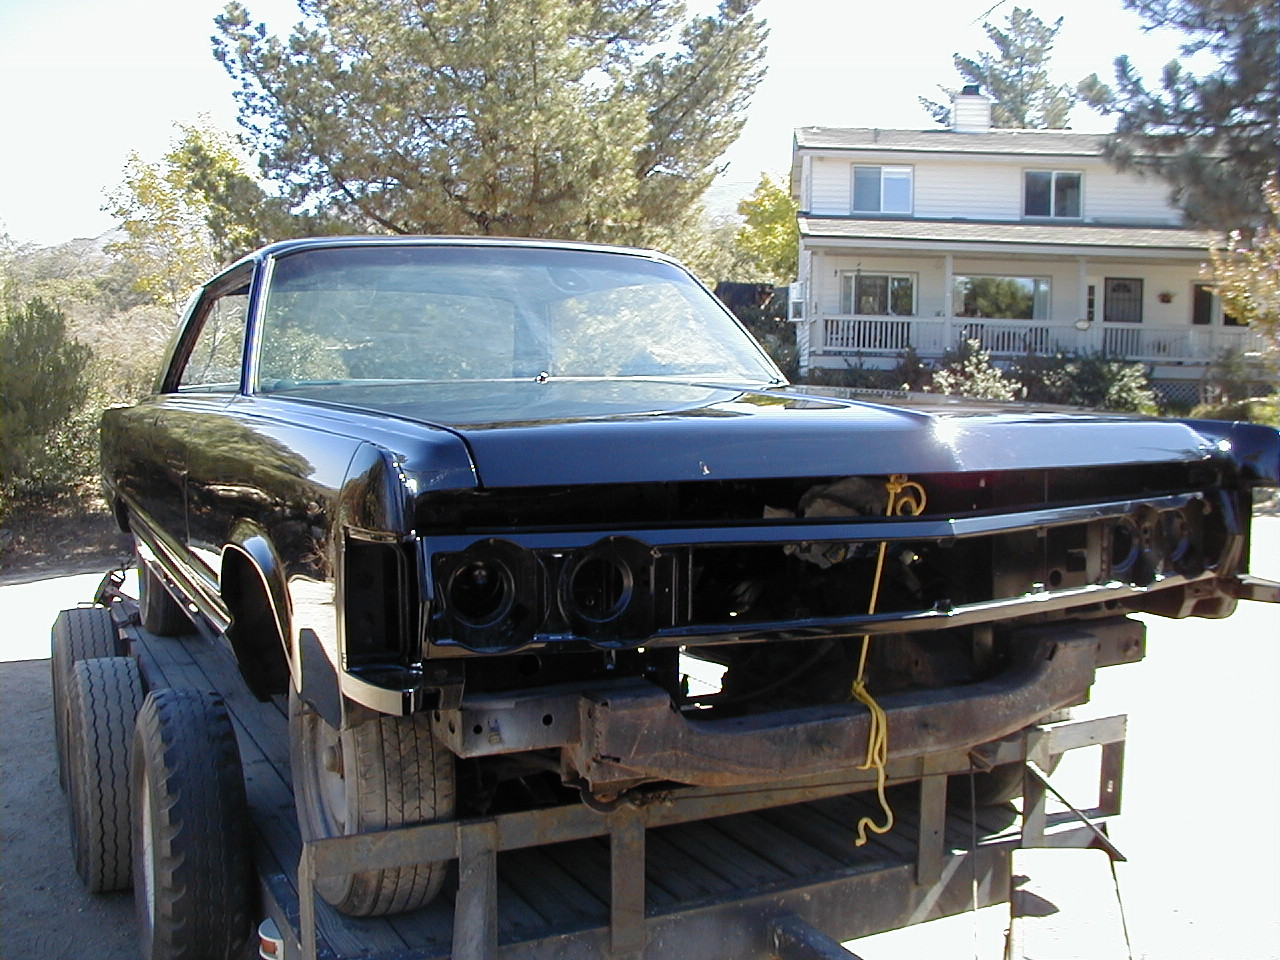
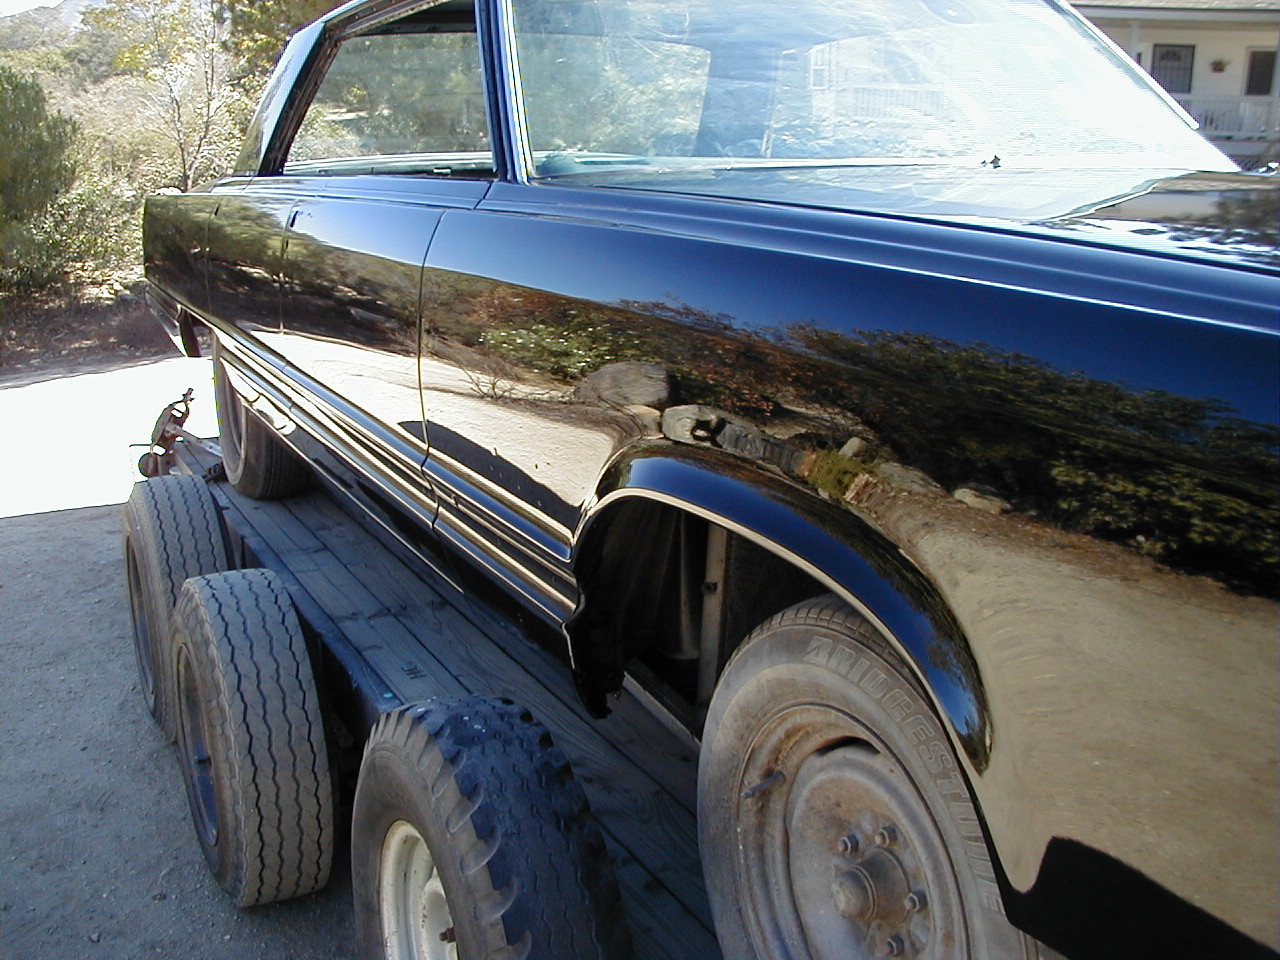
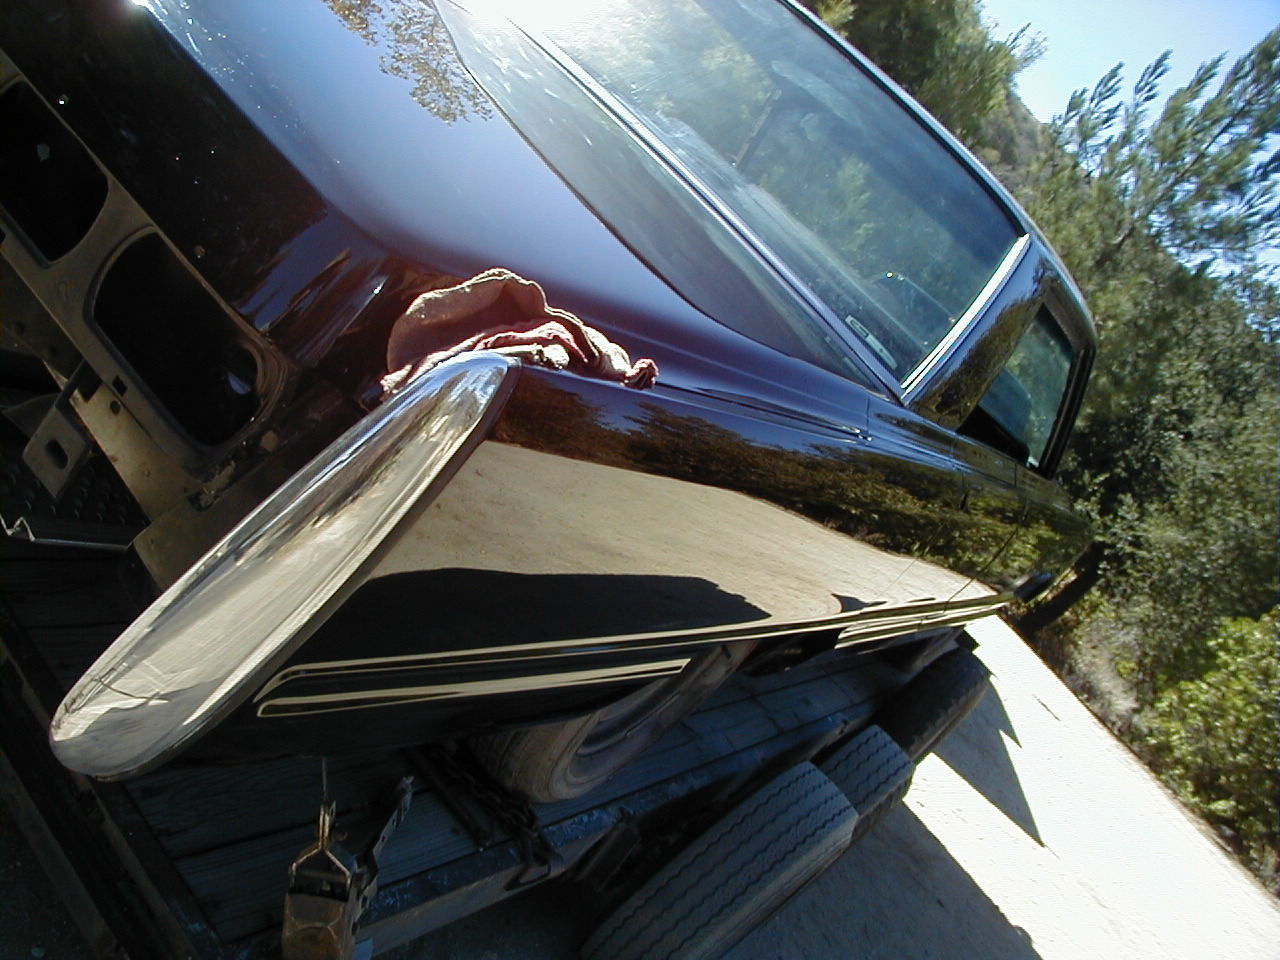
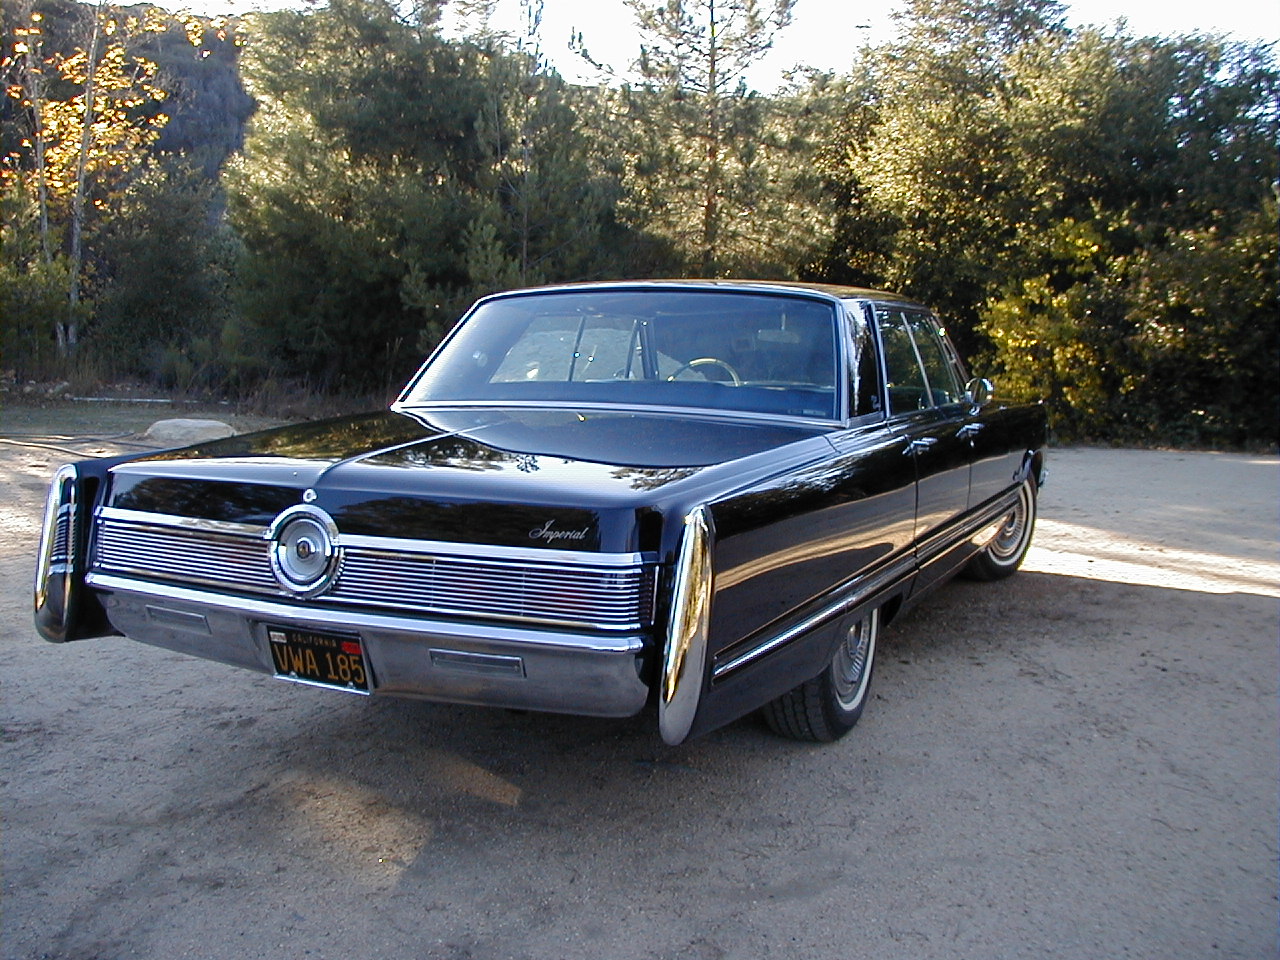
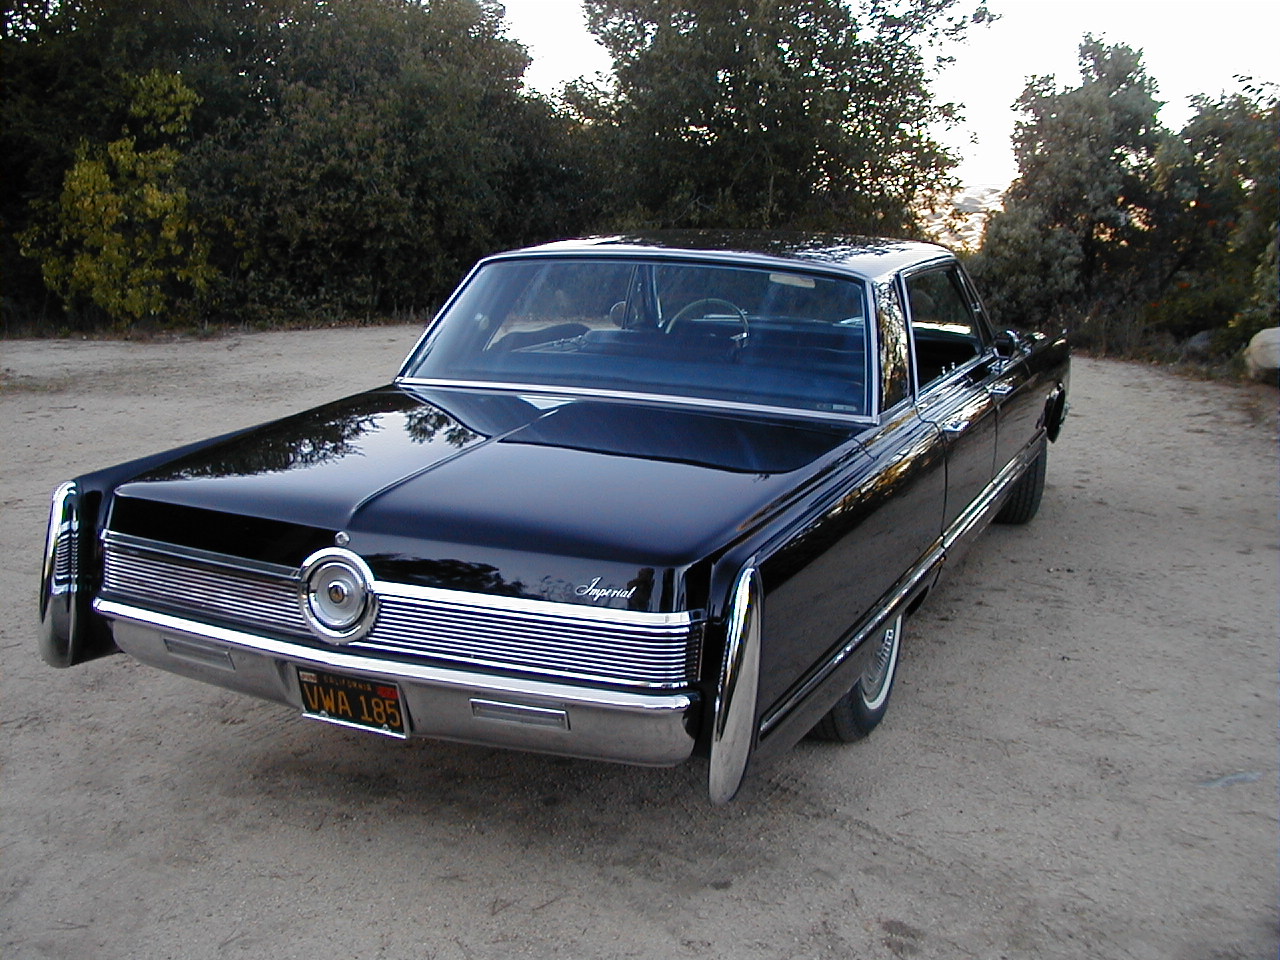
A set of pictures of the 67 as removed from my barn in January 2002 (the car is filthy, and a few parts have already been removed):
(Click on any photo in this document to see a larger version.)
The second picture shows the 68 in the background, along with some of my other junk.
BODY
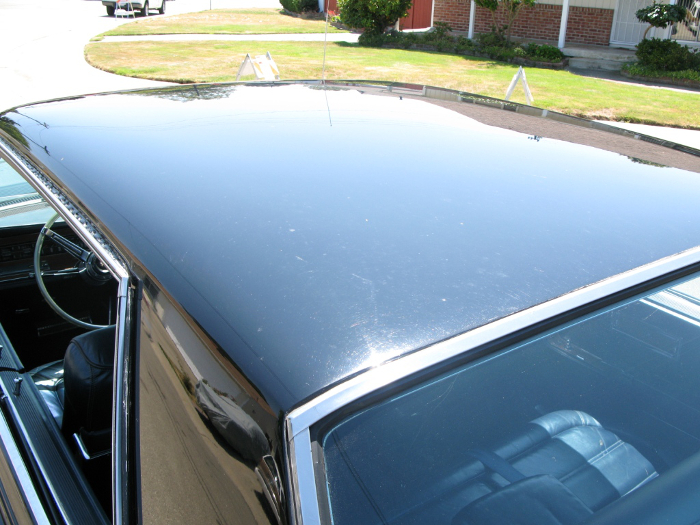
The body is quite sound on both cars, but the vinyl top has caused serious rust problems and will be removed (permanently, as I don't care for them) as the cars are restored.
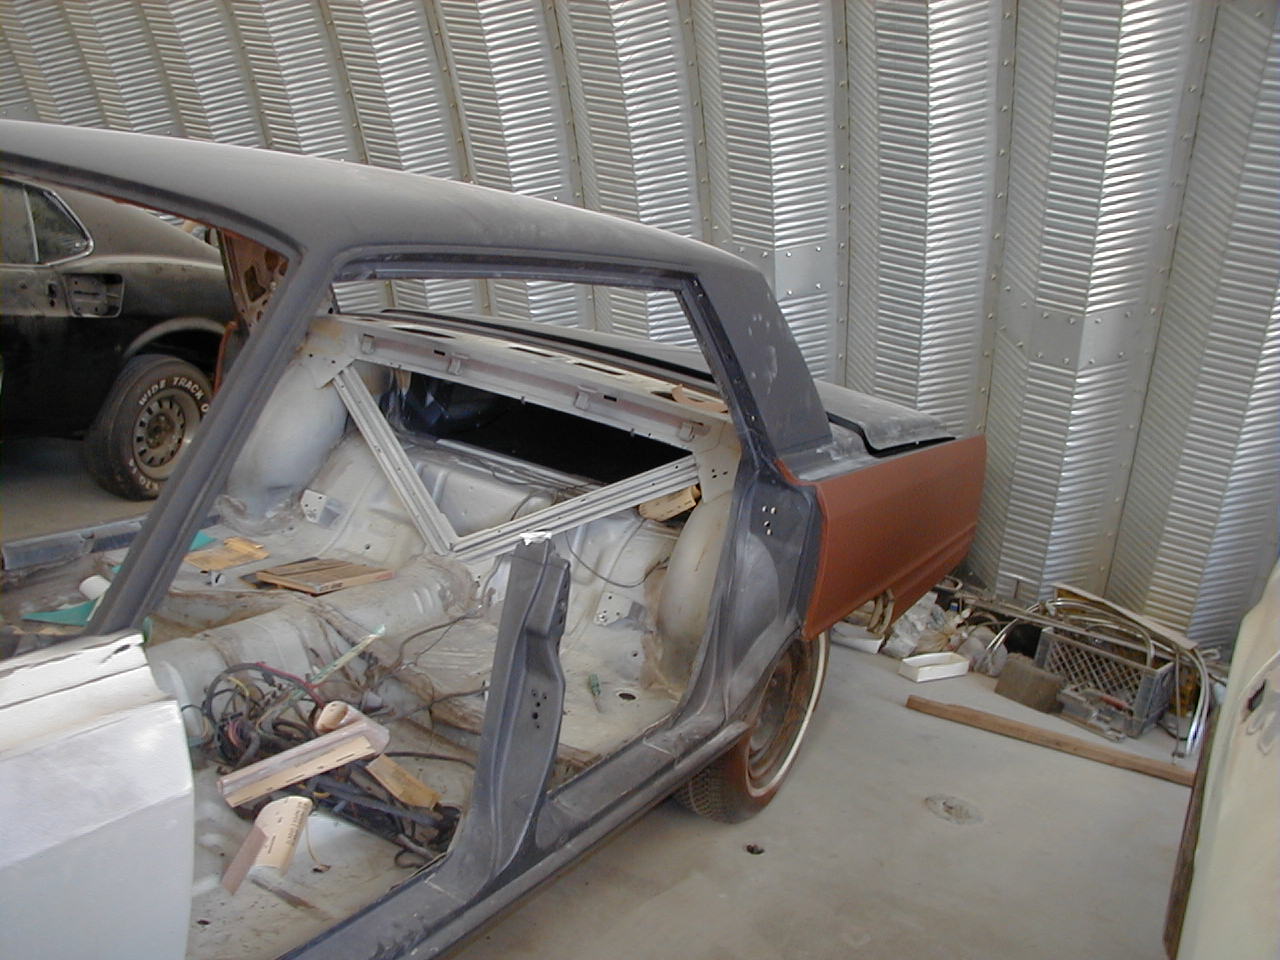
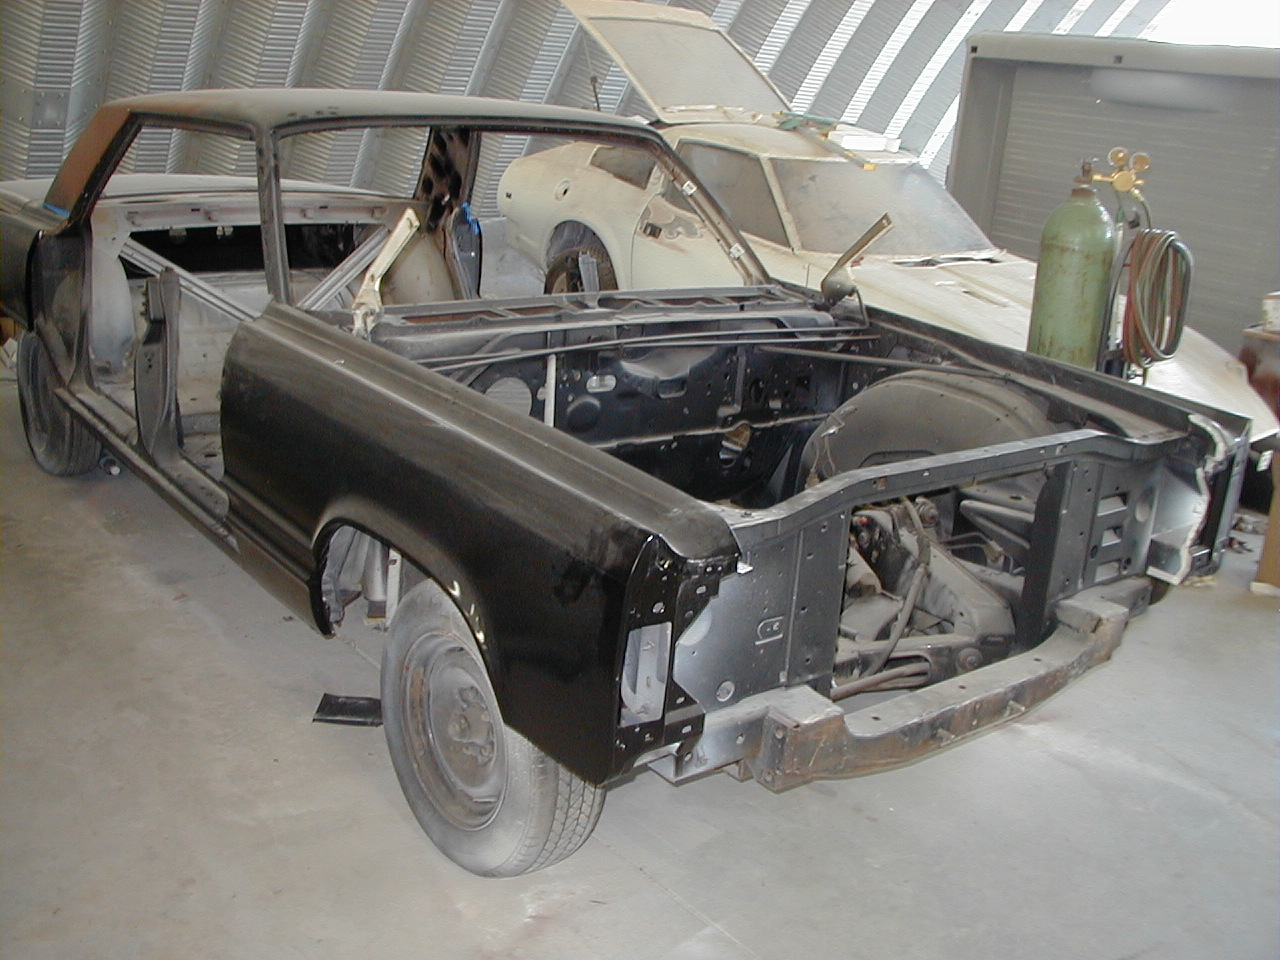
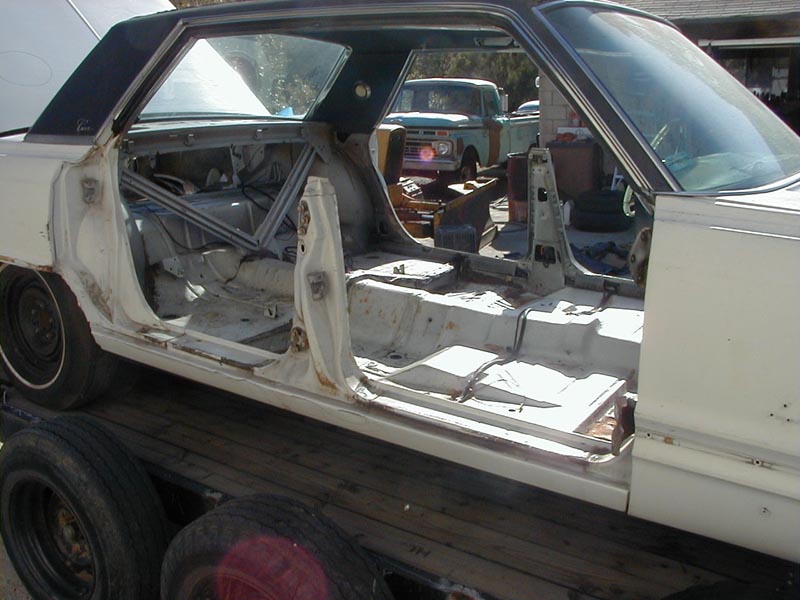
The 67 has been stripped to a bare rolling body shell, as I am going to change the color to "Regal" blue, a correct 1967 color, and I don't want any evidence of the original color to show, even under carpets and the like. A few pictures of the stripped body:
 |
 |
 |
 |
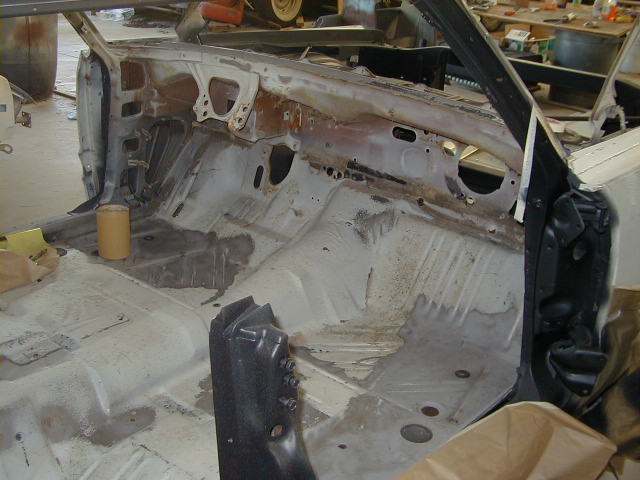
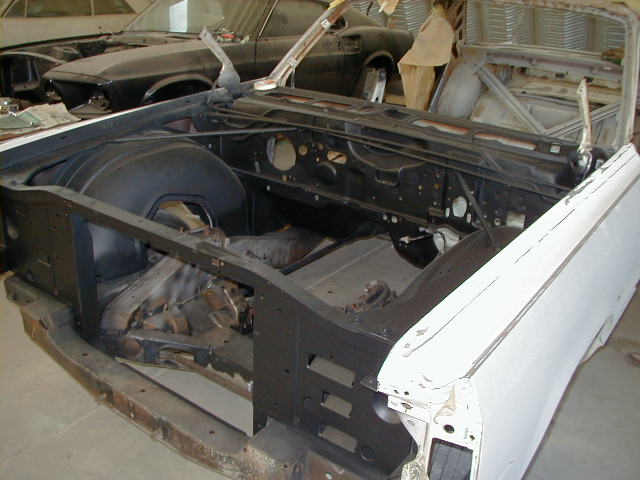
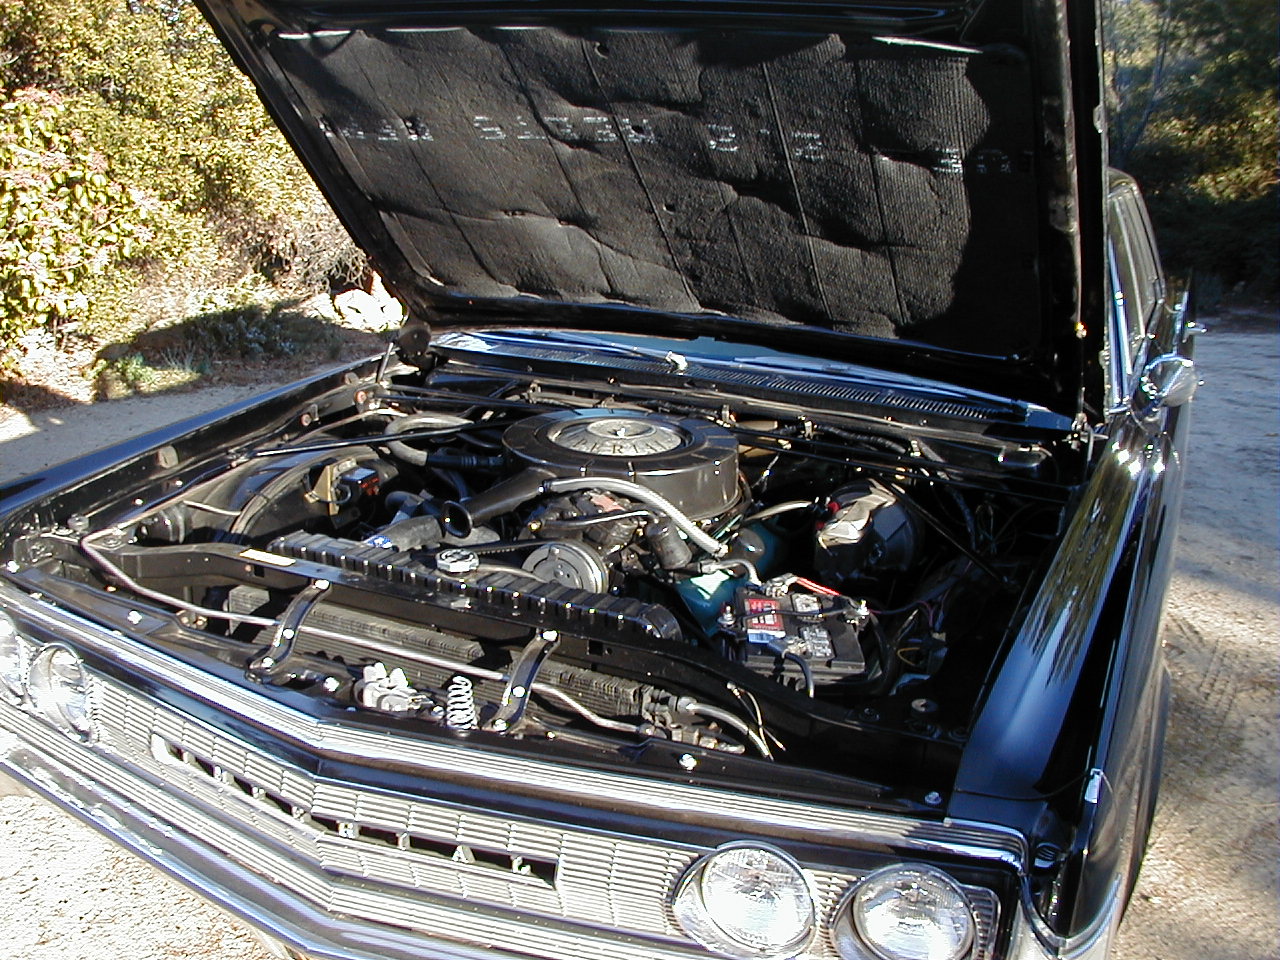
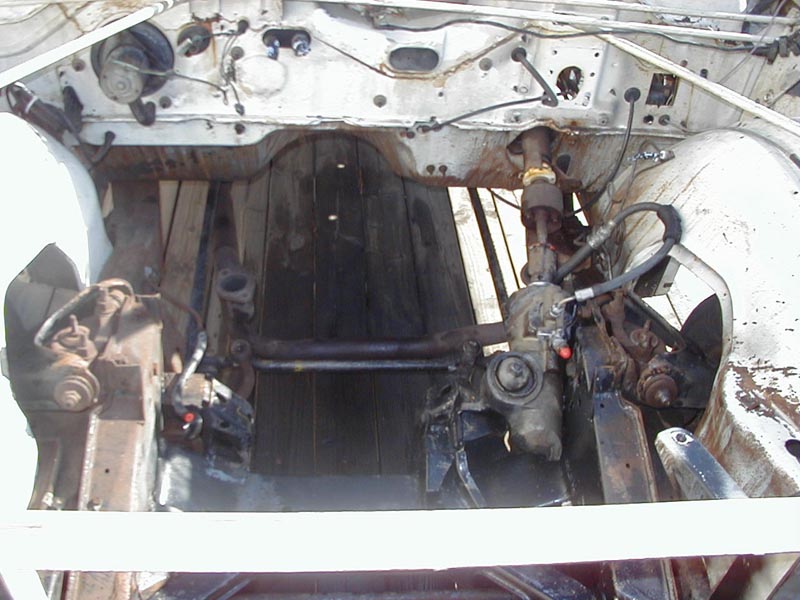
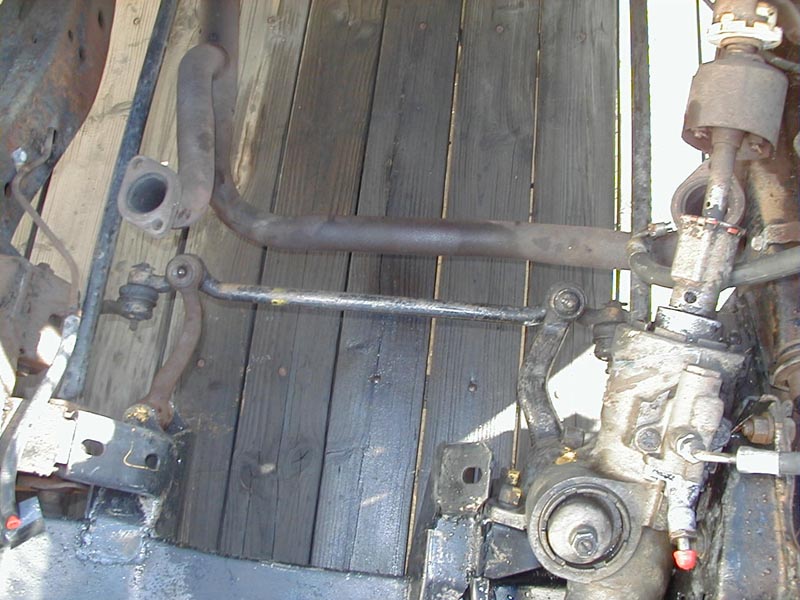
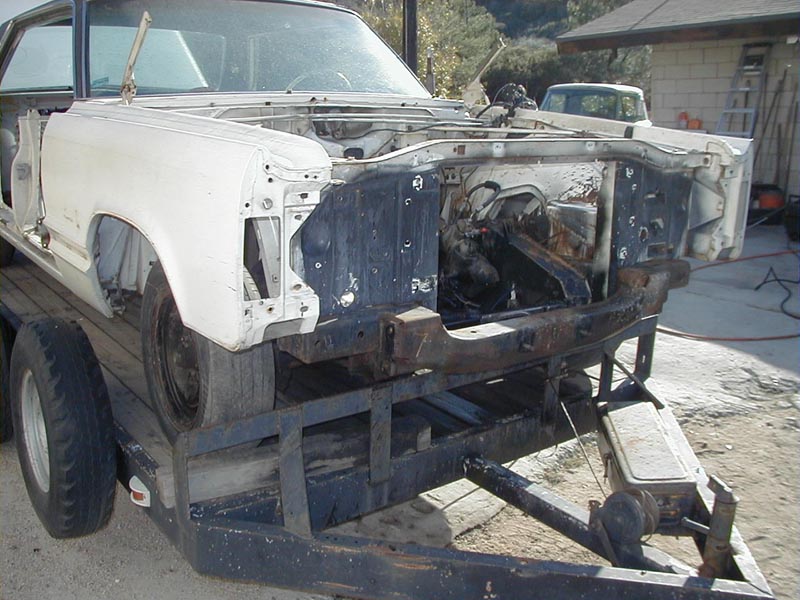
| Engine Compartment | Front Suspension (note colored inspection marks on various components): | Partly stripped body on way to body shop | |
 |
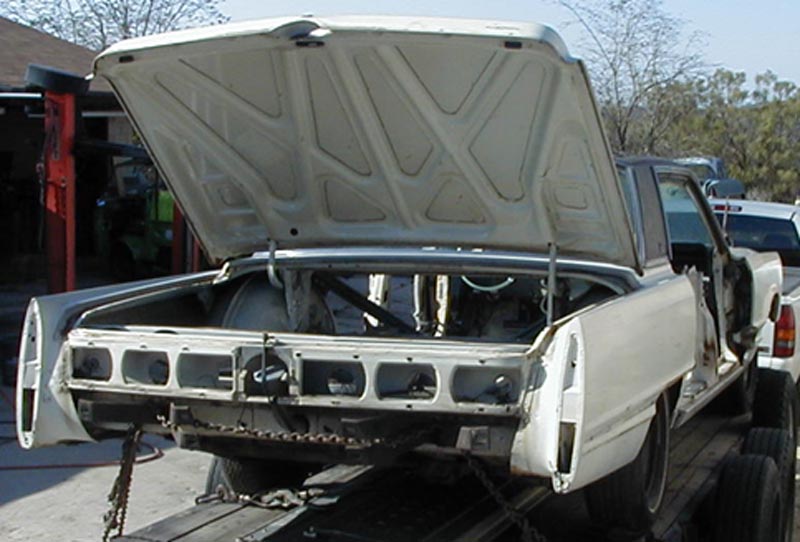 |
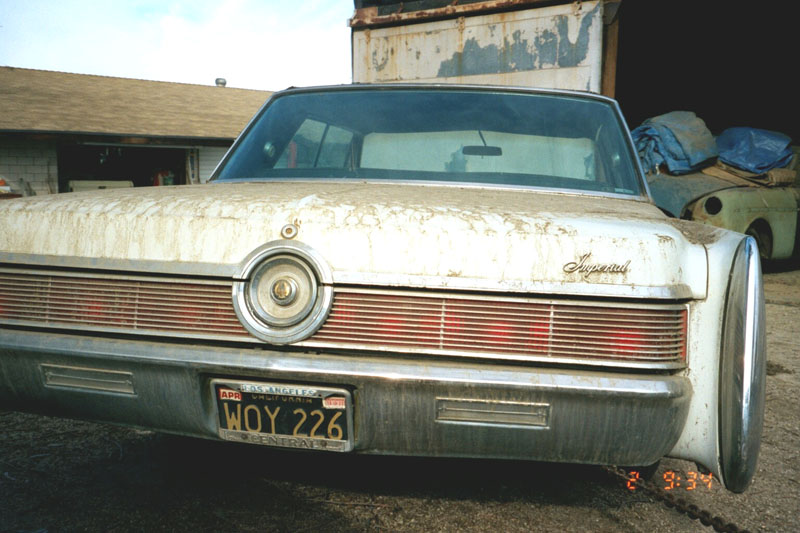
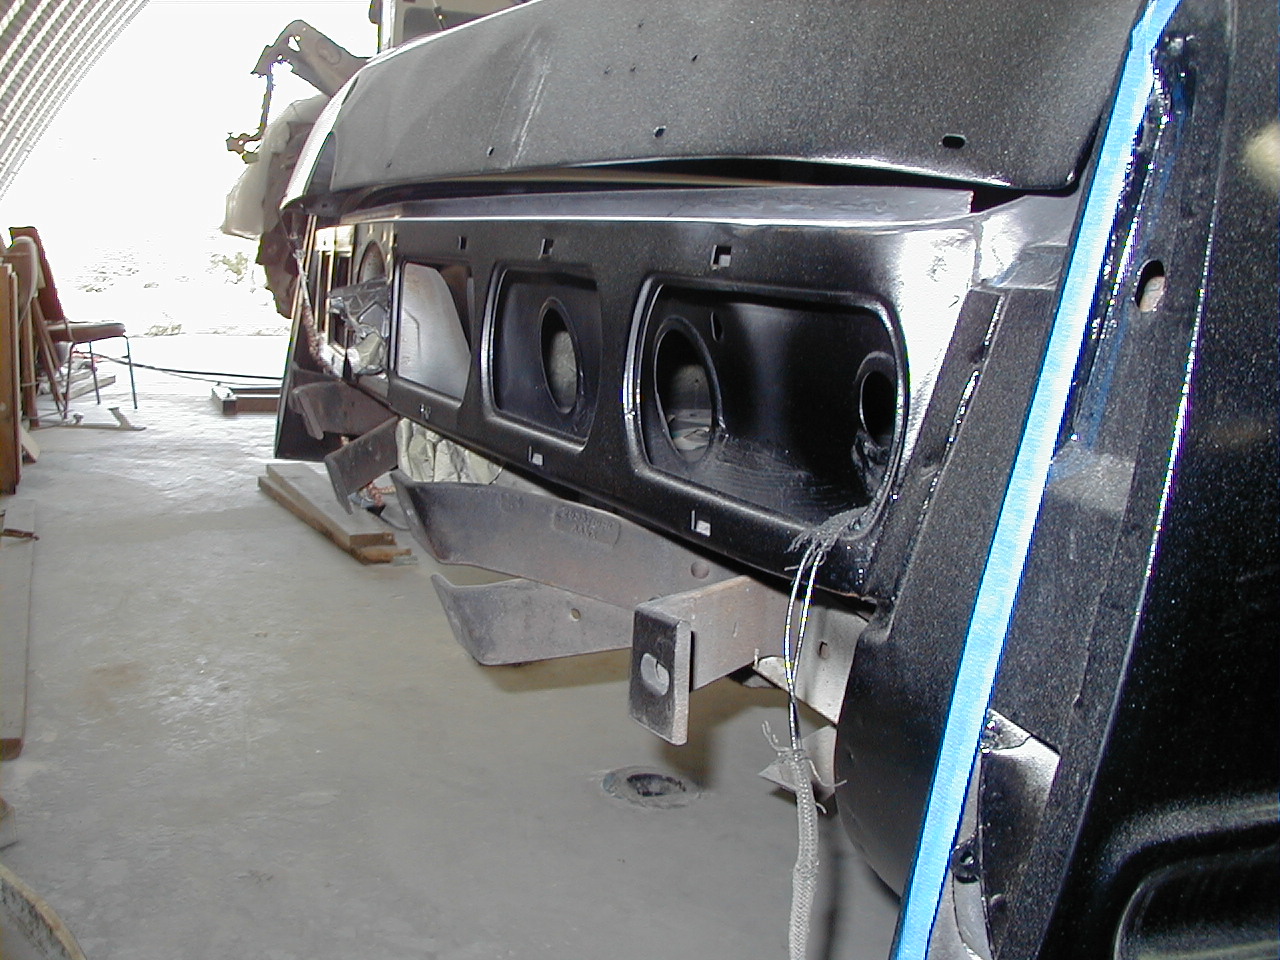
| Front of Body (note flat black overspray on everything one might see through the grille!) | Rear of Body |
The remaining body parts such as dash, steering column, glass, harnesses, interior trim etc. were removed later (by me but at the body shop premises).
See also my 1967 Imperial Dash Pad Removal procedure.
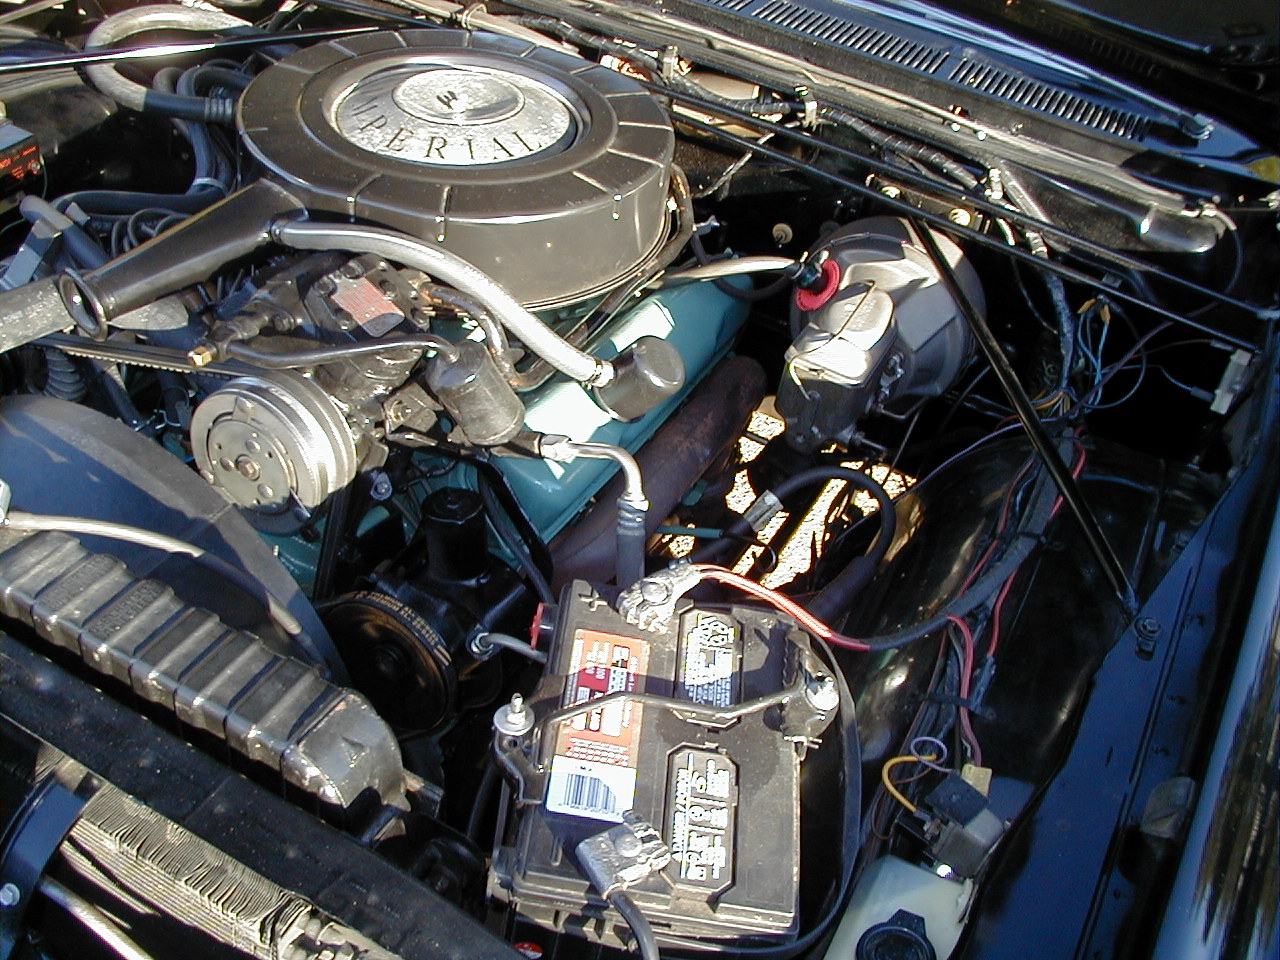
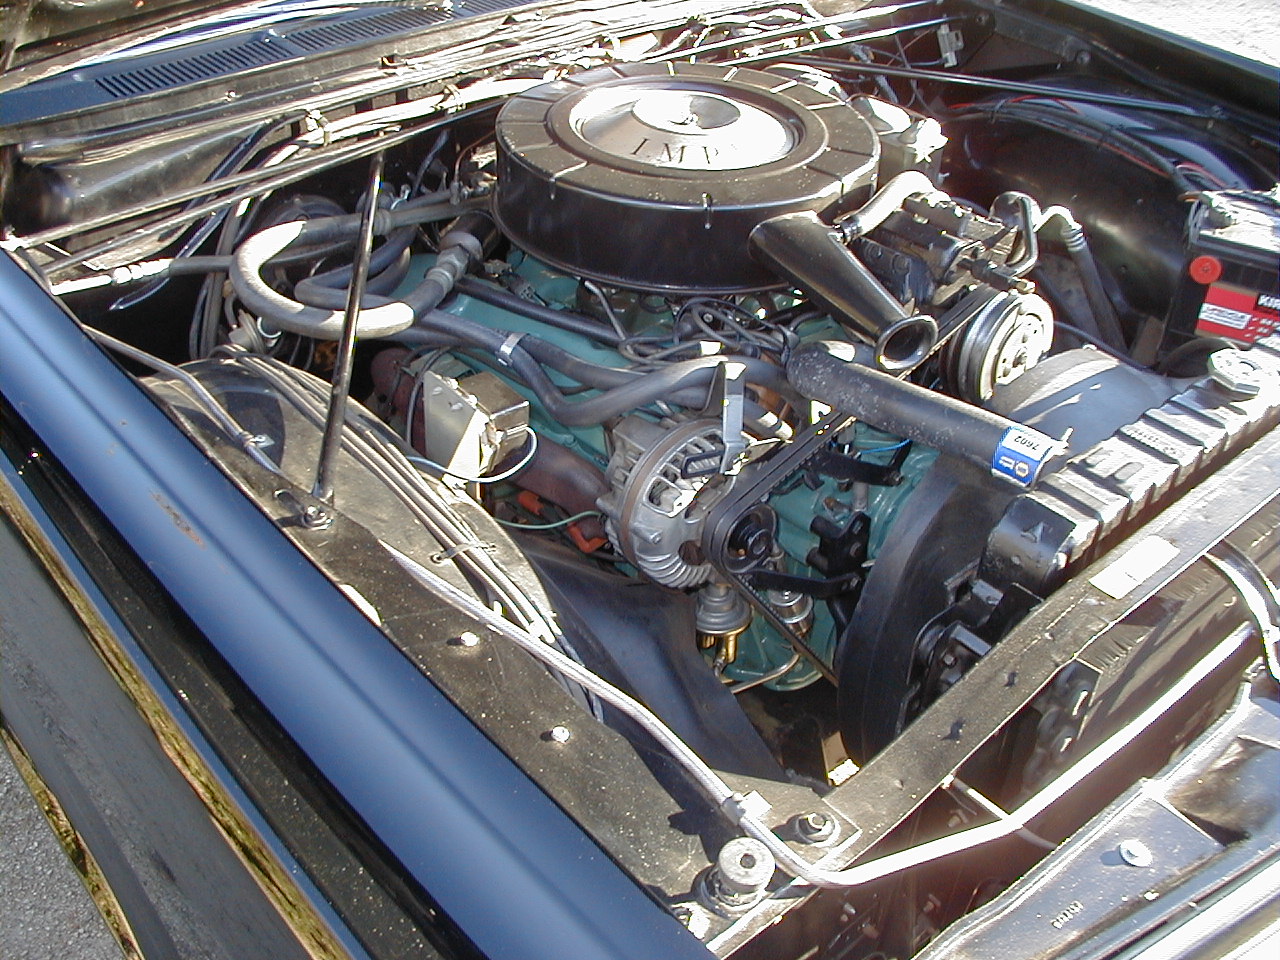
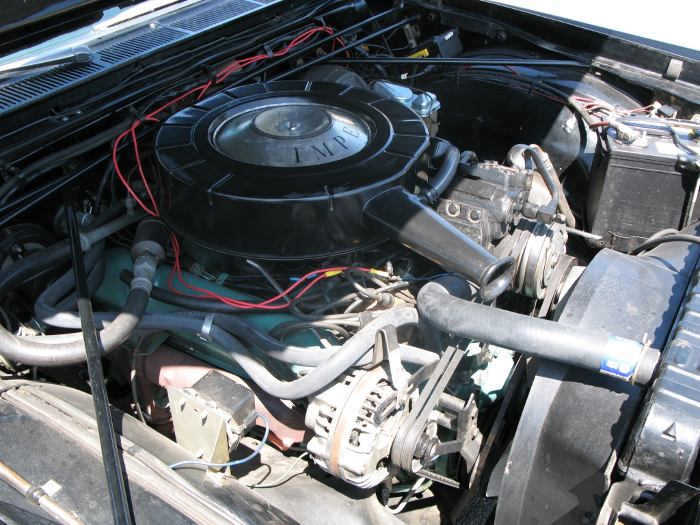
ENGINE
The engine was quite dirty externally, but showed no evidence of any repair work, with the original belts, hoses, and all other bolt on pieces being obviously just as the car left the factory. I disassembled the engine to check for any worn parts, and found none at all, and a very clean interior. For instance, the piston fit was still 0.001 to 0.0015", the bearings plastiguage checked to between 0.0007" to 0.001" etc. The piston rings were stuck in the piston lands, but there was no ring groove wear, taper in the cylinders, or ridge. I found one push rod had been forced right through it's rocker arm, apparently in a misguided attempt to start the engine at some time in the past. The oil pump, timing hardware, and camshaft all check to new specifications. However, I did replace the timing gears and chain as the original nylon timing gear teeth worried me due to their age. I had the heads completely refurbished, and of course replaced the rings, gaskets and etc.
The engine should perform and sound exactly as it did when new - I'll append a report when I have run it on the test stand.
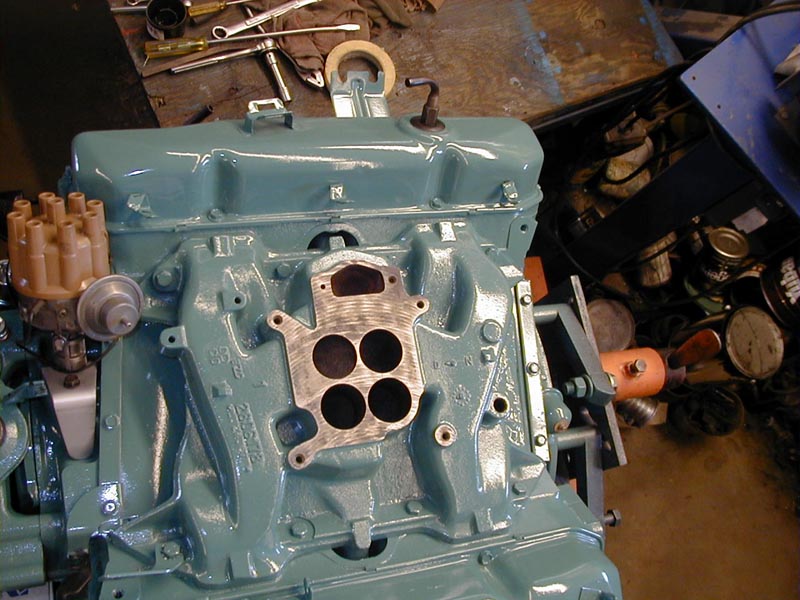
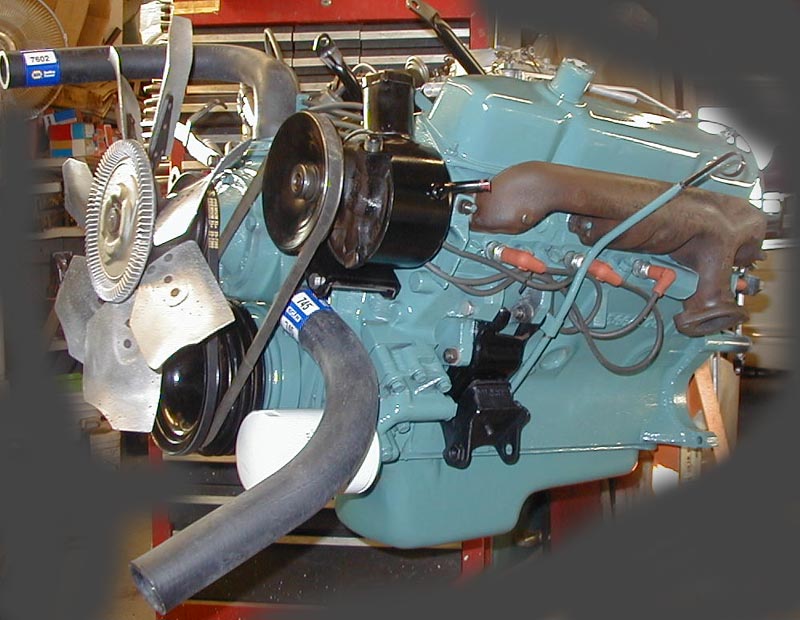
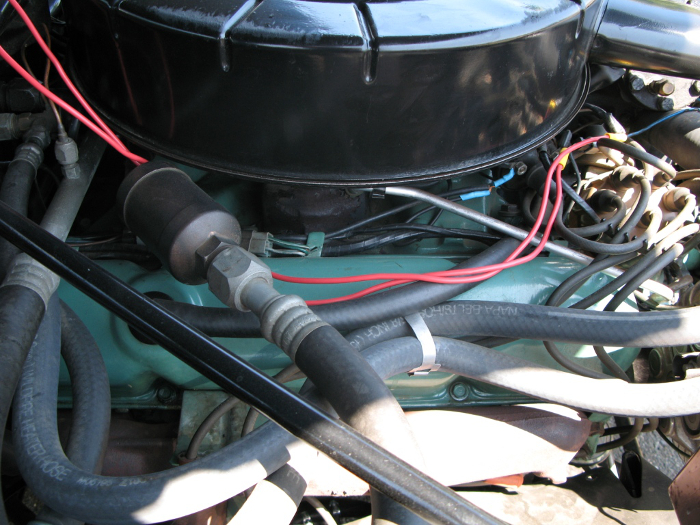
In cleaning the engine, I was careful to note how it was assembled, paying attention to what was on the engine when it was painted at the factory, and what was installed later and thus showed no overspray etc. Surprisingly, the engine was painted the Chrysler blue-green color with the fuel pump, accelerator linkage, oil pressure senders, spark plug wire guides, and heat shields in place. While this is much more sloppy looking than cars I have seen which were "restored", I recreated this look when I reassembled the engine. I also noted a number written in black crayon on the right front valve cover which was unrelated to the car's VIN or date of production; I take it this is a factory control number of some sort, and put it back just as it was. There were no other hand markings on the engine, but there were the stamped and cast-in numbers that are well documented in other sources.
 |
 |
 |
|
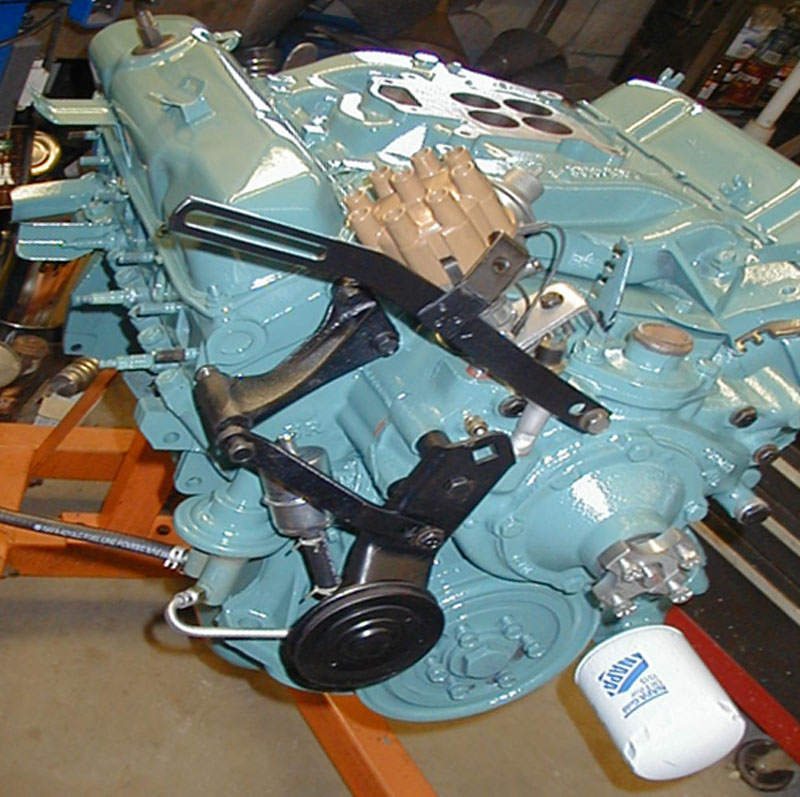
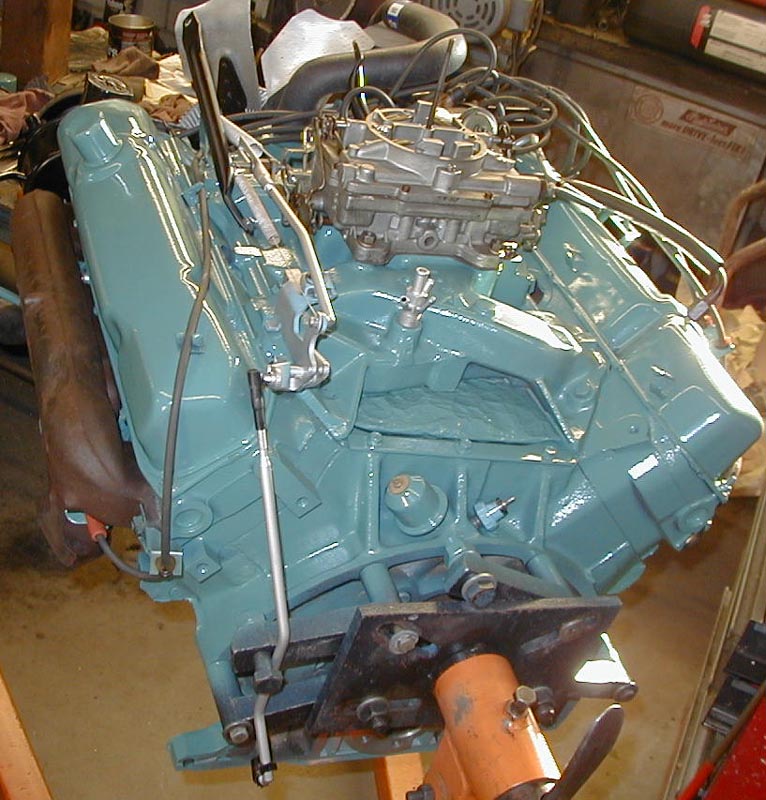
The engine during final assembly |
||
 |
 |
 |
 |
|
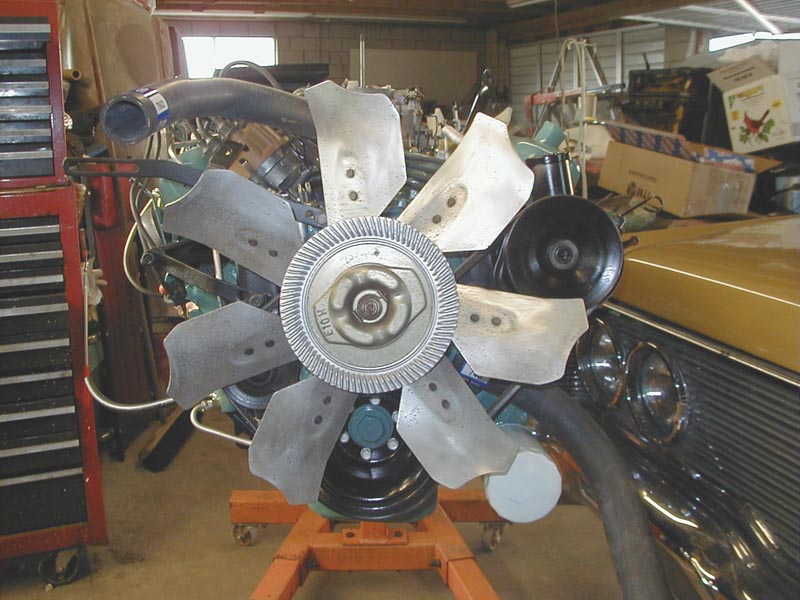
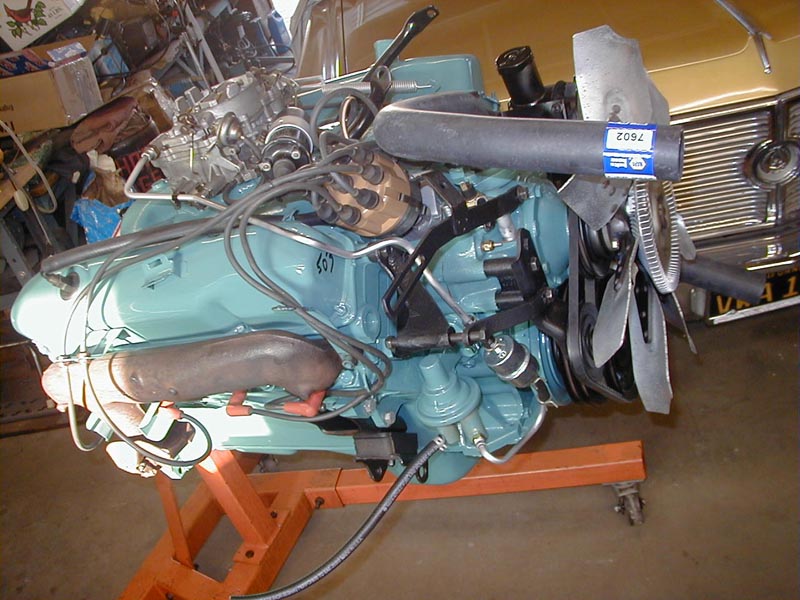
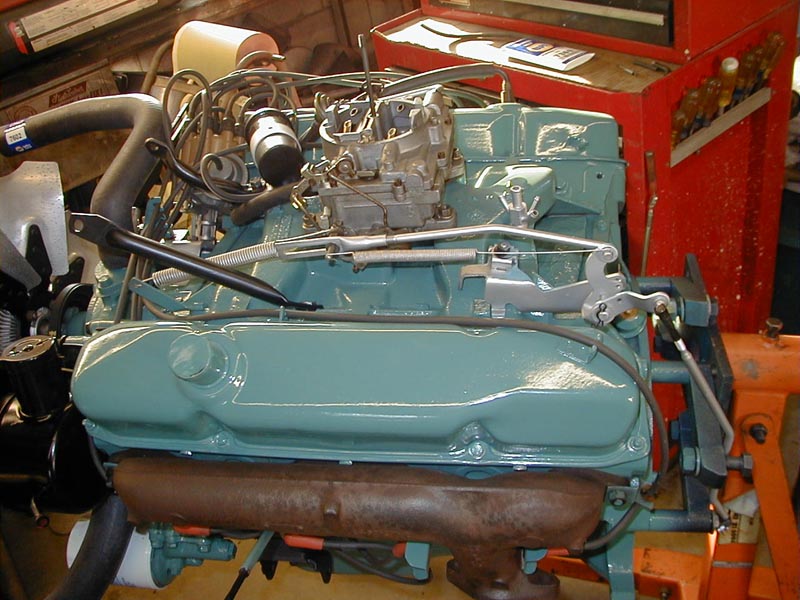
The engine ready for the test stand run-in (air cleaner, alternator and AC compressor not installed) |
|||
I have now completed the reassembly of the engine and installed it on my test stand.
|
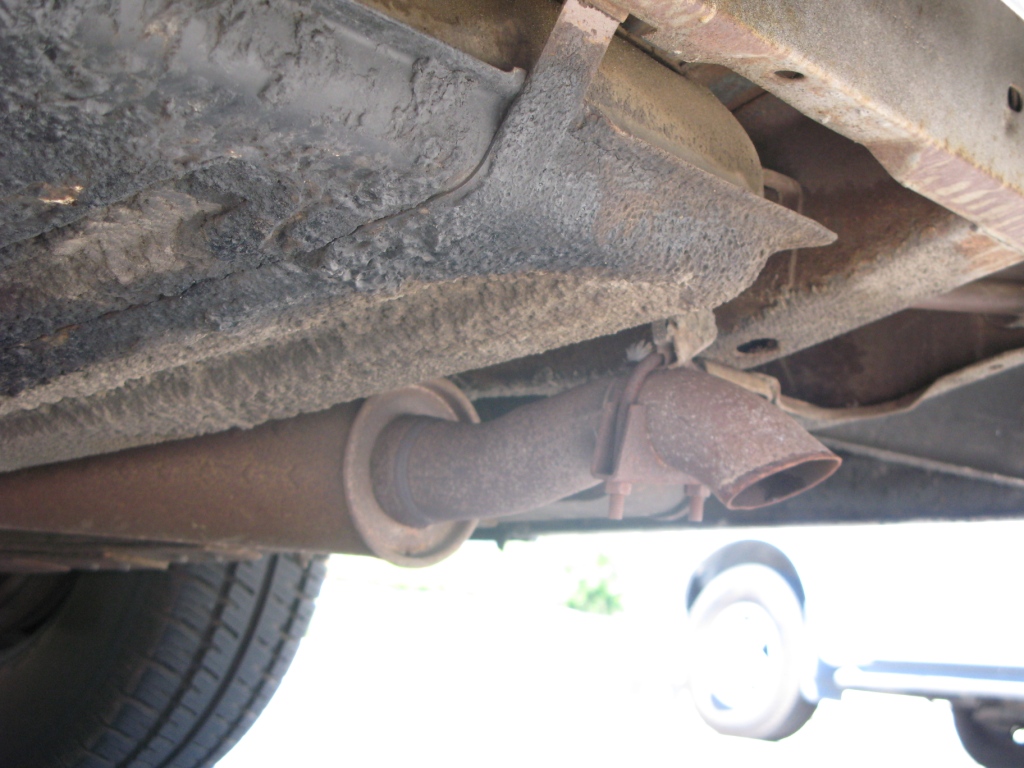
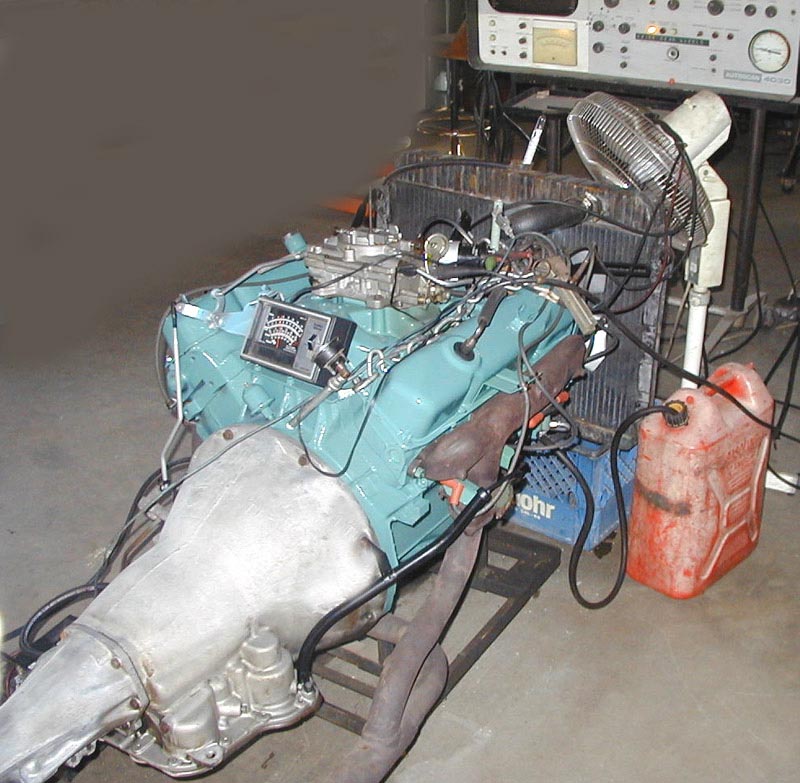
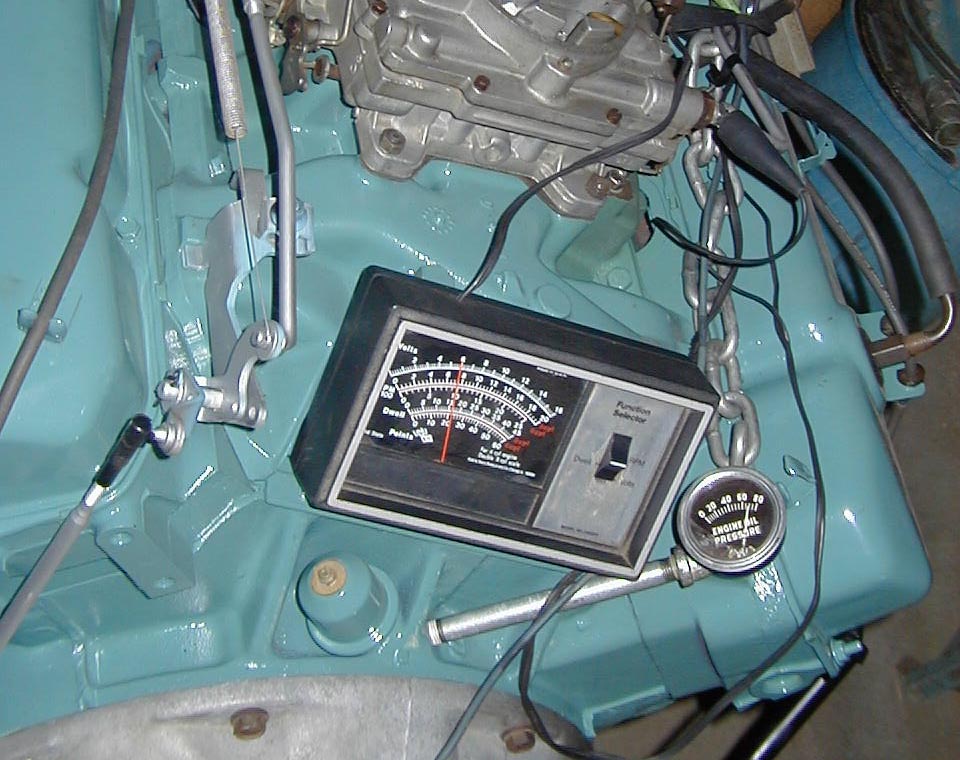
This shows the engine running on its own fuel pump, using a "jerry can" for fuel supply. The complete factory exhaust system is on the engine (otherwise I wouldn't be able to hear what is happening inside the engine), with the radiator supported on a milk crate! Except for the milk crate, the whole assembly is completely portable, with casters on the engine/transmission support and another rolling support under the exhaust system. There is a temporary ignition ballast resistor mounted directly on the coil, and the battery/ignition switch and starter button is on the left rear of the engine stand. The oil pressure sender has been temporarily replaced with a precision mechanical gauge, which you can see better in the next picture. |

|
This picture shows the engine back down at fast idle after 30 minutes at 2000 RPM, which was the initial run-in on the reassembled engine. I run it this fast because I want the oil to splash around and lubricate the cylinder walls right from the start, so that the rings will begin to seat. The gauges here show 780 RPM idle speed and 70 PSI oil pressure. It's out of the field of view here, but the temperature gauge is showing 185 at this point (the thermostat is a 180 degree unit). The fan looks stopped here, but that is because of the high speed shutter in my camera. |
|
At this time, I fiddled with the carburetor and distributor adjustments, to bring everything to the exact factory specification, then proceeded to run it for another hour at 1500 RPM. The readings didn't change. |

|
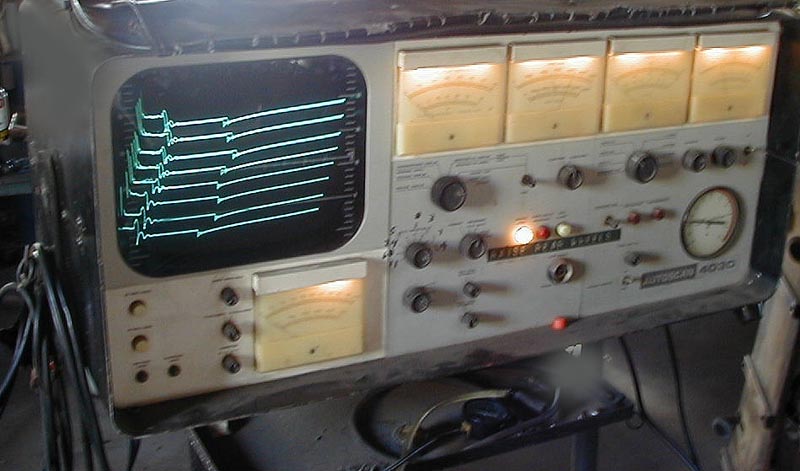
This is the engine analyzer I keep hooked up to the engine while I am testing it, and use to adjust the various settings. Here it is reading intake manifold vacuum of 19" Hg at 560 RPM, an excellent reading for my altitude (2000 Ft.). The auxiliary fans are required because there is no shroud or other device forcing the air through the radiator when it is not mounted in the car. This was a 105 degree day (common here in the high desert in August). |
|
Here is another view of the analyzer. The oscilloscope is showing the individual cylinder combustion, in order of firing order from top to bottom (1-8-4-3-6-5-7-2-). This device also monitors individual cylinder point dwell, power balance, point circuit resistance, RPM, intake manifold vacuum, and fuel/air ratio. |
After about 4 hours of running at various RPMs, I lowered the idle to 560 RPM and the engine is ready to install in the car, when I get it back from the paint shop. I should not have to touch any adjustments until the break-in is complete at 5000 miles or so.
Chapter 3
March 2003
At my last report, I had completed the engine and transmission work, and had them running on the test stand.
This part will cover the work that has been done to date on the body.
"Before" pictures (these have been shown before)
As some will recall, this is a basically rust free car with 35,000 miles, that had been stored since 1978 with no protection from the weather. Worse, the car had been parked under a Eucalyptus tree (notoriously dirty trees), and was not cleaned off in all that time.
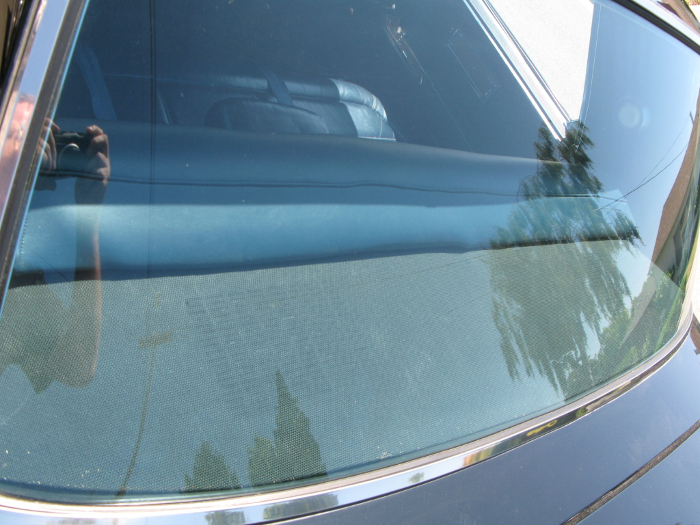
The result was that while the interior is still as fresh as a typical 3 year old car (thanks to the deep shade), the leaf debris combined with the failure of the vinyl top to protect the metal caused rust damage around the windshield top corners, and also around the rear window opening.
The car as I dragged it out of my storage barn in the spring of 2002 looked like this:
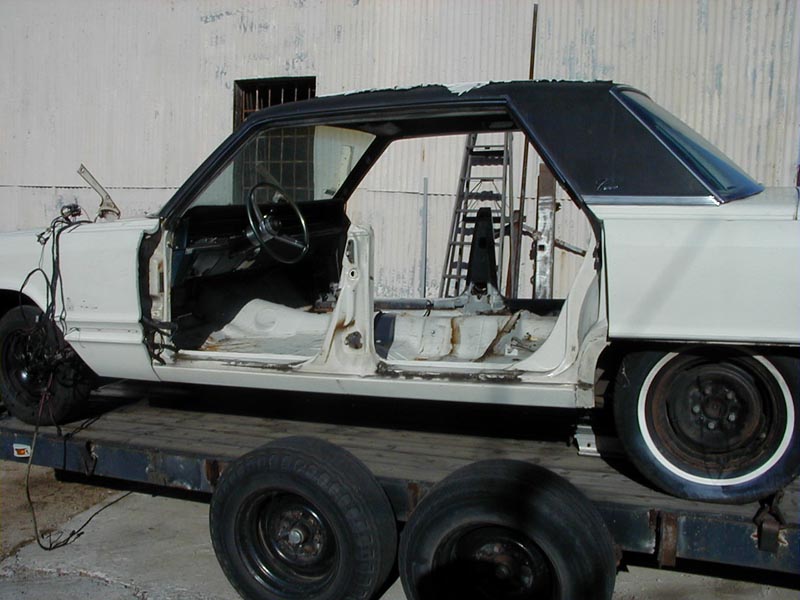
The first item of business was to completely remove all interior parts, glass, doors, all external trim, and all mechanical parts beyond just what is needed to move the car around on it's wheels. I did most of this work personally.
Here are some shots of the rolling body on my trailer, just before taking it to the body shop.
You'll note that at this point, I had not yet removed the dash, HVAC, interior roof trim, or steering column. One reason for this is that I had discovered that to remove the dash, I had to remove the windshield first, and I wanted help with this job. The original windshield is still like new, and I didn't want to take any chances - thus I let the guys at the body shop help me remove the trim and glass for both front and rear glass. Once that was done, I completed stripping the car to a bare empty shell. I would not have gone to this much trouble if I had not been planning to change the color, but since I was going from white to black, I wanted to be sure that everything that was originally painted body color at the factory was painted black, just as it would have been if the car were originally black.
In the close up of the front suspension parts visible in the engine compartment, you can still see the color dabs of paint used in the inspection process at the factory, indicating these points have been double checked by the quality assurance guys. On a very low mileage car, one should be able to see these easily.
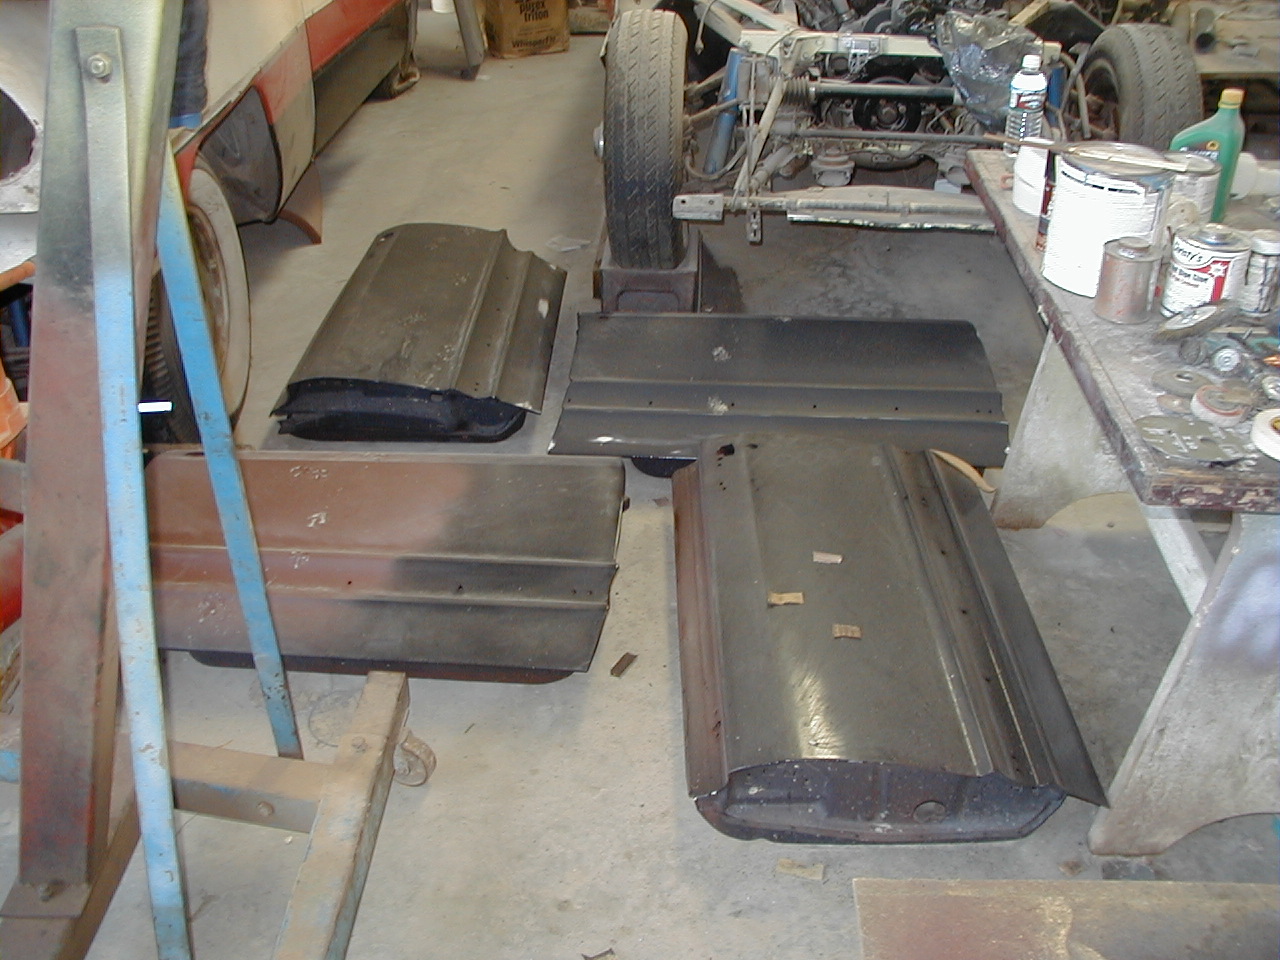
Step 1:
The next step in the process was to sandblast around the glass openings, in the weather strip grove for the trunk, and any place else that might have a possible rust residue. The Vinyl top is not going to be replaced, so we sandblasted the complete roof, and places on the lower body sides where there was evidence of old scrapes and parking lot dings. The inside surfaces of the "A" pillars had some sign of light surface rust, for instance, mostly where the original body color overspray didn't really seal the metal completely. The front floors, under the carpet matting was also suspect due to an apparently bad heater core, or perhaps a water leak around the windshield. This was all sandblasted, then quickly primed with Dupont DP-40 Epoxy primer. Even though I live in the desert, we did not let the body sit without primer on it for more than a few hours.
The body after this process is shown here:
Note that at this point, we were starting to "Jam" the insides of the door openings and the engine compartment.
Step 2:
Next, we set in new steel in the places where rust had damaged the body, mostly at the top corners of the windshield, but there was also some new metal needed around the left rear corner of the rear glass. (I'm using "we" very loosely here - I merely watched while the pros did this part!).
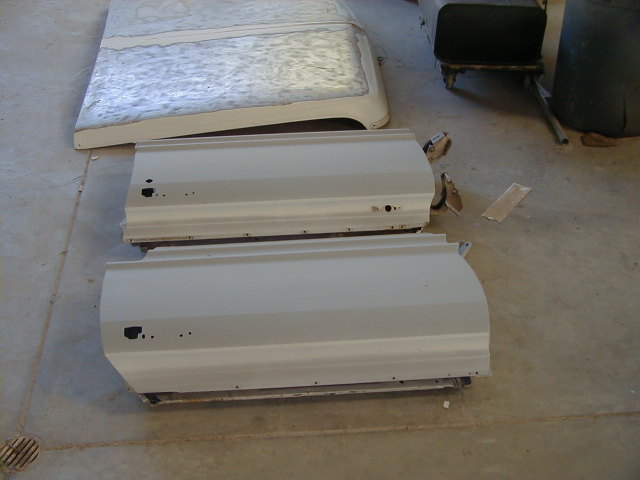
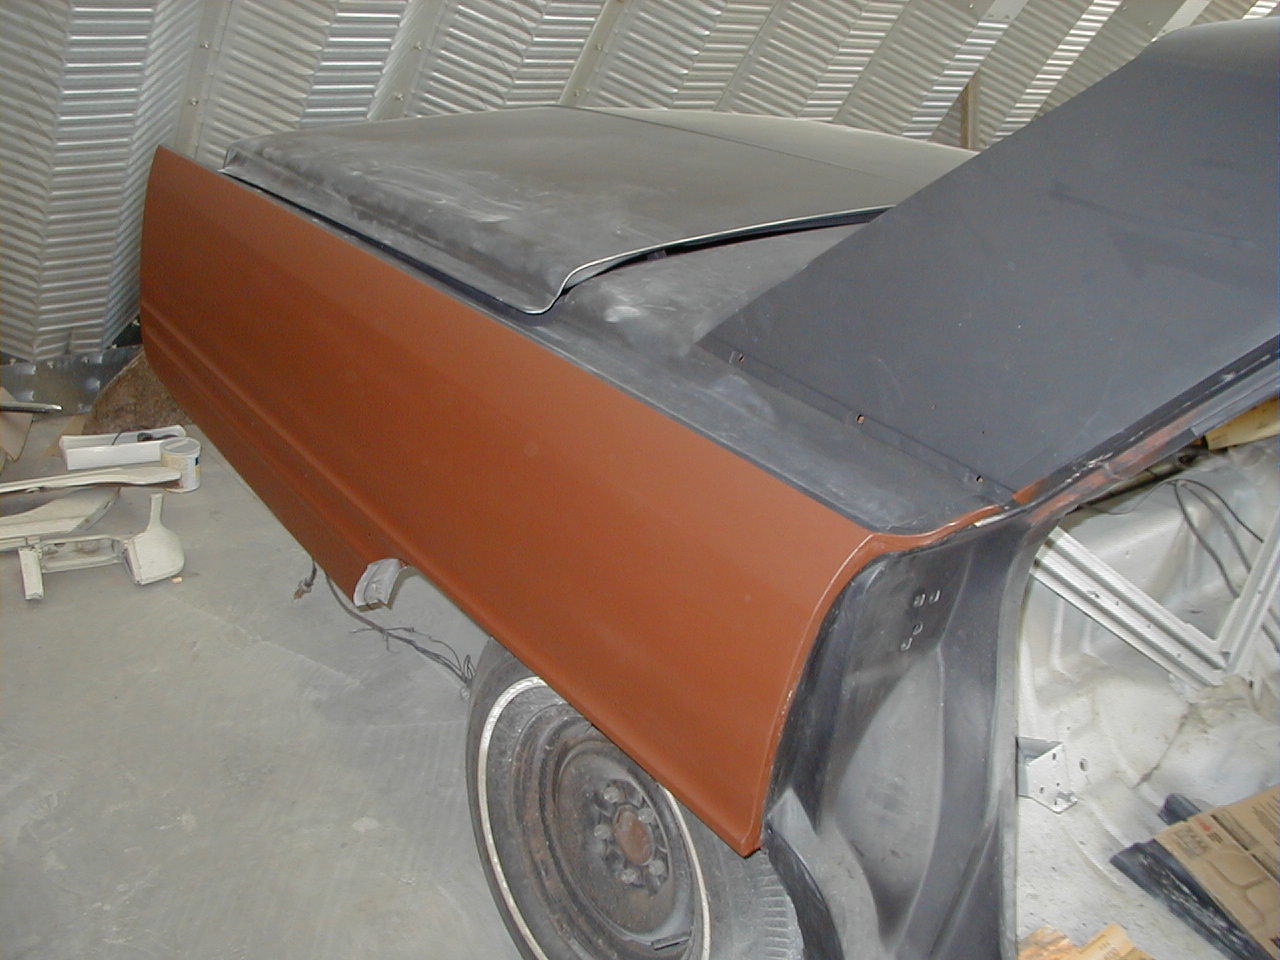
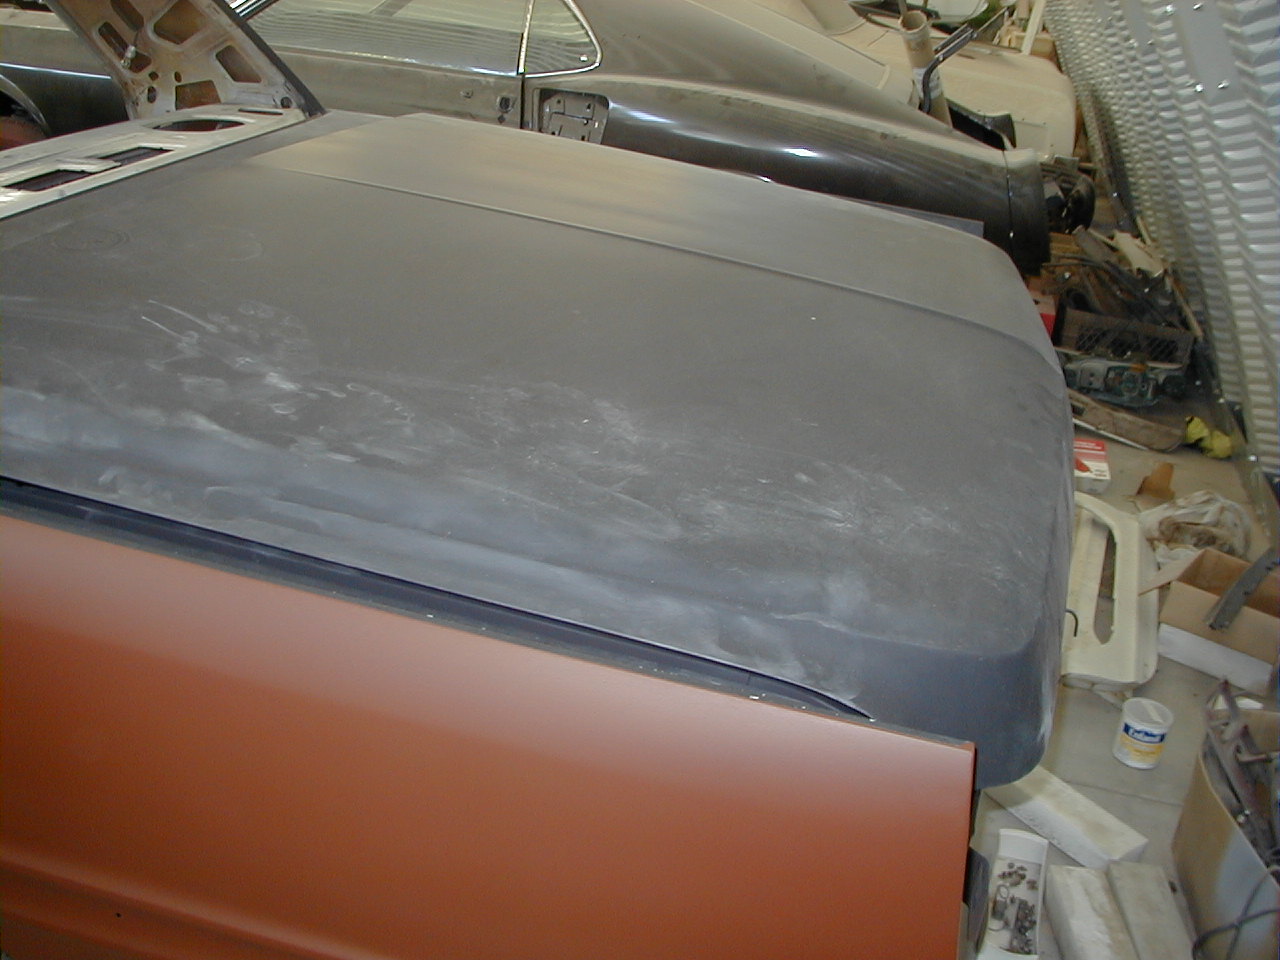
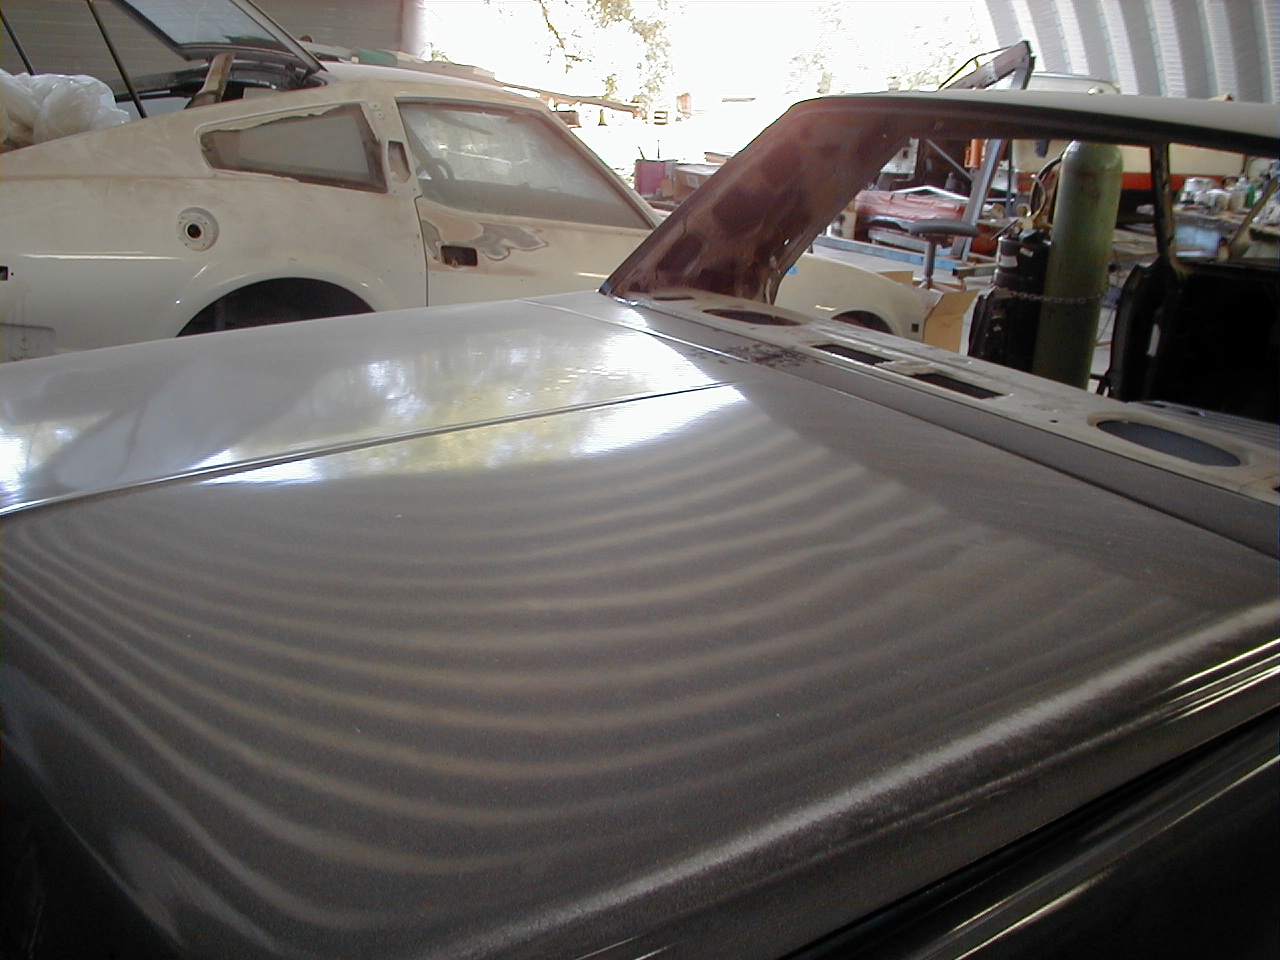
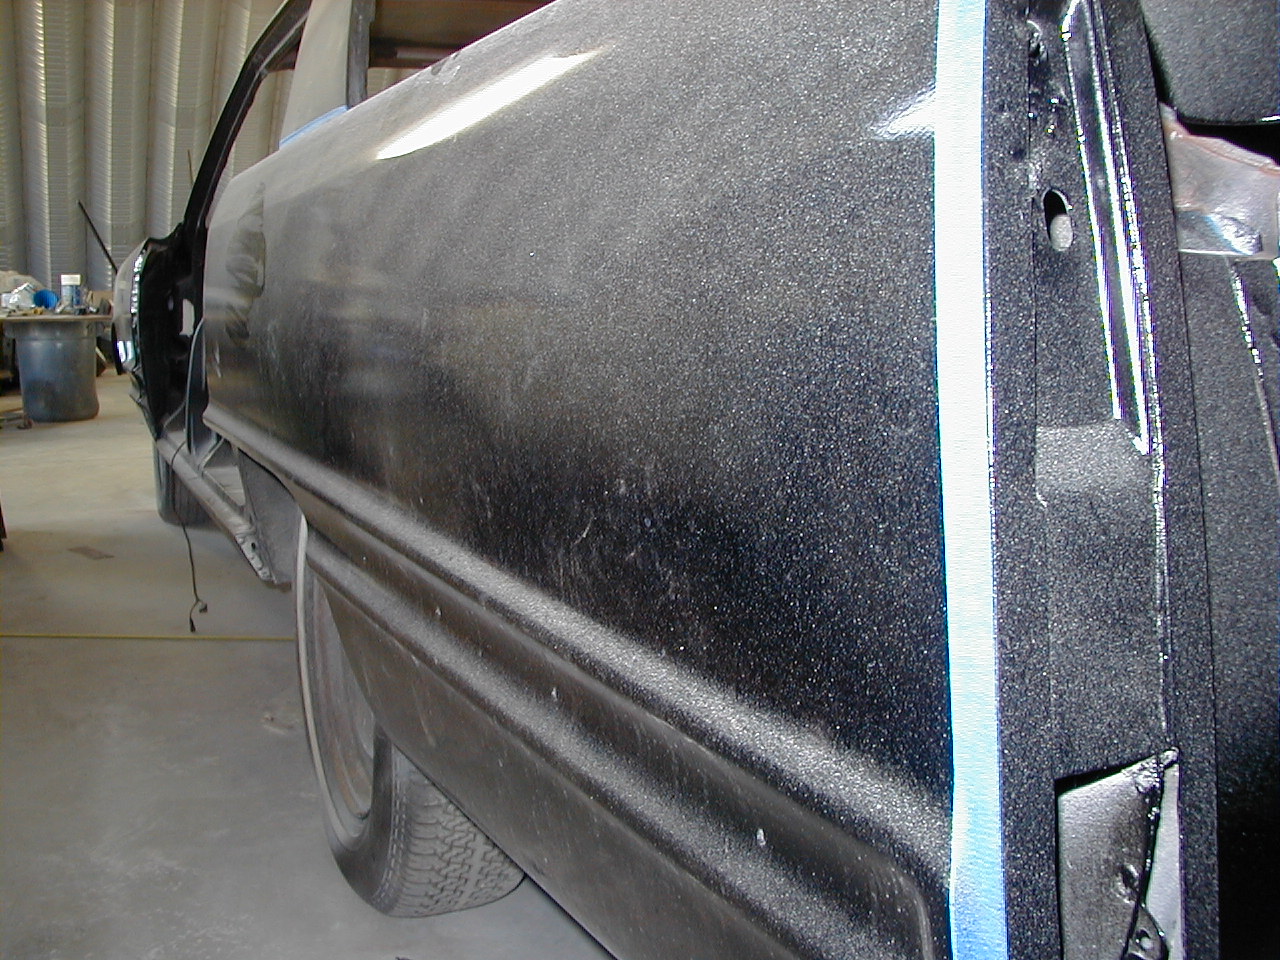
The black exterior parts have been metal finished to as close to perfection as could be done by feel, now we have put a black guide coat on to show us high and low spots with the long block sander. The door shown here had been the worst of the 4 doors, with a serious scrape along the bottom trim strip area.
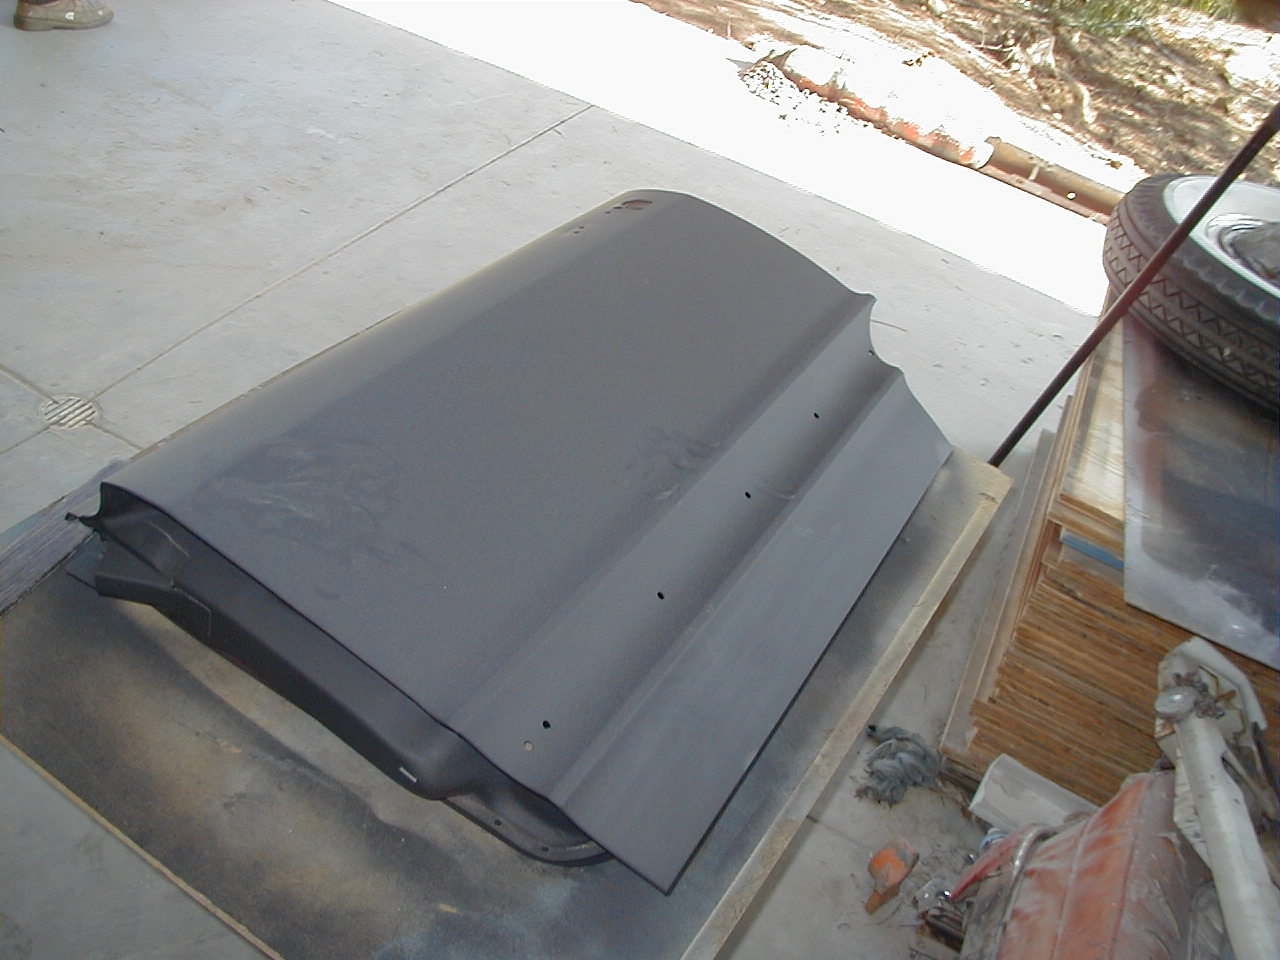
The decklid has been sanded back to bare metal on the high spots- it needed more metal work before it was ready for the second guide coat. Apparently the lid had been closed on some unyielding cargo at one point. These high spots were completely hidden until we began the block sanding process.
The two front fenders are not yet ready for the guide coat.
The results are shown here:
Now we were ready for the second guide coat.
Step 3:

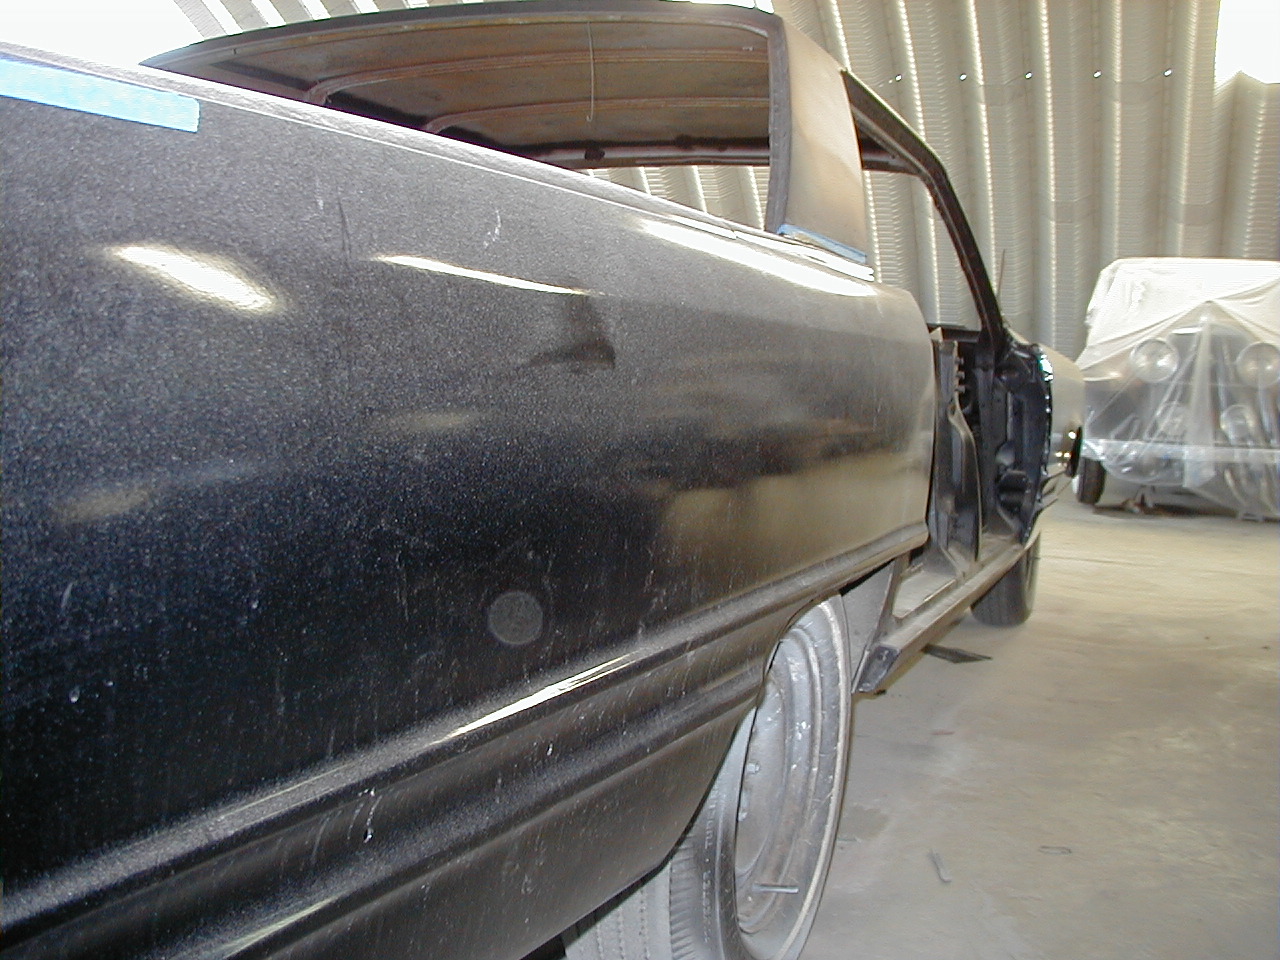
This is the status of the car at this point. These last pictures were taken February 15th. You can see the reflection of the overhead lights in the various panels - even though the car is dusty (body shops are some of the dirtiest places in the world), you can clearly see the body is approaching perfection. The left rear door still needed more metal work- it is back into primer here. We'll be letting the paint shrink down for another 6 weeks or so, then applying another guide coat, then final block sanding, and finally top coat, color-sand/buff out. Then I get to put it all back together again.
Chapter 4
October 9, 2004
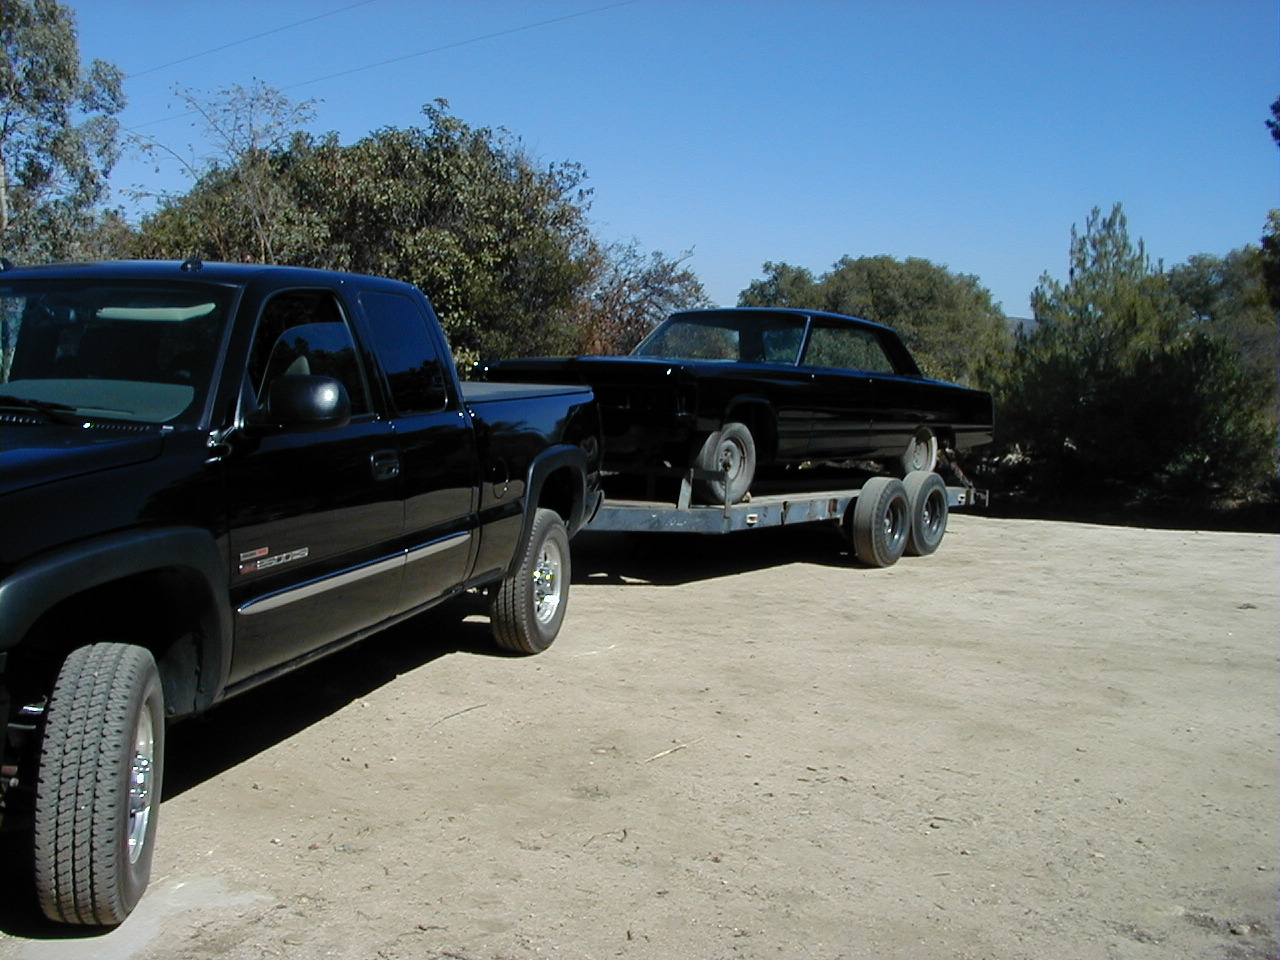
Today was a big day! I brought it home from the body shop. Now I get to put it back together!
Here are a few pictures taken as I arrived home with it.
Sharp eyed viewers will note that the car is no longer white, and no longer has a vinyl top, and perhaps also that the truck has had to be traded in on a matching color one.
Now the hard work begins -- finding where I stashed all those tiny pieces!
I did not allow the shop to detail the chassis -- so it looks rather lousy now, after living in a paint shop for 2 1/2 years, but I did not want them to destroy all the factory inspection marks etc., so I will be doing the chassis detailing myself. They did all the topside work, however, including everything that showed even an overspray of the original color. The only way anyone will ever know that I changed the color is to read the data plate, which I will leave original, of course.
Chapter 5
December 4, 2005
Picking up where I left off about a year ago, I'd like to describe some of the steps I went through in putting the car back together.
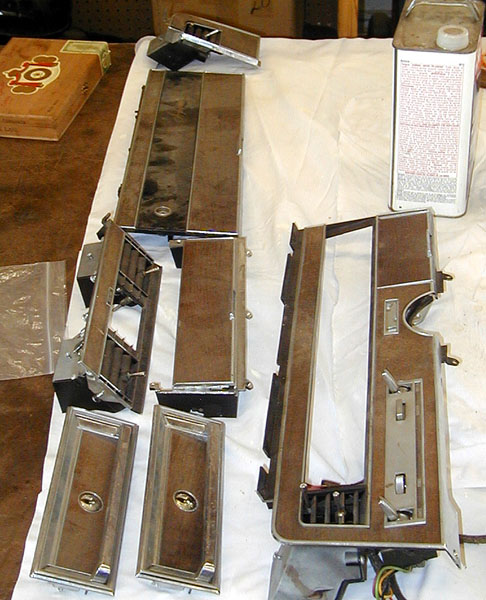
All of the walnut trim inside the car was faded, dry looking and needed to be replaced. I had done this before on my 67 convertible, following advice from Roger Farrar, also a member of the IML and the Southern California Imperial Owners Club. Roger had kindly tipped me off to the procedure he had followed, and I had such success with it that I thought the rest of the IML members who have 66 and 67 cars with walnut trim would appreciate the information.
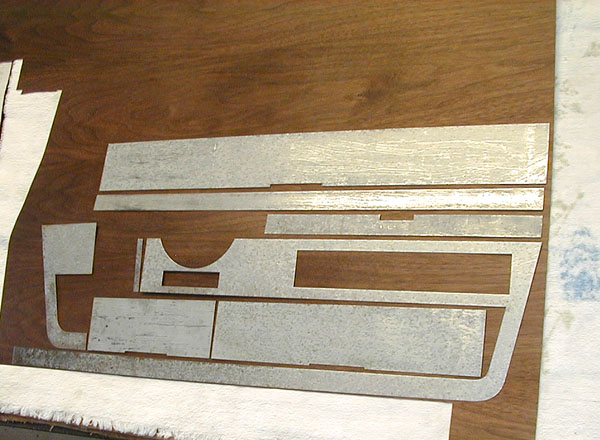
There are about 25 pieces of wood in a 67 4 Door Crown HT. This is what the wood from this car looked like before re-doing.
First, one has to obtain the correct walnut veneer from a hardwood supply house. There is such a vendor in San Diego and in Boston, and I suspect in many other large cities. One caution: if you love beautiful wood, as I do, don't take your credit cards with you when you visit the hardwood store! The store in San Diego is Frost Hardwood - as with most such specialty houses, this one is a 4th generation family owned business - what a treat to walk in there!
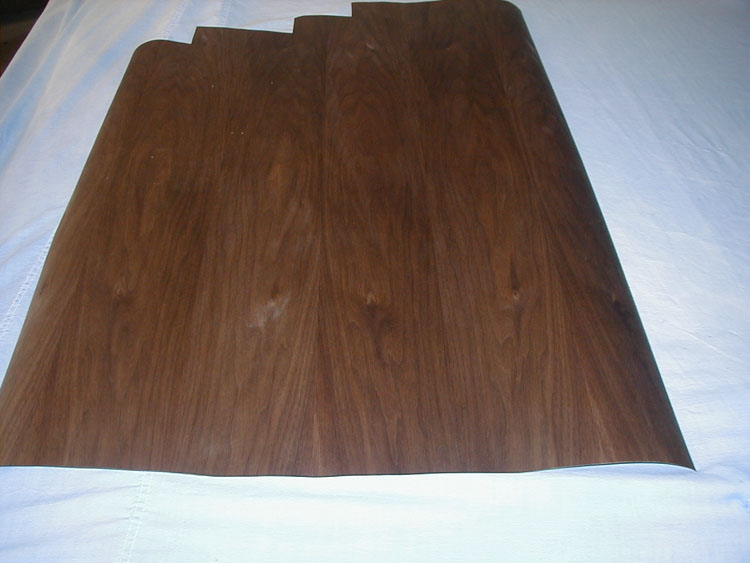
The veneer comes in 2 x 8 sheets, which is enough to do at least 3 cars. It can be rolled loosely into a 2 foot long tube about 1 foot in diameter long enough to drive it home, but it should be stored flat as soon as you can do it so that it doesn't take a permanent curved shape.
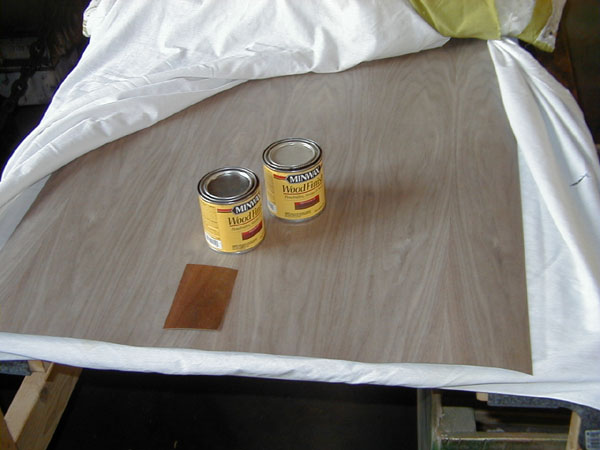
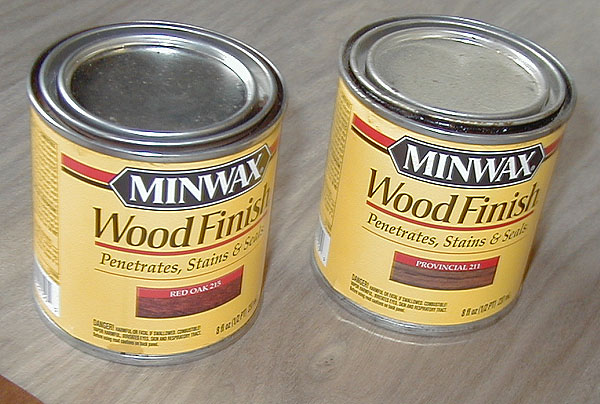
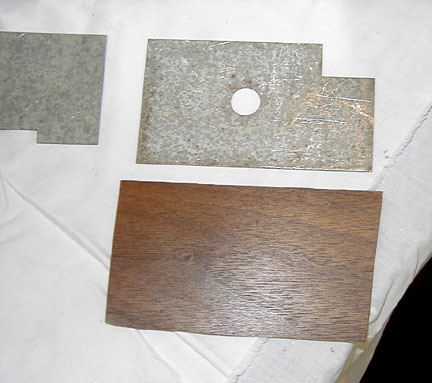
This first picture shows the raw veneer, with a piece of properly stained wood on top to show the color contrast. The two cans of Minwax are what is used to stain the raw wood to get the right color and finish.
Before I started staining the wood, I cut off a section which I knew would be adequate to do the whole car, and stored the left over wood, flat, in the unstained condition. The directions on the cans of Minwax are very clear - basically, you dip a cloth in the stain and rub it into the wood until it looks right. Keep an original good piece of wood close for color comparison. When you get it just a little too dark, take a clean cloth and wipe off the excess. I used Red Oak and Provincial stains, rubbing the Provincial in first, then adding just a small amount of Red Oak to supply the slightly reddish look.
These are the two cans of stain. Buy the smallest amount you can find, you'll never use it all up if you restore 50 cars!
Here is the walnut sheet after staining.
Processing the individual pieces
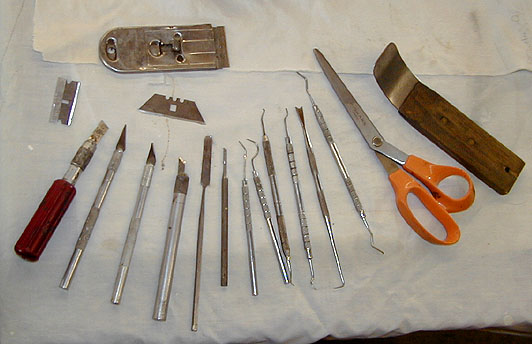
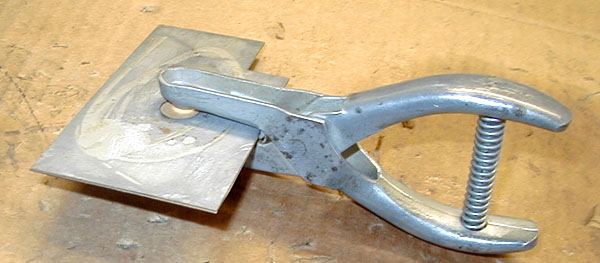
Step one is to remove the metal plates which hold the veneer from their various locations in the car. These metal plates are glued in place. Some will come off very easily, some will be tough. You'll do most of the loosening by working around the edges with a razor blade. Other sharp tools will come in handy too; the main objective is to get them off WITHOUT BENDING THEM!. Here are the tools I used for the purpose.
The tool on the far right is probably the most useful tool to have for this sort of work; it is a headliner stuffing tool which you can find in most auto upholstery supply houses, or you can make one by taking a putty knife of about the same dimensions, bending a gentle curve in the blade, and rounding off and dulling the leading edge so it won't dig into anything. Once you work an edge loose with the razor blade, you can work the edge of the headliner tool under the lifted edge and slowly, very slowly work the plate all the way off.
Anything thin and long is a big help here - I have a friend who is a dentist, and he gives me all his worn out dental tools; that is what most of the other items are. Ask your dentist - they throw this stuff out when it is only slightly used.
The wood is also glued to the backing plates. Removing the wood from the various metal backing plates is done with exactly the same tools and procedures; however this step is much easier because you don't have the chrome ridge around the piece to fight with anymore. Here is the main dash bezel in the process.
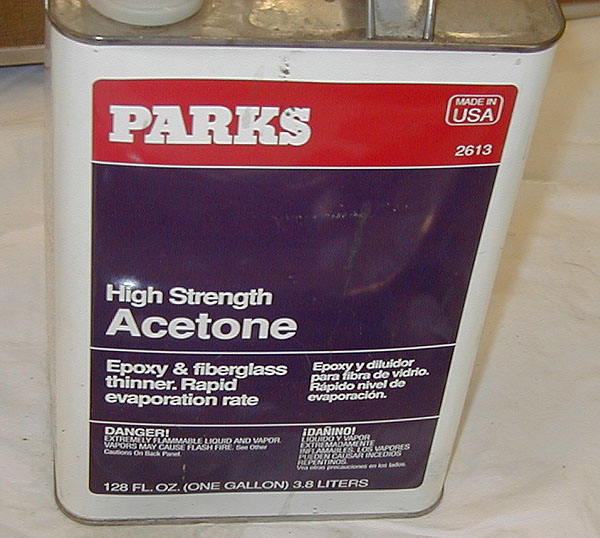
Once the plates are stripped of the remains of the wood, you need to remove all remnants of the old glue, leaving a clean, flat surface to receive the new wood. Of course the parts which receive the plates also need to be cleaned off in the same way. Most of this work can be done with a razor blade; then followed up with a washdown with acetone. Acetone is available at any paint or home center store. One caution is that you MUST NOT LET ACETONE TOUCH ANYTHING MADE OF PLASTIC!!. Acetone dissolves plastic immediately on contact - anything it touches, including paint, is immediately ruined. Acetone comes in a gallon can, and has many other uses for cleaning and degreasing, but wear acetone resistant gloves, it is very hard on skin, and have good ventilation in your workspace, plus be sure not to have any open flame around.
The plates will have glue remnants on both sides, the chrome parts will have glue left on them also - all of this has to be removed.
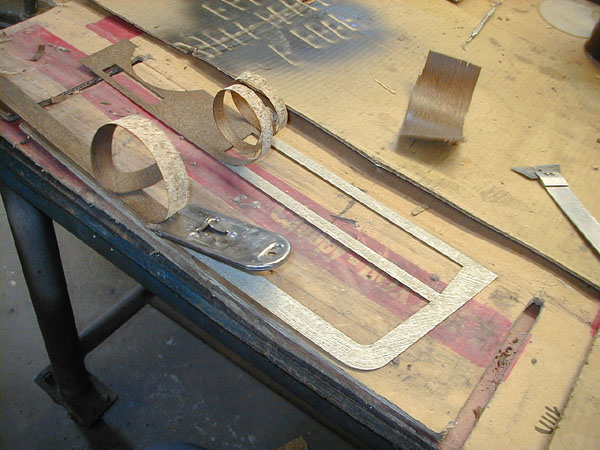
Once the plates are cleaned off, you can cut pieces of veneer with sharp scissors to fit the plates. Make the pieces very slightly oversize, so you can trim using the metal plate edges to guide you for a neat job.
Before you start cutting out pieces, lay them all out on the sheet of walnut, arranging them so that you can cut with minimum waste of wood. Here is the dash section laid out, I still have to add the door pieces etc.
This is the glue you are going to use - buy that at the home center store also. The little brush is called an "acid brush" - they are available in many sizes and are very cheap. You'll only use this brush for gluing - the bristles are quite stiff, making for easy control of where the glue goes.
This stuff is quite tricky to use. Be sure to read and follow the directions exactly, especially with respect to being patient. You MUST let it set up for the prescribed time or else the bond will not be strong or permanent. You MUST be aware that once it makes contact, it is stuck fast - there is no possibility of moving anything once it is put together with this stuff, so make sure to have the parts positioned correctly before they make contact.
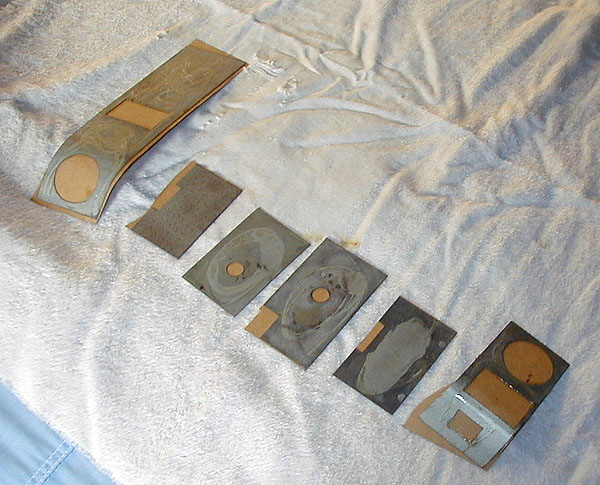
As an example, here is one of the door switch panel pieces ready to glue.
Next are a few of the pieces glued, but before trimming.
Now it's time to trim the excess wood from the edges of the plates. This is probably the most painstaking part of the job - you must be very cautious not to splinter the wood especially when you are cutting across the grain. I found the way to do this is to have a super sharp razor blade (I went through a pack of 100 single edge blades - using each blade for only one cut). You press down at an angle and drag the blade along the edge of the piece, with the wood facing you, but using the metal edge of the plate as a guide. Do the straight edges first until you get the feel of cutting the wood.
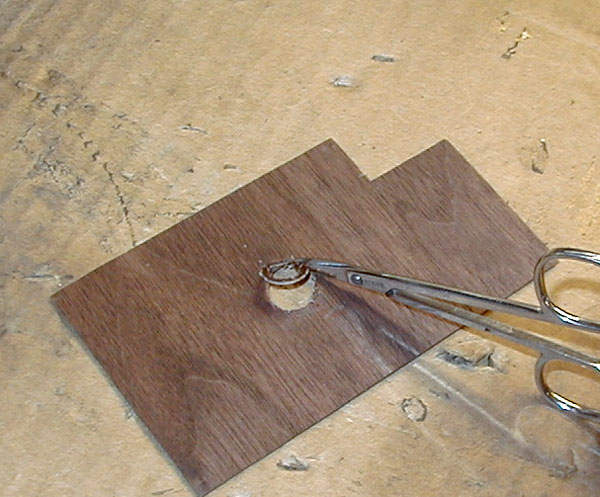
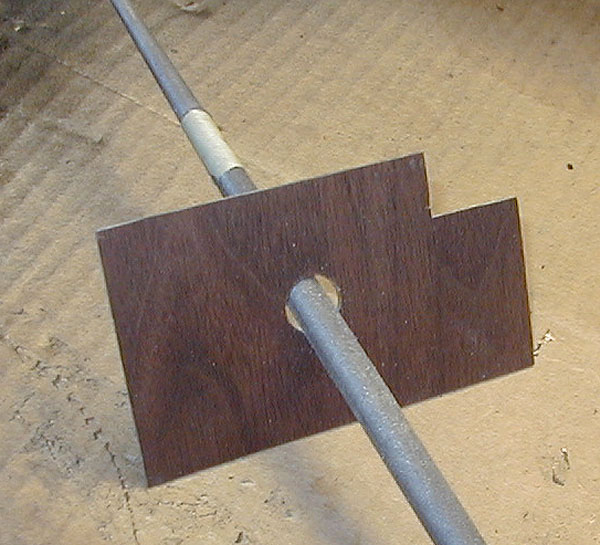
For the pieces that have a hole, I found that using a hole punch to start the hole saved a lot of grief with splintering the wood. Once the hole is punched, you can use cuticle scissors to expand the hole until it is close to the final size, but leave a little fuzz on the edge for final trim with a fine round "rat tail" file. Here's the final cleanup on a round hole. Once each piece is trimmed, it can be glued back into place on the chrome. Of course you will have cleaned and polished the chrome first, and wiped any oily residue off the metal so the glue will stick.
This is what the wood looks like when it is all done:
Chapter 6
December 4, 2005
REASSEMBLY OF THE CAR
INTERIOR
The order in which I assembled the interior was:
- Dashboard (must go in before installing windshield)
- Front and rear windshields
- Parking brake
- Steering column
- Insulation and trim panel for inside of firewall
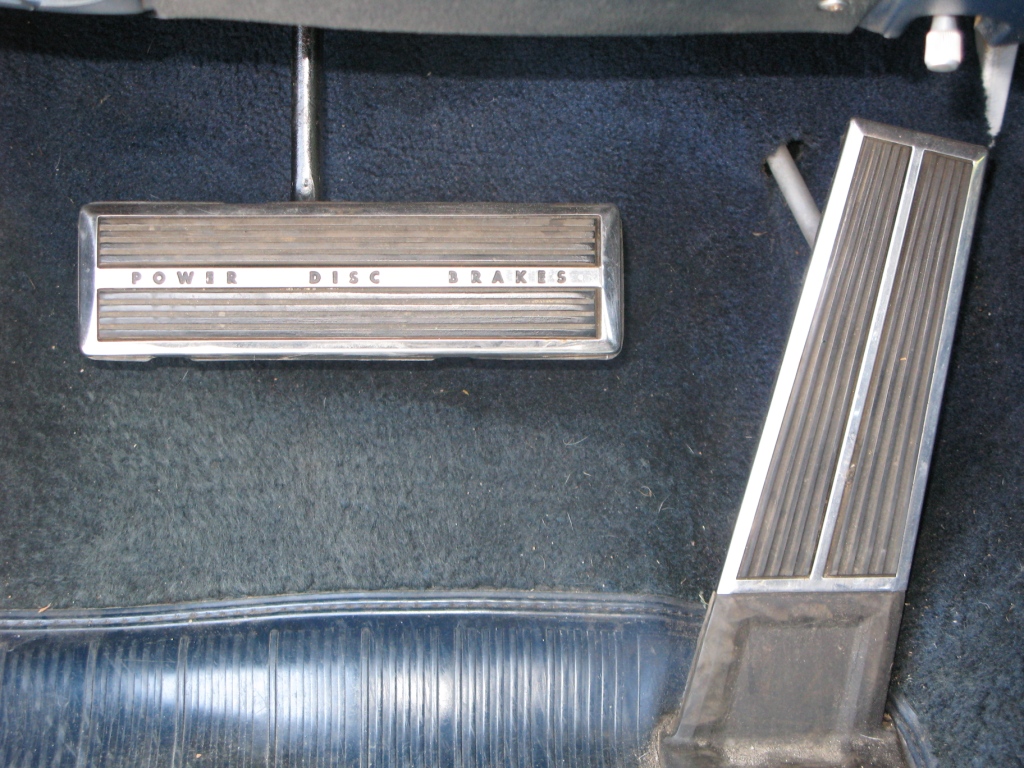
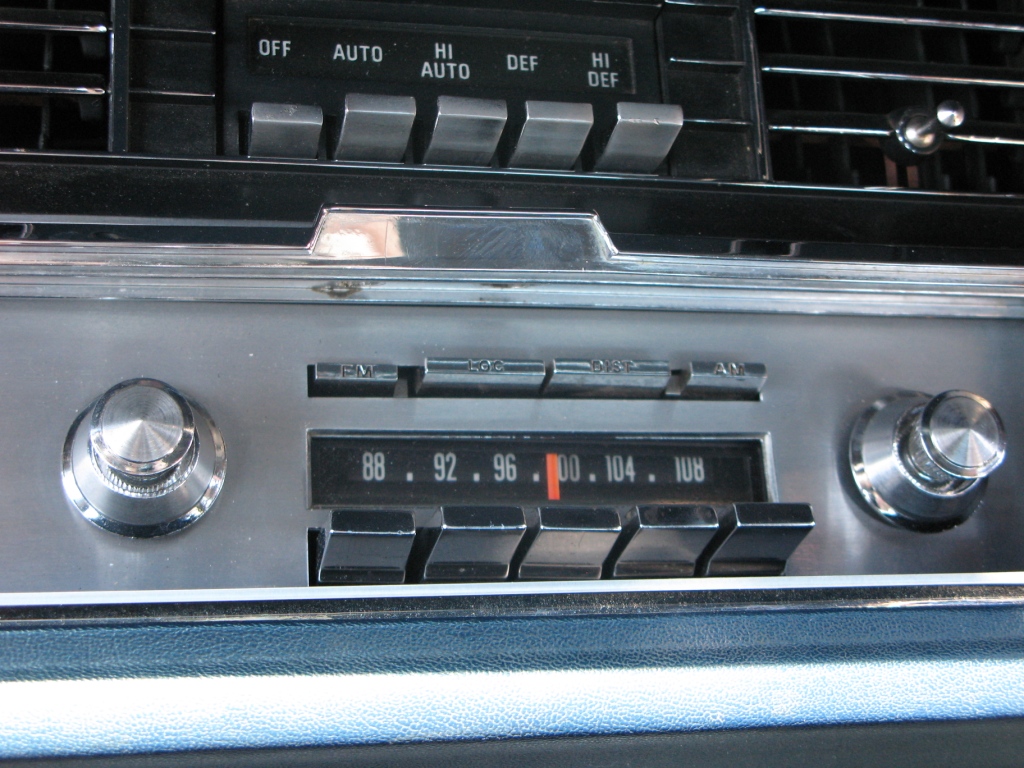
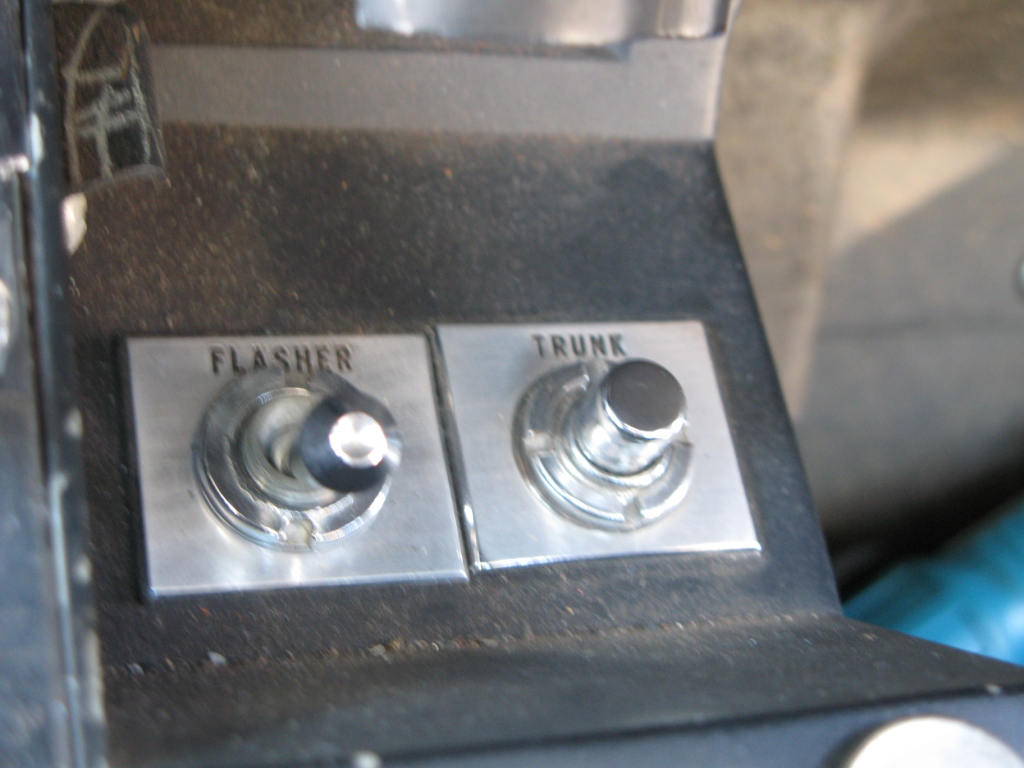
- Pedals and floor buttons for headlight dimmer and radio tuning
- Body harness including vacuum line for trunk release
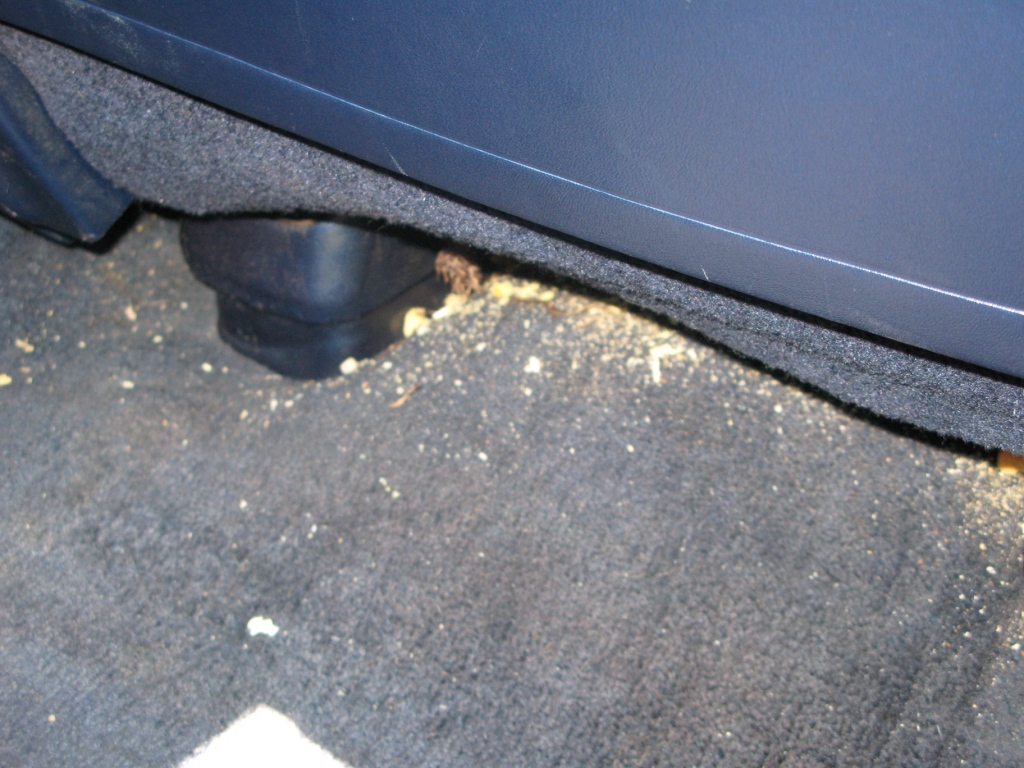
- Carpet and padding on floor (put in at this stage so I could comfortably work under the dash without lying on the hard floor)
- Defroster outlets
- Front speaker
- Air conditioning/heater system (except dash AC ducts)
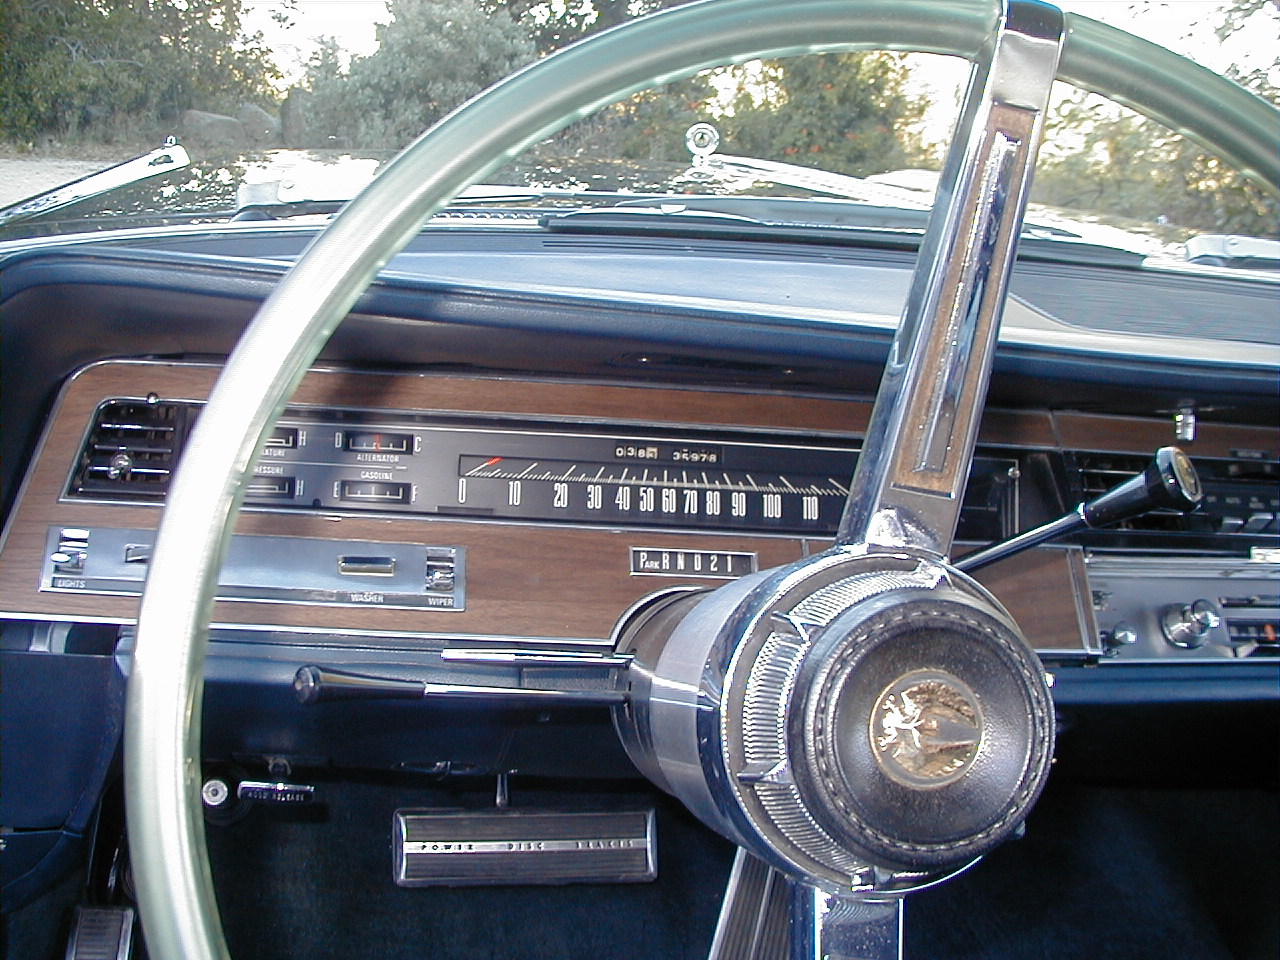
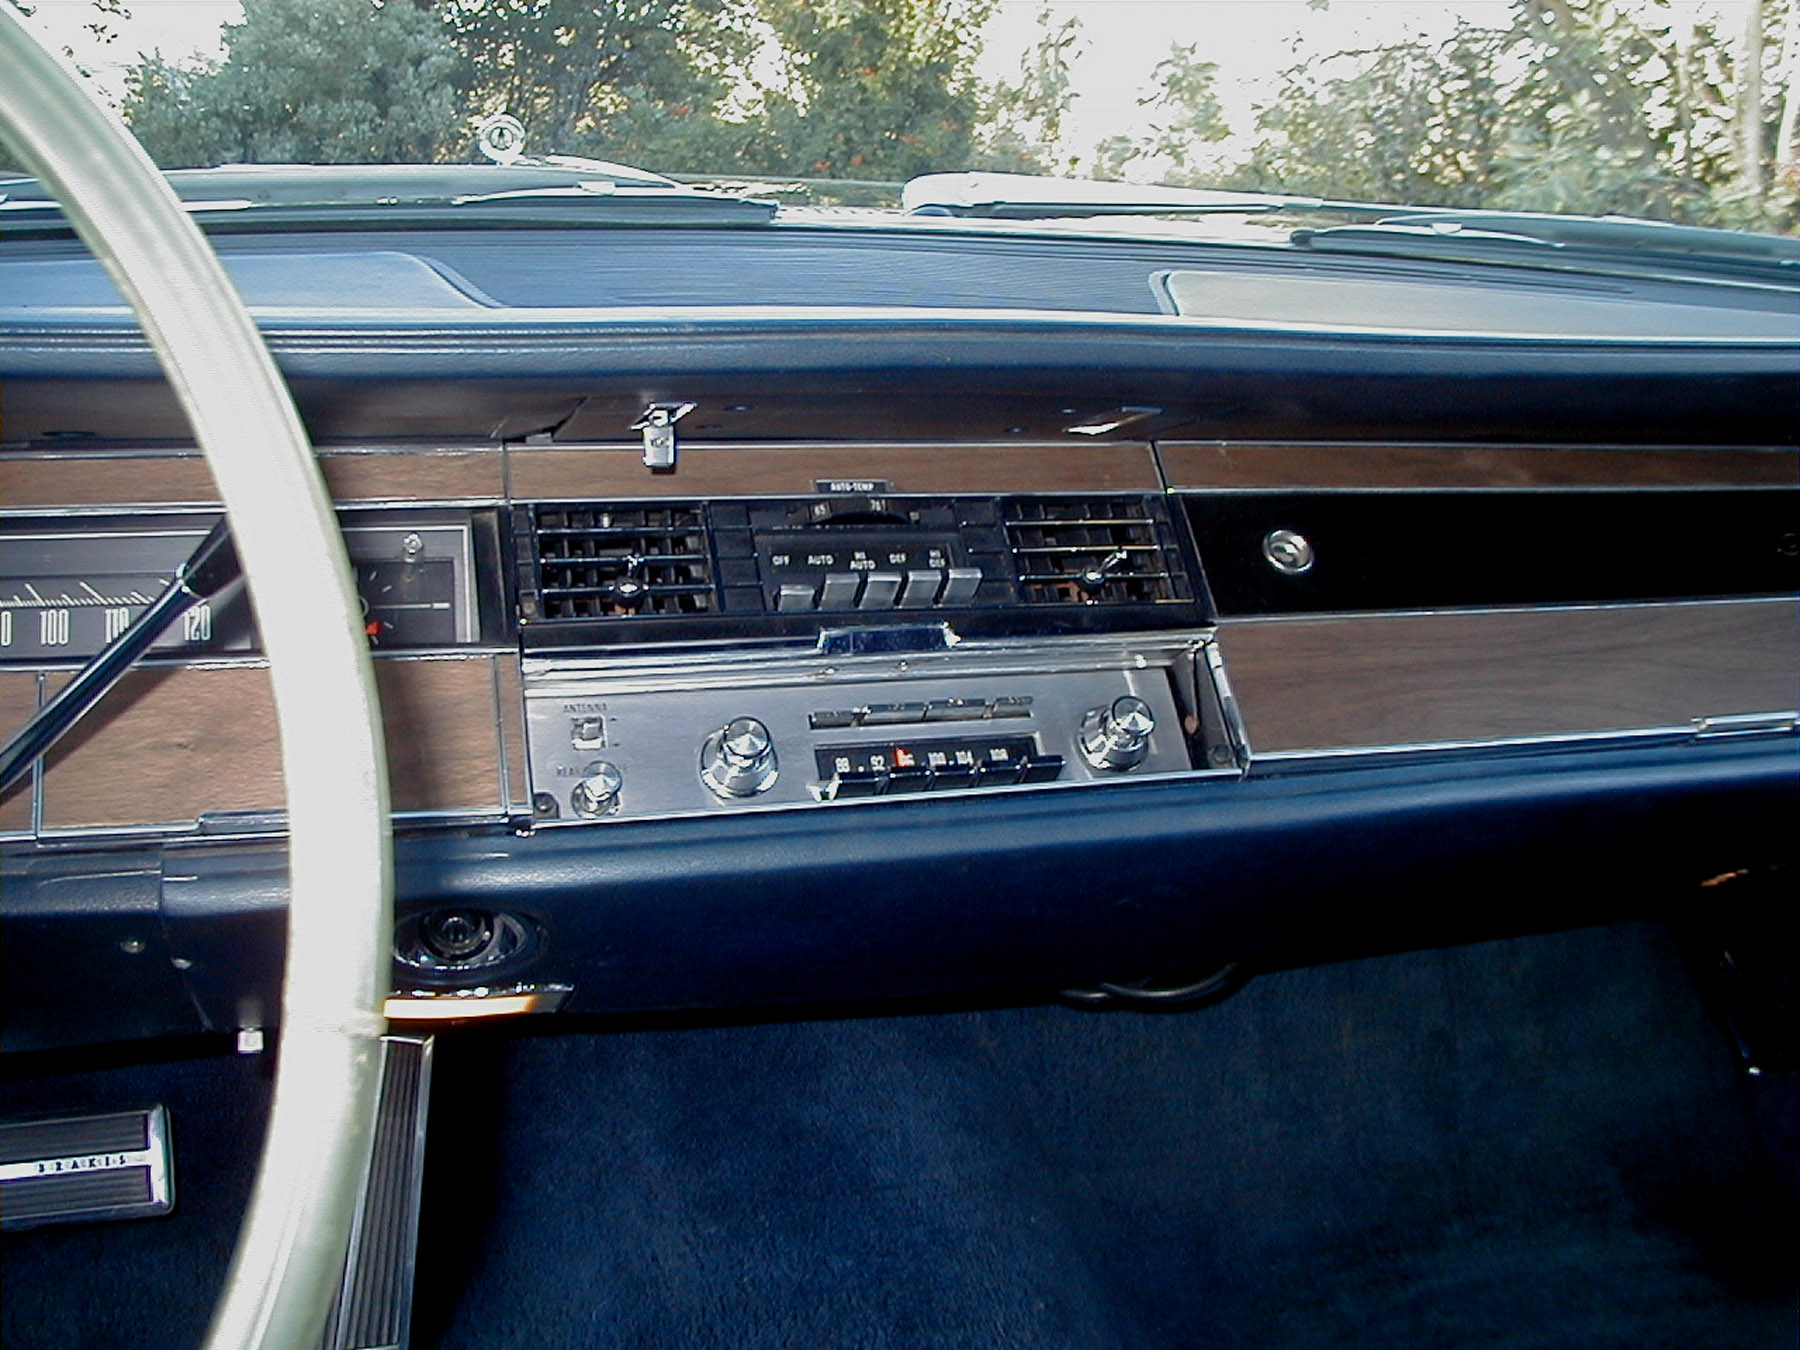
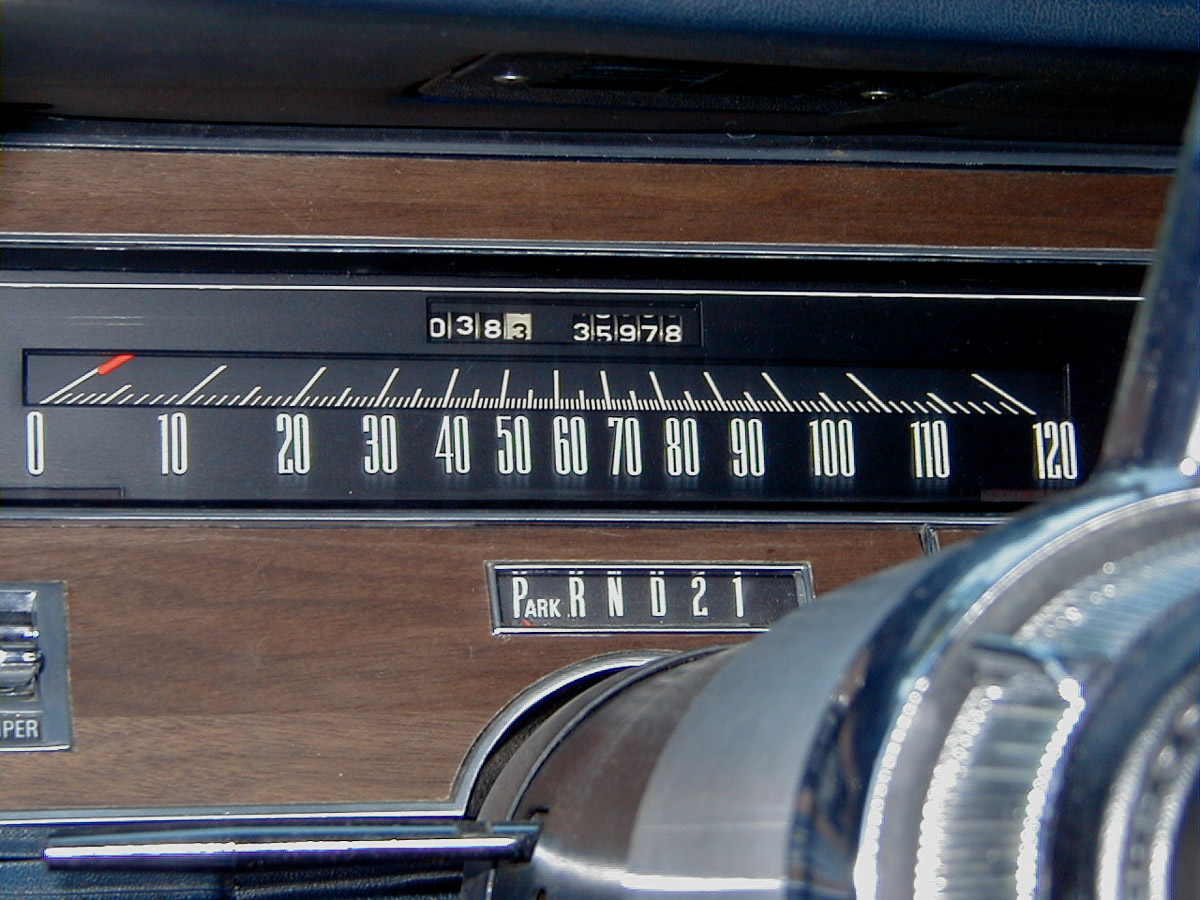
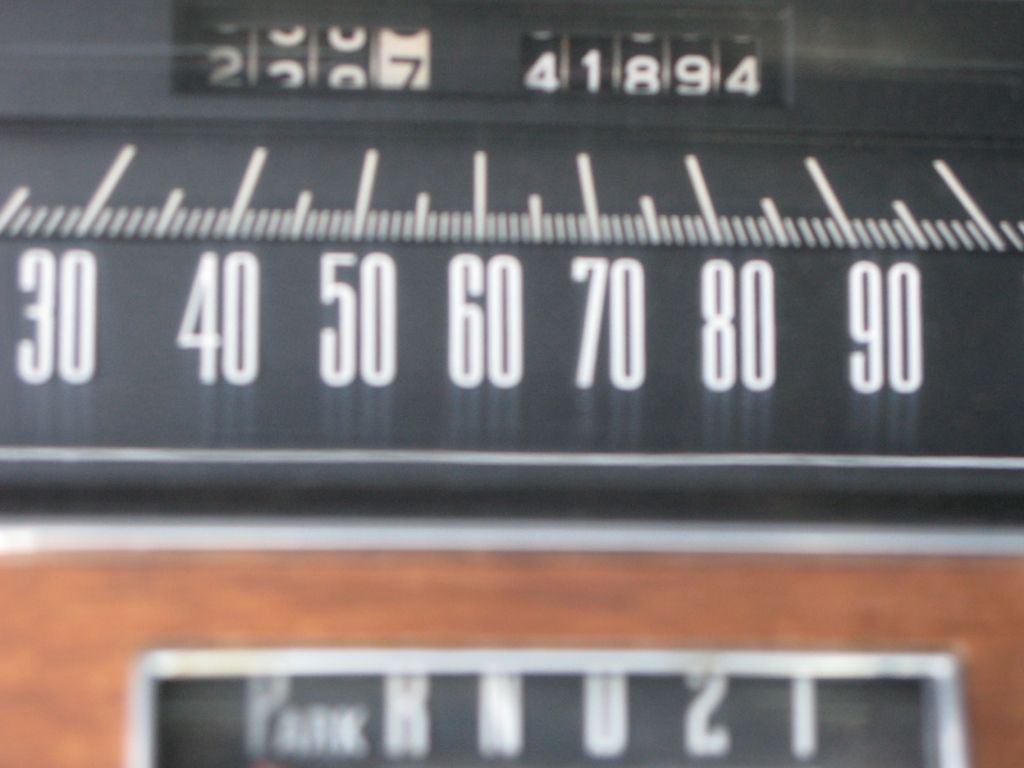
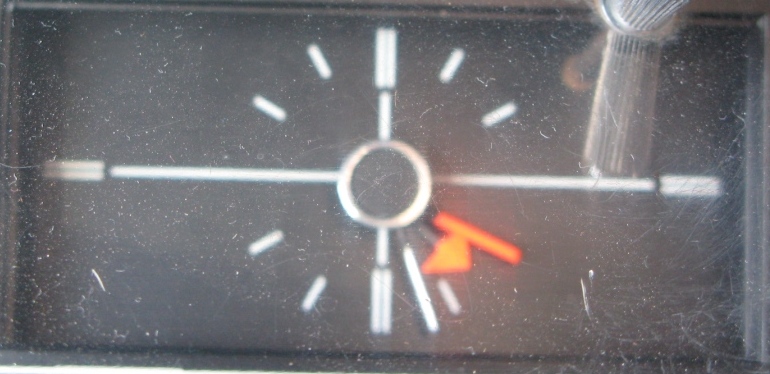
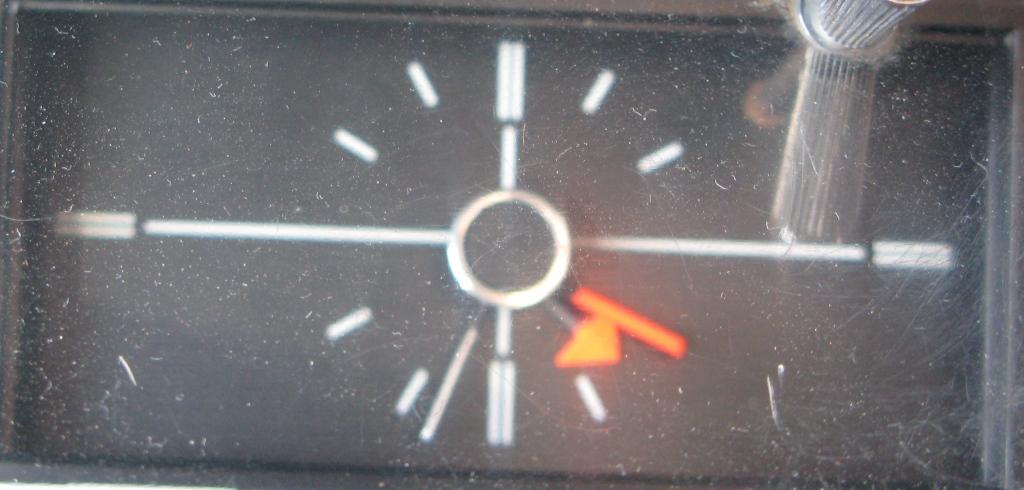
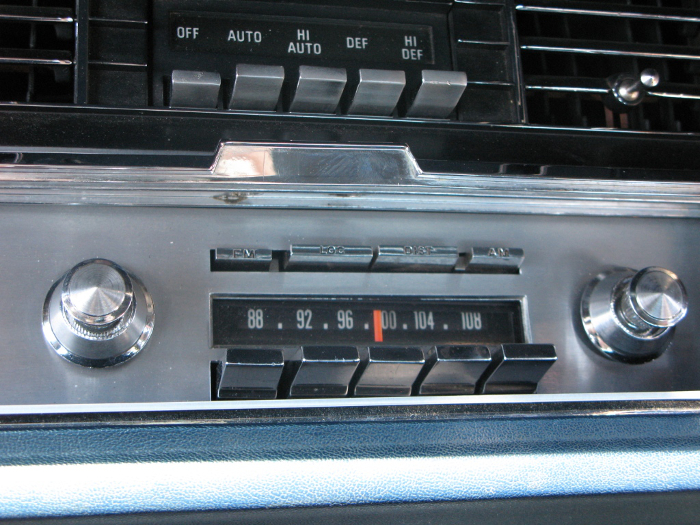
- Dash instruments. I disassembled, cleaned and adjusted all the instruments, accessories, the speedometer, clock, radio, all lights received new bulbs and rebuilt the switches before installing them.
- Dash harness
- Radio
- Glovebox
- Door innards. I disassembled and lubricated the window regulators and motors, and the lock mechanisms prior to installing them.
- Weatherstripping (bought new from Steele Rubber products -- exact match for the originals)
- Rubber bumpers for doors, hood and trunk (from Steele Rubber)
- Trunk weatherstrip (Steele again)
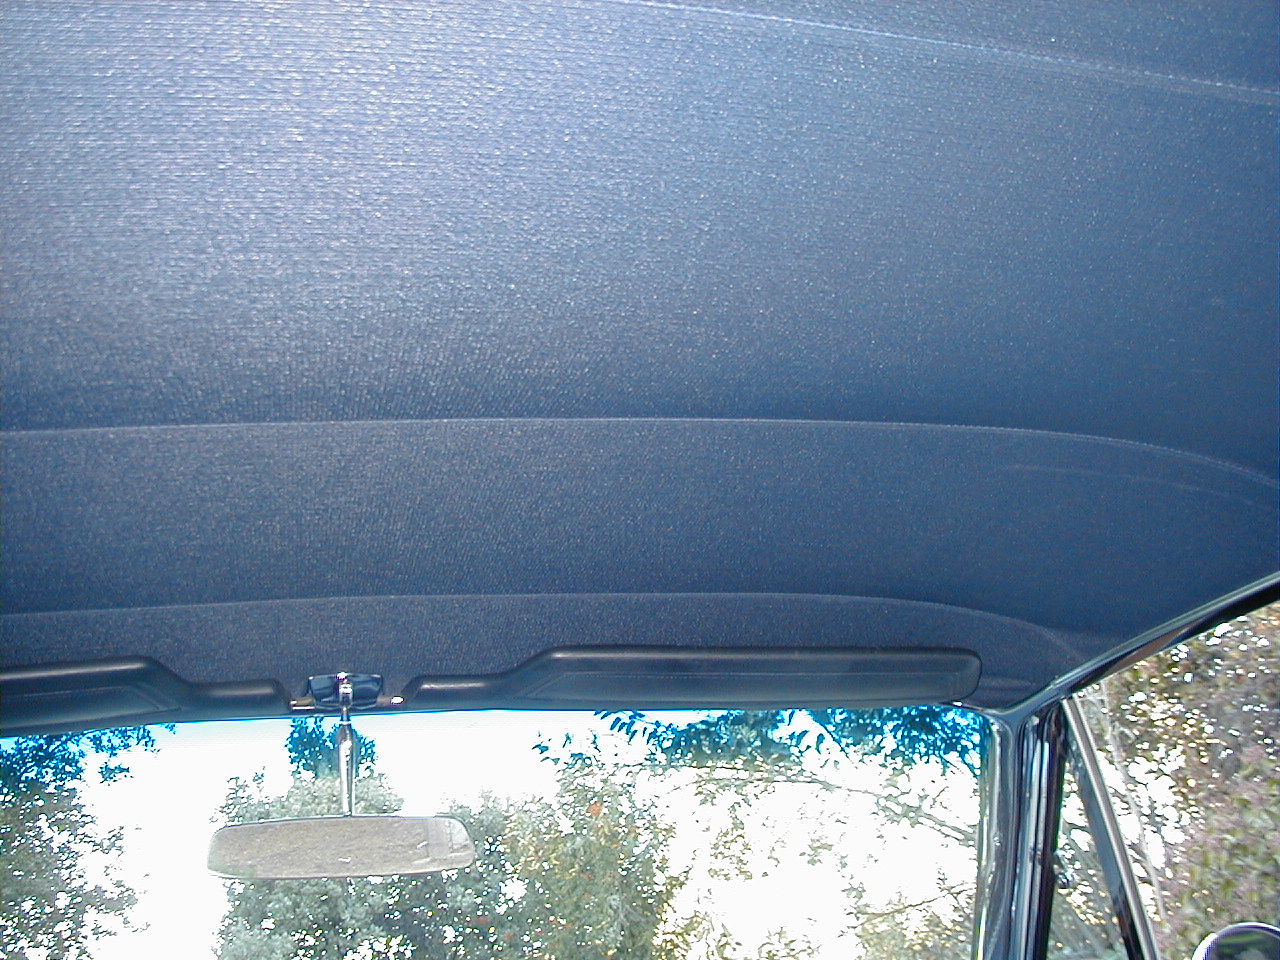
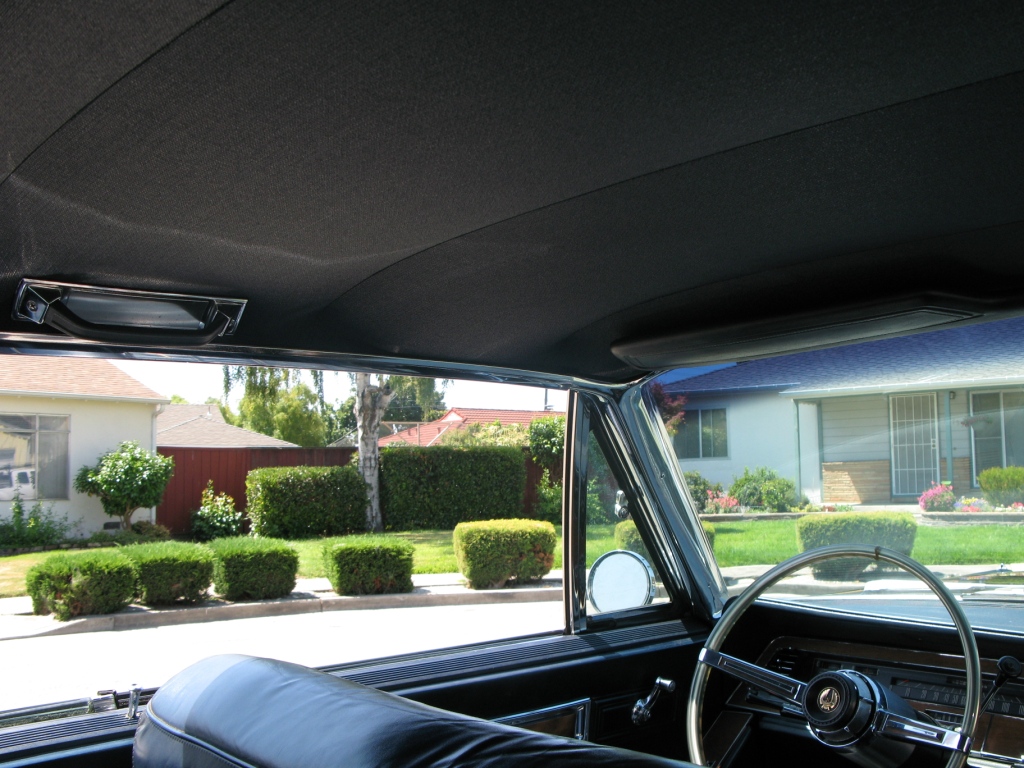
- Headliner. The original headliner had split when I removed it from the car -- it had been perfect, but the material was so brittle that it could not take being handled. Fortunately, Acme still had the original headliner material in stock, so I have an NOS headliner!
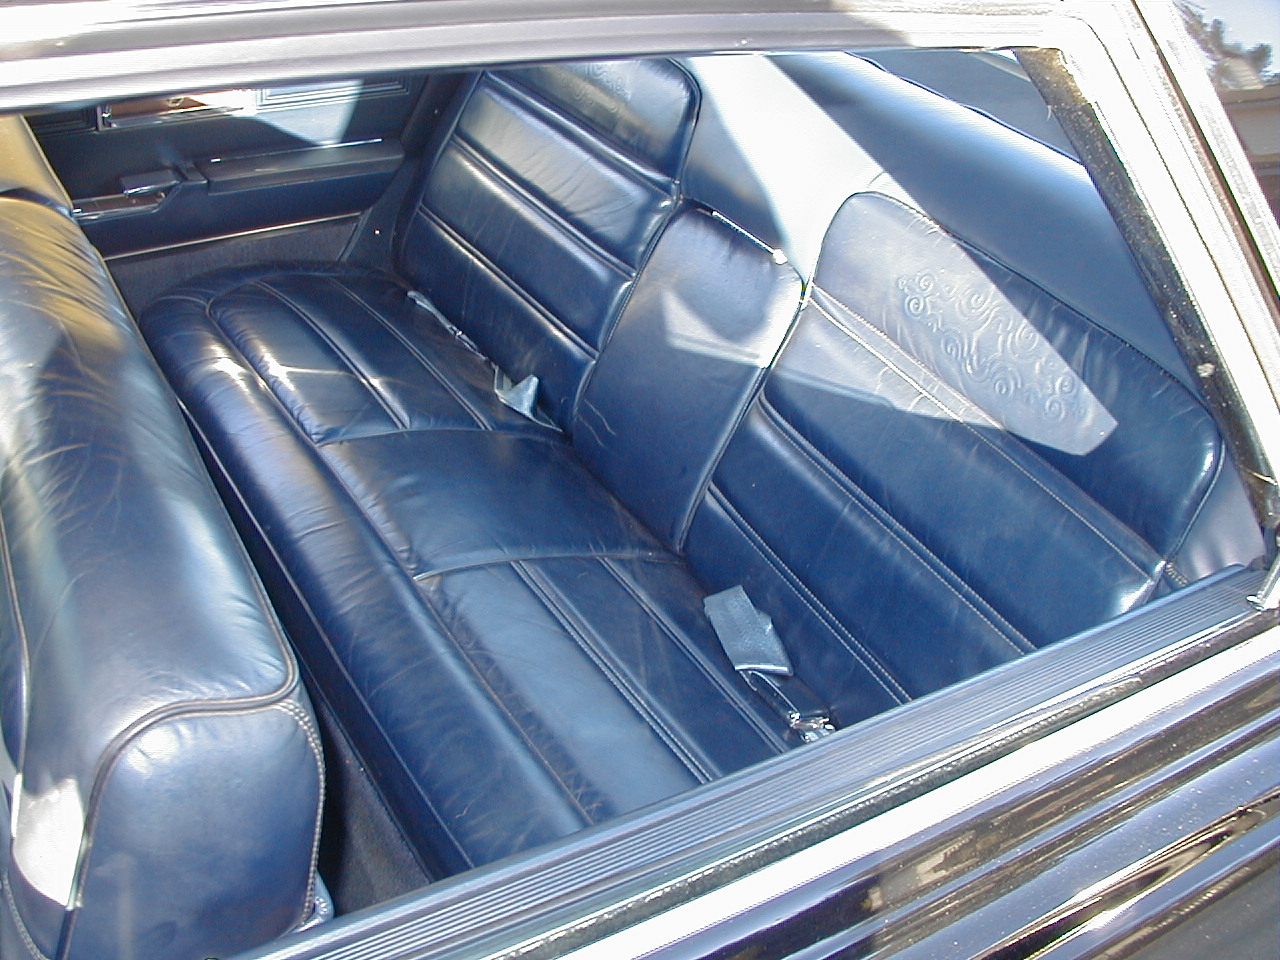
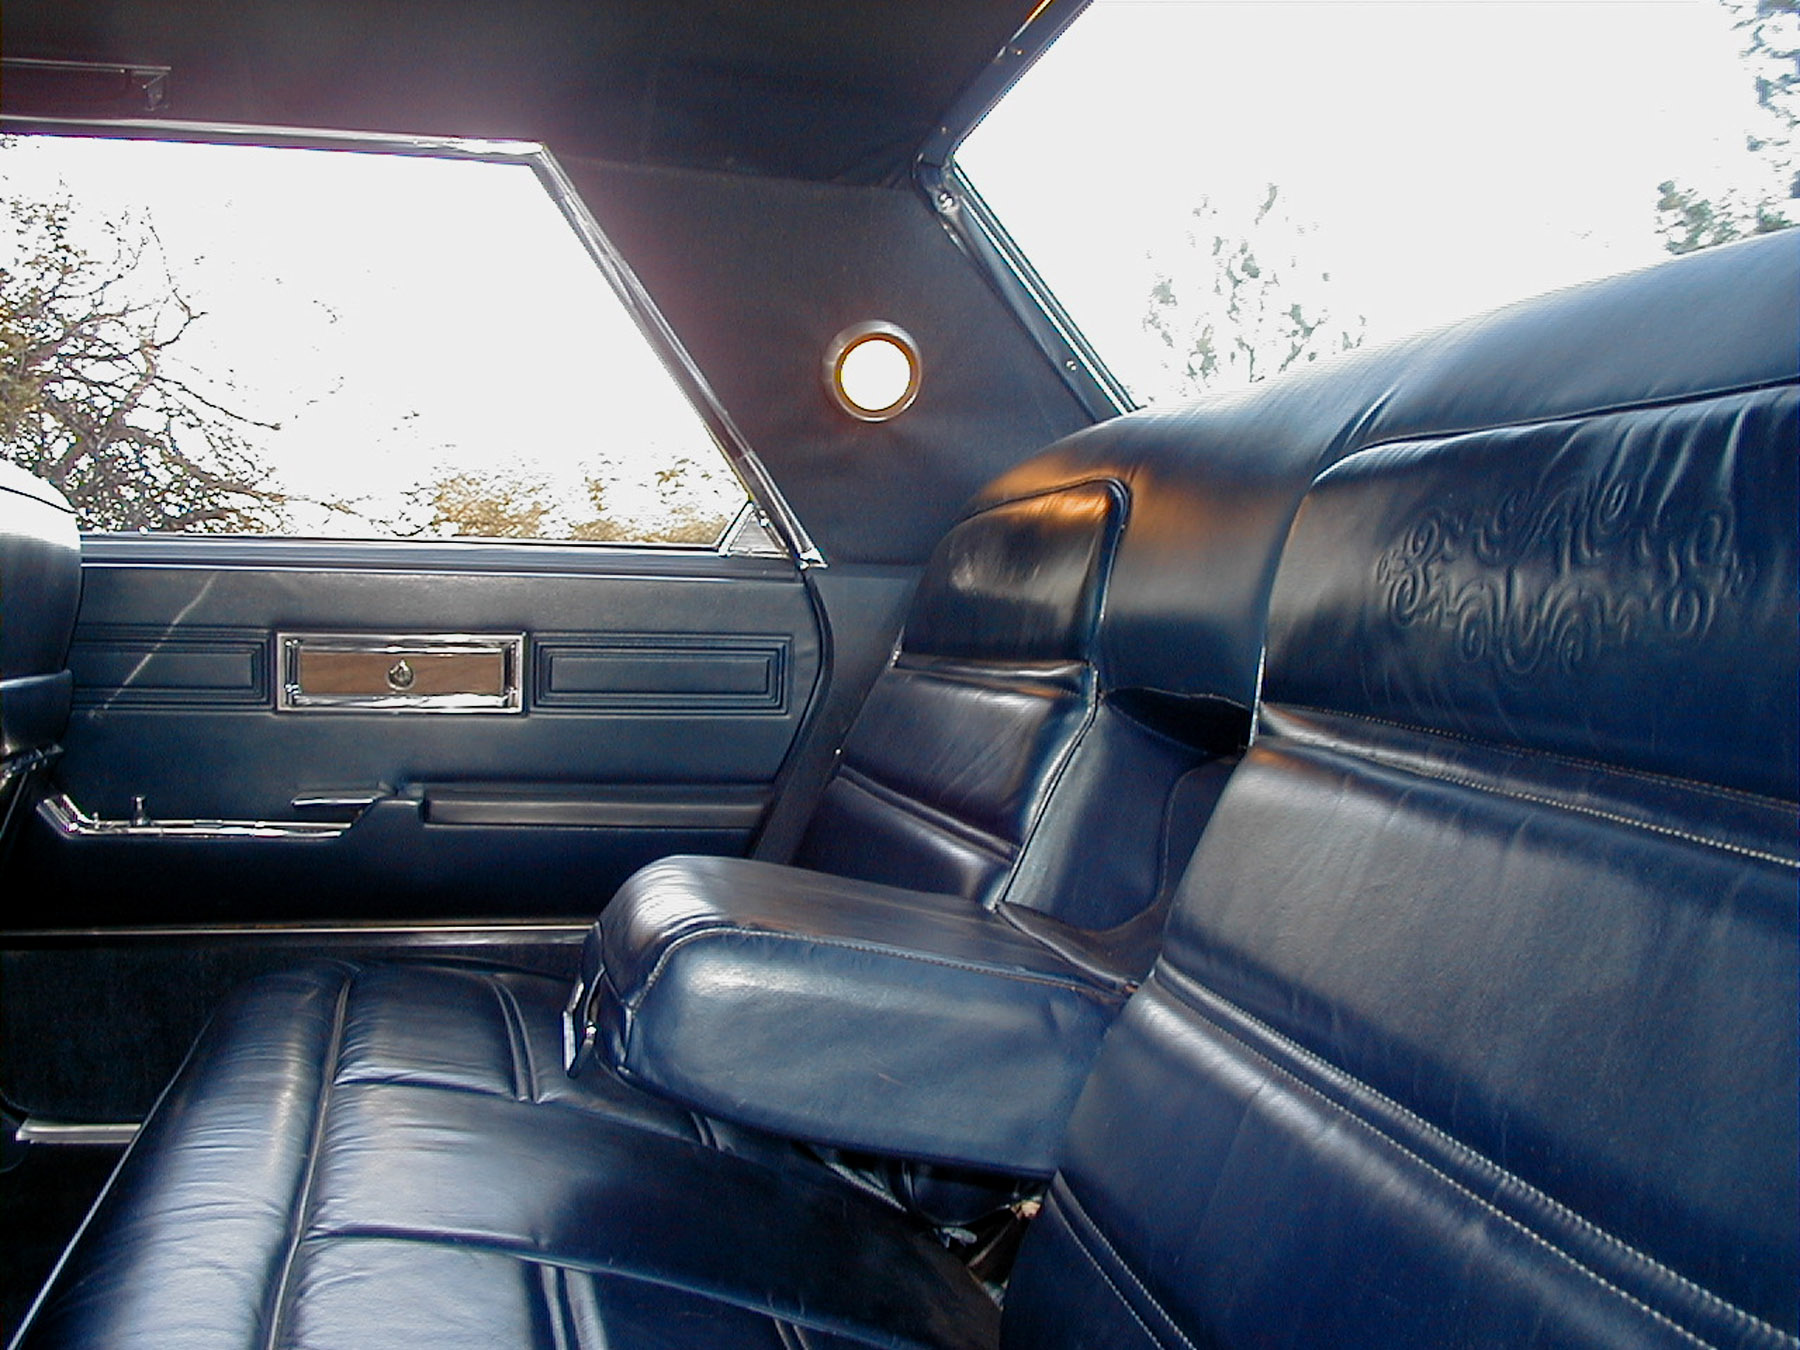
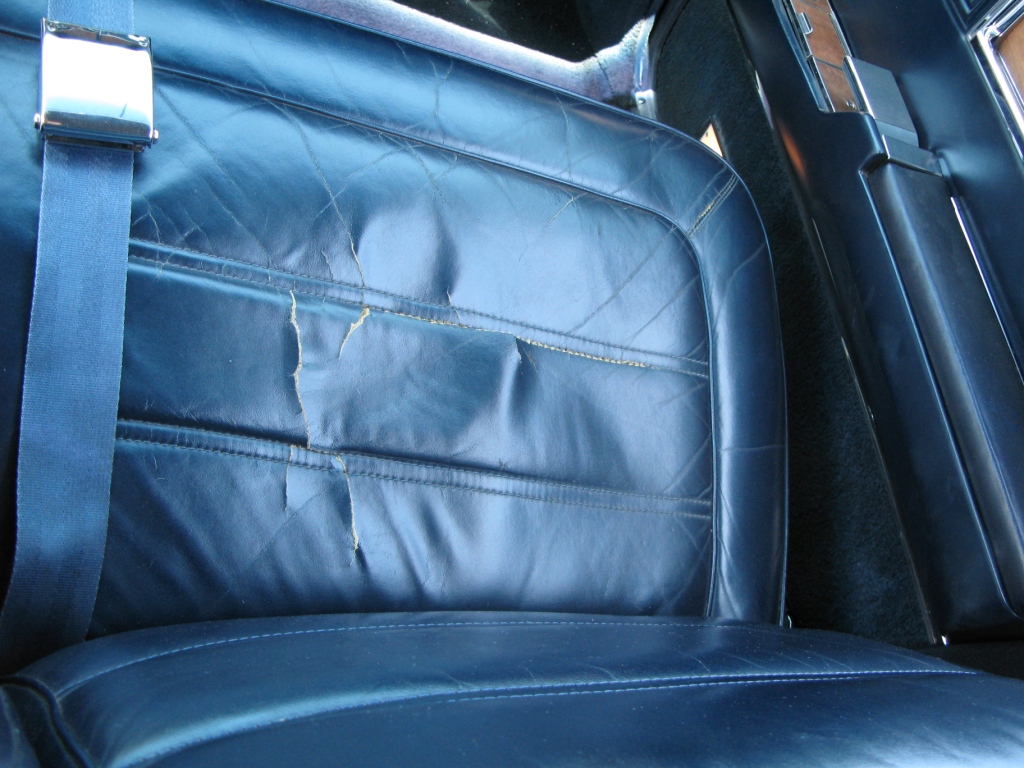
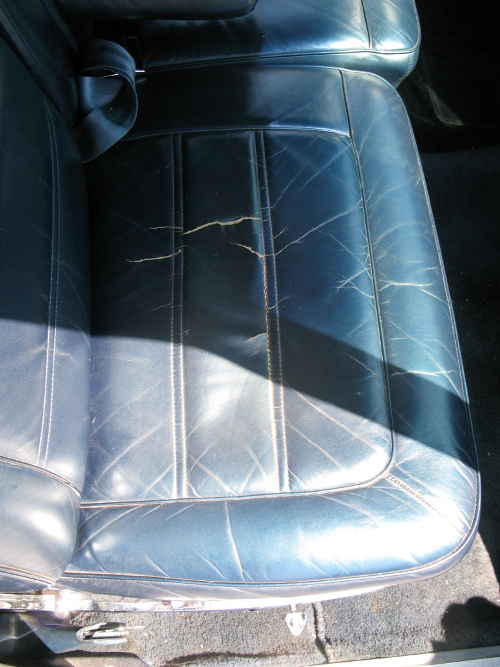
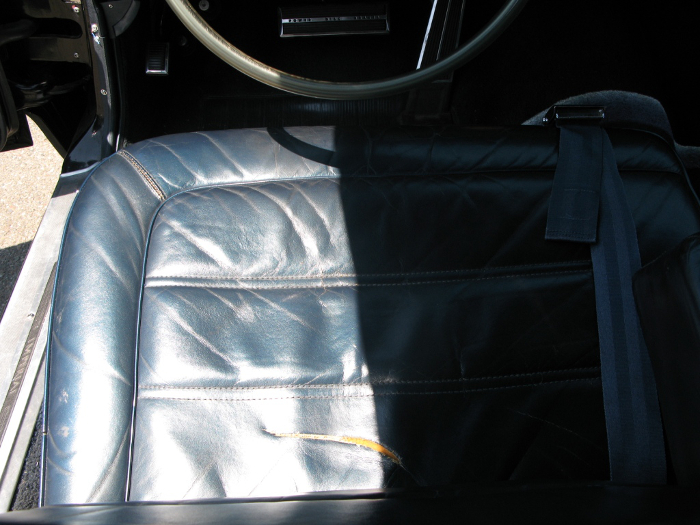
- Rear seat. The rear seat was sunburned and brittle below the rear window, so I had to replace two pieces of leather -- fortunately, my upholstery supply house had exactly the right shade and surface.
- Front seats. I disassembled and lubricated the seat motors and switches -- and I changed the passenger's seat from manual to power, using another seat motor and control from a junked car Chris H. (the left coast one) found in the local u-pull-it yard a few years ago. Thanks again, Chris!
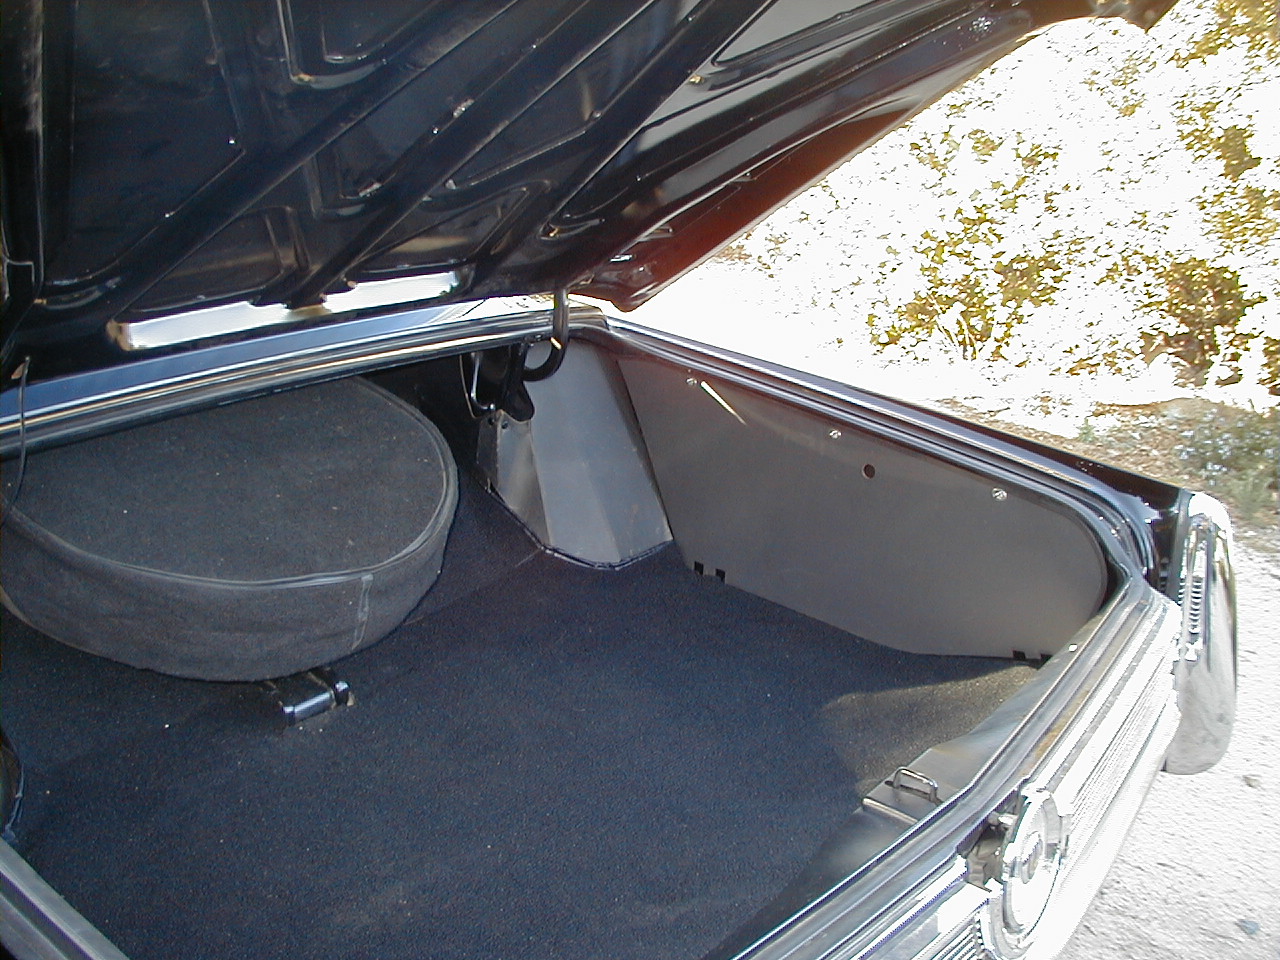
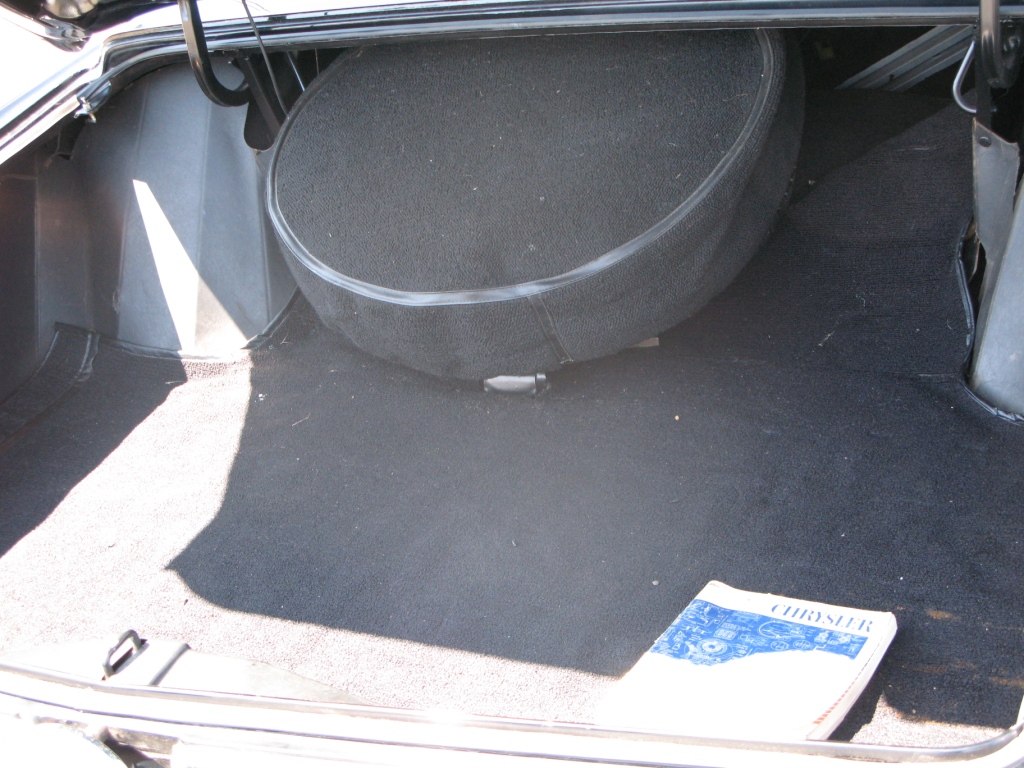
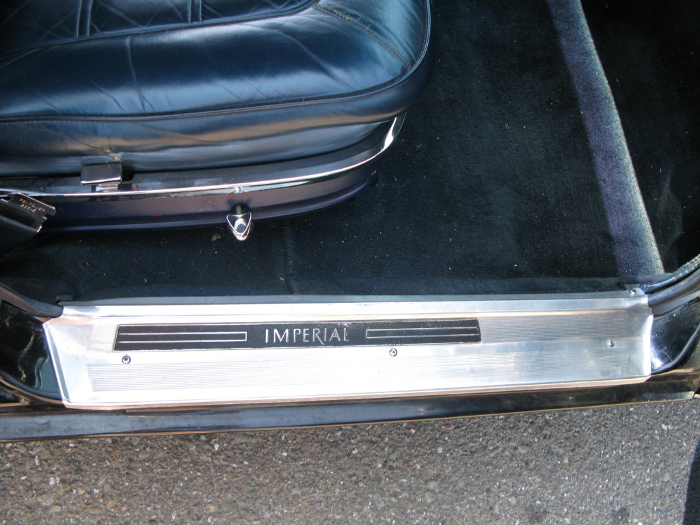
- Trunk. The trunk carpet was somewhat stained; I decided to replace it with new.
I have a few comments on some of the above items:
HVAC
One of the first things to go back in the car has to be the Heating, Ventilating and Air Conditioning system, because it basically will not fit after everything else is installed in the dash and firewall area.
This car is a very late production 1967 and thus has the newly available automatic temperature control system. I was lucky enough to find brand new components for the "brain box" on eBay, and in fact most of the control system was available from various vendors. I found that NAPA still stocks the blower motor, and I got a new push button control and all the vacuum check valves, master and compression switches etc. on eBay. I set up the whole system on a table in my workshop, using a vacuum pump to simulate a running engine, and a 12 volt battery to provide electrical service to the unit. This way, I was able to check out and operate all the control flaps and to exercise the variable speed motor and thermostatic operation of the water and AC controls. I had a new heater core made, as the old one showed signs of previous leakage. The evaporator and condensers seemed to be just fine, as did all the refrigerant plumbing. I drained and replaced the oil in the compressor, checked the compressor bearings and seals, and found that everything was just fine, as you might expect with only 35,000 miles on the car.
Setting up the linkage that controls the various flaps and doors was quite time consuming, as I had completely disassembled all that stuff to clean it and lubricate it, and I had done that over a year ago. Fortunately, I had another car with ATC to look at (my 68), so I didn't have to reinvent the design completely. Getting it all adjusted was pretty tough, and would have been impossible without the 68 factory shop manual. The 67 manual does not have any information on the ATC system, as it was a very late changeover. It is a must to have a 68 FSM to service this system, especially when setting up the temperature thresholds for switching the various upper and lower air distribution ducts, and for adjusting the mixer for outside and recirculating air, plus of course the defroster vent interaction with the other heat duct controls. The 68 FSM is very good at telling you how to set these up; without it you'd be hard pressed to get everything right.
I substituted a 1000 ohm potentiometer for the in-car temperature sensor, so that I could fool the system into thinking it was any temperature "in the car" that I wanted to, to see if the control system would react to the temperature changes with more heat or more cooling, and different fan speeds, as it is supposed to. I was very pleased to see that the system seemed to work just fine, although of course I didn't have a source of circulating hot water, and the refrigerant was not yet installed in the air conditioning, but I could measure the vacuum at the various control devices and the voltage supplied to the blower, and using those measurements I could tell everything was in good shape.
Next step was to reinstall the system in the car. Having the 68 nearby to double check hose and cable routing was extremely valuable, and the installation went quickly and without too much undoing of mistakes.
I left the air distribution ductwork off temporarily, as I didn't want it in my way as I installed the rest of the dashboard wiring, instruments and accessories. There is about 1.5 inches of padding under the leatherette board that hides the metal of the firewall from the eyes of the occupants of the car. It is easy to see why these cars are so quiet and well insulated -- they thought of everything!
Dash
Once the AC equipment is in the car, the assembly of the rest of the dash is pretty straightforward, but time consuming. I had already disassembled all the gauges, switches, controls and instruments, and cleaned, lubricated and adjusted them, so it was just a matter of assembling them back into the dash cluster, then installing the cluster and all the electrical and vacuum connectors. I found an NOS vacuum canister for the automatic brake release on eBay, and put that in first so that I had some brakes even before the foot brake system was installed. The last item to go into the dash is the glove box, and it is very difficult to get it in without damage, but it can be done with enough patience and care.
I still left the AC ductwork off until after I could run the engine, so that I could troubleshoot any mistakes without having to remove the ductwork to get at things. Fortunately, there weren't any, so I just put the ductwork in later.
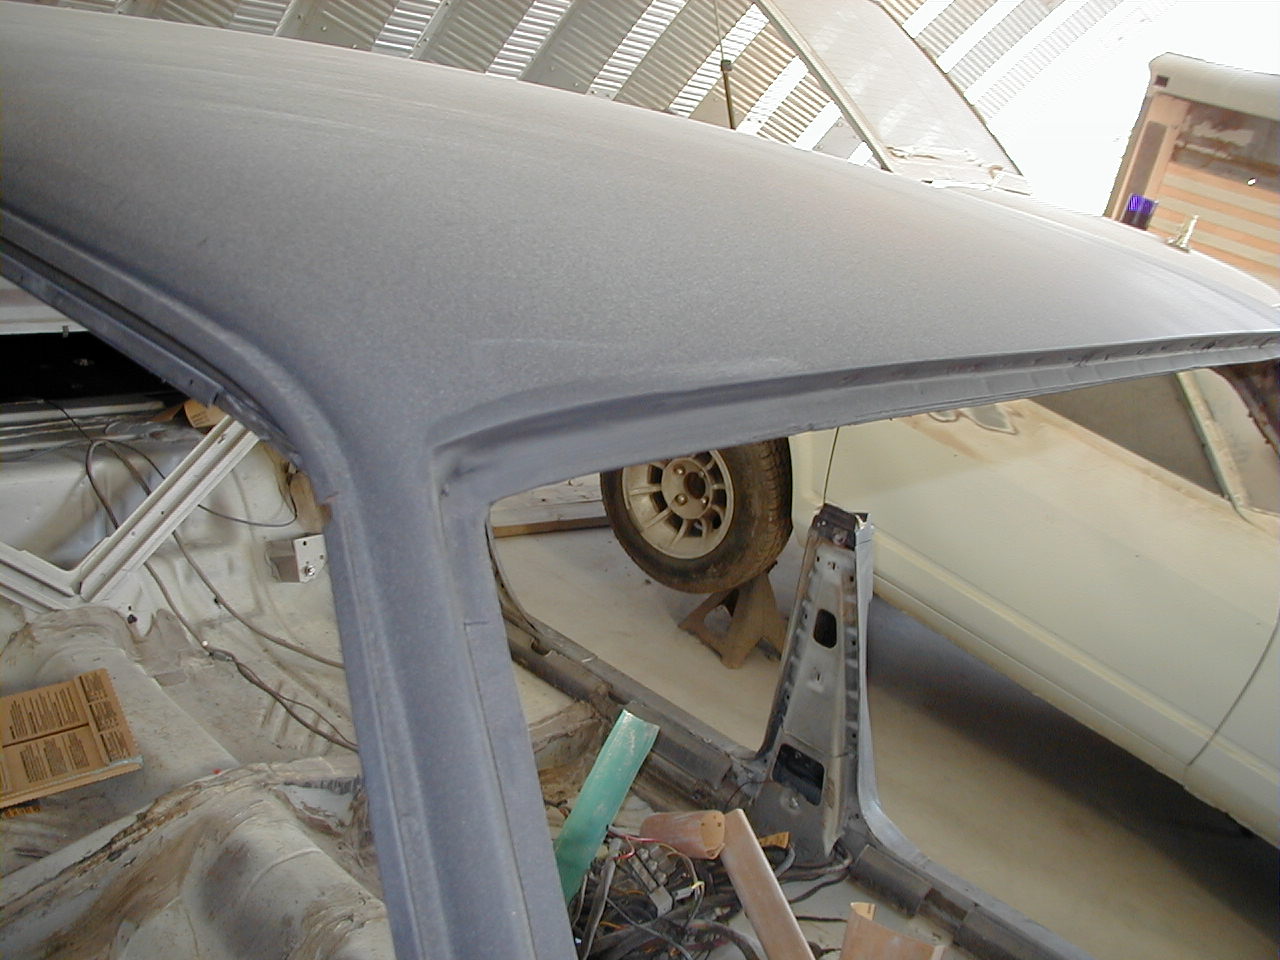
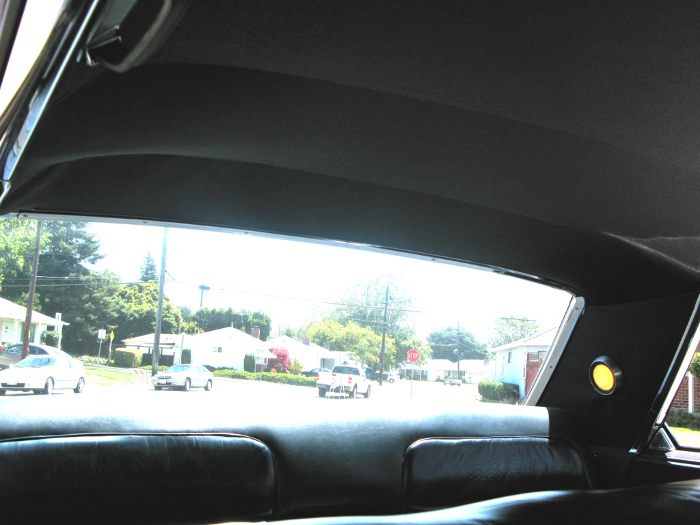
Headliner
I purchased a new headliner from Acme Auto Headlining -- after worrying for 3 years about not being able to find the correct material, I discovered in talking to my friend at Acme that they had a stash of the original (very unusual) material in their warehouse.
When they supply a headliner, it is a perfect fit with all the provisions for the retainers etc. already sewn in. They also supply enough extra material to cover the insides of the "C" pillars. The headliner has to go in early, because the roof rail weatherstrip has to be in place in order to adjust the door glass properly. The sun visors, front and rear windshield trim, and the rear view mirror go in at this time, then the roof rail trim and weatherstrip retainers.
Before installing the "C" pillar trim and reading lights, you must install the "Crown" script and the belt molding on the "C" pillar, as they bolt through the body. You use body sealer on all the mounting holes and nuts to keep the weather from getting under the trim and into the interior of the car.
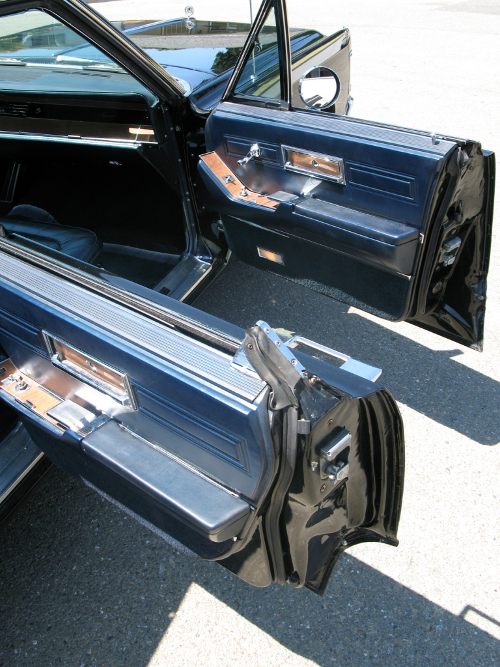
Doors
Before assembling the internal parts of the doors, the exterior brightwork and weatherstripping and the door bumpers have to be installed, as there is much better access without the glass and window mechanism in place. The roof rail weatherstripping has to be in place to properly adjust the door glass.
I had previously taken apart, cleaned and lubed all the door window motors, switches, latches, locks and other moving parts, and replaced the weather-stripping, so it was pretty straightforward to just install everything in the doors. The FSM is very complete in its instructions as to how to set the windows so that there is no wind noise or rain leaks. Fortunately, I have all new weatherstripping (from Steele Rubber), so that went quite well. One of the things that is tough on these cars is the clearance between the armrests on the rear doors and the plastic molding that outlines the rear of the rear door opening. It took about 20 different tries at adjusting the door position on the hinges, and the hinge position on the body, to get all the gaps similar, and to avoid anything rubbing. This is painstaking work, because any mistake results in chipped paint -- you have to be VERY careful!
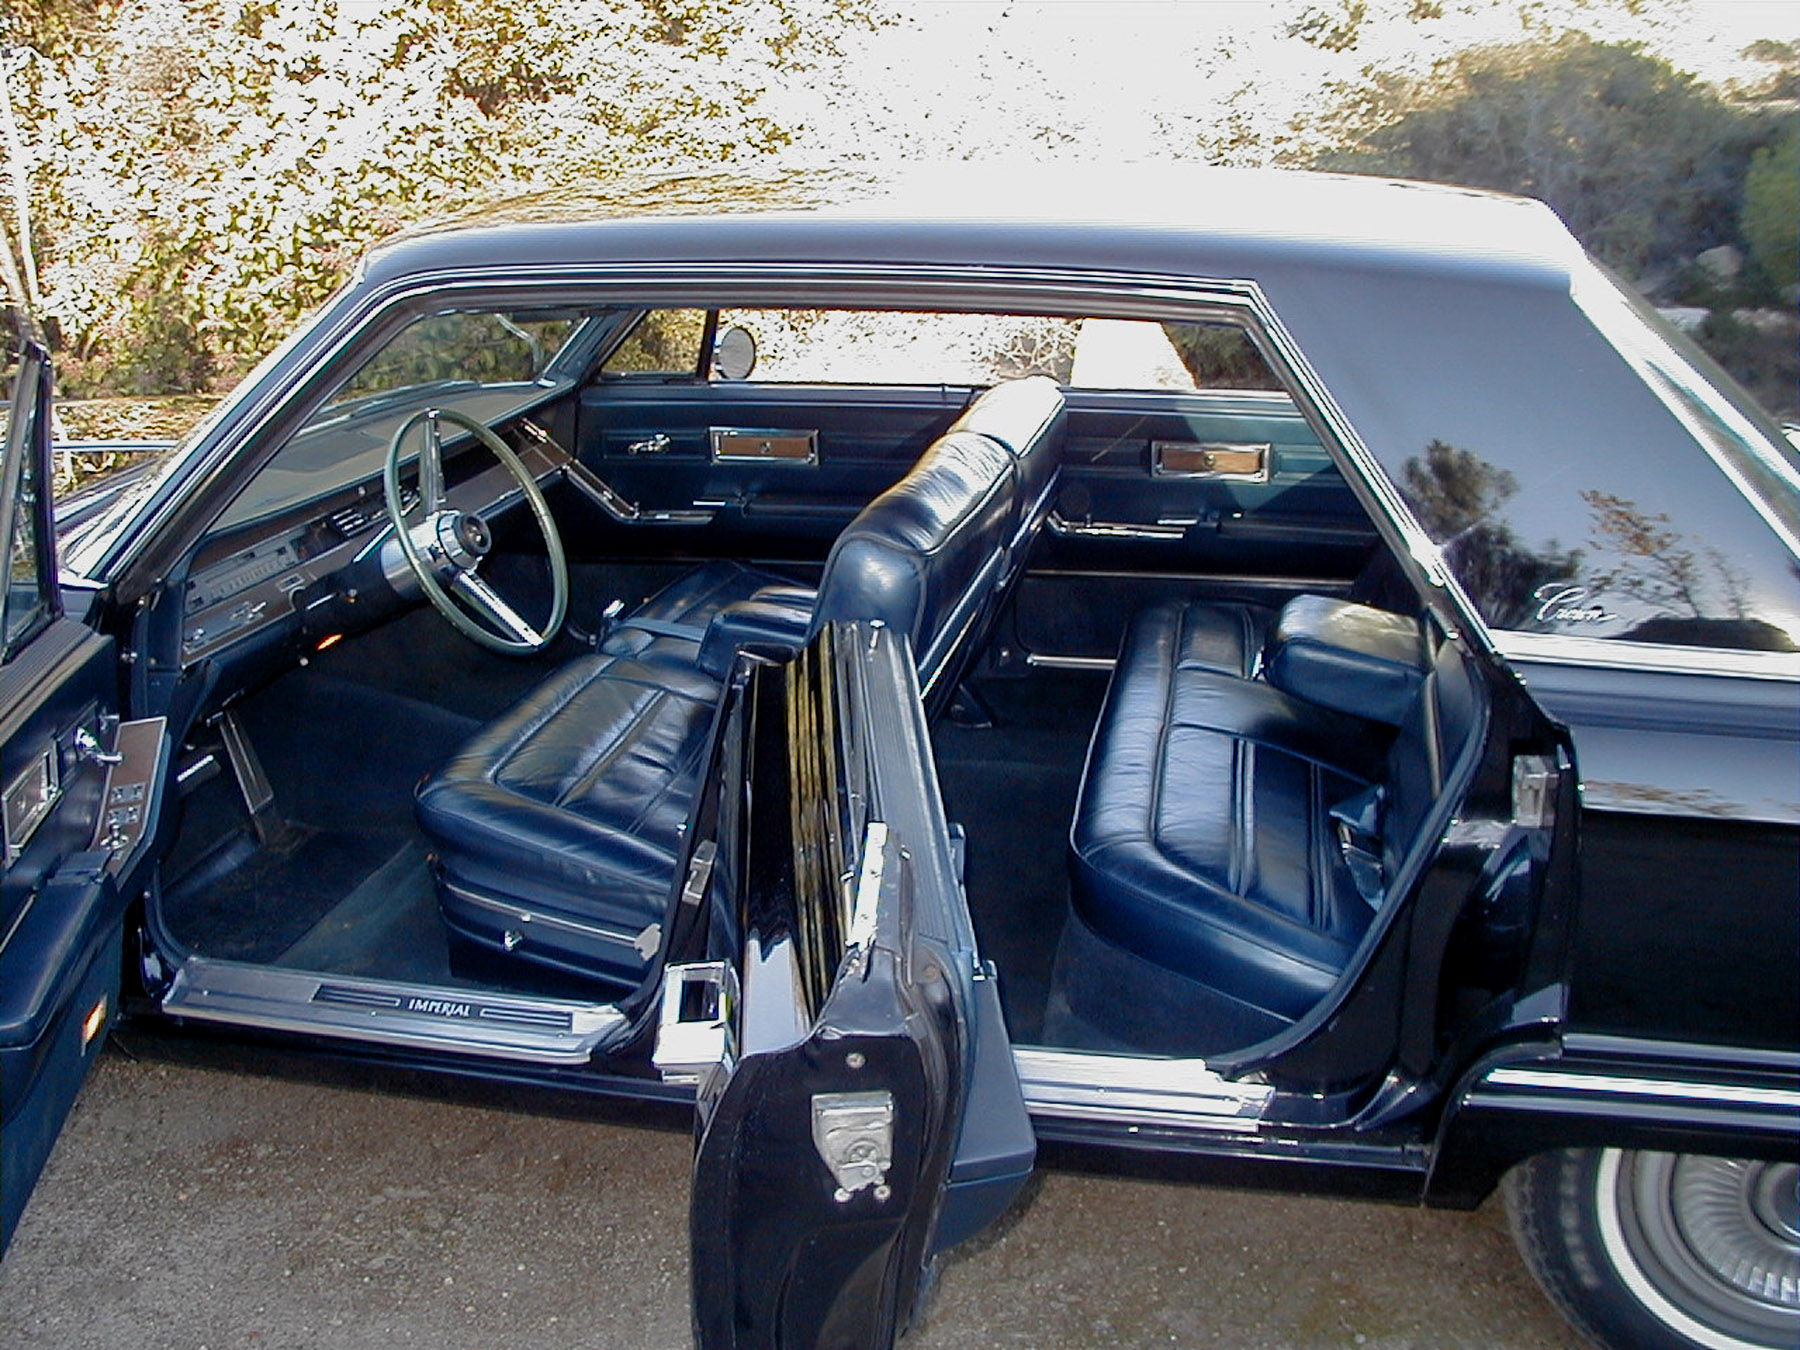
Seats
The seats in this car were in close to perfect condition, but I did take the mechanism for the power adjusters all apart to clean, lube and adjust. The seats are very heavy, and too much for me to handle when all together, so I put the bottom cushion and power mechanism in as one unit, then installed the backrests and armrests in the car. I did have one piece of leather that had been damaged on the back of one of the seats, so I replaced that while the seat was apart.
Engine and Transmission
According to the factory shop manual, the engine and transmission have to be installed separately, with the engine going in first, then the transmission being mated to the engine from under the car. While I'm sure that in most cases, it is easier to do it that way, in my case, I decided to deviate from that procedure.
I had already operated the engine and transmission together on my test stand (see above) for many hours while waiting for the body to come back from the body shop. I did not want to take them apart again, disturbing the front seal or the linkage settings; and I saw no reason for doing that in my case.
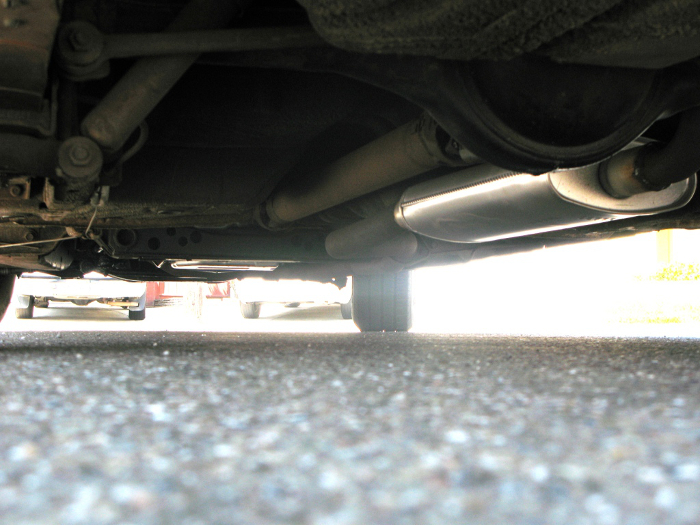
The reason that it is not recommended to install them as a unit is that the tailshaft of the transmission has to dip well below the bottom of the chassis as you shoehorn the assembly down into the engine compartment. By making a few measurements, however, I calculated that if I raised the rear end of the car about 2 feet in the air, I could clear all the obstacles and slip the whole assembly into place.
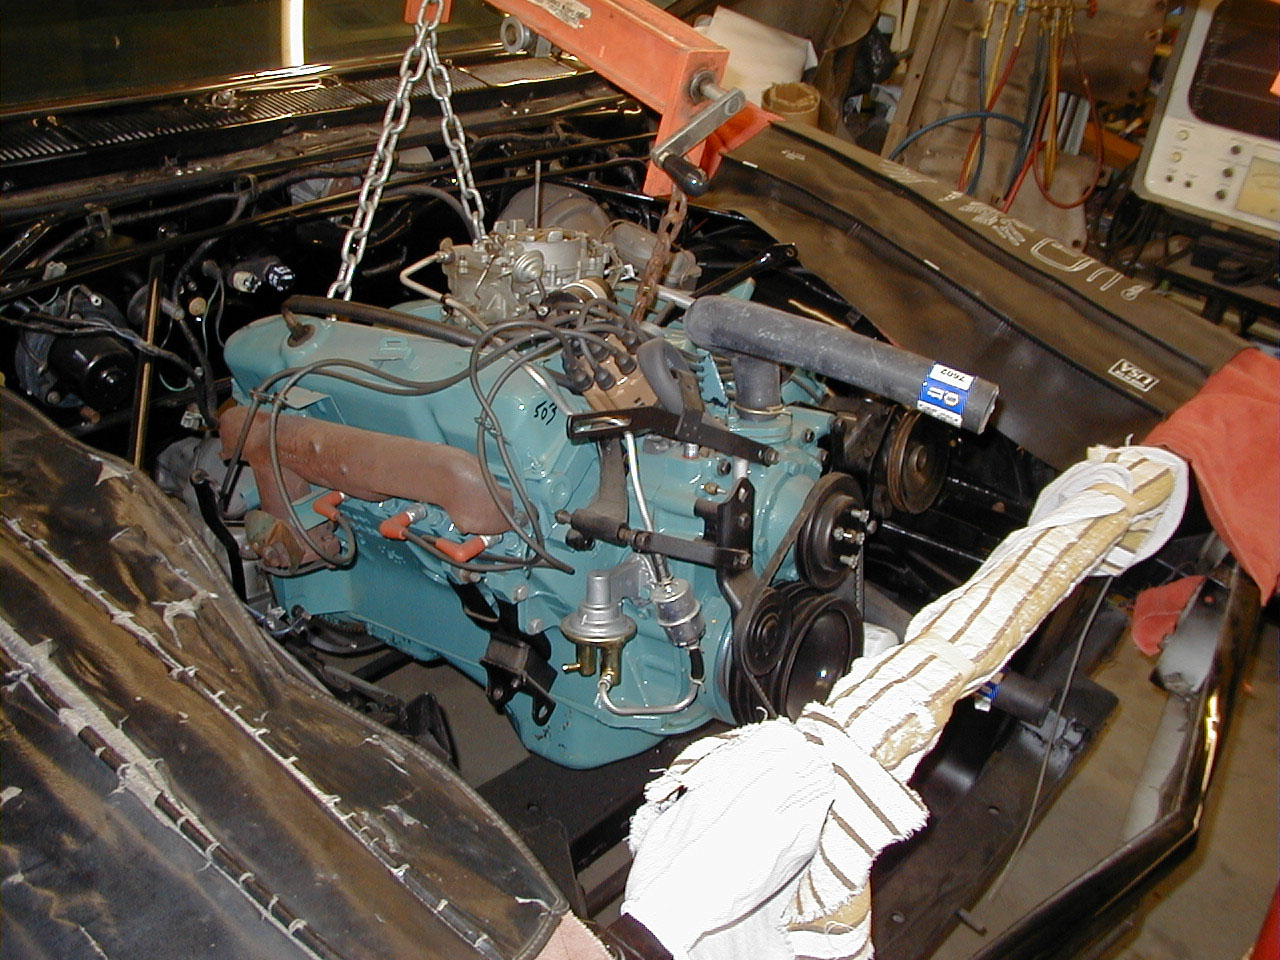
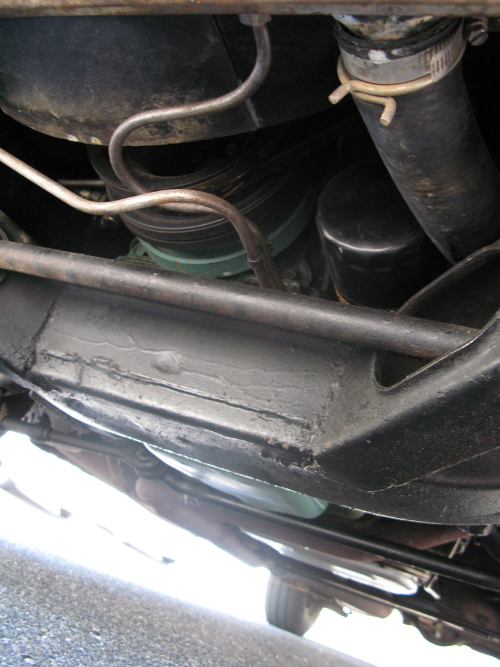
I started by lifting the engine/transmission assembly high enough that the lowest part of it would clear the body structure at the radiator area. Then I tilted the engine downward at the rear (my engine hoist has a crank arrangement for adjusting the tilt angle of the engine) so that the transmission would slip under the firewall without touching anything. The transmission tailshaft came very close to the floor, but did not touch it. Then, taking baby steps, I lowered the whole assembly in small increments, adjusting the angle so as to keep the transmission from touching the floor. Here is a picture as the engine is about 1 foot above its final position during this process.
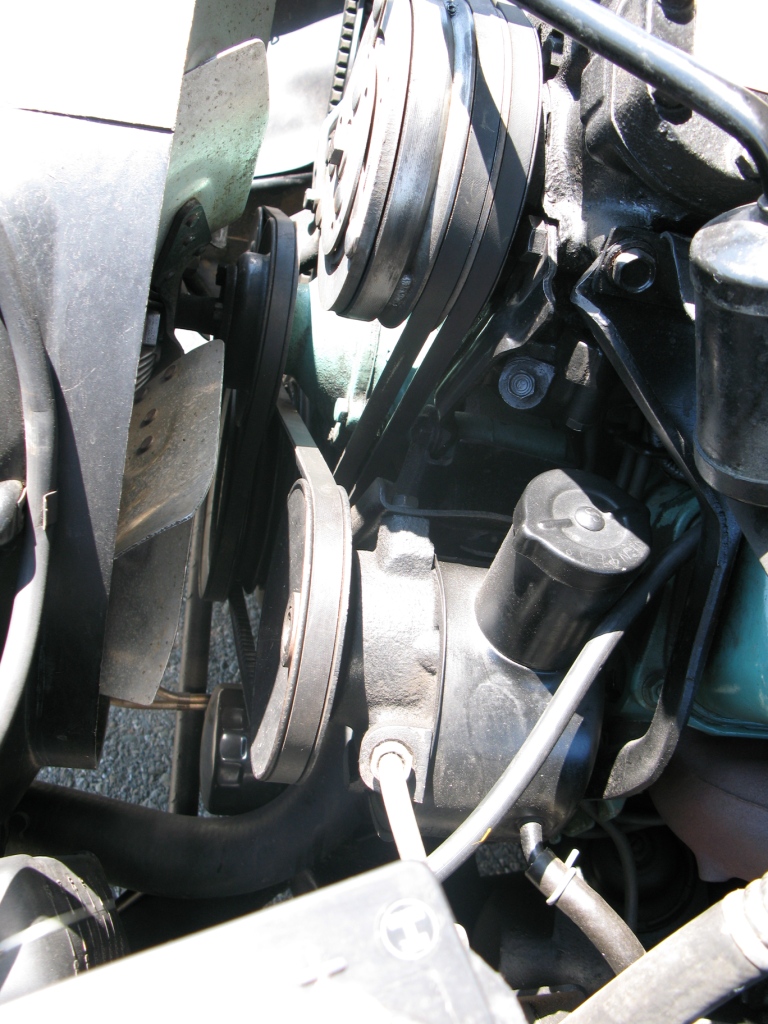
This was done with almost everything in place on the engine and car body including the brake master cylinder, water pump and power steering pump etc. The engine was still ready to run, with the carburetor, distributor, fuel pump etc. In fact it was still full of oil from the break-in run on the test stand.
I did, of course, apply copious padding on the fender tops and radiator support structure, to avoid marring the paint during my work.
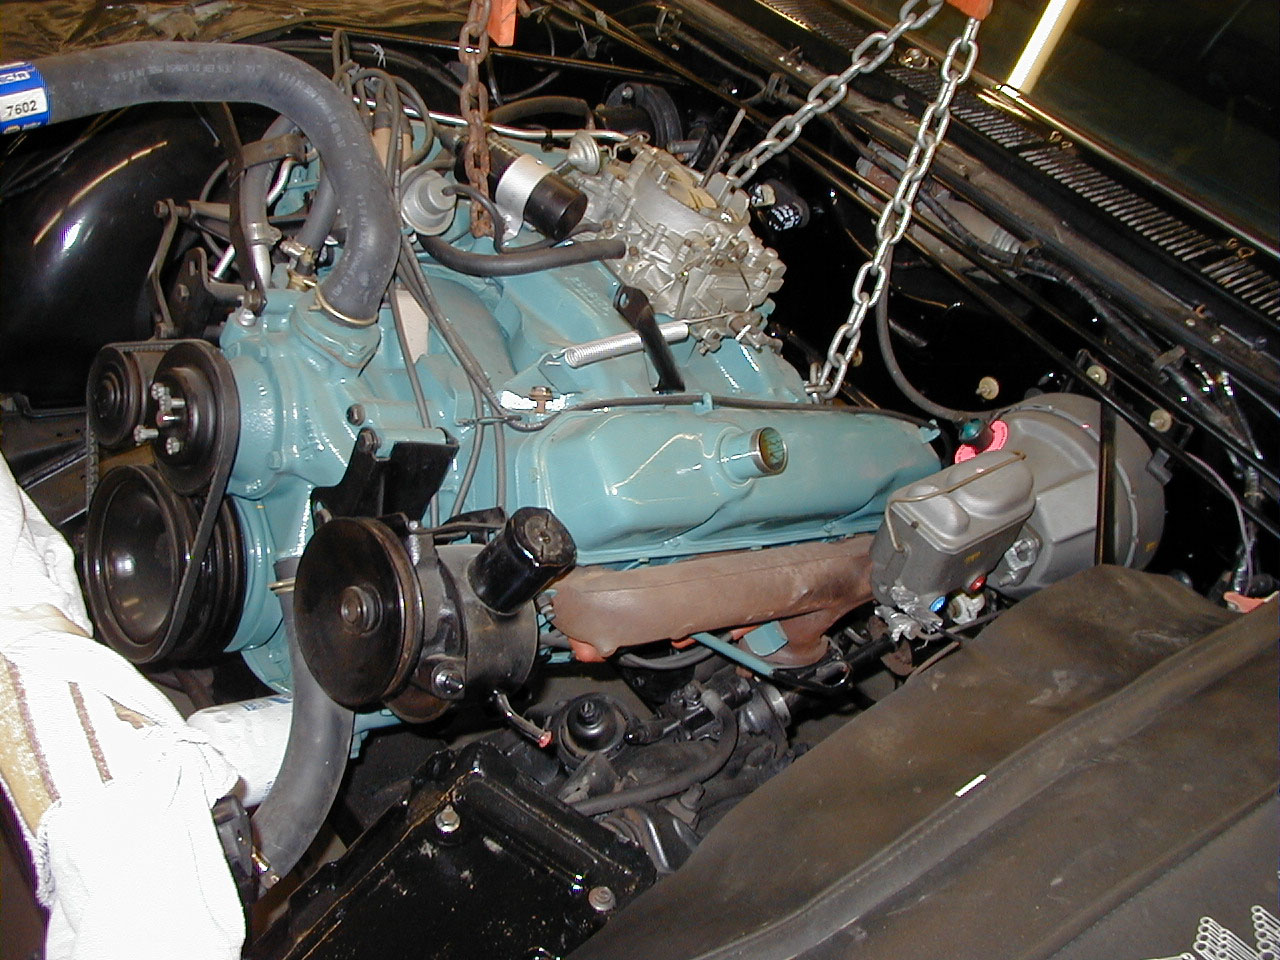
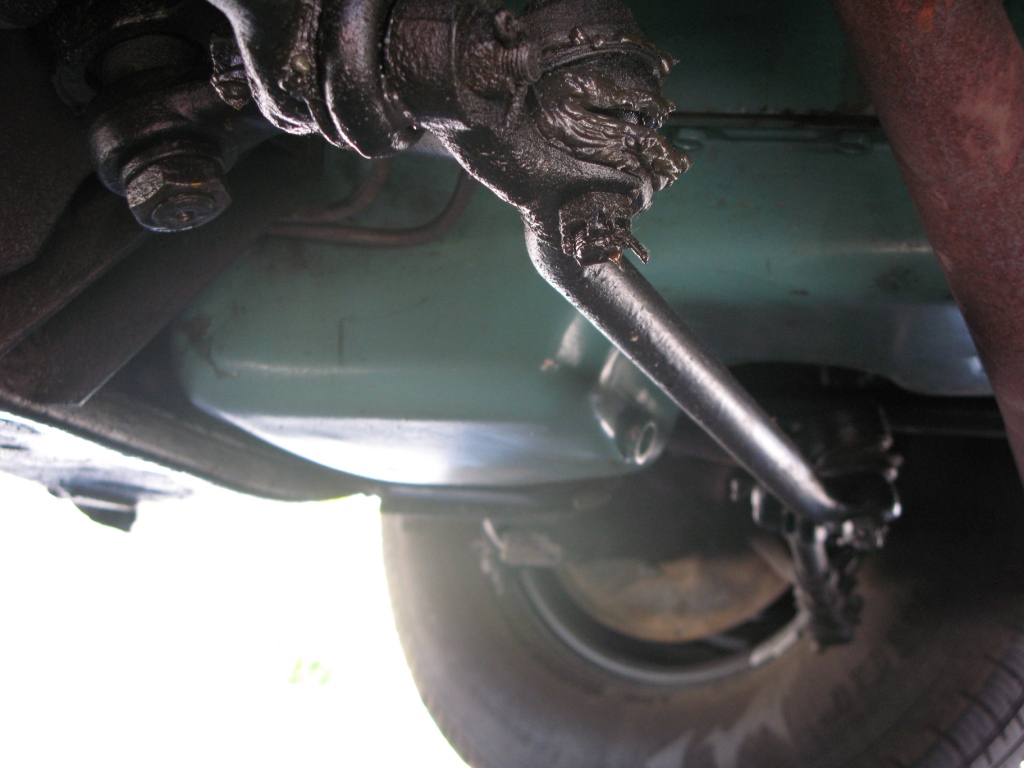
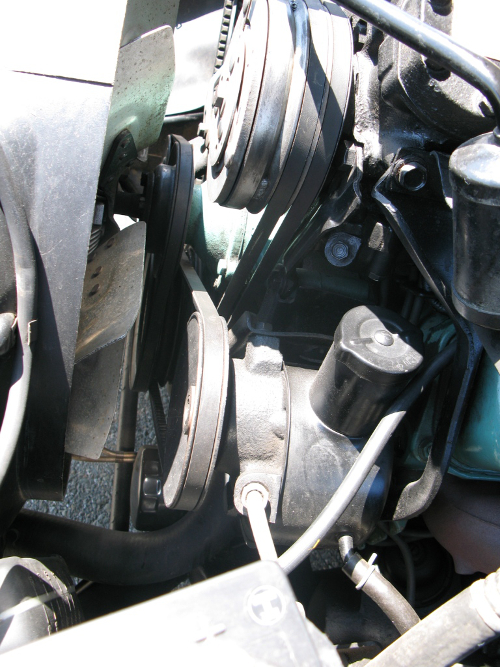
Here's a view of the tight clearance on the driver's side of the engine. This shows the engine lowered further, and almost "home". Note the motor mount on the passenger's side of the engine. I later discovered that I needed to temporarily remove that in order to clear the structure that it bolts to, rather than risk scratching some paint.
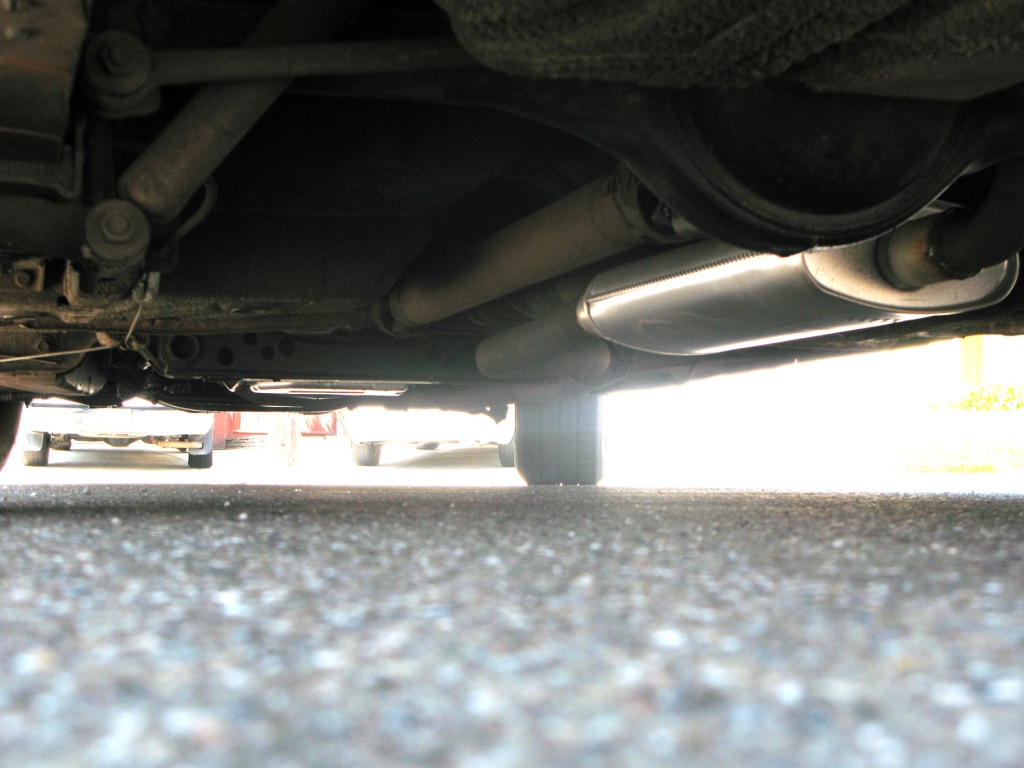
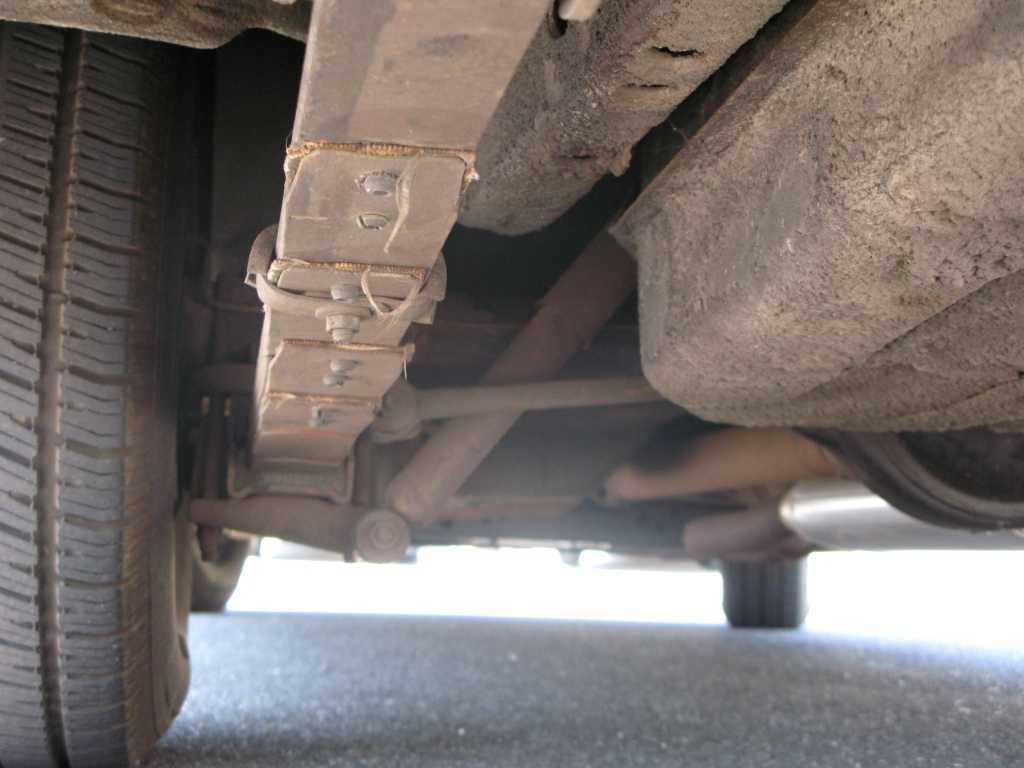
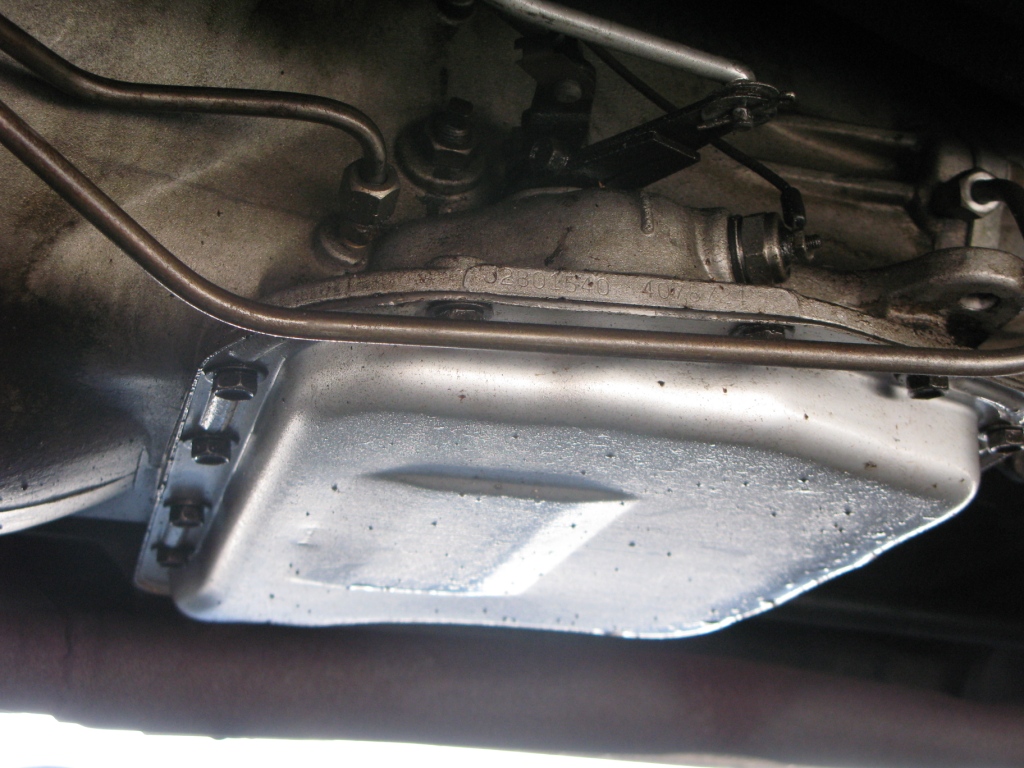
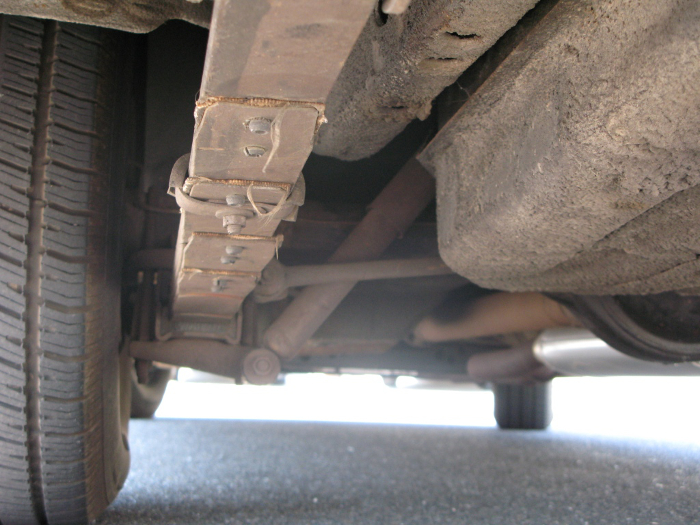
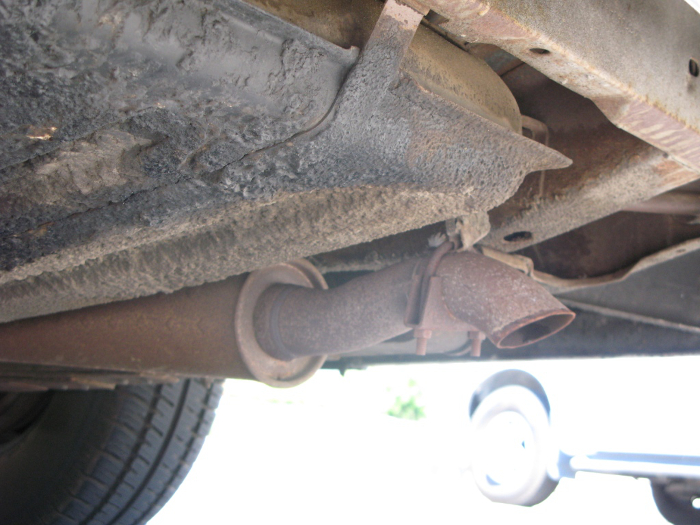
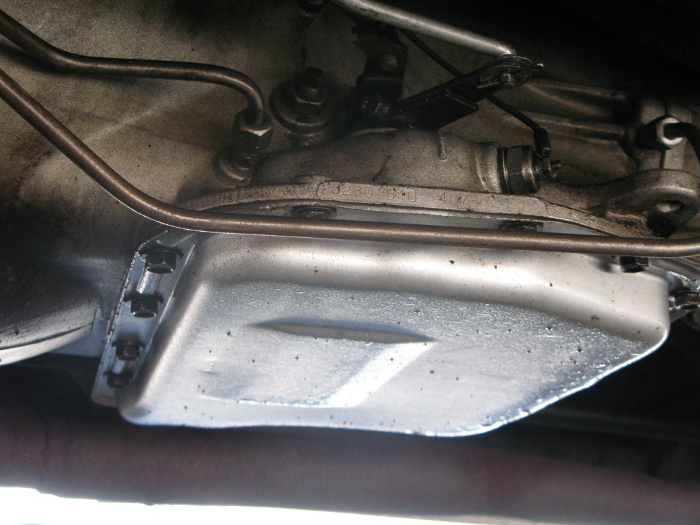
Here is a view under the car, as the rear of the transmission gets close to slipping over the frame crossmember. The transmission support is sitting on the floor here, ready to be bolted in to support the rear of the transmission. By the way, the yellow color of the support cushion is original, all I did was clean it up! Typical of this car -- I don't think it has ever been in a rainstorm!
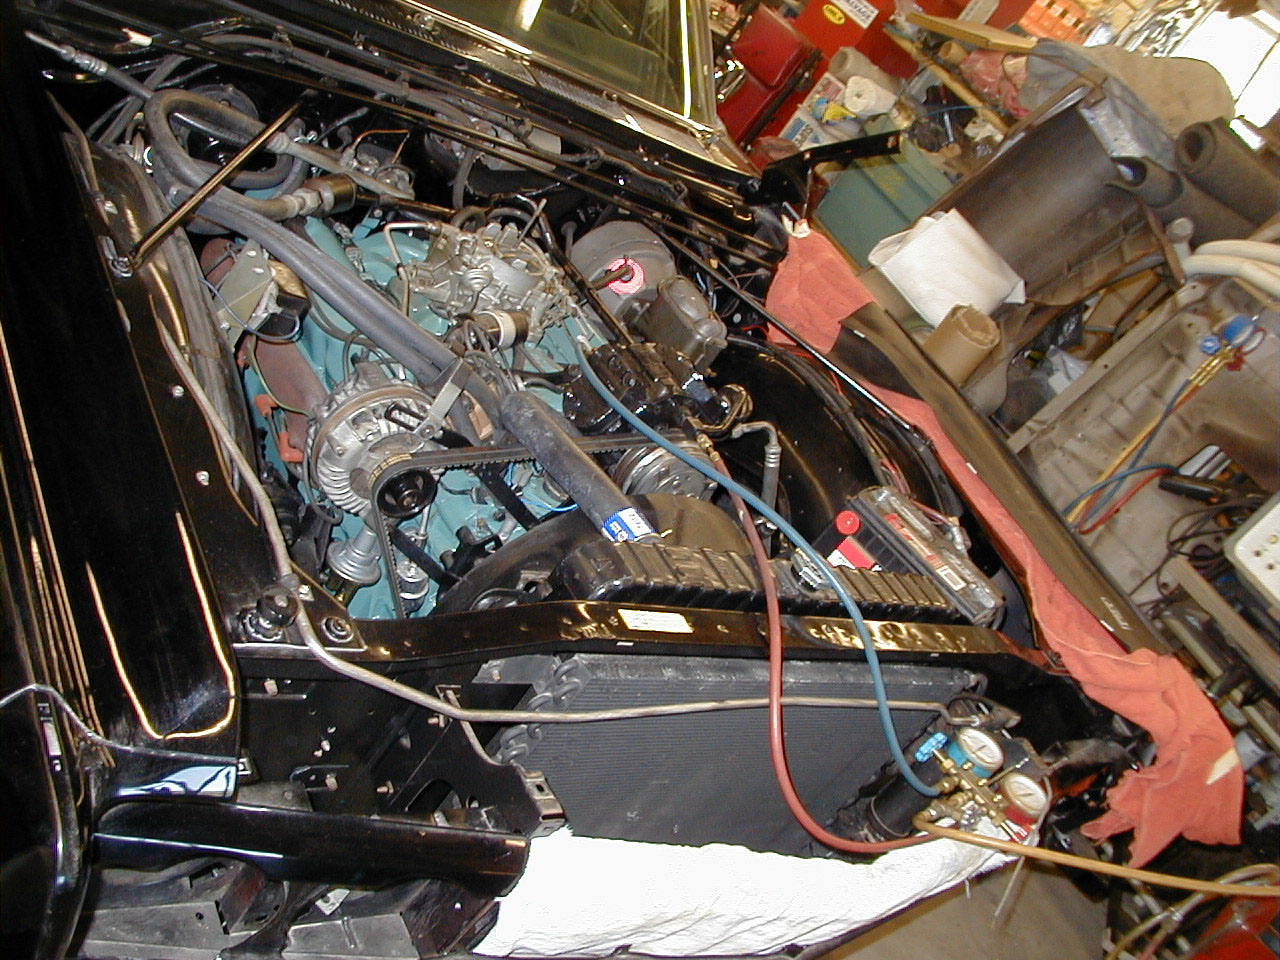
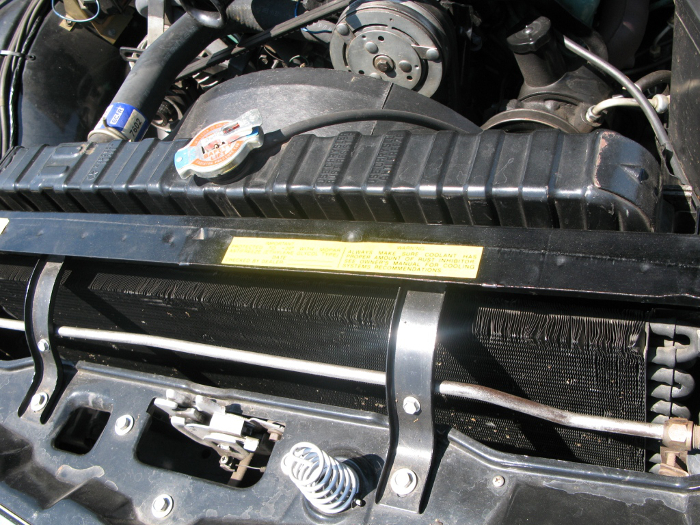
Here, finally, it's all back in, running in place for the first time since 1978! I'm charging the AC as this picture was taken.
Now with the hood back on -- after the first drive (since 1978!). BODY EXTERIOR
Now that the engine and transmission are back in the car, it is much easier to work on the rest of the car, as I could move it under its own power (sitting on a milk crate!).
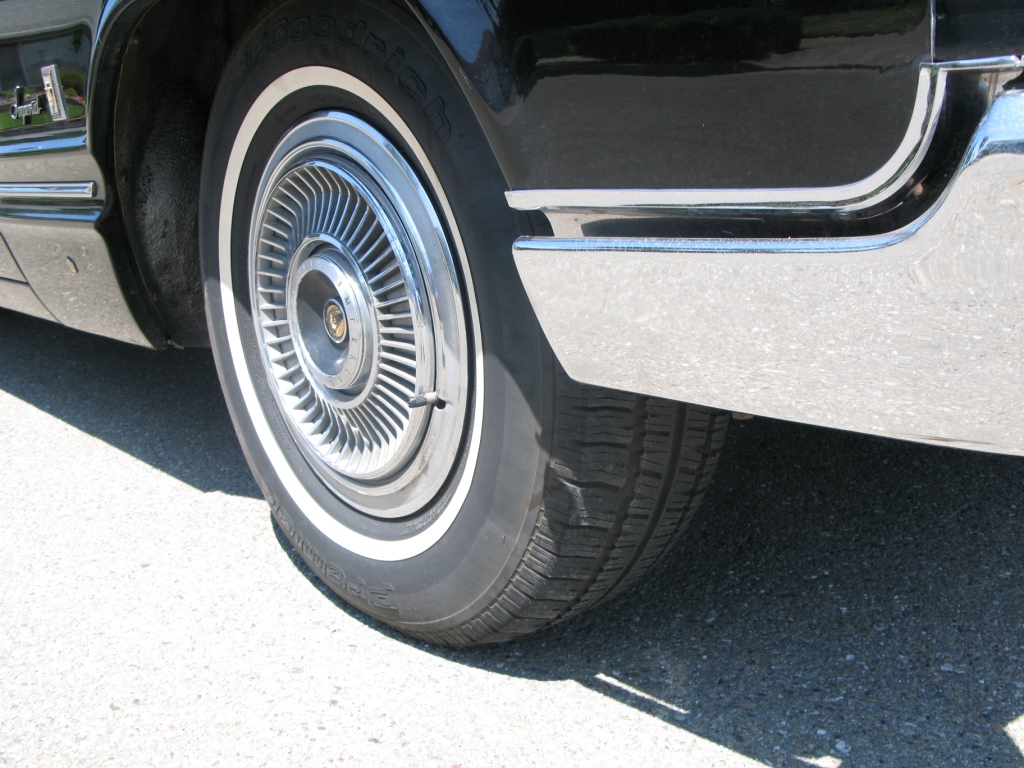
Wheelcovers
The wheelcovers on this car were close to mint condition, but they were dirty, so I disassembled and polished each individual part. They look new now.
Front End Chrome
This can go on at any time -- as it is pretty accessible without having to remove other items to get at the fasteners -- I left it to the last.
Lights
I replaced all the bulbs with new, and cleaned and polished the insides of each light fixture. Some of the crimps of the light sockets to the supporting shells were not making good contact -- both in the backup lights and in the parking lights, so I soldered ground wires to each bulb socket.
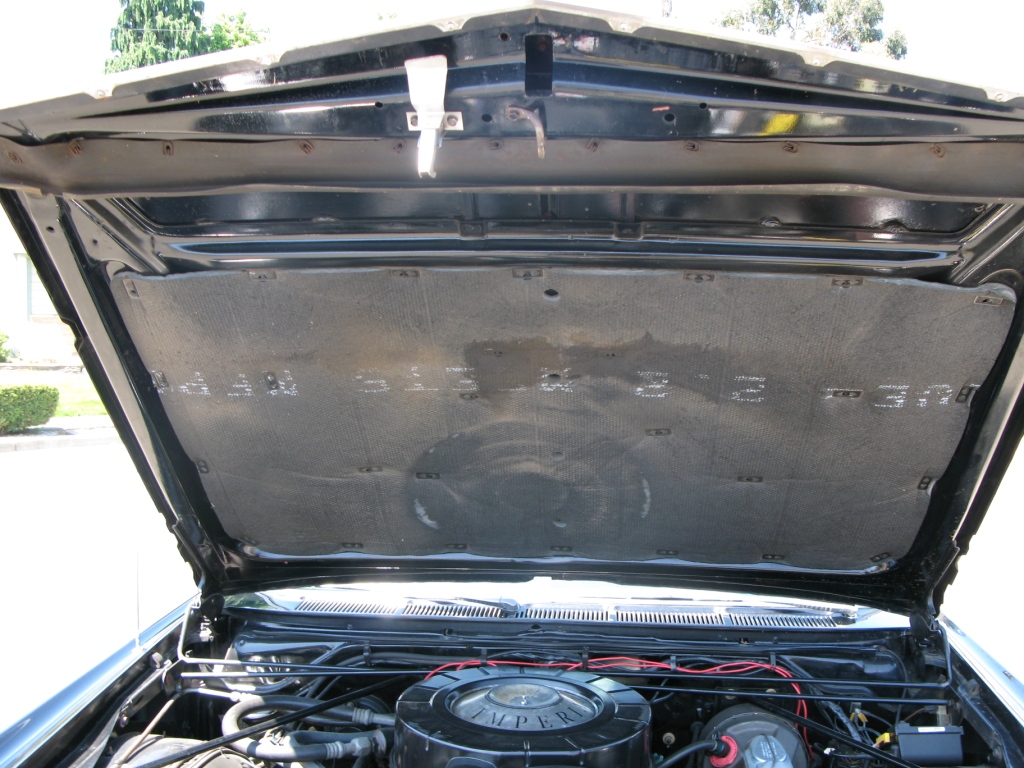
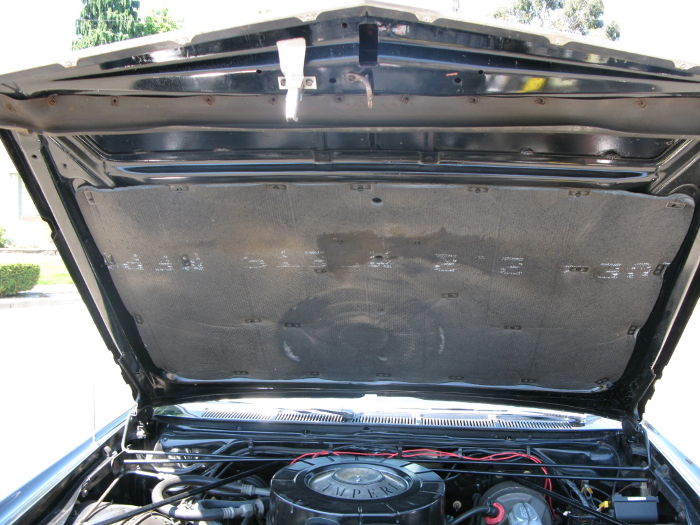
Hood Pad
I bought one from Gary Goers -- it is an exact fit, with all the holes die cut and in the right place -- it looks beautiful.
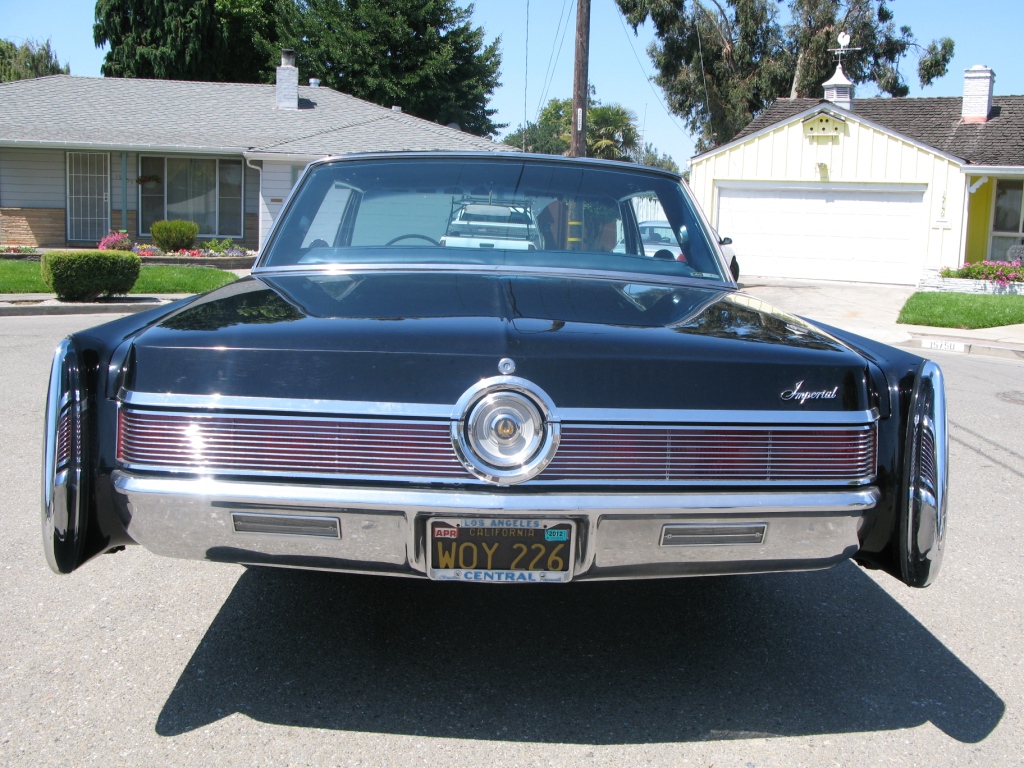
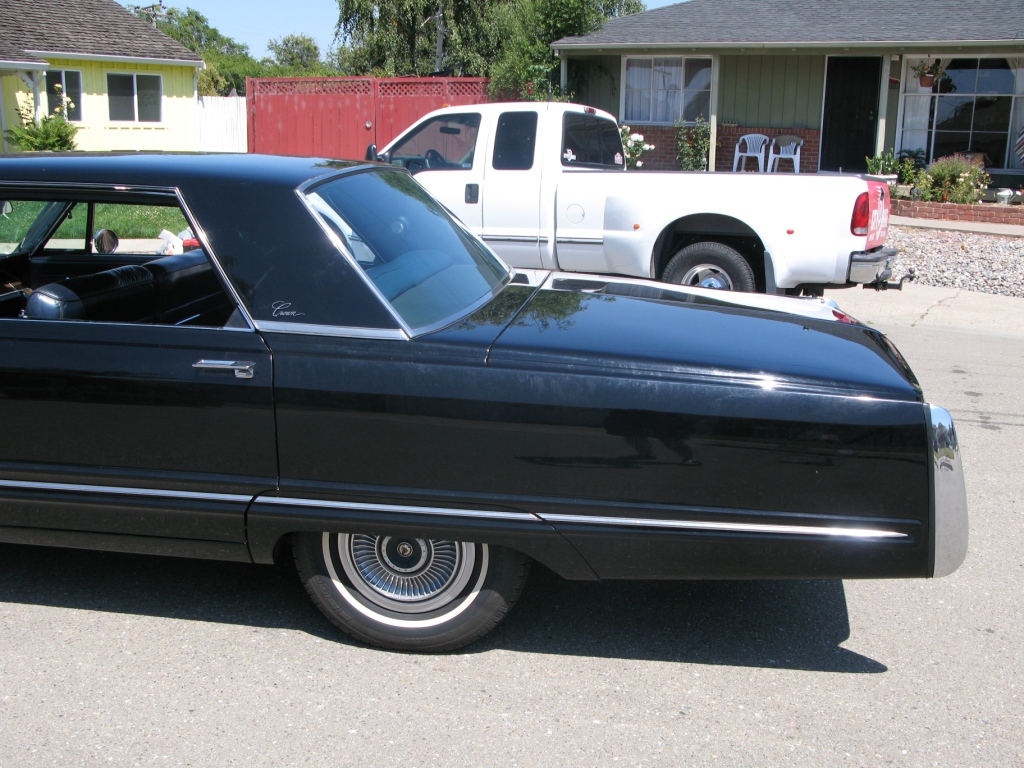
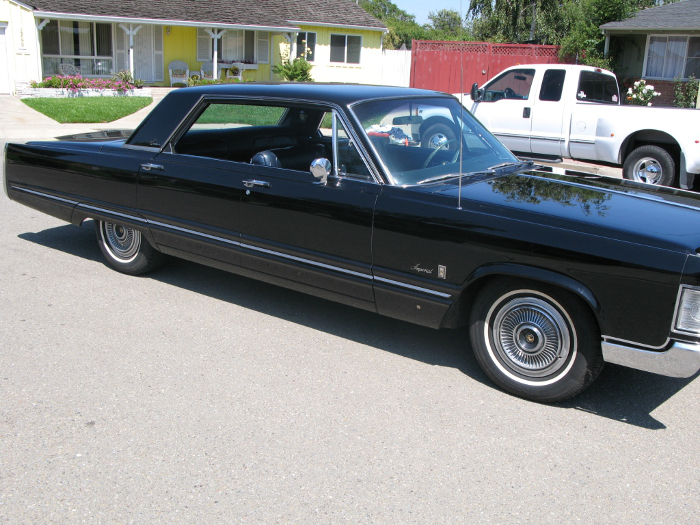
Final Result
Thanks for bearing with me over these last 3+ years!
Dick Benjamin
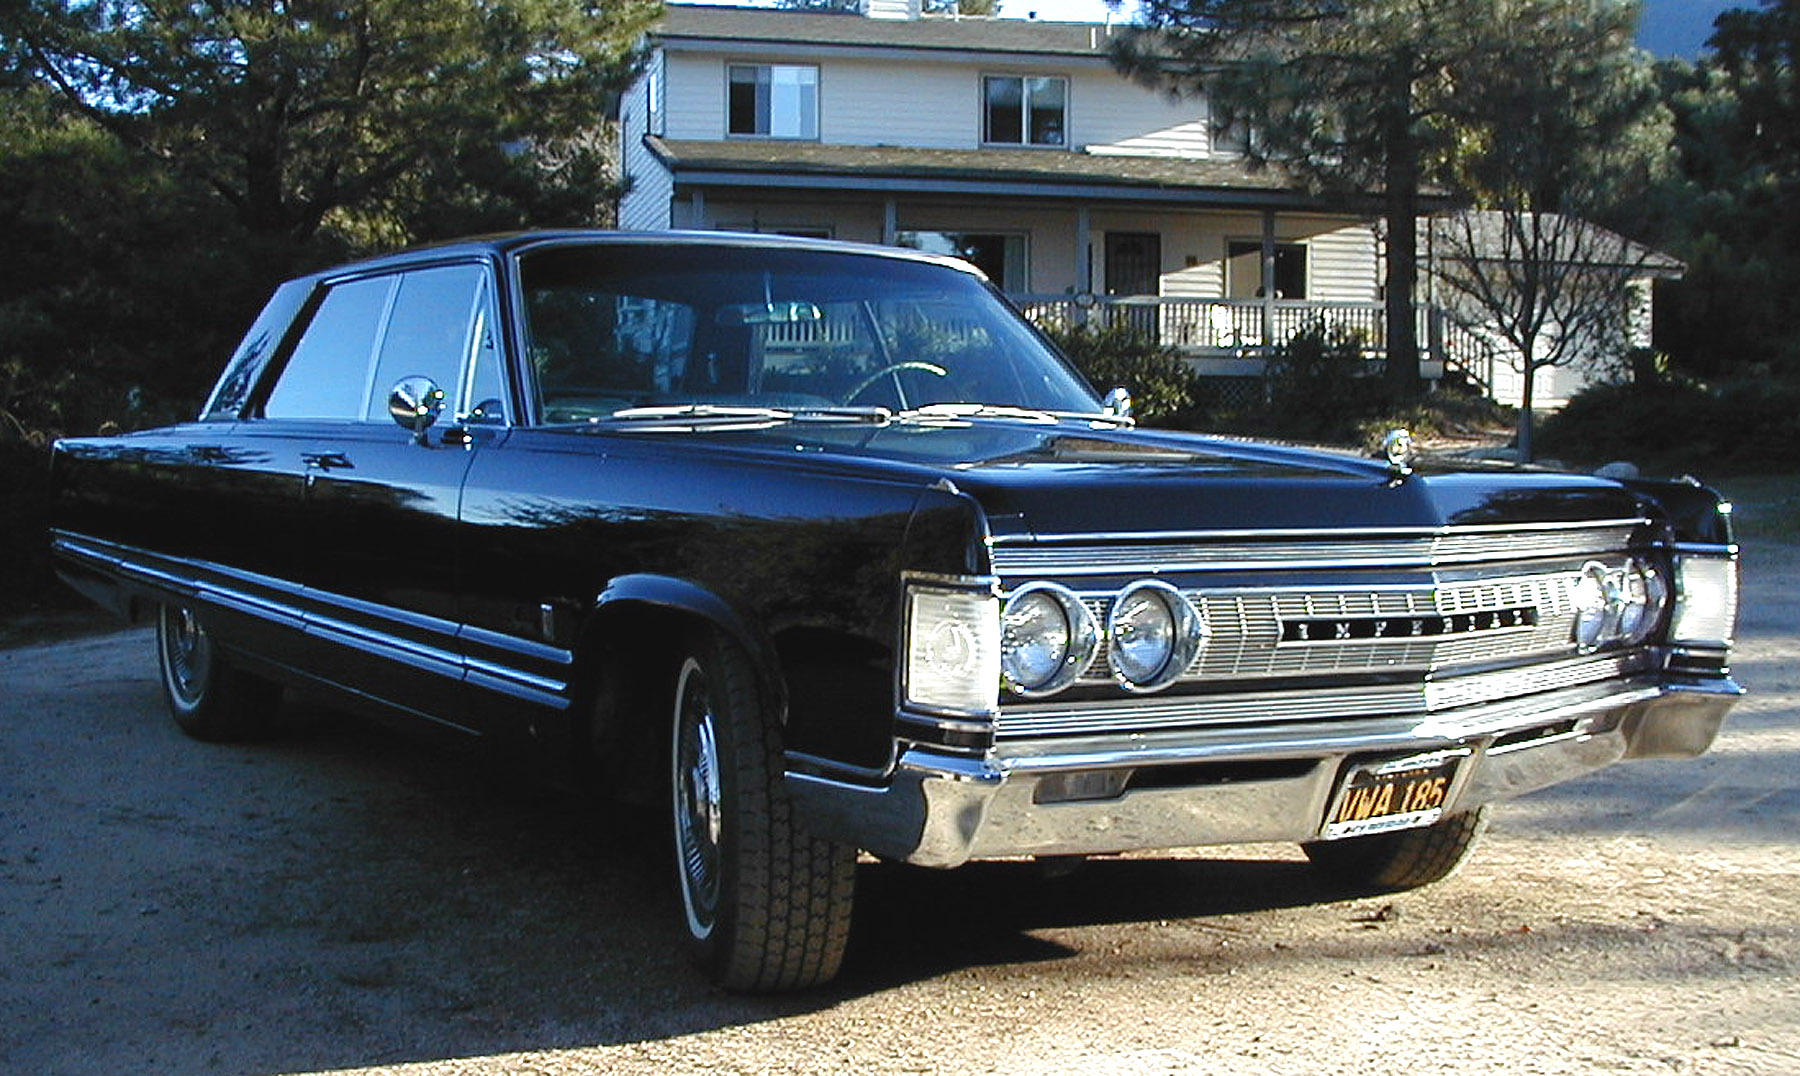
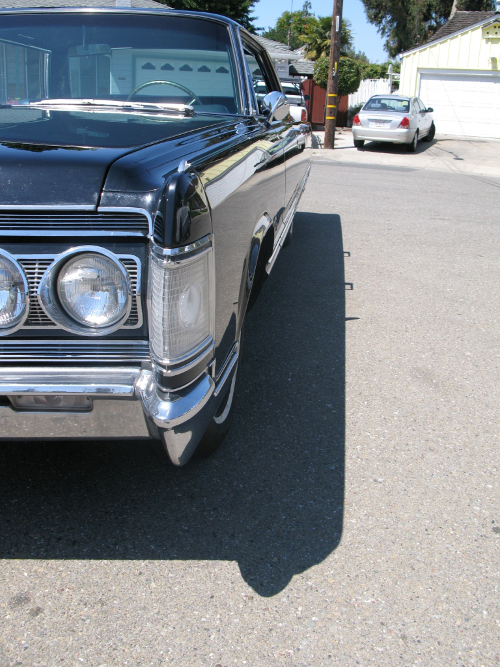
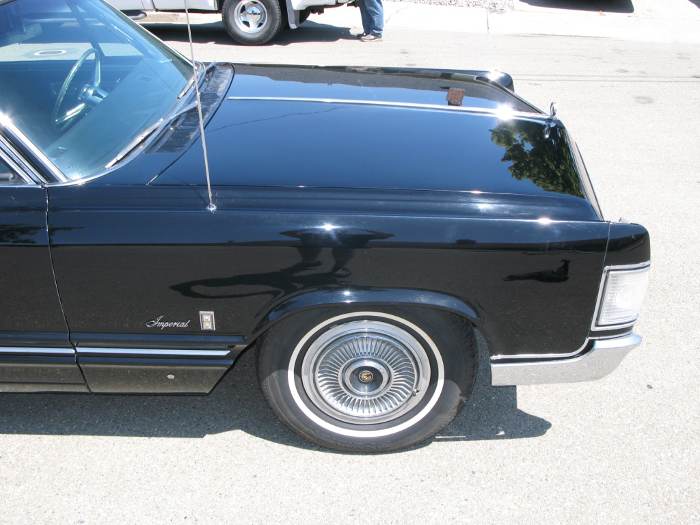
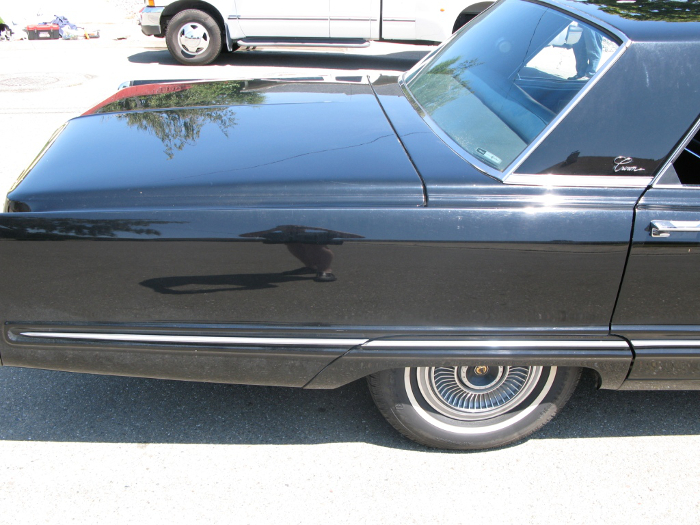
-- UPDATE 2014 --
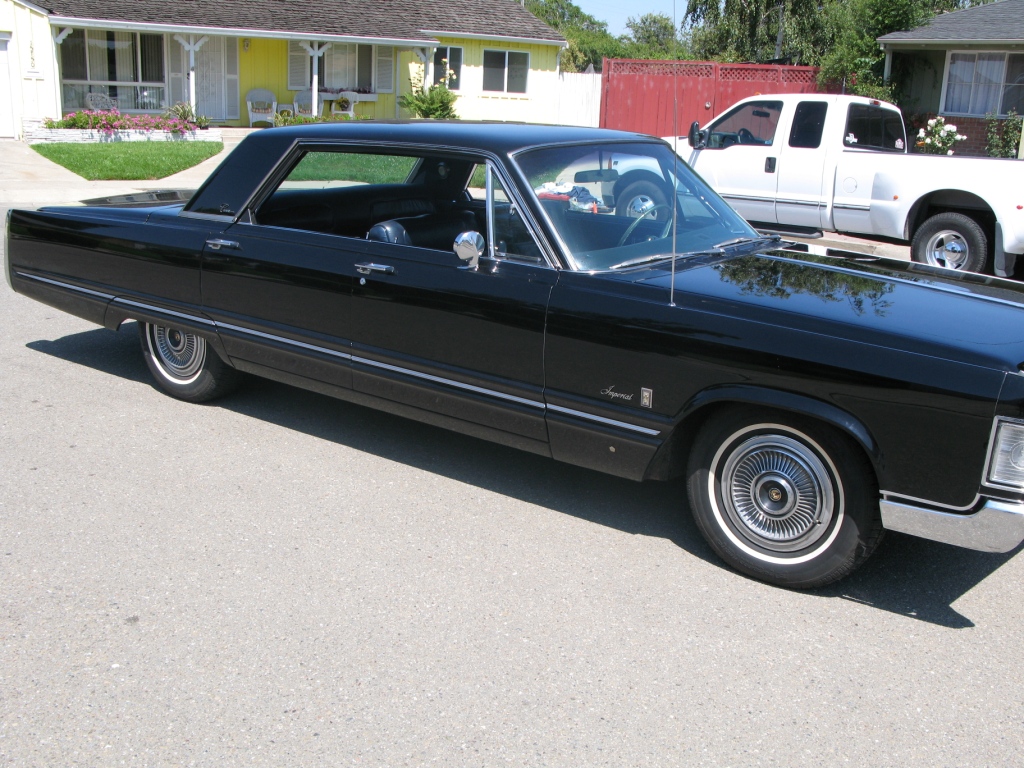
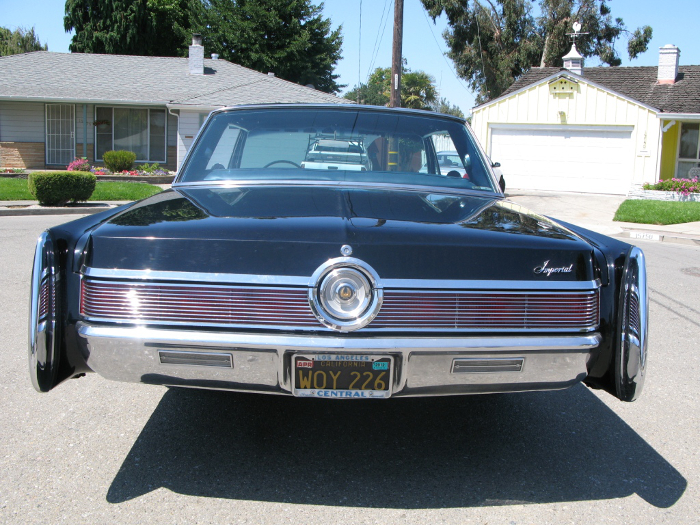
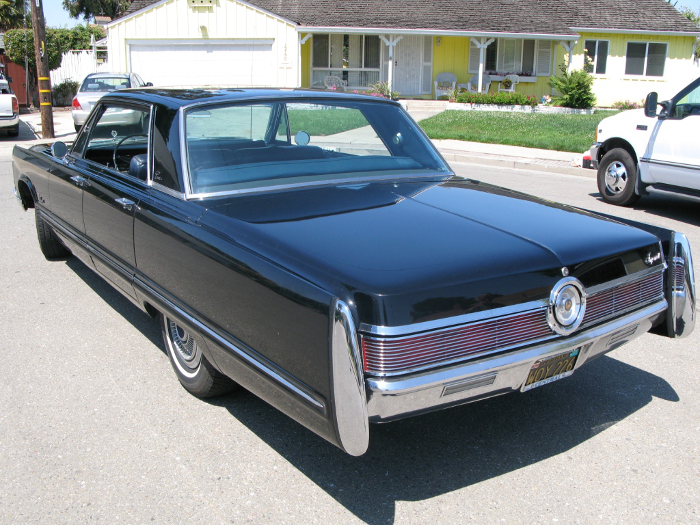
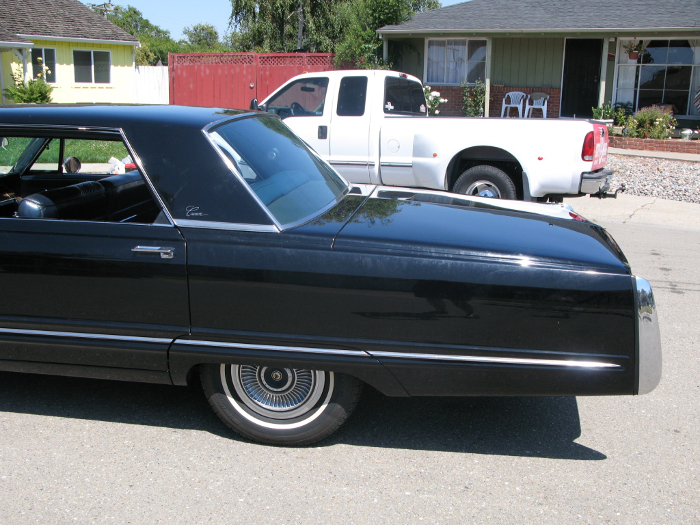
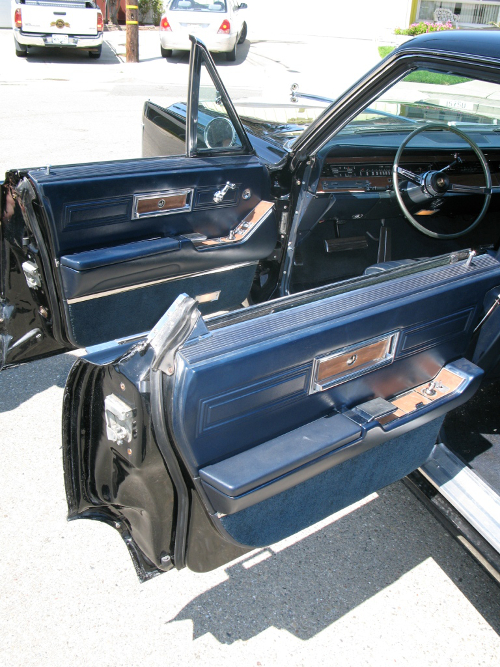
Dick Benjamin was a great Mentor and a great friend to many members of the Classic Car community. Sadly, he passed away in 2012 and one of his favorite Imperials was spotted on Ebay in 2013, the same one from the story above.
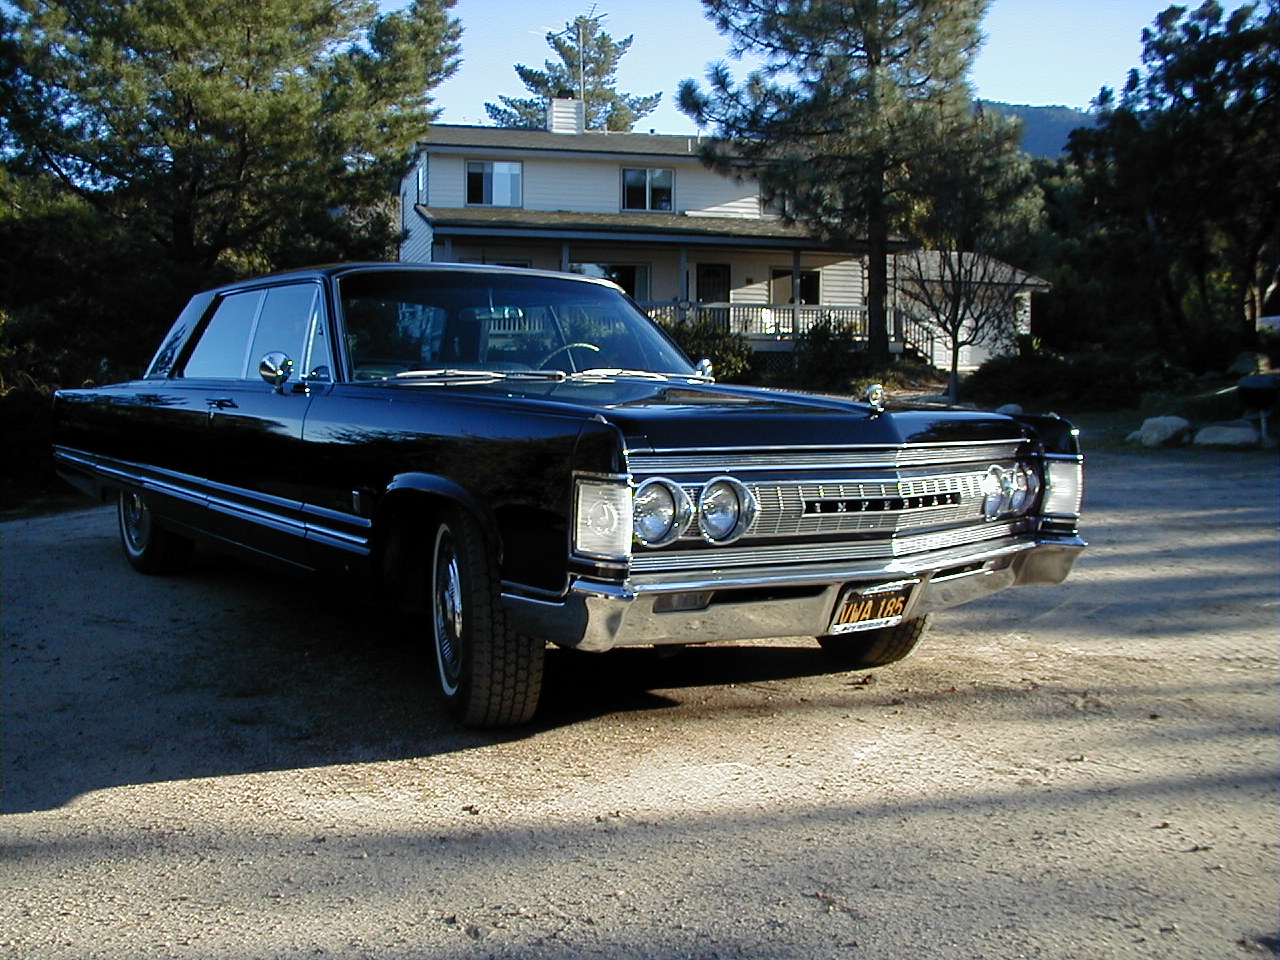
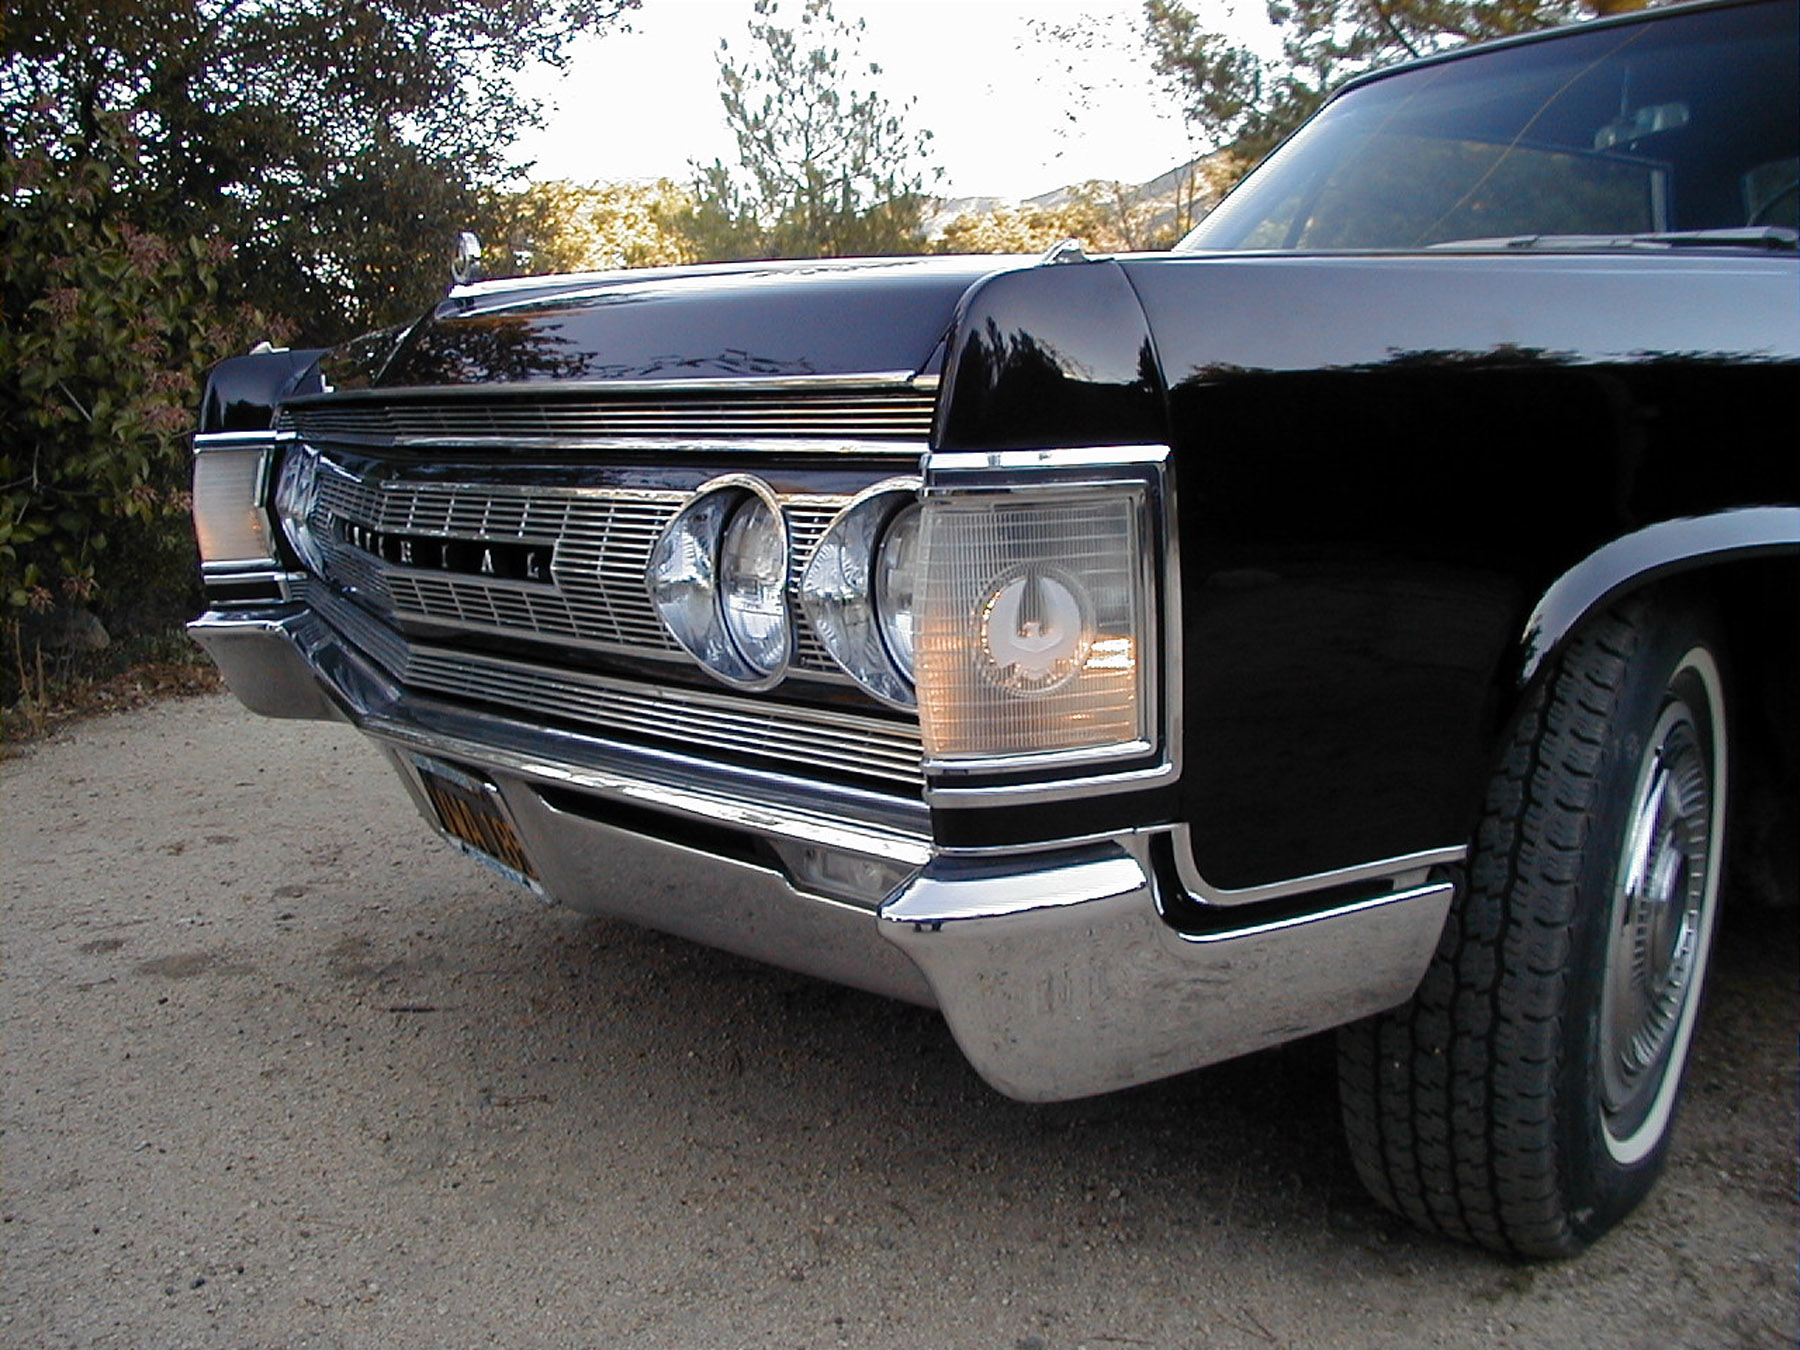
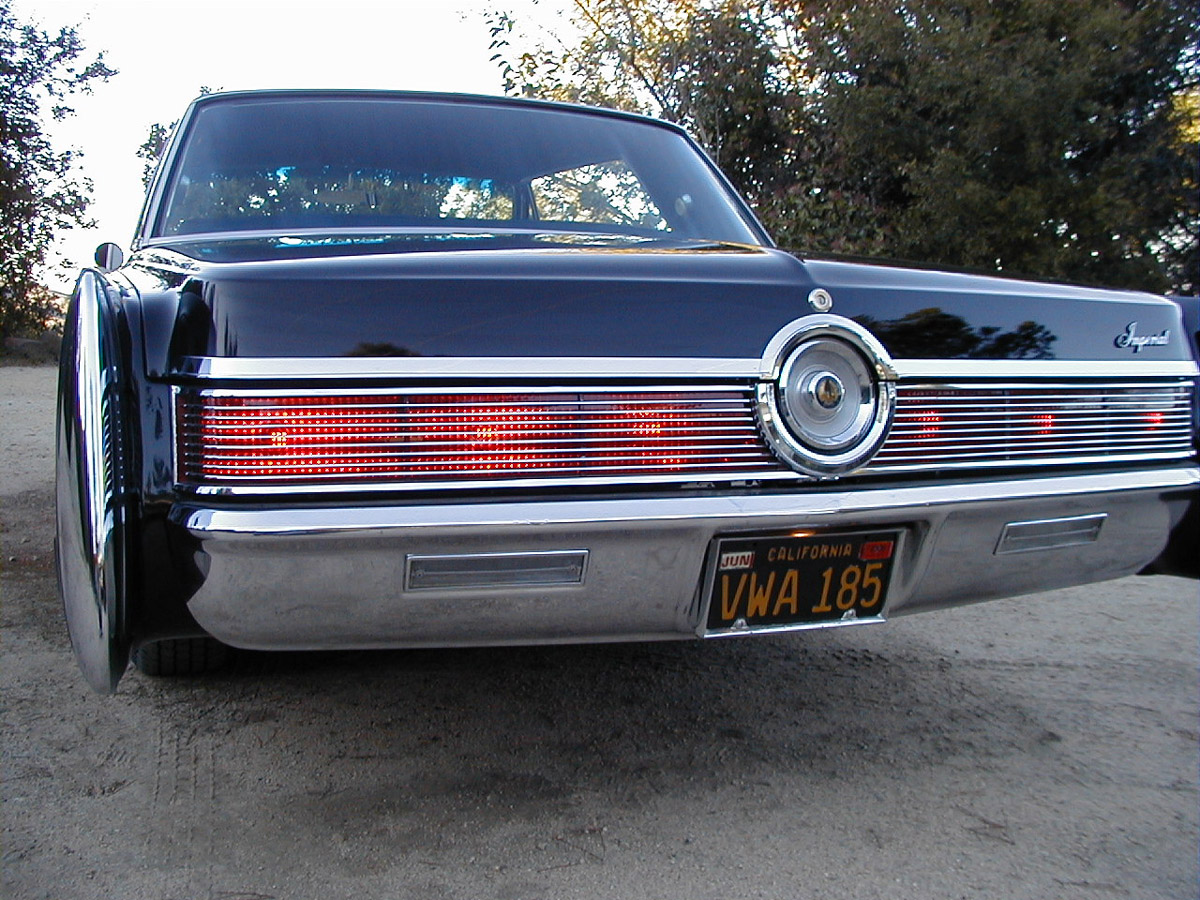
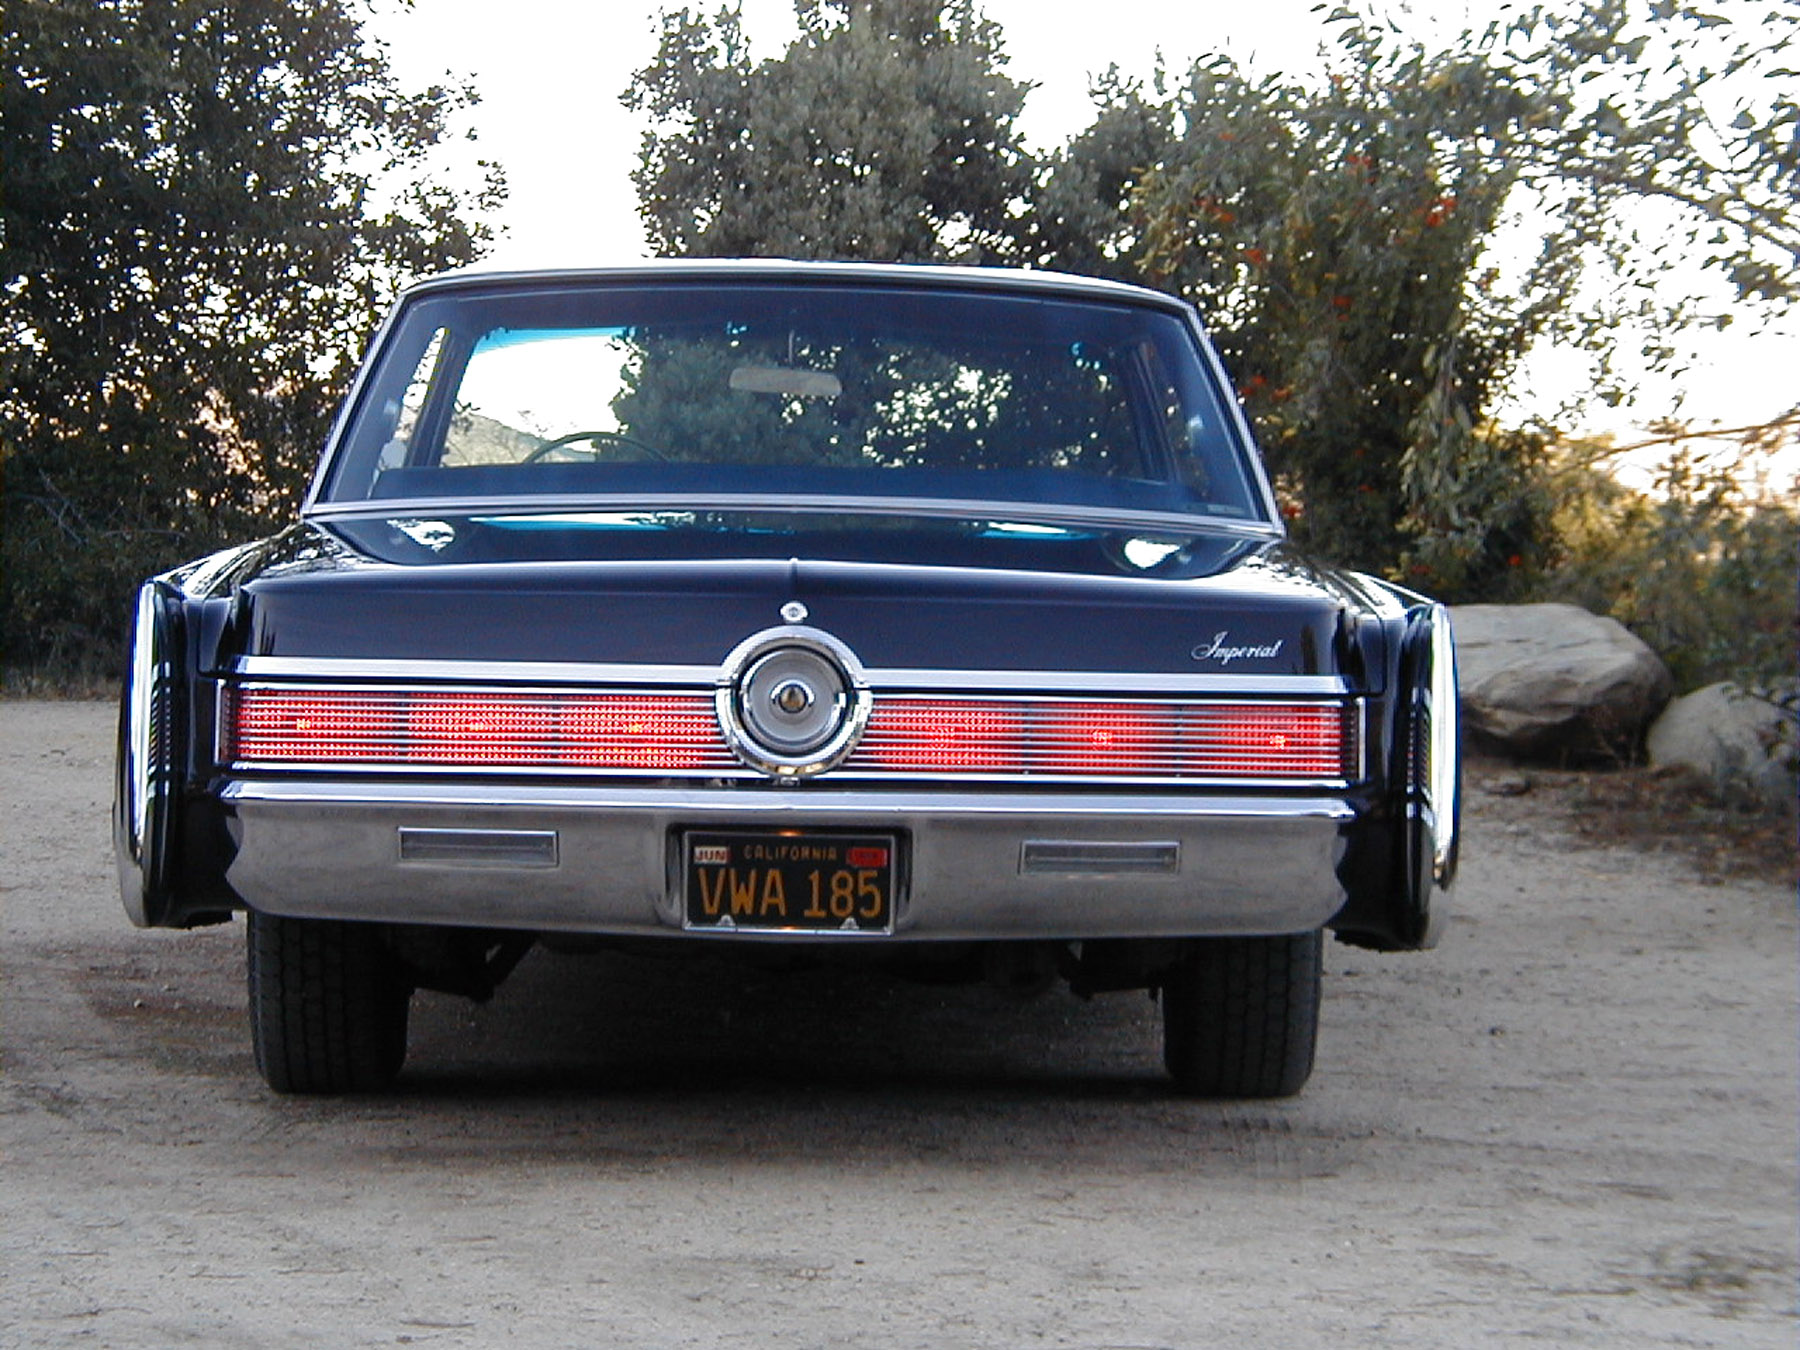
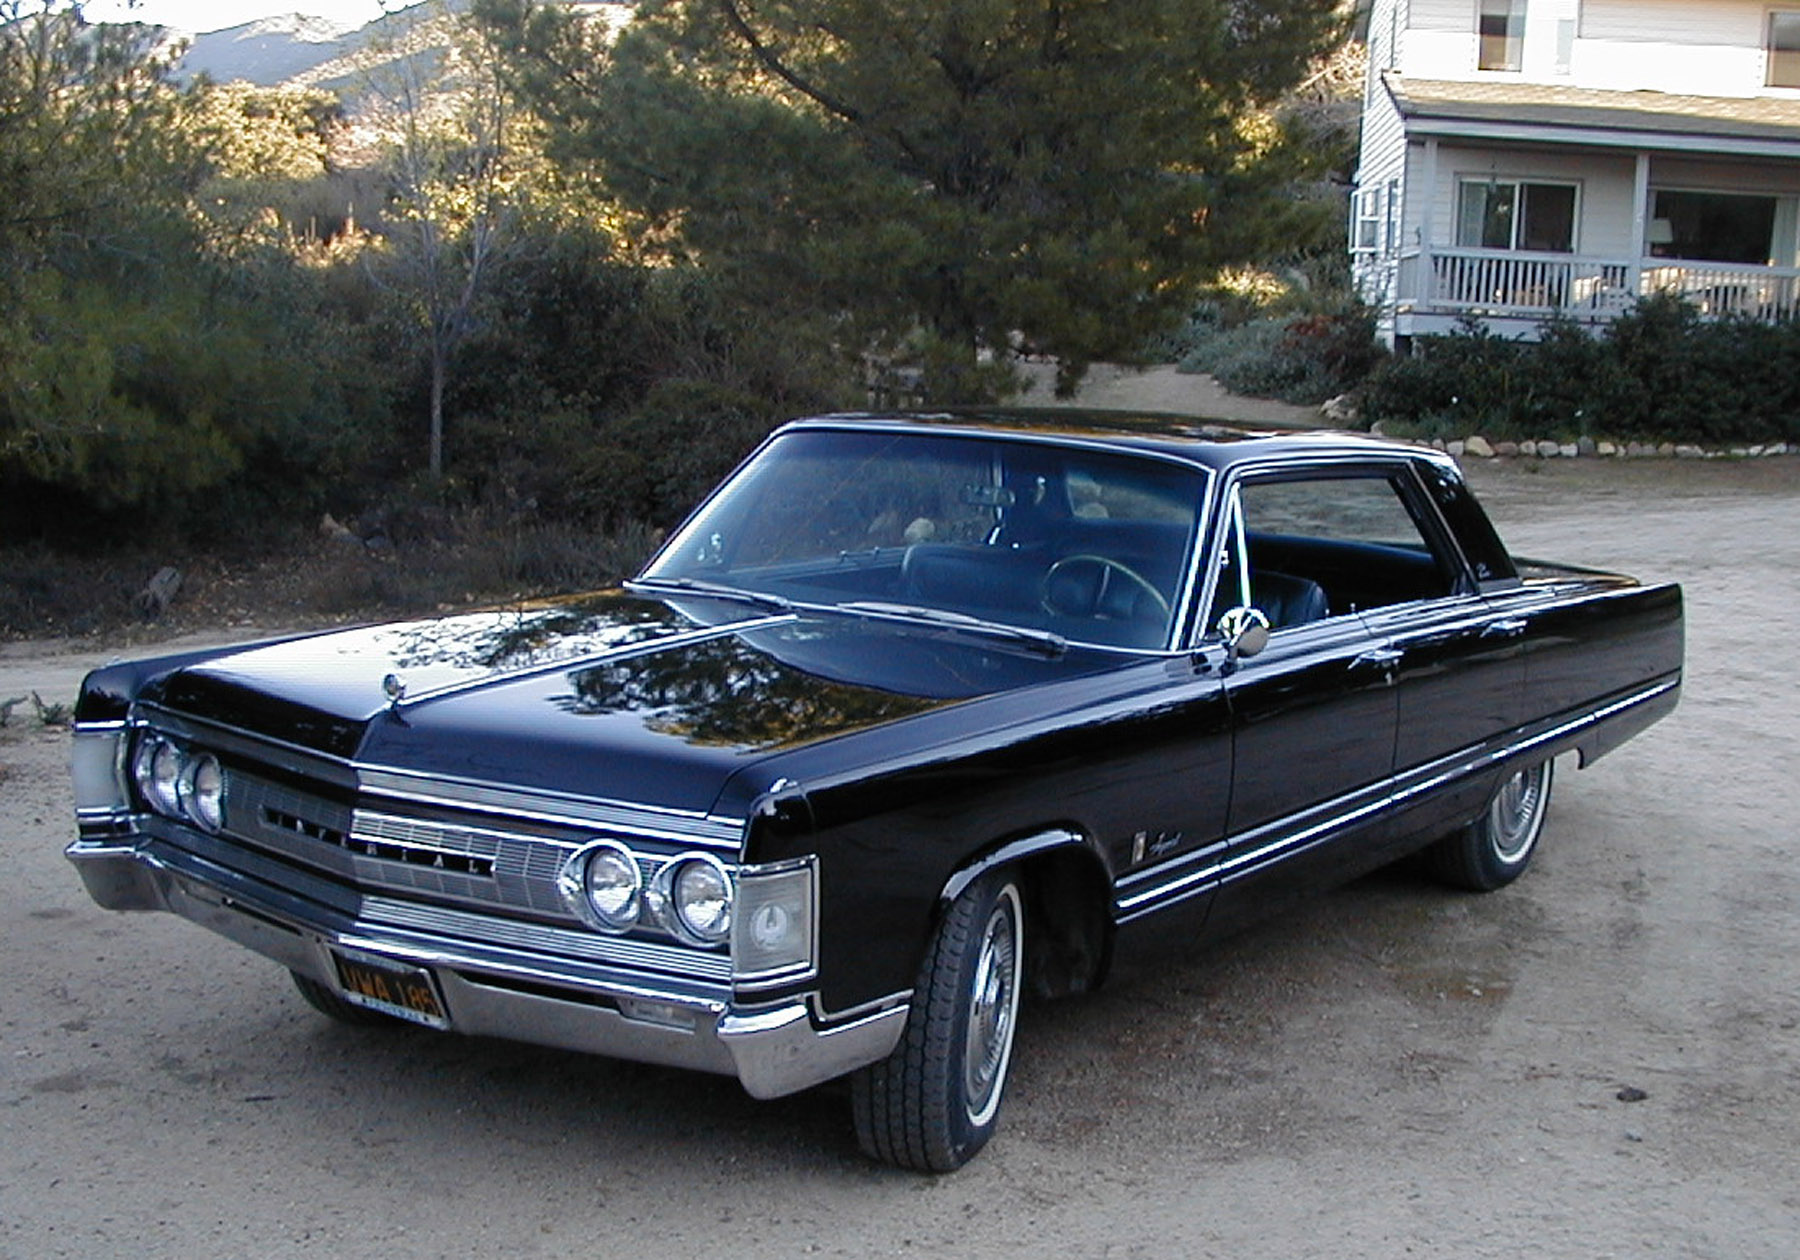
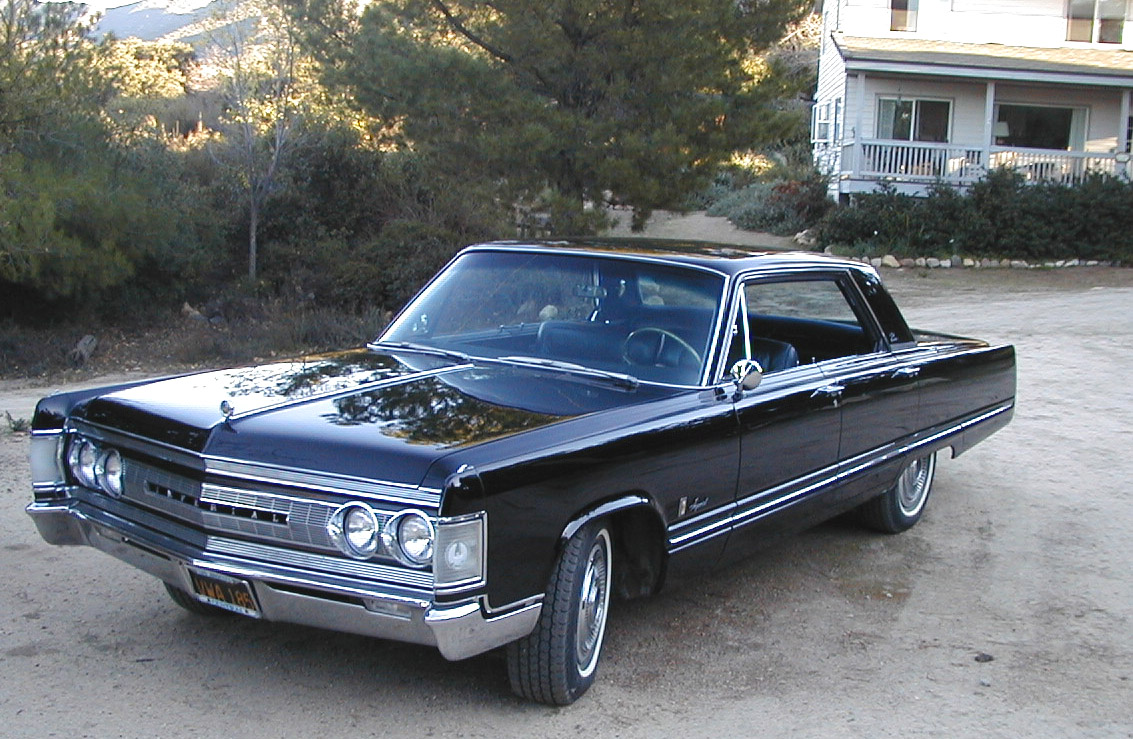
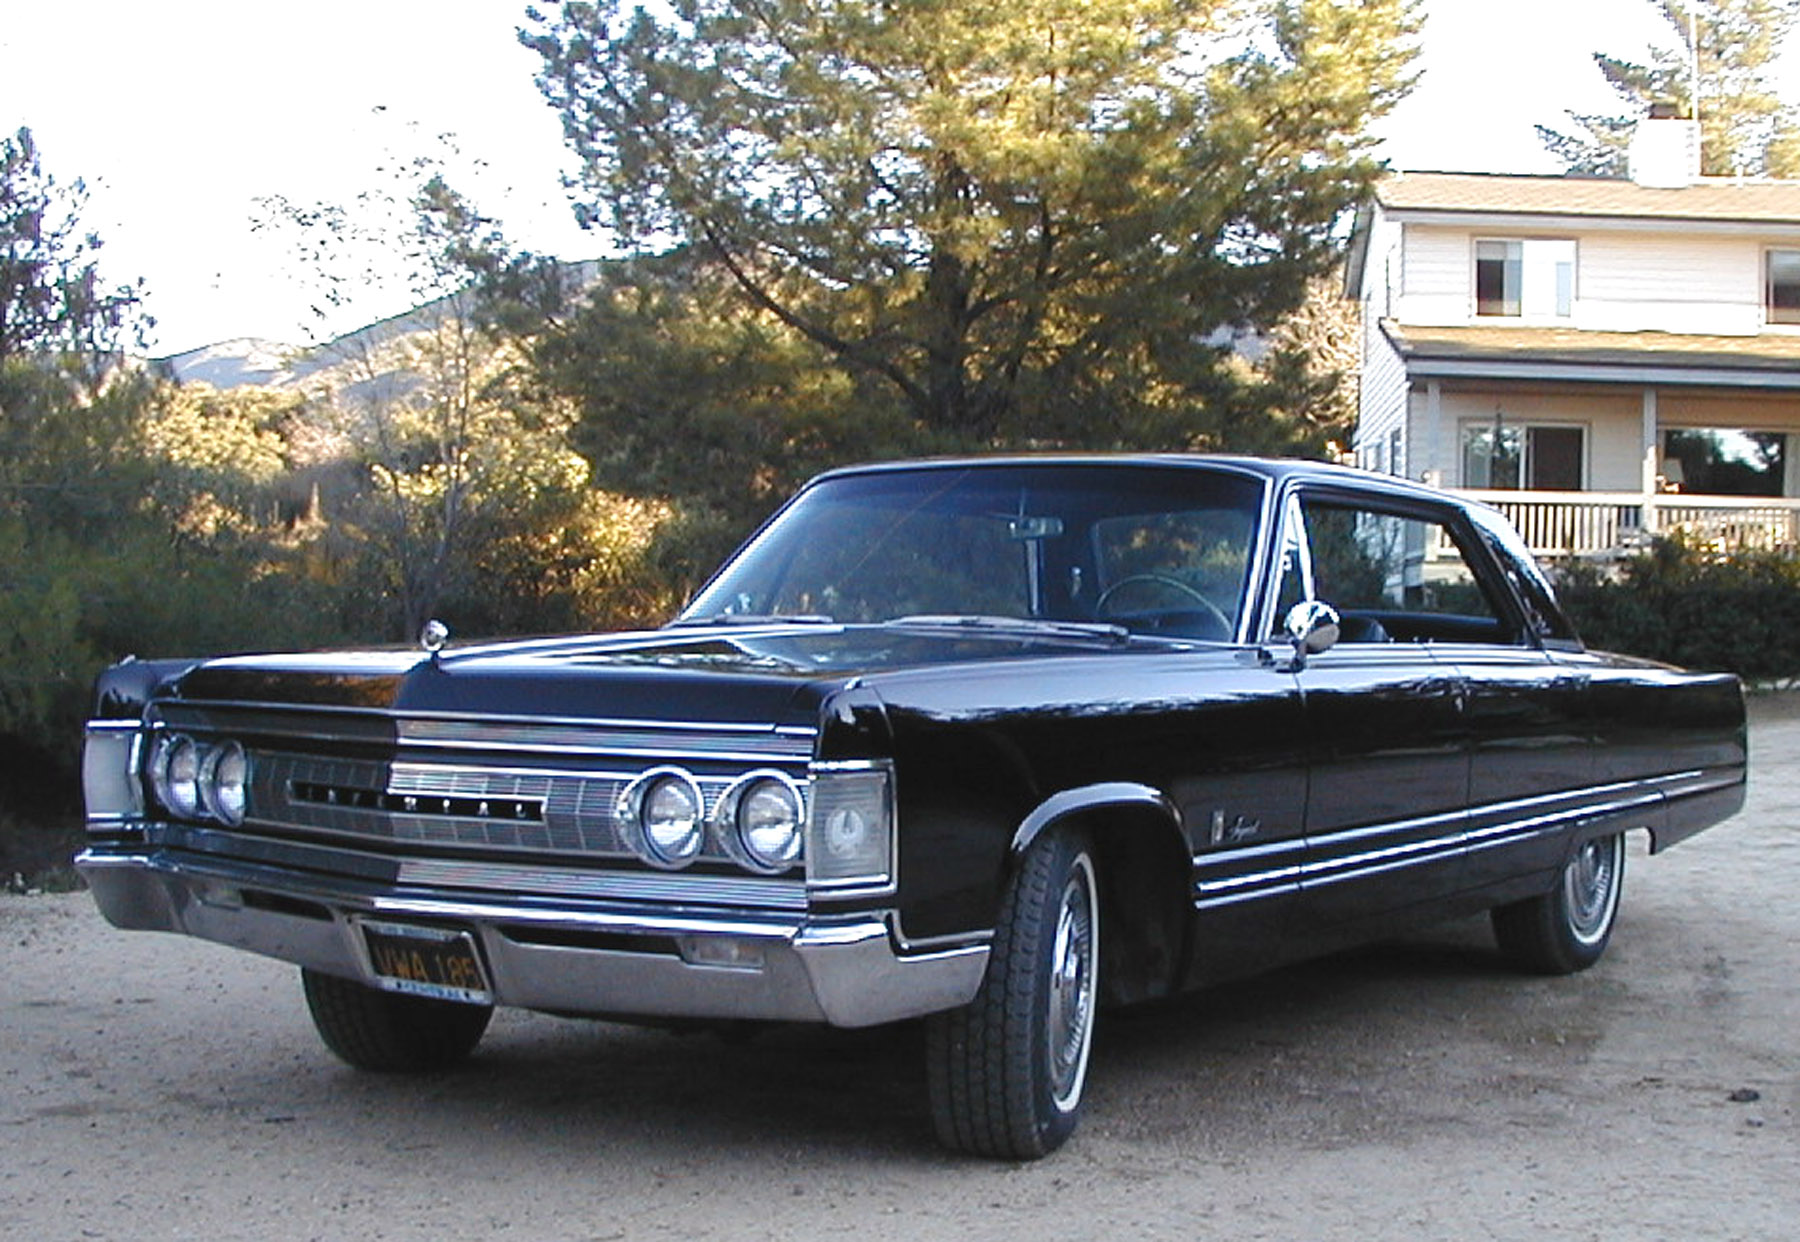
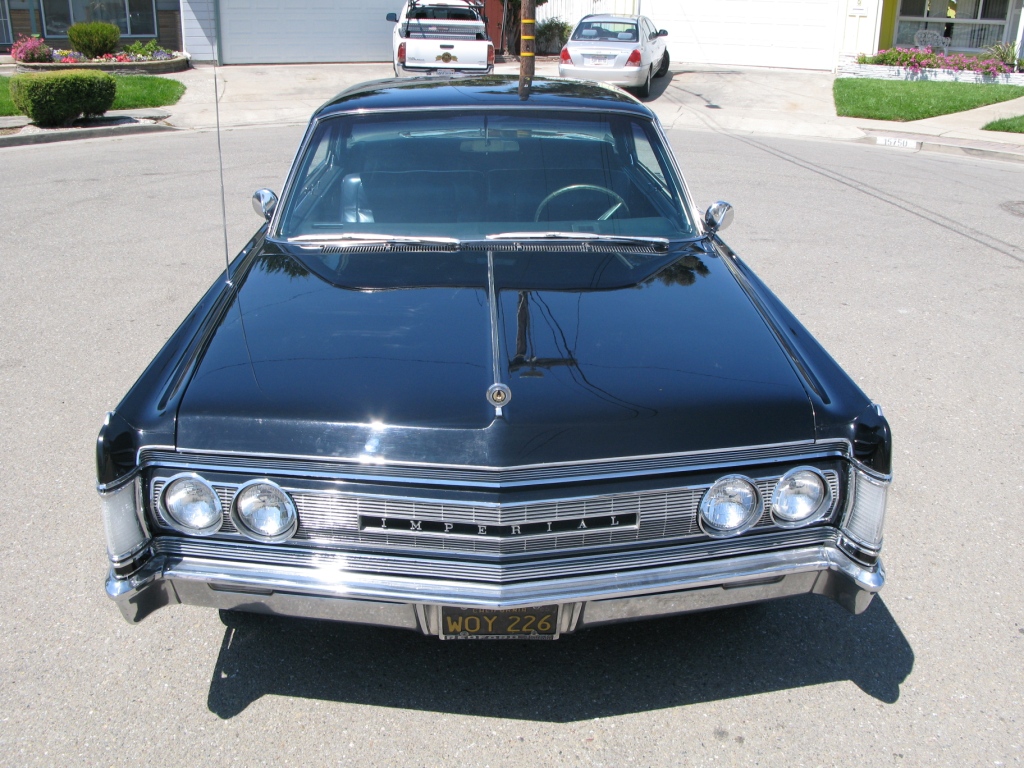
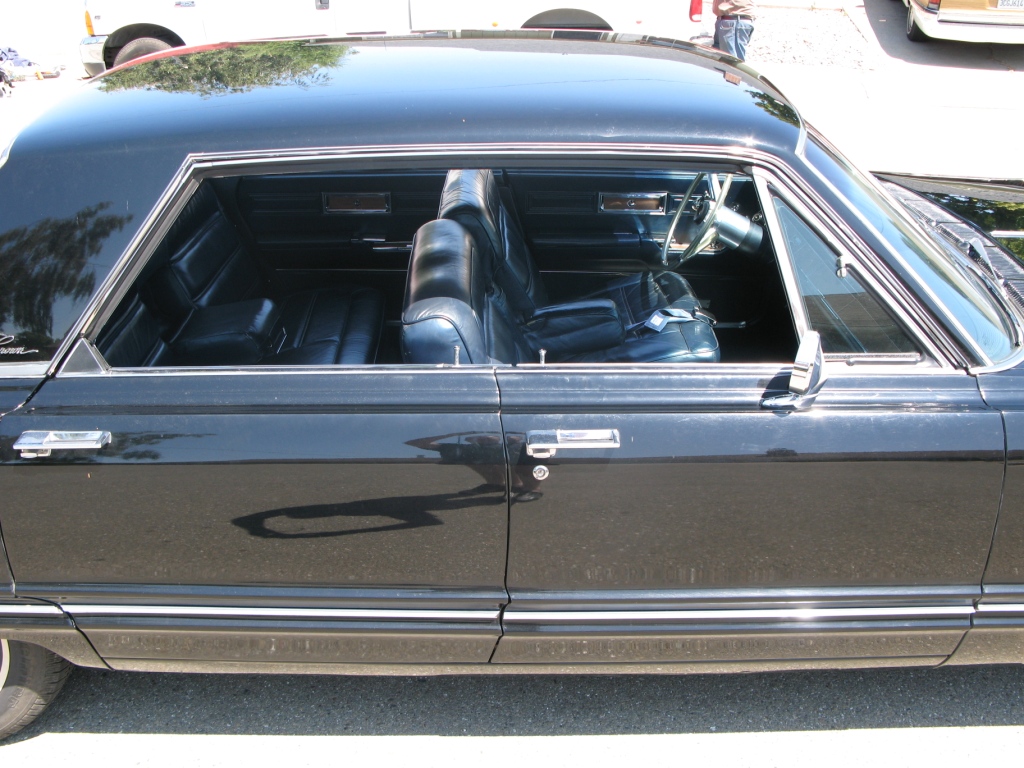
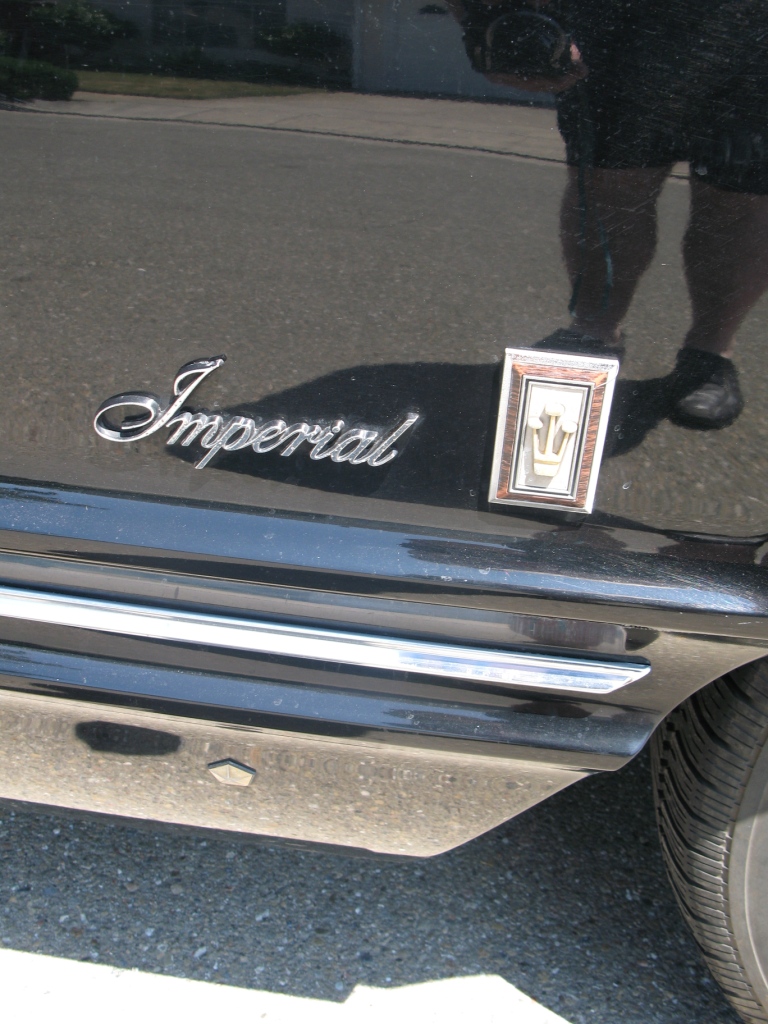
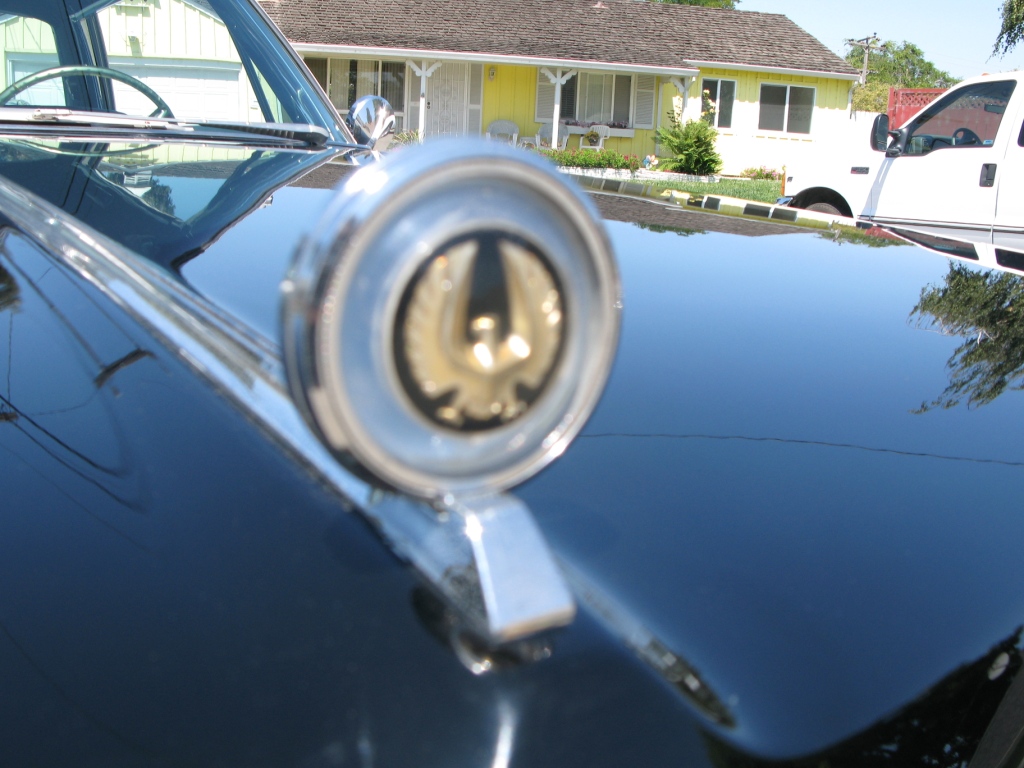
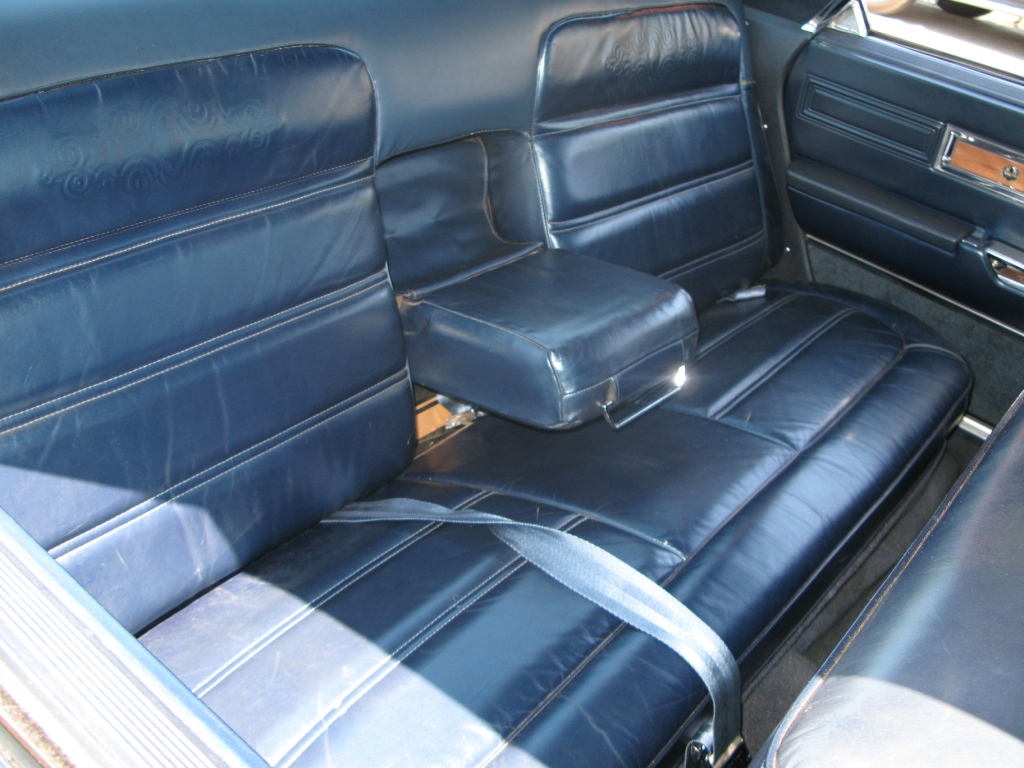
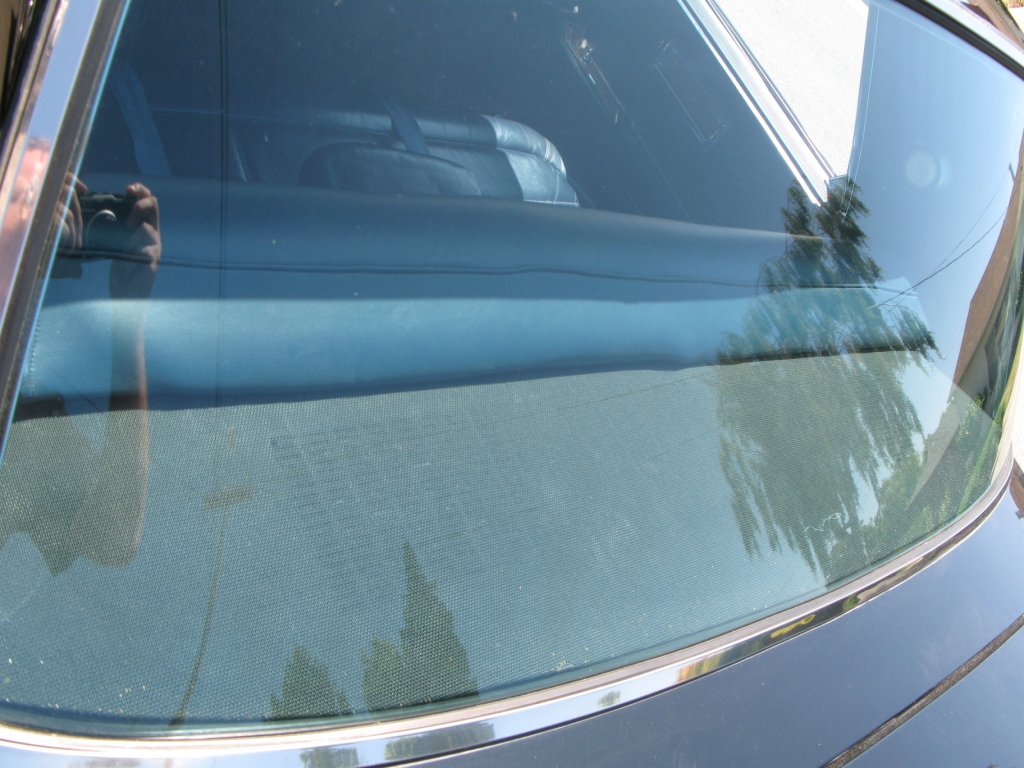
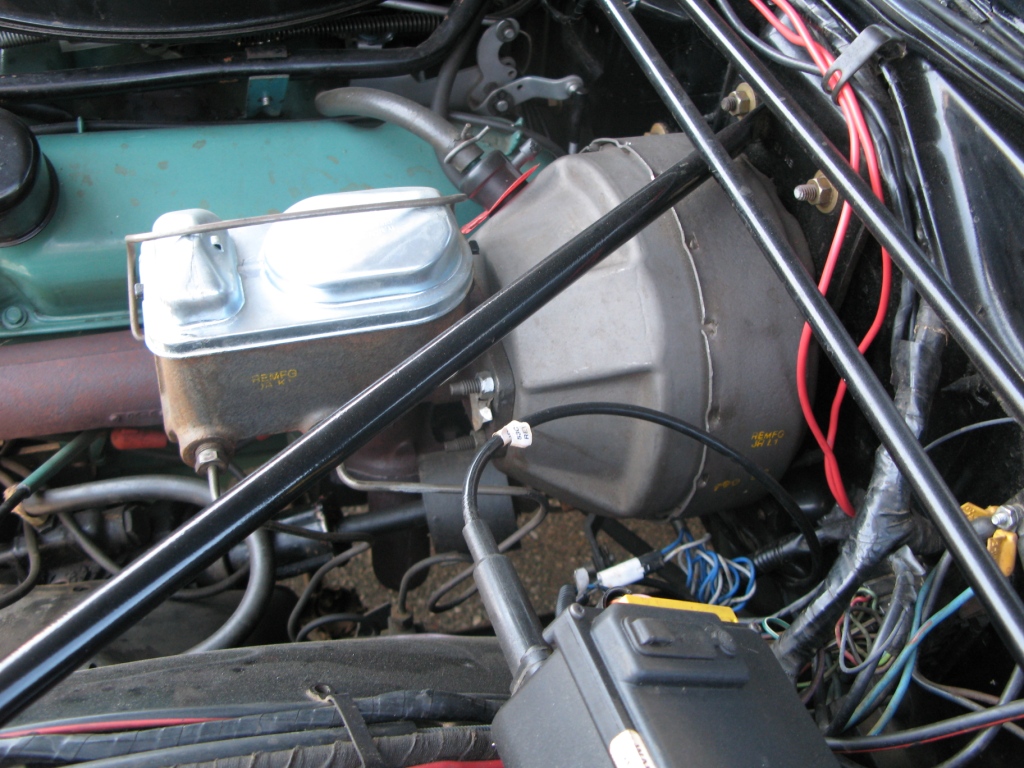
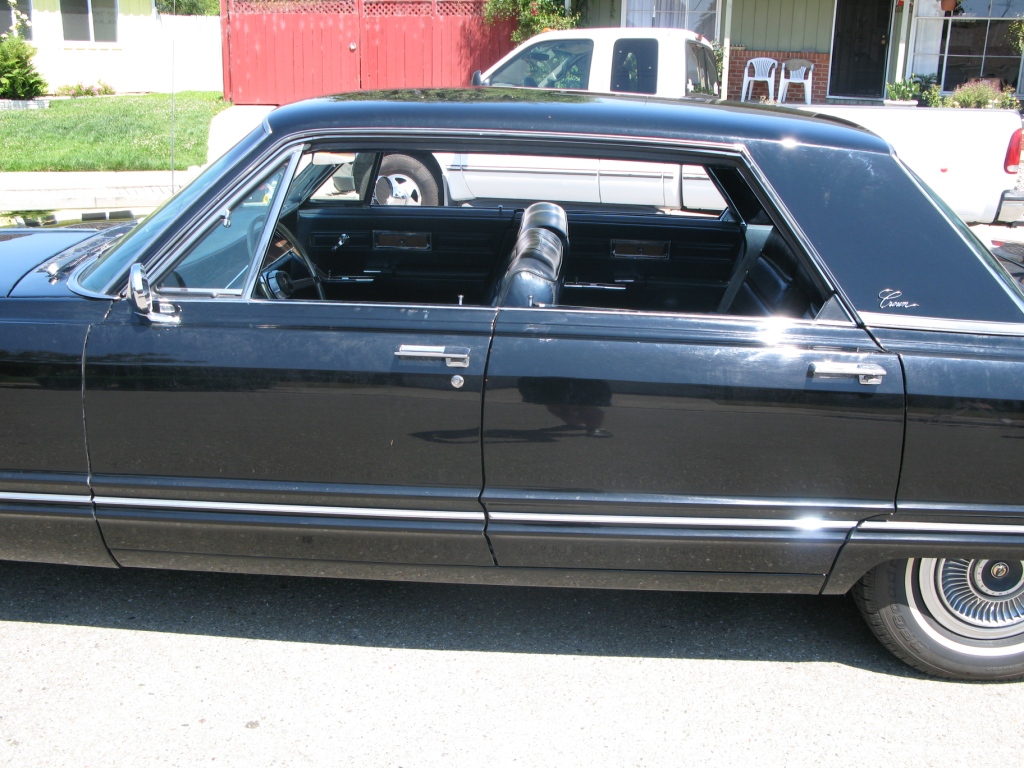
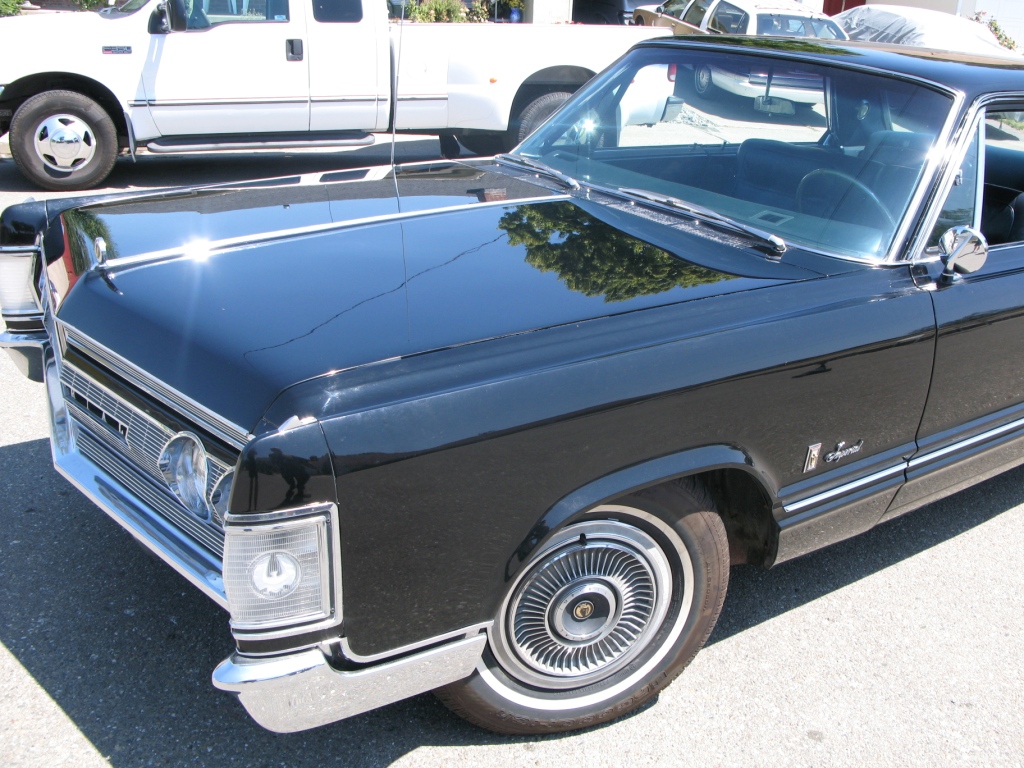
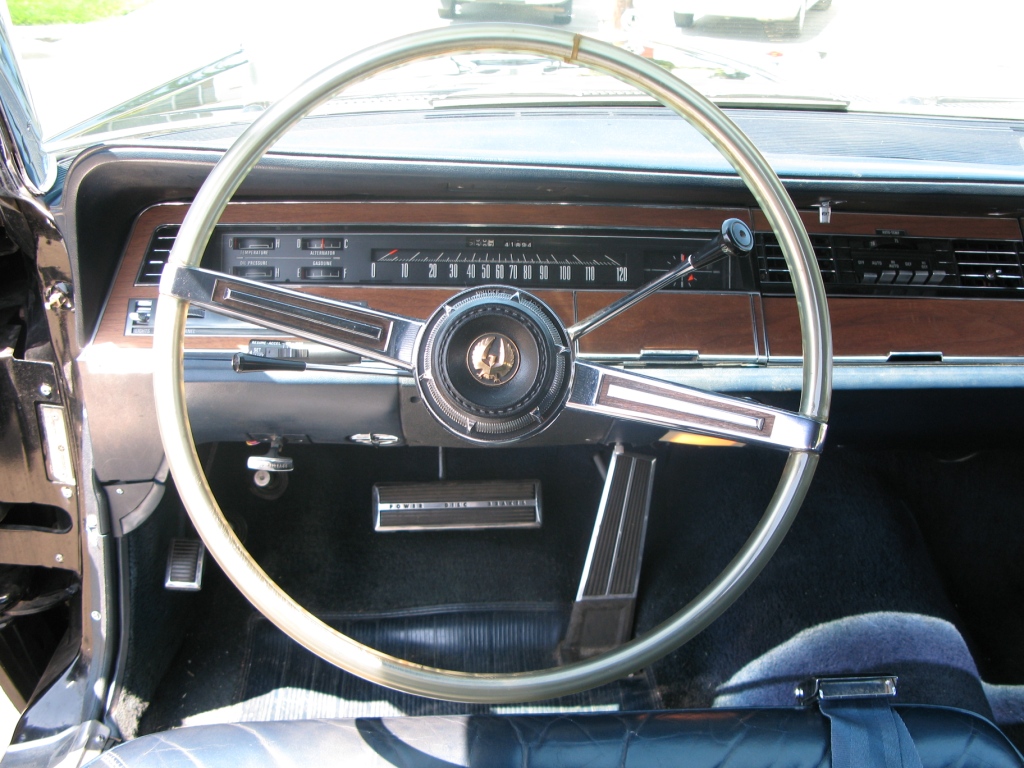
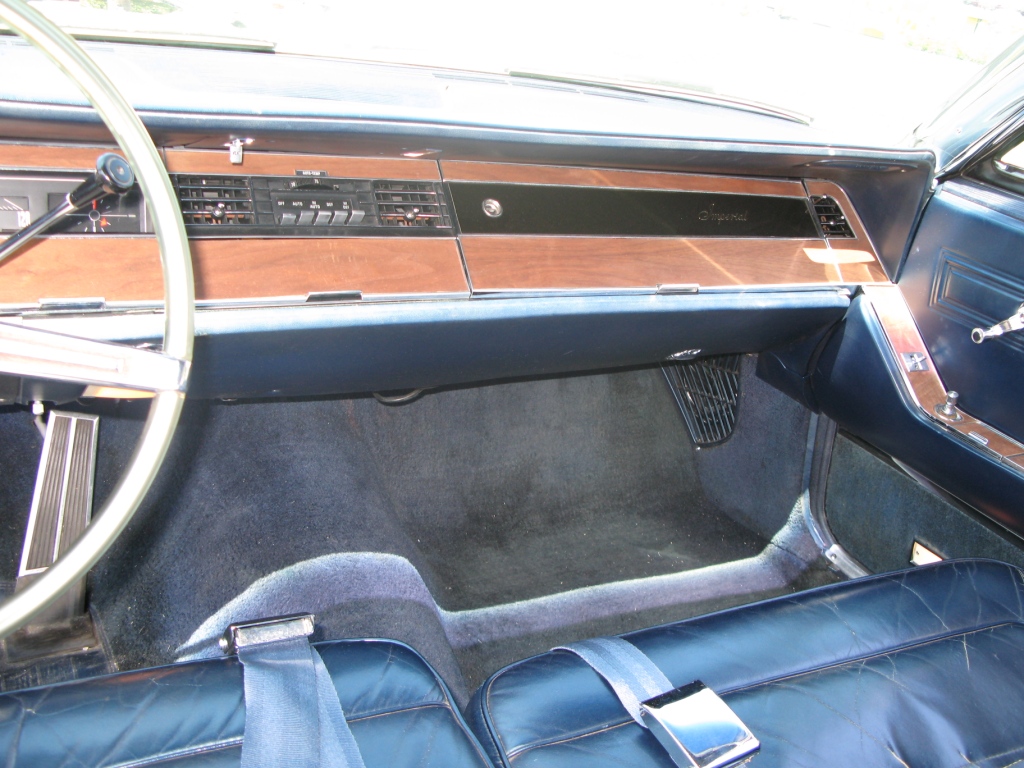
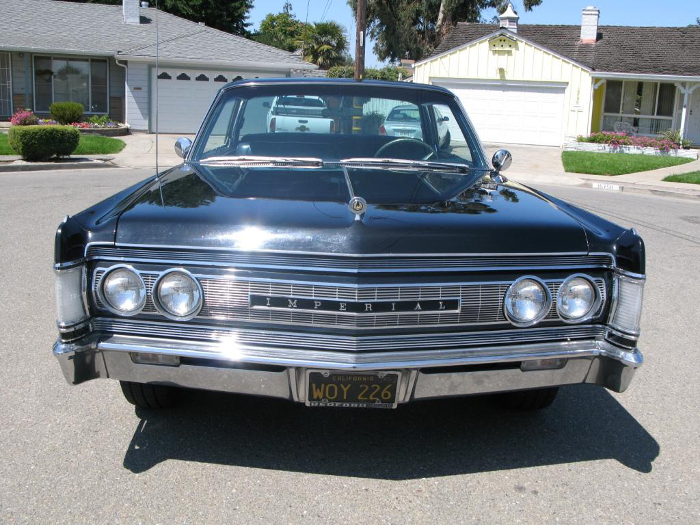
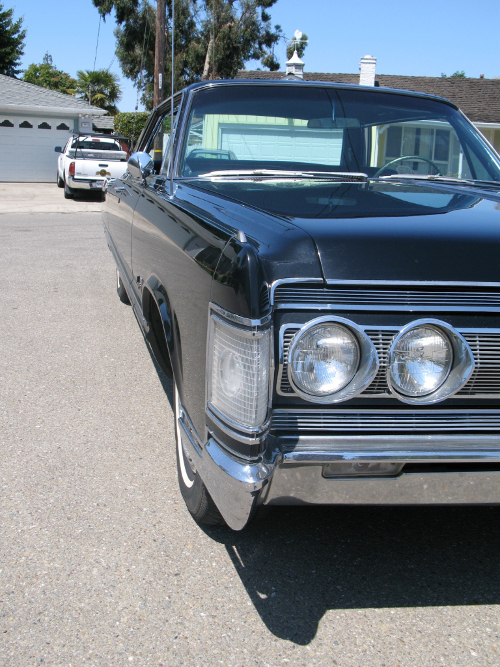
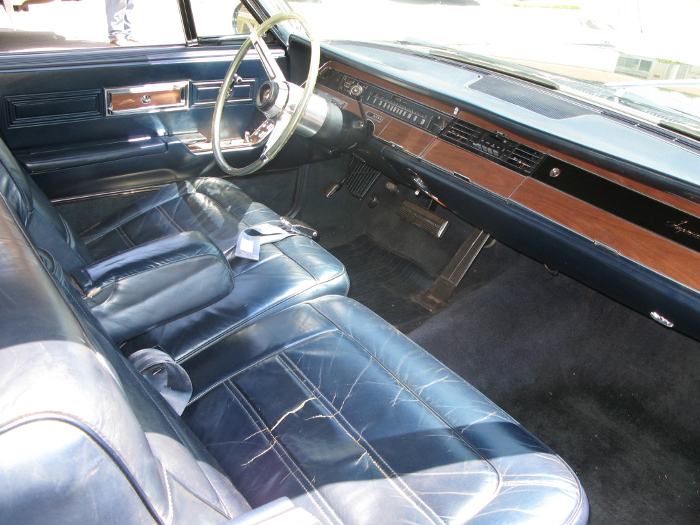
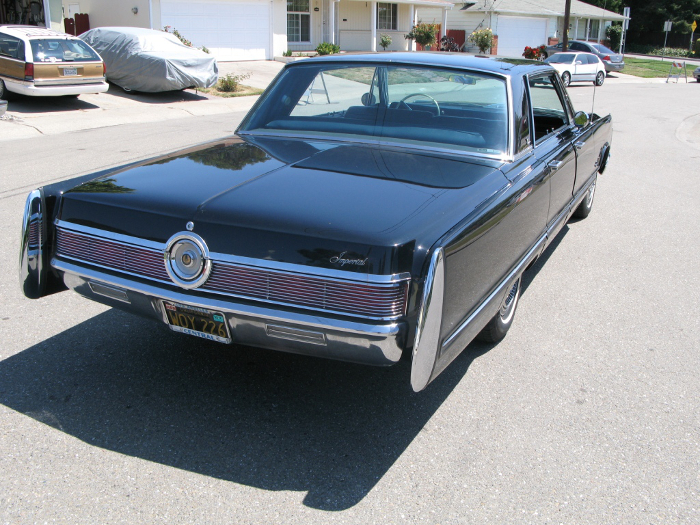
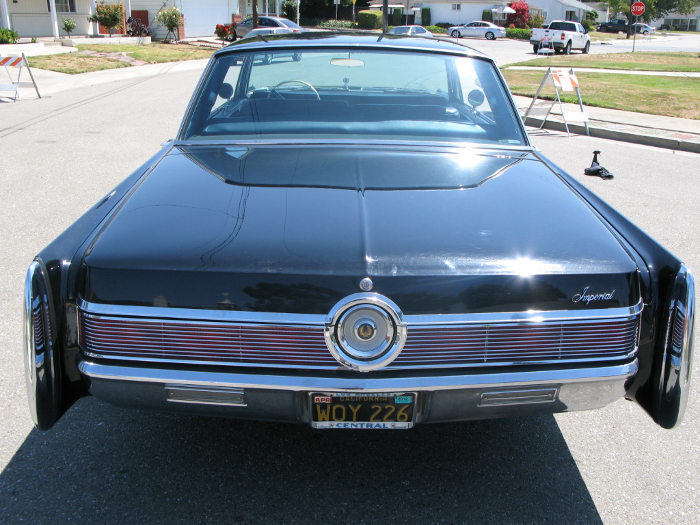
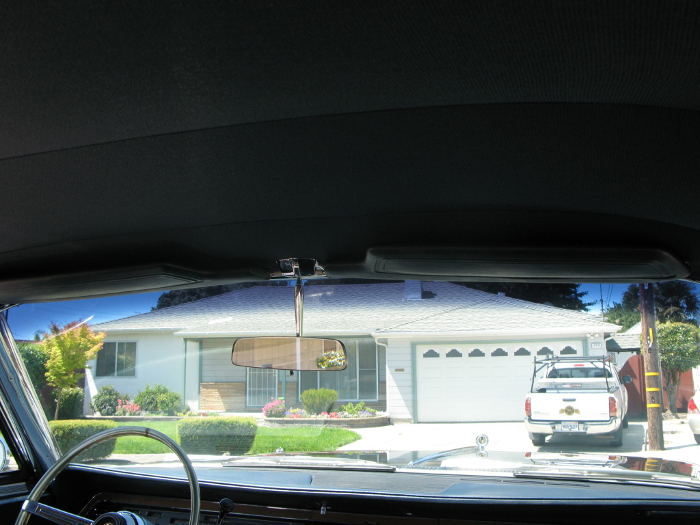
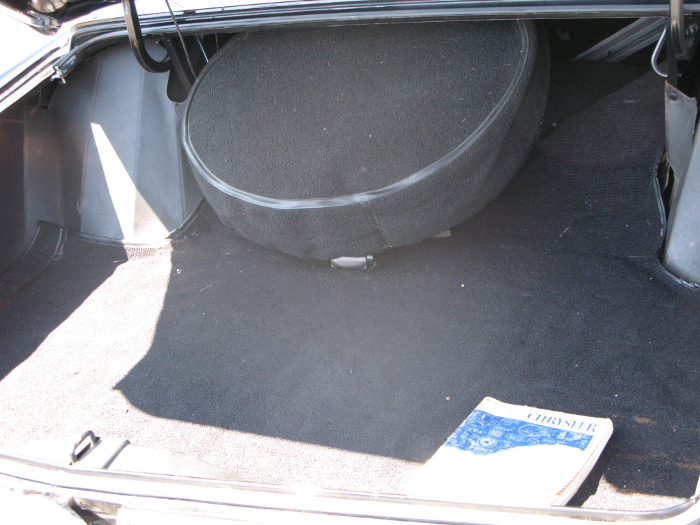
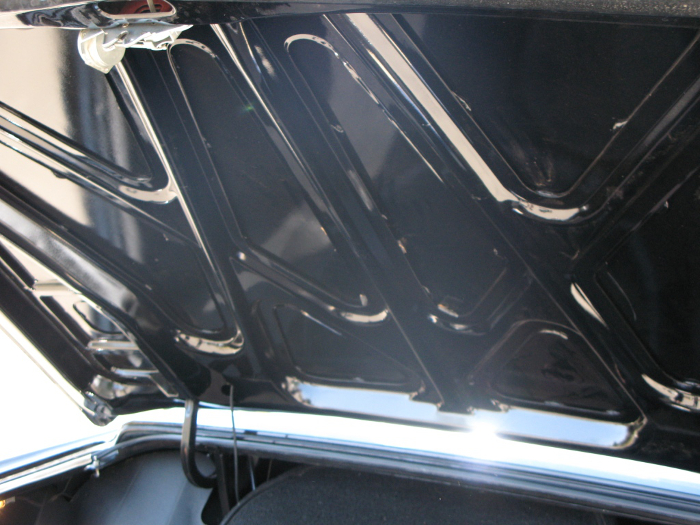
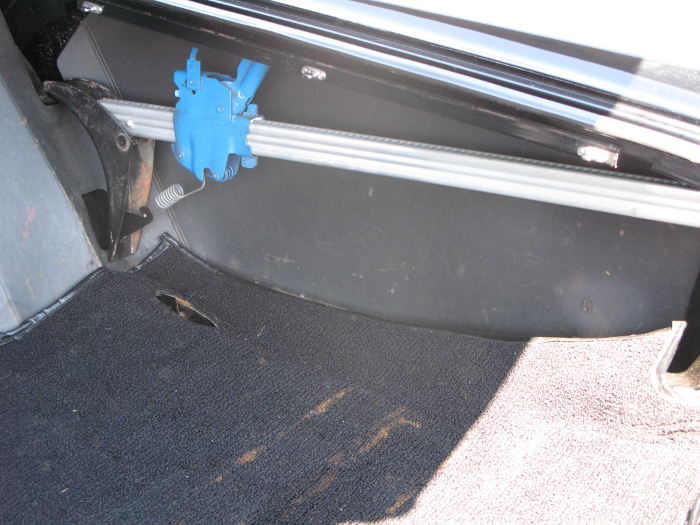
Here are MORE detailed "after" pictures of Dick's 1967 Imperial:


This page was last updated April 22, 2014. Send us your feedback, and come join the Imperial Mailing List / Online Imperial Club.