
Imperial Home Page -> Repair -> Body -> Paint & Body -> Part 1
Elijah's comments are in italics. Kerry's are normal.
Elijah arrived Wednesday evening. We put the car on the lift and looked things over. I had seen the car at the Anniston gathering but not given it a careful look. Immediately saw some pretty serious work to be done.
Thursday morning -- About 7am we got started. It was chilly and Elijah and I both put on coveralls. Step 1 is always to wash and scrub the car with soapy water. Any dirt left will be driven into the paint by sanding and cause problems later on.
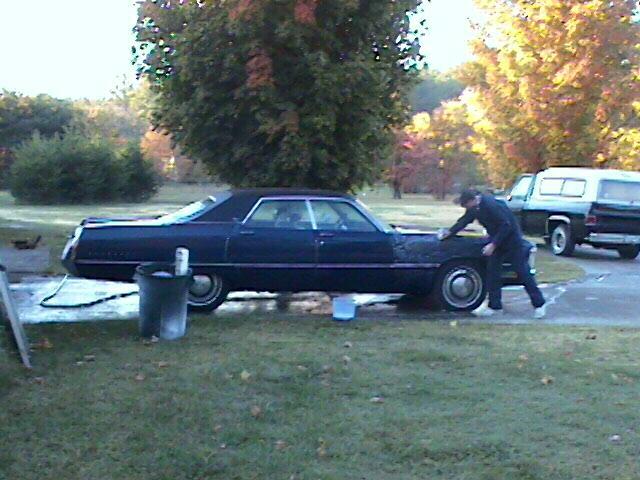
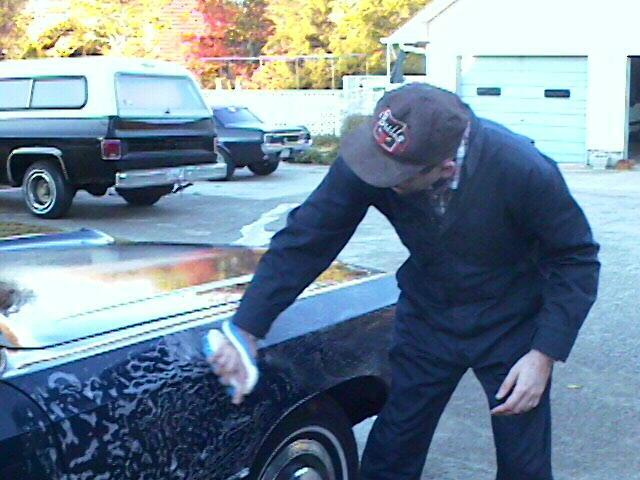
During my 7 hour drive from Milledgeville, GA, to Huntsville, AL, I managed to cut a considerable swath through the bug population of those two states. Washing the Imperial was a high priority -- and a lot of work! I didn't realize how hard it was to wash this car until after our project was done. The explanation for this statement will become clear later on in our saga.
While waiting for the car to dry, Elijah got in the trunk to pull some of the remaining trim. On a 71, the lower roof molding is held on with bolts through the body while my 73 used the pins and plastic clips. From a bodywork perspective, I prefer the holes because not only do the pins make sanding much more difficult but they will mess your hands up when you ram your fingers into them while sanding.
How many bodies can fit in the trunk of an Imperial? A BUNCH! But in this shot, it's just my 6'4" frame, trying to remove all that roofline trim. The nuts that hold it on are a bear to get to.
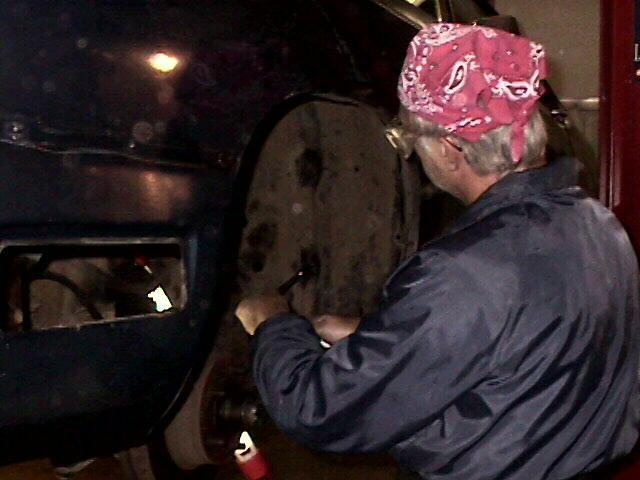
Because both fenders had creases and dents behind the front bumper, it was necessary to pull the inner fender liner. Elijah's 71 was easier than my 73 for some reason. We only broke 1 bolt. Removing the front tires makes things much simpler also and gives more room to work while keeping the tires clean.
Before I knew it, Kerry was banging away at the front fender, and soon had it close to its original shape. The damage to this fender occurred about ten years ago when I accidentally swiped my Grandmother's '78 New Yorker Brougham. Another memory, but one I'll definitely be glad to see disappear beneath Kerry's excellent bodywork!
Here is the car on the lift. The blue plastic tarps are something used to close off the lift room. A old AC unit does a reasonable job cooling one room but won't phase the whole shop. Similarly a torpedo type propane heater will heat up one room much quicker. When it gets too warm, the tarps are open. Most work is done in the lift room. This lift is an above ground "Rotary" brand that I've had for several years. It is not necessary to doing the work but sure makes it easier on my old back.

Having a lift is definitely a blessing for this sort of work. I've never had access to a lift before when working on one of my cars, but I sure did appreciate the advantages of being able to get to various parts of the car without bending, squatting, or lying on the ground.
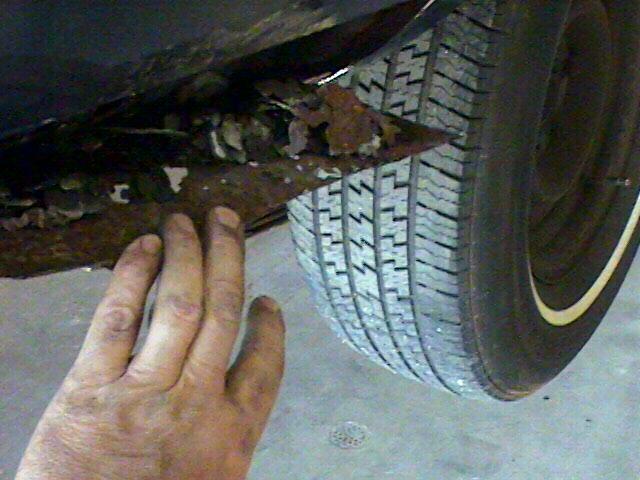
Now it is time to get to work. The following shots show the cancer we have to repair. Both rear quarters and behind the front wheel well had serious rot.
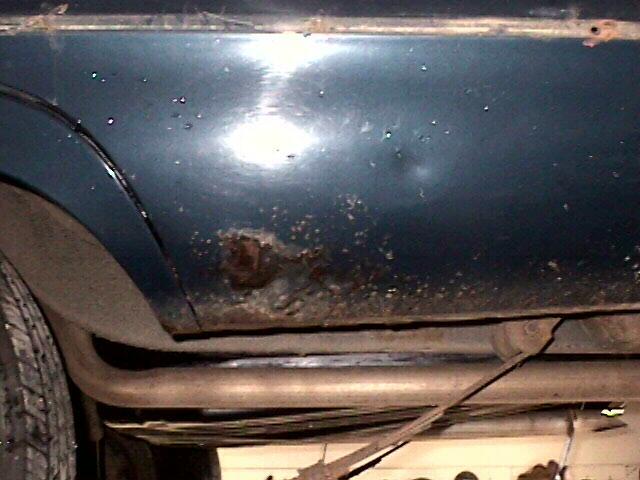
The most serious rust and rot on the car was in the rear quarter panels, which seems to be pretty common for these cars. The rust was already in place when I purchased the car, but had definitely progressed considerably over the past twelve years. In fact, I didn't realize just how MUCH rust was in there until Kerry went to work. We probably got a good couple of pounds of scale and crud out of these quarters. We also found a socket I had accidentally dropped down in one of those crevices about six or seven years ago -- a nice surprise!
Pulling the rear bumper is not too difficult but is a two person job although if you are willing to sacrifice your back, it can be done by one. I don't recommend doing it alone. On the 71, there are two bolts on each side that go to the frame and two smaller bolts that are reached from inside the trunk. The frame bolts are 3/4 inch and rusty. The great ceremonial cheater bar was required to break them loose. When the bumper still would not come out, we realized the rubber 'flashing' was still connected and the cast aluminum moldings had to come off first. Four small speed nuts hold them on. Disconnect the lights and wires and off she comes. We carried it outside out of the way. The rear gravel pan will need to be sanded down and painted but we will do that without removing the pan from the bumper.
Pulling the rear bumper was amazingly simple -- I was expecting it to require a lot more effort. But don't let anyone kid you -- that sucker is HEAVY! The valence panel beneath the chrome part of the bumper has some of the thickest sheet metal I've ever seen. All things considered, I still feel MUCH safer in an Imperial than any new car. The sheer amount of steel involved in the rear bumper and its attachment only reinforces this feeling of security.
Pulling the trunk is a matter of 4 bolts and disconnecting the trunk light wire. As we were lifting it off, we could hear the rust sliding around inside it. Not a good sign! Inspection showed a ton of scale on the inner panels and lots of serious rot developing on the rear lip. It did not take long to realize that the trunk lid was scrap metal. Fortunately, the 72 Imperial parts car I had been "given" had a much better lid so while I started on some body work, Elijah pulled the yellow trunk and removed all the latches and trim. This also meant we would have to paint the inside of the trunk. Elijah used a wire brush on the grinder to dress down any rusty spots and we literally poured rust killer inside and sloshed it around. Finally, we invested a quart of Coroless to protecting the inside metal also and poured it in the trunk lid inner openings and sloshed it around until it ran out every orifice. Messy work but perhaps it will stop future problems.
It's a good thing Kerry had a good trunk lid on his parts car. I didn't realize just how bad mine was until we starting removing it! Removing the trim revealed the extent of the rust that I was completely unaware of. Fortunately, the '72 trunk lid matches exactly, only requiring that we drill a few holes to accommodate the '71 trim.
With the inner fender out of the way, a variety of body hammers, spoons, and dollies (TAKE PHOTO AND INSERT HERE) were used to straighten out a crease on the left front. The technique used was to hold the dolly on the 'good' (near normal shape and contour) metal on the outside while tapping the dented metal out from the inside. This needs to be a slow process. If you just whack hell out of the metal with a 3 pound hammer you will stretch the metal and make things worse. This particular crease was directly over the trim and a character line was part of the problem. We decided to cut off the pins and drill holes to reattach the trim because the pins would make it very difficult to rebuild the filler in a straight line with the correct contour. A little filler is perfectly acceptable. We decided to leave the front bumper on and work around it. It is interesting that the 71 body, while similar in overall contour to the 72/73 years, is much simpler. It has less trim and considerably less character lines. From a body work perspective this is a very good thing.
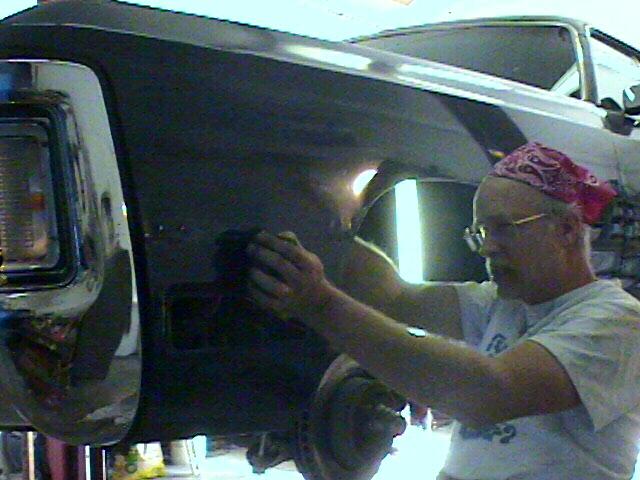
Kerry amazed me with his work on the front fender. Unlike modern cars, where a similar dent would likely result in replacing a body panel, repairing this fender required good knowledge of metal working. Kerry whipped this panel back into shape in good order. It's impossible to spot any repair on this fender!
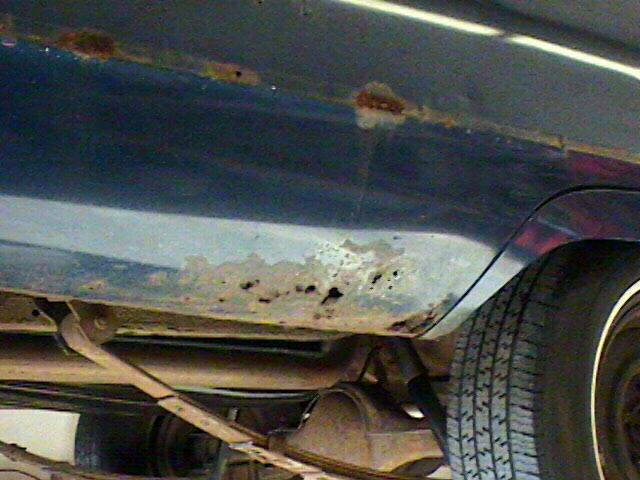
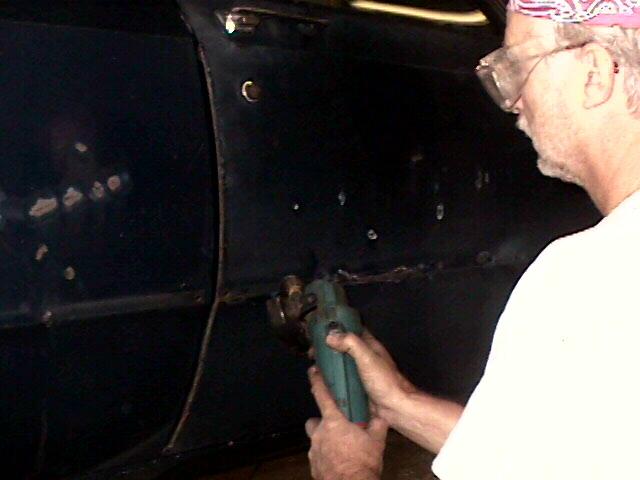
A cutoff blade in a 4 inch grinder was used to cut out the cancer behind the rear wheels. The second photo shows all the scale, rust, and long lost sockets and other stuff that had collected in the area. It was all this 'stuff' that held the moisture and caused the rot to develop. We are going to concentrate on the exterior rust. Elijah has some POR-15 at home and he is going to de'scale and paint the inner trunk and trunk bottom when he gets home.
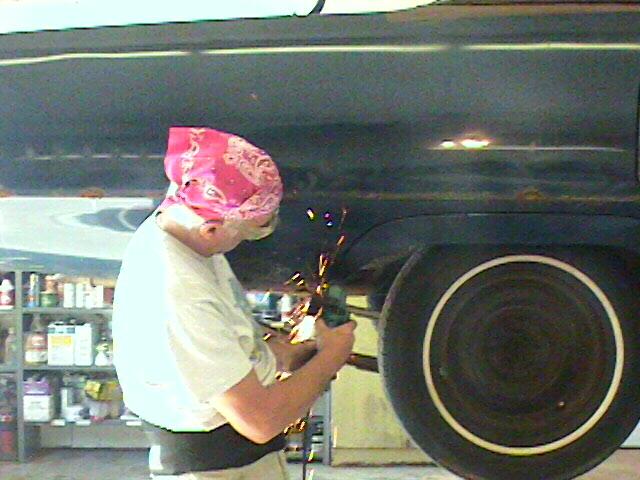
As I stated earlier, I was amazed at how much crap was living down in those rear fenders. Of course, cutting them open was pretty much the only way to get it all out. Wow!
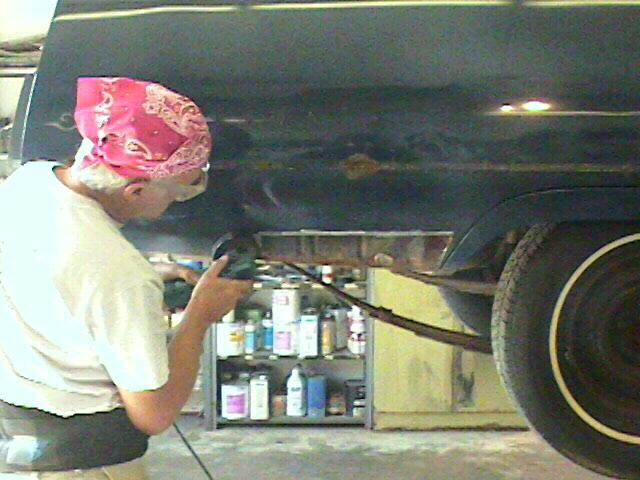
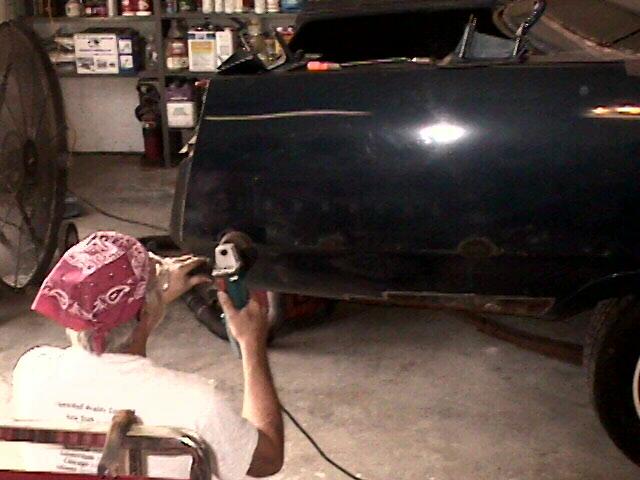
There was a LARGE collection of rock chips and door dings. Our first thought was to just fill and paint but upon inspection, we discovered some rust in most of them so they had to be fixed. We put a wire brush in a small grinder (Harbor Freight $29 bucks) and hit each one. We are going to try a different approach to filling these spots than was done on the 73 Imperial.
Our next task was to tidy up 29+ years of dings, chips, minor dents, scuffs, and general wear. I would never have realize how much surface rust could exist under what appear to be only a little scratch. As Kerry and I went to town with the grinder, we found LOTS of places that needed a little extra attention.
Elijah's 71 Body and Paint Homepage
This page was last updated August 30, 2000. Send us your feedback, and join the Imperial Mailing List online car club today!
