
Imperial Home Page -> Repair -> Body -> Paint & Body -> Part 2
Elijah's comments in italics, Kerry's in normal text.
Still day 1 - Once the chips and dents were ground out, Elijah (note the stylish blue 'yard sale' coveralls) applied a "rust killer" with a small paint brush to EVERY spot. There are several varieties of this stuff. RustMort is one popular brand. This stuff has acid in it. Rubber gloves are a must! Also, do NOT get too friendly with it. It WILL burn your nasal passages if you take a good whiff. Trust me on this.

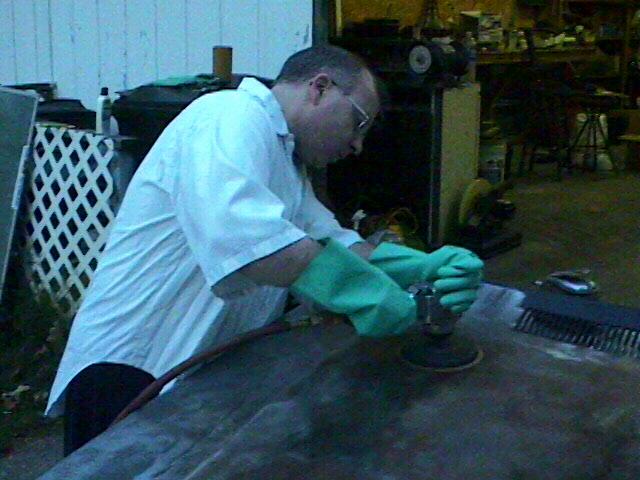
What can I say? I am one damn sexy guy in coveralls! Thank goodness Kerry had some extra coveralls. I brought plenty of work clothes, but I didn't realize just how messy some parts of this job would be. Those big rubber gloves are a plus too. In this shot, I'm working with large amounts of lacquer thinner, which will really dry out skin fast.
The hood was a real mess. In retrospect, we probably should have scrapped it and used the one from the parts car. Ken Newberry came out after work. Elijah and I had already pulled the hood and put it on a small rolling table. After painfully removing ALL the paint and sanding the hood smooth, rust killer was applied. Air tools are very handy for this type of work. A variety were used from an 8" air grinder to a 6" DA (Dual Action) sander and a Jitterbug sander. After some good hand tools, the first thing for your shop should be a good air compressor and assortment of air tools. They will save tons of time and pain. Get at least 5HP air. You cannot have too much air. Running two big sanders at once will even pull down a 6 1/2 hp two stage unit. This is why you see 3-4 big compressors lined up outside most body shops. Smaller compressors will go to 125psi but can't keep up with demand and pressure soon drops to 60-80psi cutting way down on tool effectiveness.
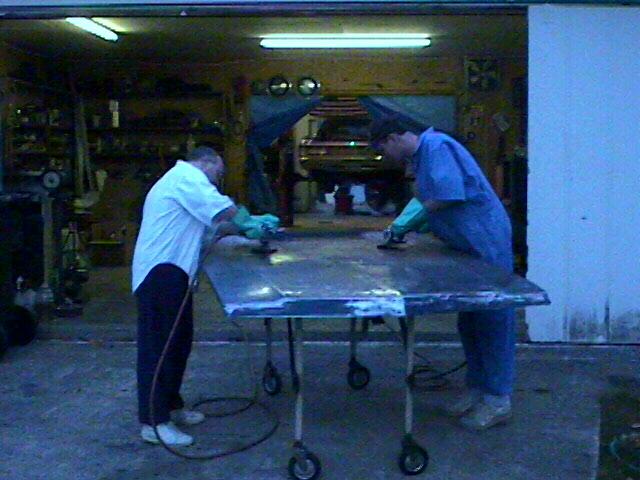
I just can't say THANK YOU enough to my friend Ken Newberry. Ken came out to help us with this project just for the sheer fun of it. He is a true Imperialist and a great guy. Ken and I spent a LOT of time working on the hood of the car. In retrospect, I wish that I had had a replacement hood to work with. This one had a huge amount of surface rust, which meant that we had to sand off all the paint. Ironically, even though the paint had deteriorated enough to allow all this rust, the remaining paint was almost impossible to remove! We put several hours of elbow grease into this hood, finally getting it down to a smooth, relatively shiny surface.
And by the time this part of the job was done, Ken and I were both experts with air tools!
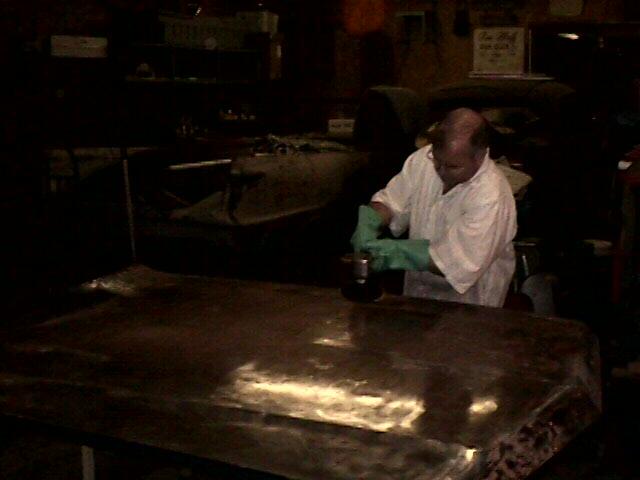
Even though the hood still looks a little rough in the pictures, by this time it was shaping up nicely. We took the extra precaution of turning the hood upside down and filling the openings with Corroless. This procedure will prevent any rust from growing on the inside of the hood.
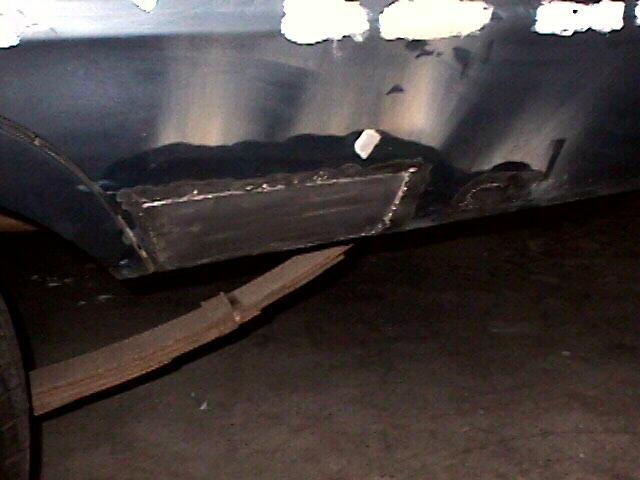
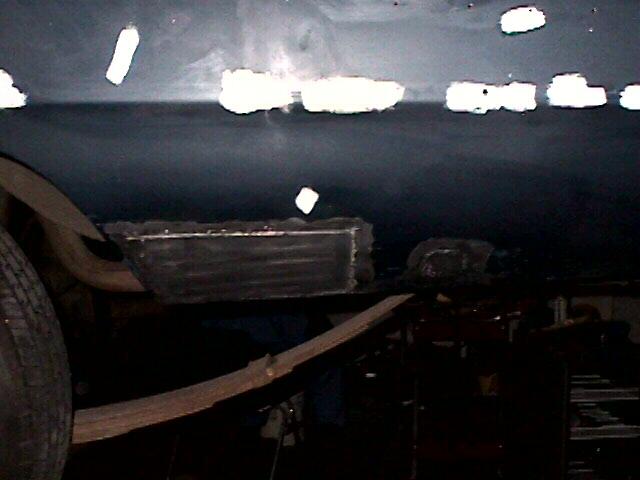
Below is a finished patch panel. We were able to save the wheel well lip. A piece of 20 gauge "paint grip" sheet metal was cut and trimmed to slightly larger than the hole. Shaping it was simply a matter of bending it over a block of wood on the floor. More complicated shapes can be done using a sandbag and rubber mallets. If necessary, multiple smaller patches can be welded together. The patch was then inserted behind the hole and tacked in place with a MIG welder. Once tacked, it was welded in solid by doing about an inch at a time and moving around so heat would not build up and warp the metal. Once the welds are ground down and a skim coat of filler applied the repair is complete.
A lot of people are scared of this process but it is actually very easy. You need a MIG welder, something to cut the metal with, some metal, and a grinder. This ain't rocket science!
Kerry made these patch panels from scratch and installed them in almost no time. He made it look easy! Again, this is one job that definitely requires the proper tools, but it's not rocket science. Kerry did a superb job of forming and fitting the patches. It was a great feeling to see those rusty quarters replaced with shiny, solid metal.
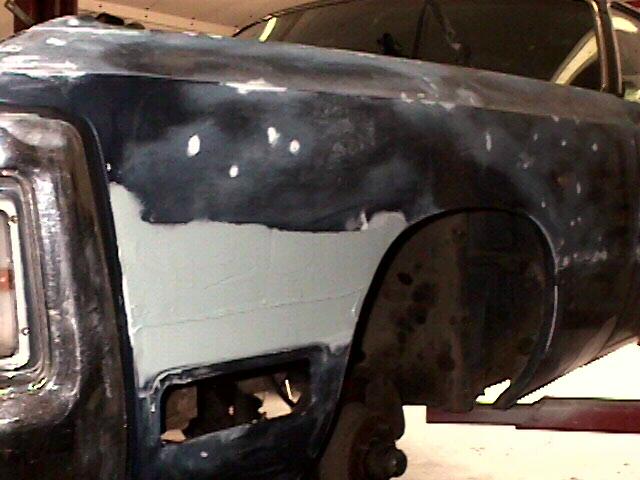
See all the white spots in the photos below? Every one of these was a ding or rust spot. Leprosy! Once they are ground out and the rust killed, they must be filled to get them back to the level of the paint. Failure to do this will leave the sanded out low spots VERY visible in the paint. This lesson has been learned the hard way, trust me. We are using a urethane primer. This is a two part product that has a catalyst. It dries in about 30 minutes and is ready to sand. Lacquer primer will continue to dry and outgas for a month which means you will have problems if you paint a non porous top coat over it before then. We are using a hardened acrylic enamel. The rust spots were filled by using a small paint brush to dab on the primer. Two coats brought them up above the level of the paint and they were then sanded level.
A mistake I made on the 73 was that I primed the whole car first. This meant that the low spots were 'lost'. I had to find them by feel and the old mark one eyeball. Some were missed and I see them every time I look at the car. (most people don't but I do)
It's BONDO time! Actually Bondo is a brand name for what was the first plastic filler back in the 50's. Plastic fillers have improved greatly and are used even at the factory. Leading is not only a lost art, it is not normally a superior process anymore. Just don't used much filler. 1/8" or less is fine. Note the rubber gloves. Filler is HARD to get off your skin! I no longer use plastic spreaders by the case. Dick Benjamin passed along a tip to wipe down the spreader with lacquer thinner after each use. Great tip. The same spreader was used for my 73 and the 71 and is still like new. By the way, get a couple of gallons of lacquer thinner for general clean up of tools and spray equipment.

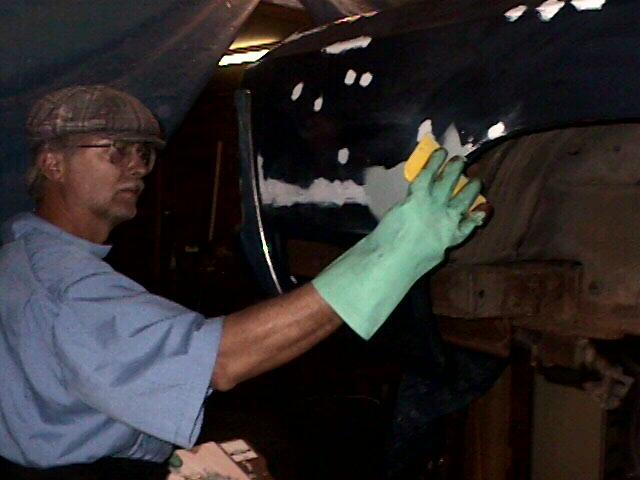
You can tell Kerry's doing some serious work -- he's wearing "the hat!" Even though the patch panels fit great, they still require a bit of filler to achieve a truly smooth surface. Bondo is pretty easy to work with, but you have to work very fast before it cures.
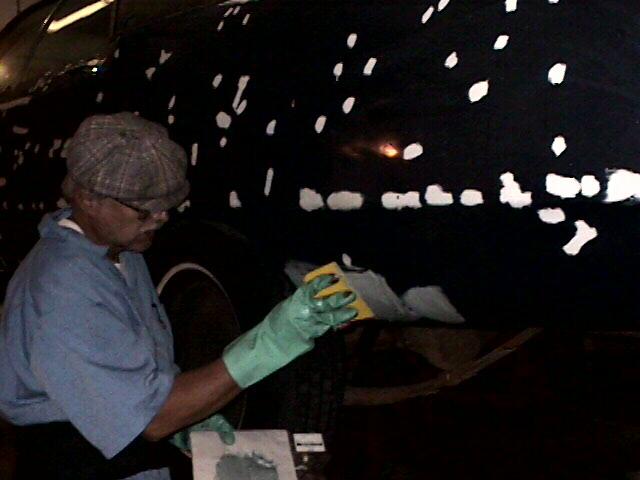
Did I mention that I really wanted a polka-dot Imperial??? All those cute little white spots are actually places where scratches, scuffs, and dings were sanded down to reveal rust. After killing the rust with RustMort, we hit each spot with a good coating of primer.
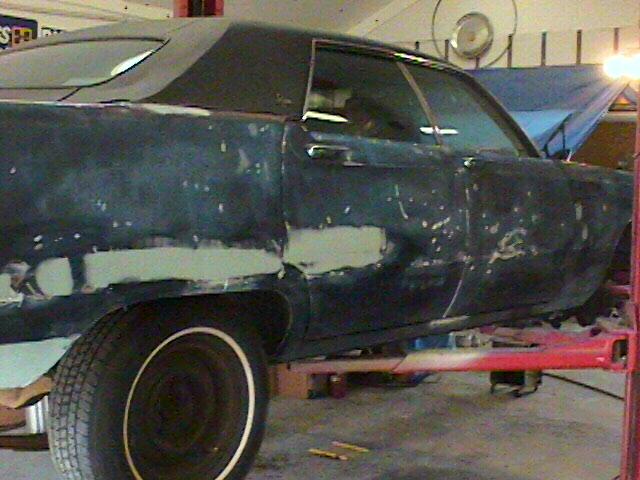
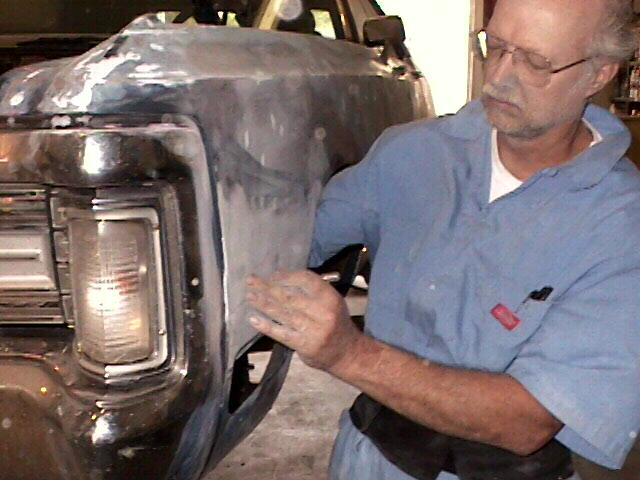
At this point, Kerry is doing the final touches on my front fender dent. This is the one time in the twelve years I've owned the car that I actually hit something with it, so I'm glad to see this spot disappear. Repairing this dent was a little challenging, because of both the contours of the body line as well as the bracing behind the panel. Some hammer and dolly work followed by a bit of bondo smoothed it out like new.
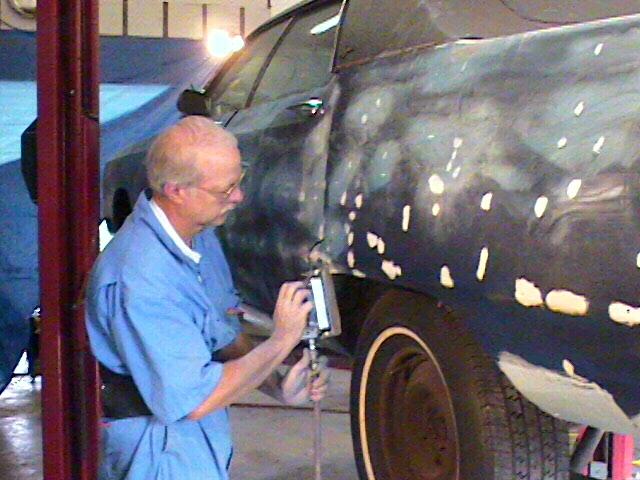
Remember all those dots of primer? Once they've all cured, they have to be sanded down so that they will match the level of the rest of the paint. In this process, the primer acts more or less as a filler to cover the holes we sanded to get to the little rusty spots. Once the whole car is sanded, the surface should be really smooth and level.
Now we are in sand it off mode. A 'jitterbug' orbital sander is good for this. Urethane primer is considerable more difficult to sand than the old lacquer primers. Below you can see what the panels look like after the spots have been worked.
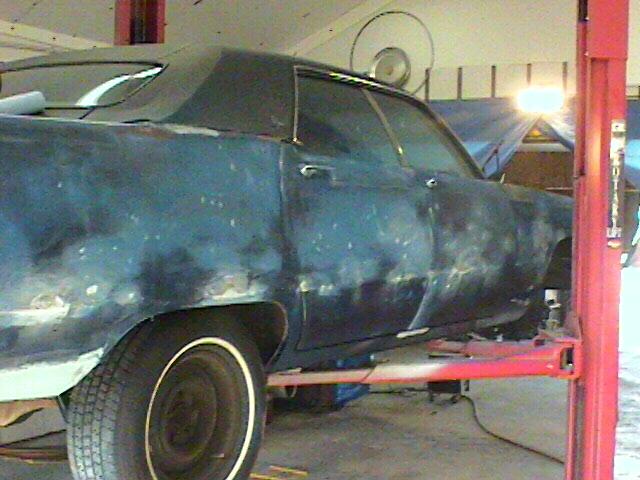
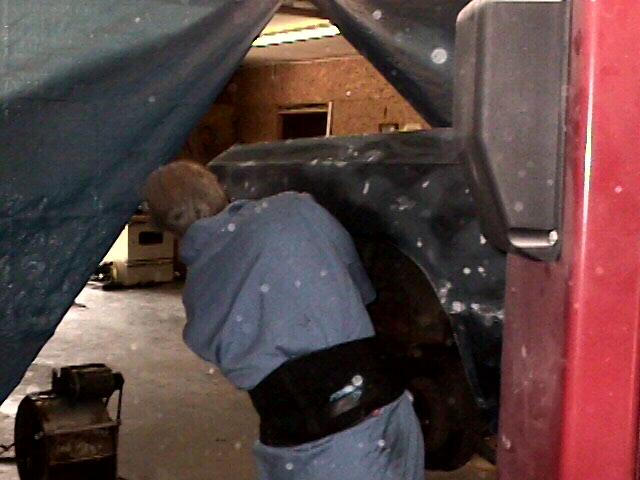
Having the car on a lift makes many part of the job SO much easier. Kerry and I are both pretty tall (I'm 6'4"), so getting things a little closer to eye/hand level makes the work go better. The sides of the Imperial show lots of wear -- plenty of dings, small dents, scratches, and other blemishes. We had to treat each of these individually, which turned out to be a lot more time consuming than the major bodywork in other areas.
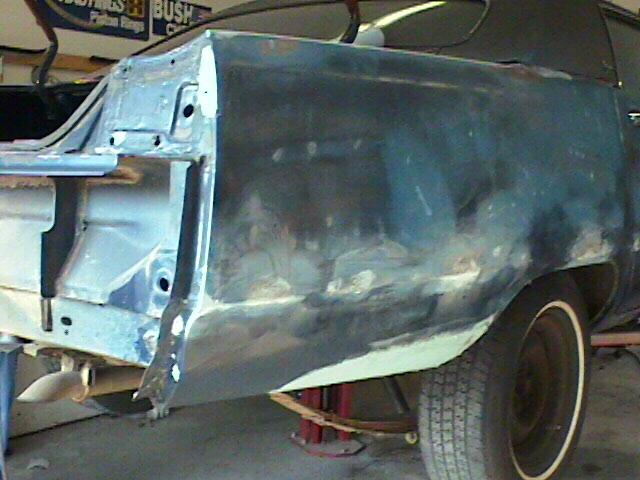
An Imperial without a rear bumper is a strange looking creature! Pulling the rear bumper and the corner panels was a must -- the rubber trim around the bumper had held in some moisture over the years, so there were some spots that had to be dealt with.

I must confess that I had NO idea how much time would be spent sanding this car. And sanding. And sanding. And sanding yet some more! Kerry is absolutely right about the necessity of air tools. A job like this would be well-nigh impossible without them.
Another crease on the right front near the upper character line was simply filled after prep.
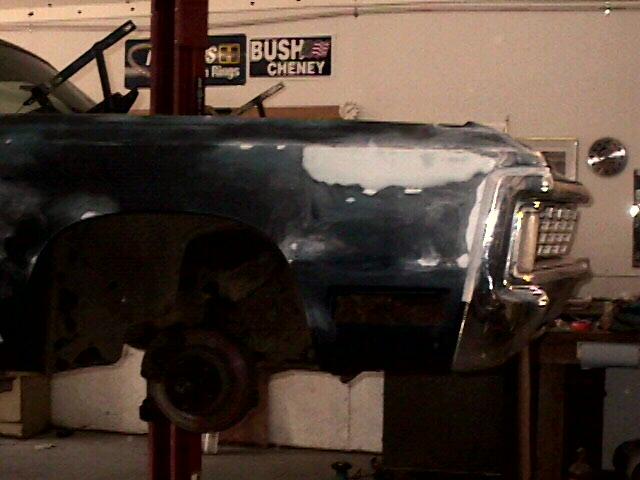
When I bought this car back in 1988, it had a huge scratch/dent on the front bumper. I have no idea how it got there, or why someone chose to try to paint it in with a totally different color of blue. No matter -- with some good use of primer and a touch of filler, it quickly disappeared.
Some rust bubbles had formed under the side trim around some of the trim pins. A light coat of filler filled the pits and leveled out the surface.
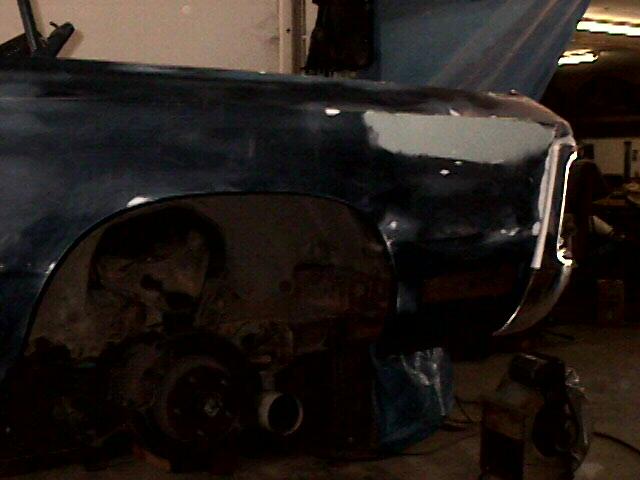
The car had some other light indentations along the side, which were also primered and filled. The worst spots were some rusty areas along the trim clips. Evidently the trim had held a little water over the years, allowing some rust to start. Fortunately, it was all surface rust, which was easily fixed.
The left front damage required a little more filler because the character line had to be recreated. Remember we ground off the pins so it was necessary to keep track of where the trim line was. Before grinding off the pins, holes were drilled. It's easier to keep these open while the filler is wet than try to re-find them and open them up after it cures. Believe me on this.
The driver's side front fender required a little more work. This was the fender with which I accidentally "tapped" my Grandmother's '78 New Yorker a few years ago. The curvature and character line of the fuselage styling required close attention to detail to recreate. By the time we were finished, Kerry had this panel looking as good as new.
Elijah's 71 Body and Paint Homepage
This page was last updated August 30, 2000. Send us your feedback, and join the Imperial Mailing List online car club today!
