
Imperial Home Page -> Repair -> Body & Paint -> Paint & Body 101 -> Part 5
Part 5 - Rust repair and body work
Thursday 23 Jan
SNOW AND COLD! The weather dudes missed it again. This time they did not predict anything and we got about an inch and a half. Coupled with temperatures around 9 at sunup it was pretty cold for Alabama.
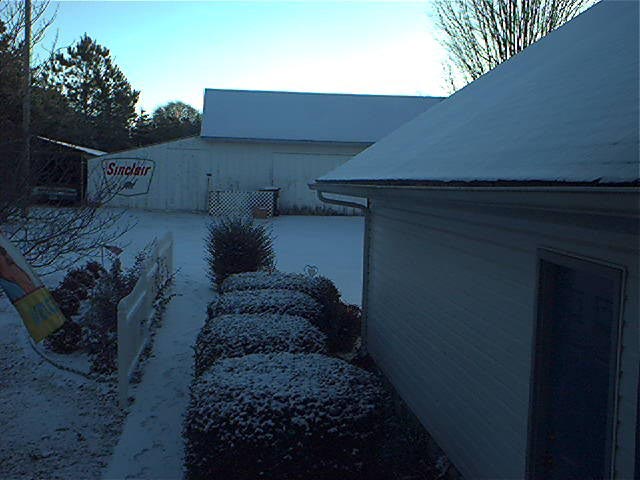
 The roads were a mess so we took my wife to work and picked her up. Made a
big dent in the day and we did not get out in the shop until 9:30.
The roads were a mess so we took my wife to work and picked her up. Made a
big dent in the day and we did not get out in the shop until 9:30.
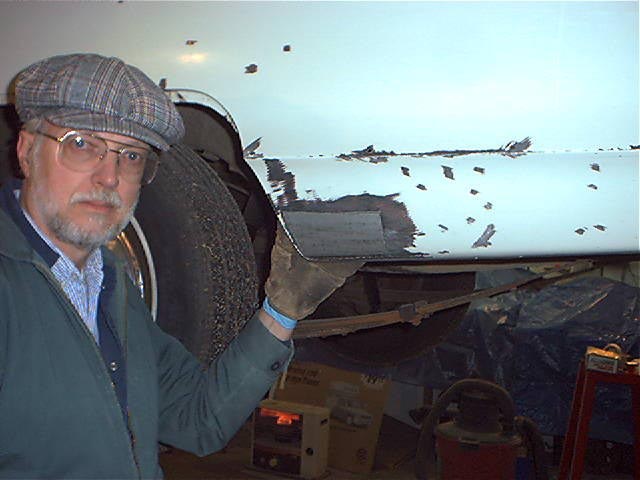
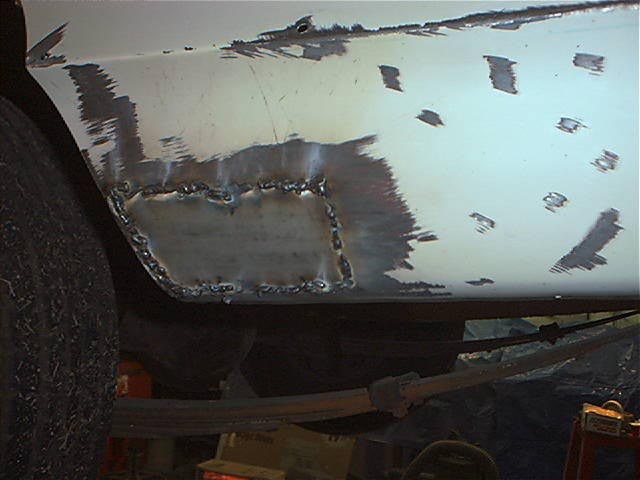
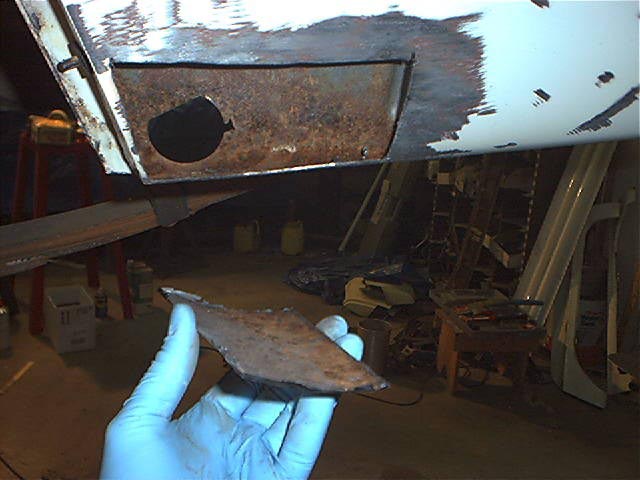 Here is the hole I cut out from the rusty panel. I need to make a patch
panel to weld in. The rest of the quarter is sound.
Here is the hole I cut out from the rusty panel. I need to make a patch
panel to weld in. The rest of the quarter is sound.
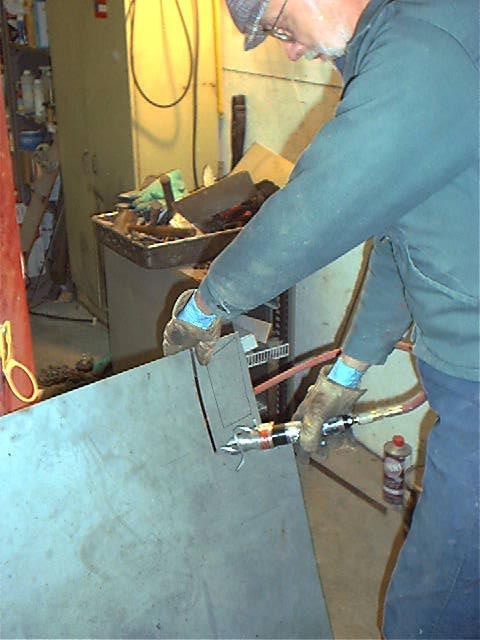 Here I am using some Kett air shears to cut the rough size out of a sheet of 20
gauge metal.
Here I am using some Kett air shears to cut the rough size out of a sheet of 20
gauge metal.
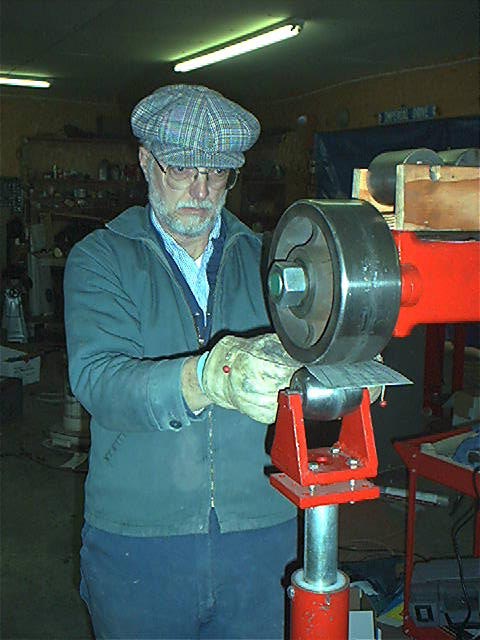 This piece has a interesting shape which increases in curvature as it gets
toward the bottom. Since this was not a compound curve, I could have just
bent it up by hand but used my English wheel just because I could. I built
this machine earlier this year from a hundred year old cast iron jig saw
frame. The upper wheel is a cast steel caster 8" in diameter, the
lower anvils are 3" in diameter with several different radius. As the
metal is rolled between the tight wheels, it is stretched and takes a shape. In
about 3 minutes it looked like this:
This piece has a interesting shape which increases in curvature as it gets
toward the bottom. Since this was not a compound curve, I could have just
bent it up by hand but used my English wheel just because I could. I built
this machine earlier this year from a hundred year old cast iron jig saw
frame. The upper wheel is a cast steel caster 8" in diameter, the
lower anvils are 3" in diameter with several different radius. As the
metal is rolled between the tight wheels, it is stretched and takes a shape. In
about 3 minutes it looked like this: 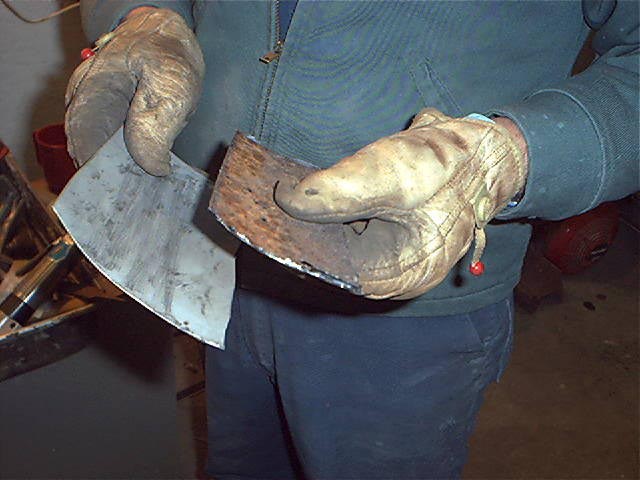 Next I cut it to about 1/4 inch larger on all sides than the removed rusty
piece. Since this was not going to be a metal finished effort (no filler),
I used a air flanger to put an offset on all 4 sides.
Next I cut it to about 1/4 inch larger on all sides than the removed rusty
piece. Since this was not going to be a metal finished effort (no filler),
I used a air flanger to put an offset on all 4 sides. 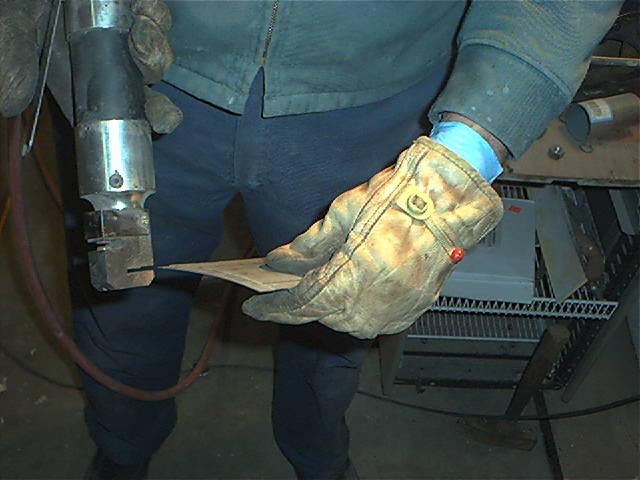
 This was then stuck through the hole and I was able to hold it in place by
reaching through the drain hole in the inner panel.
This was then stuck through the hole and I was able to hold it in place by
reaching through the drain hole in the inner panel.
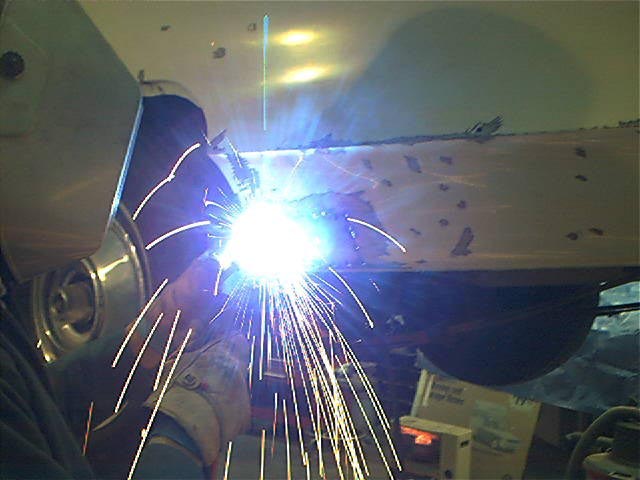 Using a MIG wirefeed welder, the patch panel was tacked on all sides about
1" apart.
Using a MIG wirefeed welder, the patch panel was tacked on all sides about
1" apart.
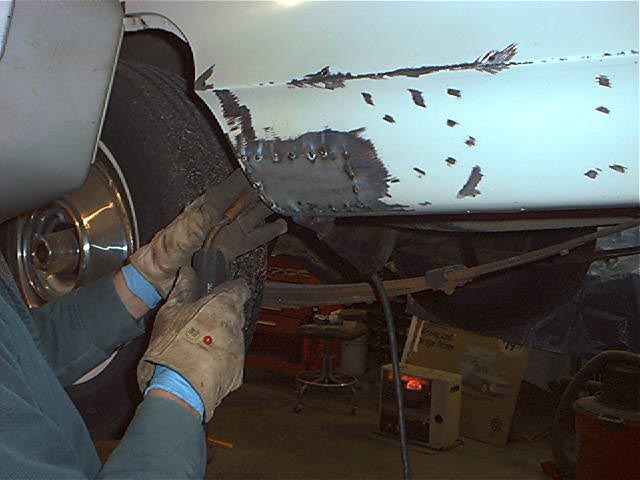 the tacks were then continued until the patch was welded solid.
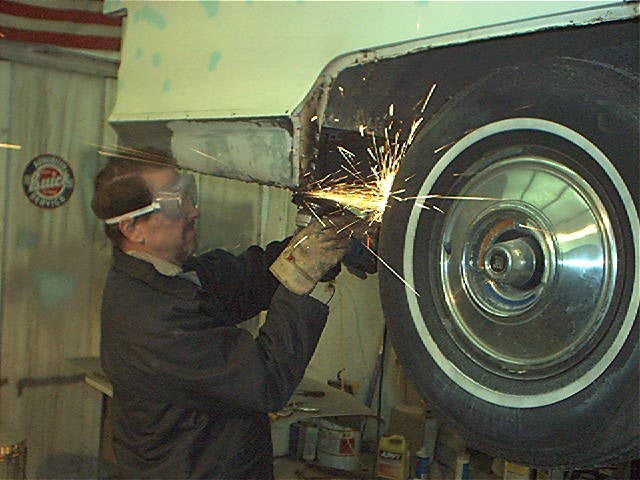
 Now it is time to grind the welds down.
 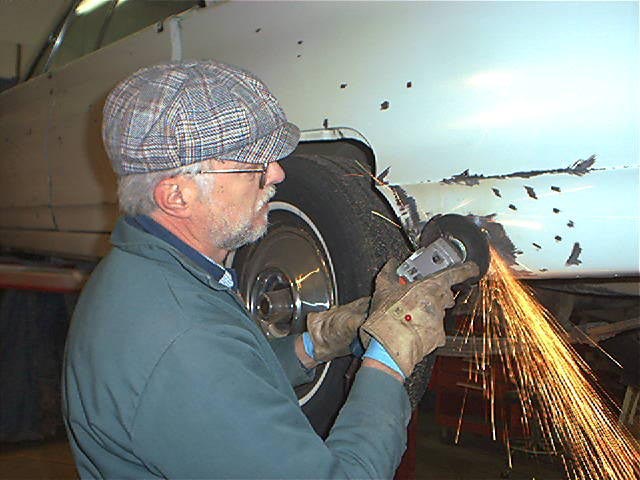 Be careful not to concentrate too much heat in one spot to avoid warping the
panel.
Be careful not to concentrate too much heat in one spot to avoid warping the
panel.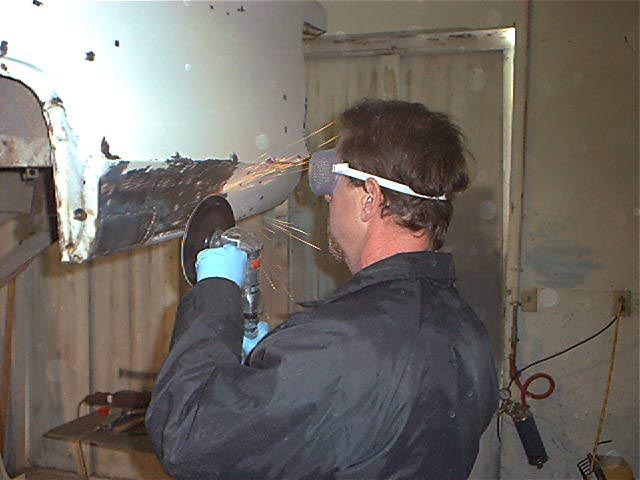 Robert used a 7" air grinder to strip the whole lower quarter.
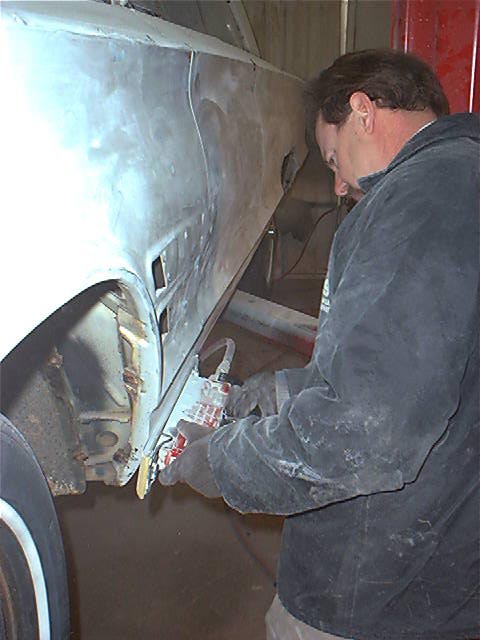
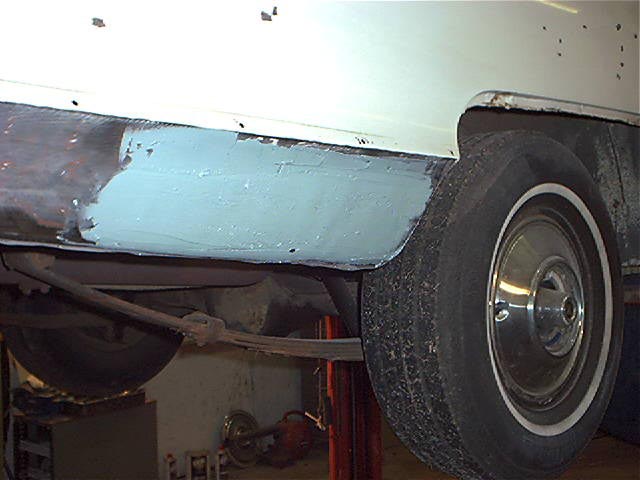 Then it was time for a skim coat of filler on both sides.
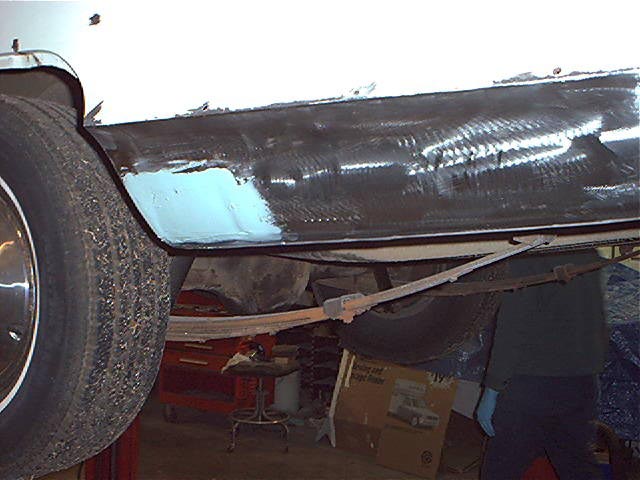
 The remaining chips were also filled with urethane putty.
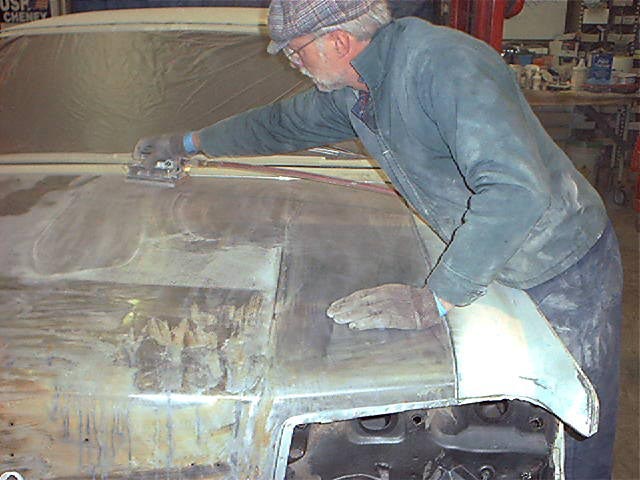
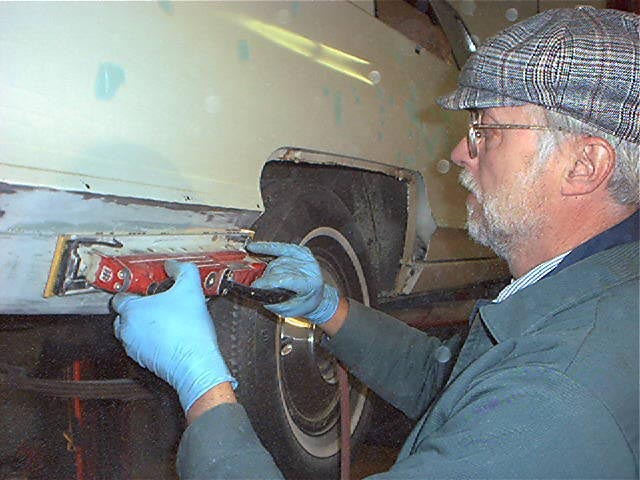 A straight line sander makes relatively quick work of sanding down the filler.
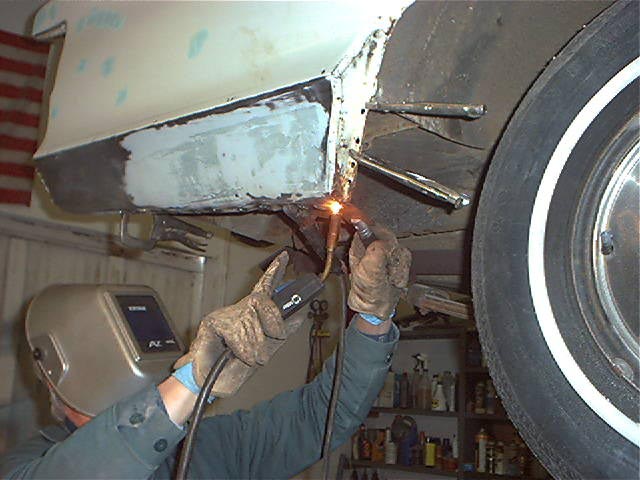 The right quarter was re-welded to the inner panel. I used a copper
backing plate on top of the inner panel holes we drilled. This allowed the
mig wire to fill the holes with fresh metal and securely welded the panels back
together.
The right quarter was re-welded to the inner panel. I used a copper
backing plate on top of the inner panel holes we drilled. This allowed the
mig wire to fill the holes with fresh metal and securely welded the panels back
together.
Vice grips were used to hold things together.
 The welds were then ground off. Note the use of safety glasses.
Robert doesn't wear a hat and later complained about all the sparks that bounced
into his hair.
The welds were then ground off. Note the use of safety glasses.
Robert doesn't wear a hat and later complained about all the sparks that bounced
into his hair.
We knocked off at 3 to go get Carolyn so today we had about 9 man hours between us.
More rust repair and body work
Friday 24 January 2003
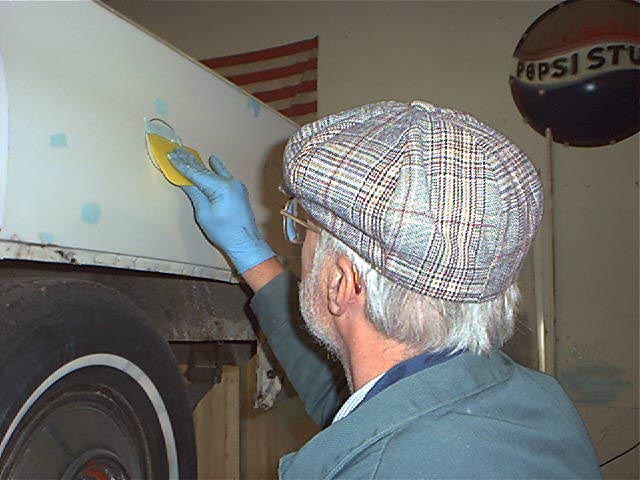
Today was frigid at 1 degree. Dang cold for our part of the world. Roads were clear but the county schools were still closed because of icy patches on secondary roads. The shop was 25 degrees. We fired up the propane torpedo heater and waited for things to warm up. By 8:30 it was 60 degrees. I lit a couple kerosene heaters and put them so they would heat up the rear quarters because they still needed some filler. While the metal was warming up we used the board sanders to take the urethane filler we applied yesterday down to the same level as the paint.
 Robert cracked the code on using the sander pretty quick. You have to be
careful not to make a low spot.
Robert cracked the code on using the sander pretty quick. You have to be
careful not to make a low spot.
 We hung the decklid back on the car so it could be primed. Also needed to sand
off the hood and trunk
We hung the decklid back on the car so it could be primed. Also needed to sand
off the hood and trunk
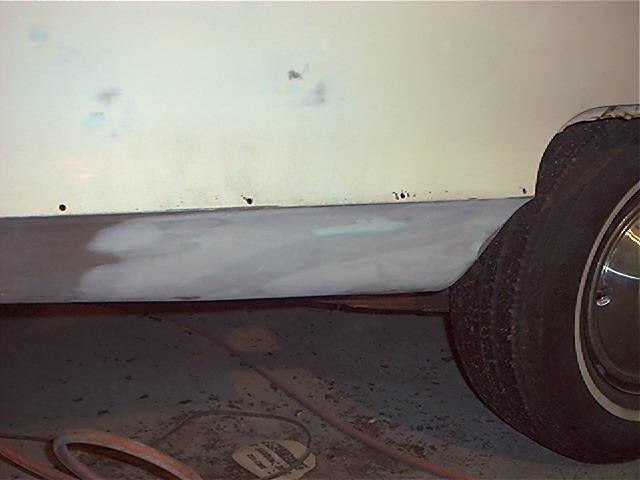 This is the right rear that was crunched. It's now very straight and
although it looks like it has a bunch of filler it only is a 16th to 1/8th
deep. I haven't cracked the code in applying enough filler to sand off in
one pass like the pro's do. I tend to apply lots of thin coats and keep
raising the low spots. Ends up the same but takes longer. Practice,
practice, practice.
This is the right rear that was crunched. It's now very straight and
although it looks like it has a bunch of filler it only is a 16th to 1/8th
deep. I haven't cracked the code in applying enough filler to sand off in
one pass like the pro's do. I tend to apply lots of thin coats and keep
raising the low spots. Ends up the same but takes longer. Practice,
practice, practice.
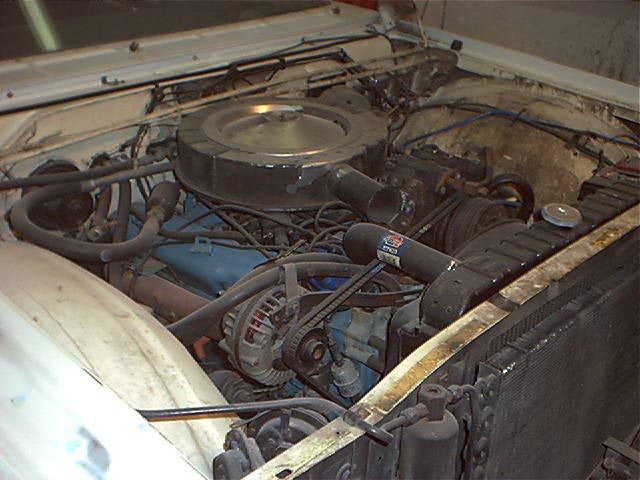 While Robert is here, we pulled the hood so I could do the engine compartment.
 This car is now ready for primer. Unfortunately it was just too cold to
spray it. If I were to open the door and turn on the exhaust fan it would
quickly drop to 15 degrees, just too cold for paint. As we were wrapping
things up about noon, we lifted the car and cleaned out the shop. I use a
leaf blower for getting rid of the dust. Works great! Monday is
supposed to be warm so first thing I'll do is mask off the glass and shoot a
couple coats of urethane primer. Then is it block sand, block sand, check
for highs/lows primer, sand, prime, sand, etc, until it's straight.
This car is now ready for primer. Unfortunately it was just too cold to
spray it. If I were to open the door and turn on the exhaust fan it would
quickly drop to 15 degrees, just too cold for paint. As we were wrapping
things up about noon, we lifted the car and cleaned out the shop. I use a
leaf blower for getting rid of the dust. Works great! Monday is
supposed to be warm so first thing I'll do is mask off the glass and shoot a
couple coats of urethane primer. Then is it block sand, block sand, check
for highs/lows primer, sand, prime, sand, etc, until it's straight.
Robert is quickly moving up from helper to apprentice so I gave him 2 hours and me 3 for the day
This page was last updated October 1, 2003. Send us your feedback, and come join the Imperial Mailing List - Online Car Club
