
Imperial Home Page -> Repair -> Suspension -> Upper Control Arm -> Kerry
On many cars, upper control arm bushing are the cause of squeaking front ends. Specifically a squeak when the suspension hits a bump and sometimes even when someone presses on the fender is normally these bushings. They are readily available and relatively easy to change. This page describes how I changed the upper control arm bushings on my 64 Imperial. The whole process took about 3 hours. Next time it will only take 2 as I have now figured it out.
NOTE! Although most torsion bar Chryslers are very similar this is not intended to be a how-to. Working on suspensions can be dangerous as springs of any type including torsion bars can and do, store tremendous energy. If you don't know what you are doing, DON'T DO THIS!!!!! This is NOT intended to be a step by step how to for all cars. Yours may be different and you should take necessary precautions to insure no damage to yourself, others, or your car.
The first step is to get the car up on jack stands with the emergency brake set and the car in park if it has one. You do NOT want the car to move. Make absolutely certain it is rock solid. I'm lucky enough to have a lift which makes it a little easier but for this job not much.
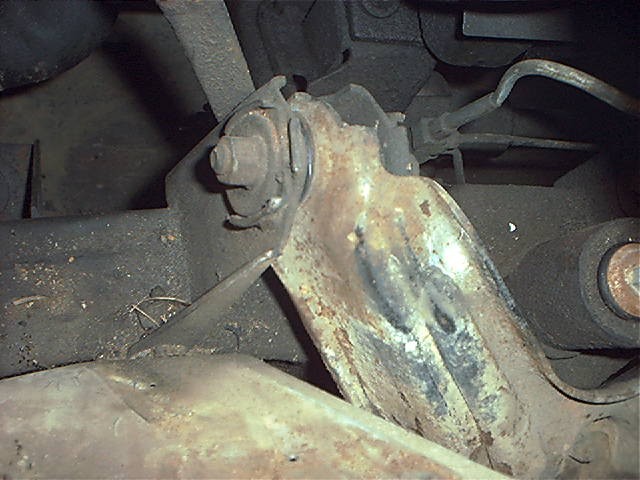
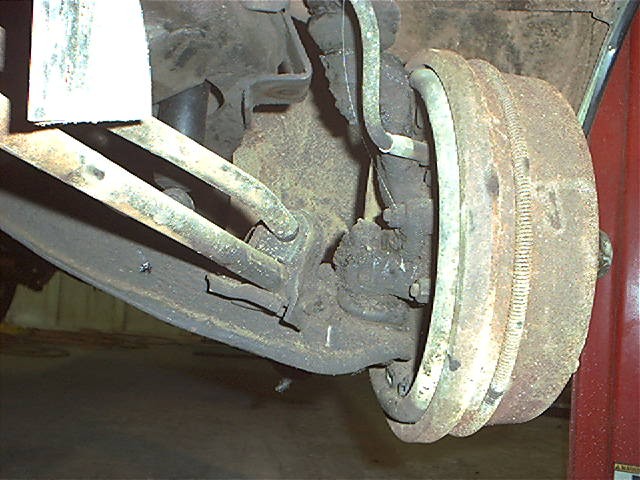 This
is what a 65K mile, original front suspension probably looks like. Here you
can plainly see the lower control arm and lower ball joint. The upper ball
joint is behind the brake flex hose at the top. This has to be removed
before the upper control arm can be removed.
This
is what a 65K mile, original front suspension probably looks like. Here you
can plainly see the lower control arm and lower ball joint. The upper ball
joint is behind the brake flex hose at the top. This has to be removed
before the upper control arm can be removed.
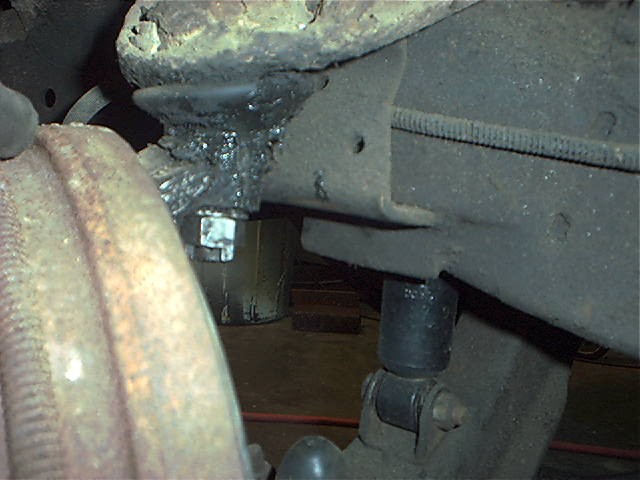 From the back side of the brake drum, you can see the upper ball joint and
the castle nut with the cotter key.
From the back side of the brake drum, you can see the upper ball joint and
the castle nut with the cotter key.
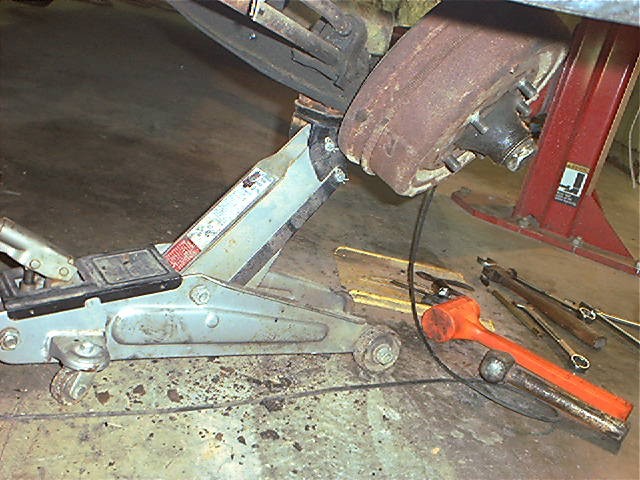 To
control the spring, it is necessary to put a floor jack under the lower control
arm and raise the suspension. Once the suspension has moved up, it is save
to remove the upper ball joint. Do this by removing the cotter key and
backing off the nut a few turns. DO NOT REMOVE THE NUT! If the floor
jack were to slip the torsion bar will drive the lower control arm down and
fling the brake drum out hard if not still connected to the upper control
arm. You would probably be hurt either way but leaving the nut on
gives some peace of mind.
To
control the spring, it is necessary to put a floor jack under the lower control
arm and raise the suspension. Once the suspension has moved up, it is save
to remove the upper ball joint. Do this by removing the cotter key and
backing off the nut a few turns. DO NOT REMOVE THE NUT! If the floor
jack were to slip the torsion bar will drive the lower control arm down and
fling the brake drum out hard if not still connected to the upper control
arm. You would probably be hurt either way but leaving the nut on
gives some peace of mind.
NORMALLY, hitting the side of the ball joint with a large hammer will allow it to break loose. If this is not successful, you may have to use a pickle fork to release the ball joint. Do NOT hit the ball joint threads as you will want to reuse them. Using a pickle fork normally destroys the grease bag around the ball joint so try the hammer approach first, it usually works.
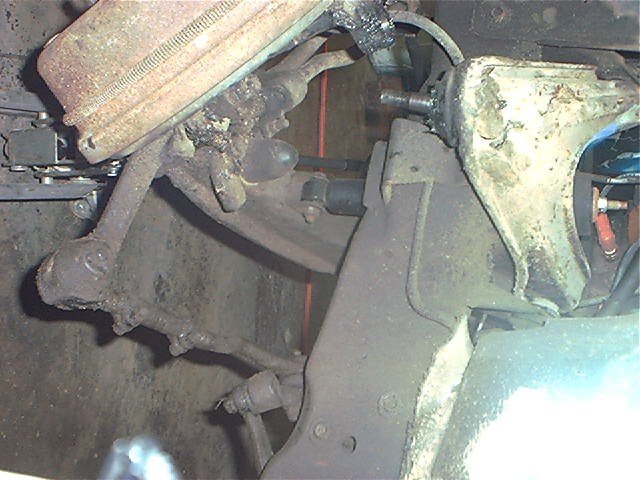 Once the ball joint has become free, you can remove the nut and CAREFULLY lower
the floor jack under the suspension letting the brake drum move out of the
way. Tie it up with some string or wire so it is not pulling on the
flexible hose or you will have brake problems down the road.
Once the ball joint has become free, you can remove the nut and CAREFULLY lower
the floor jack under the suspension letting the brake drum move out of the
way. Tie it up with some string or wire so it is not pulling on the
flexible hose or you will have brake problems down the road.
 Now we are ready to remove the upper control arm itself. If your
rubber splash shield is still in place, you will need to carefully pop the pins
out of the inner fender and remove it so you can get to the control arm. mark
the location of the washers on the bolt as these control the alignment. If
you put them back in the same place your alignment should stay about where it
was. Then simply remove the nuts and bolts and lift the control arm
out.
Now we are ready to remove the upper control arm itself. If your
rubber splash shield is still in place, you will need to carefully pop the pins
out of the inner fender and remove it so you can get to the control arm. mark
the location of the washers on the bolt as these control the alignment. If
you put them back in the same place your alignment should stay about where it
was. Then simply remove the nuts and bolts and lift the control arm
out.
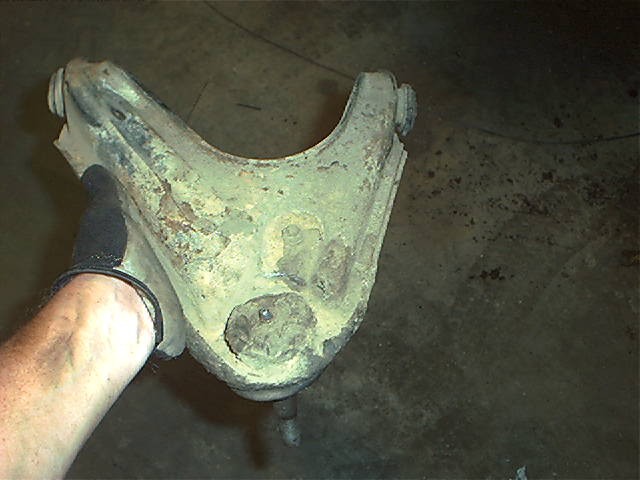 And here it is out of the car.
 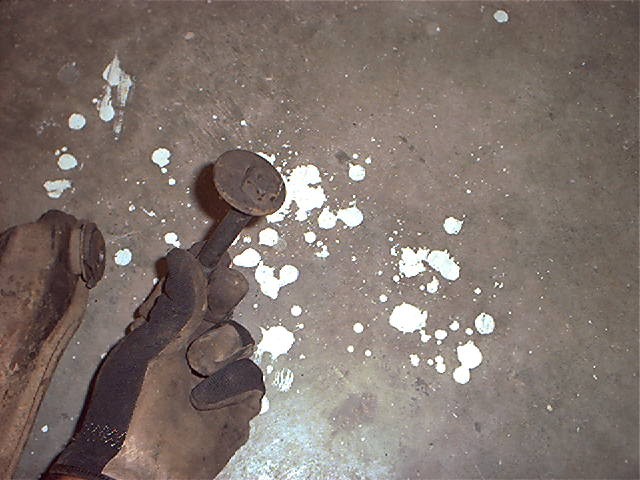 This is the eccentric nut that we just removed. When the front end shop
does an alignment, they turn this bolt which moves the suspension to align it
properly. If you mark the position so you can replace it in the same
orientation, your alignment will probably be ok or at least about where it
was.
This is the eccentric nut that we just removed. When the front end shop
does an alignment, they turn this bolt which moves the suspension to align it
properly. If you mark the position so you can replace it in the same
orientation, your alignment will probably be ok or at least about where it
was.
Btw, I really like working in these Mechanics Gloves. They have good feel and keep my hands from getting cut up and greasy. My wife likes that aspect!
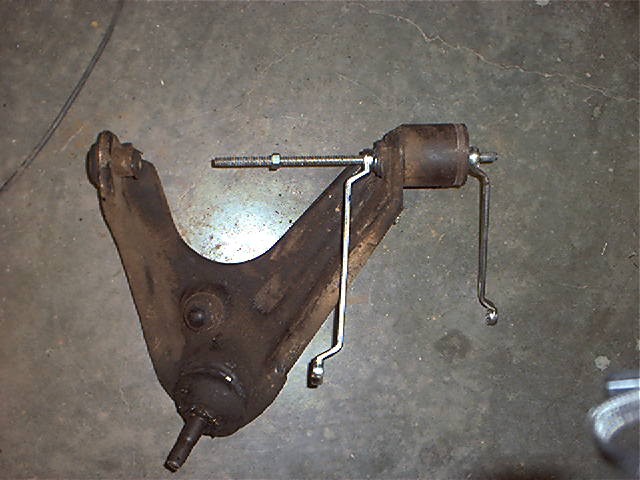
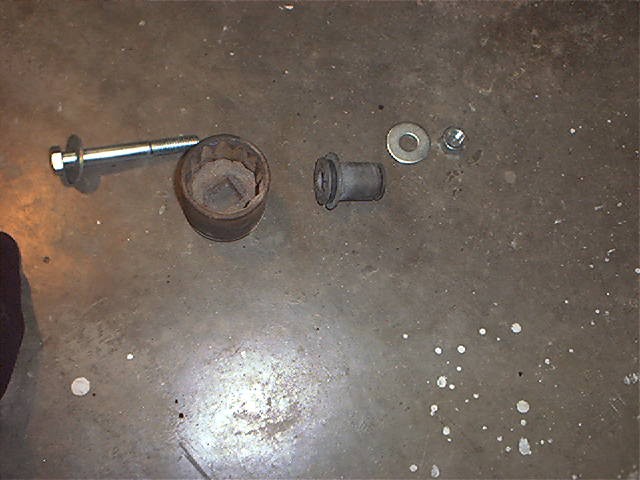 The hard part now is removing the actual bushing. In the above photo,
the gray bushing in the middle is the new upper control arm bushing. The
rest of the stuff is what I will make a puller from to remove the old bushing
from the arm. The bolt turned out to be too short so I used a piece of 3/8
all thread rod. You might be able to see how this was done below. I
took a socket which was large enough for the bushing to slide into, put a washer
and nut on top of it and inserted the all thread through everything including
the bushing. On the other side, I put a washer as close to the size of the
bushing as I could find and a nut. When the nuts are tightened, the
bushing is pushed out into the space in the big socket. This is a shade
tree way of removing a bushing if you don't have a press.
The hard part now is removing the actual bushing. In the above photo,
the gray bushing in the middle is the new upper control arm bushing. The
rest of the stuff is what I will make a puller from to remove the old bushing
from the arm. The bolt turned out to be too short so I used a piece of 3/8
all thread rod. You might be able to see how this was done below. I
took a socket which was large enough for the bushing to slide into, put a washer
and nut on top of it and inserted the all thread through everything including
the bushing. On the other side, I put a washer as close to the size of the
bushing as I could find and a nut. When the nuts are tightened, the
bushing is pushed out into the space in the big socket. This is a shade
tree way of removing a bushing if you don't have a press.
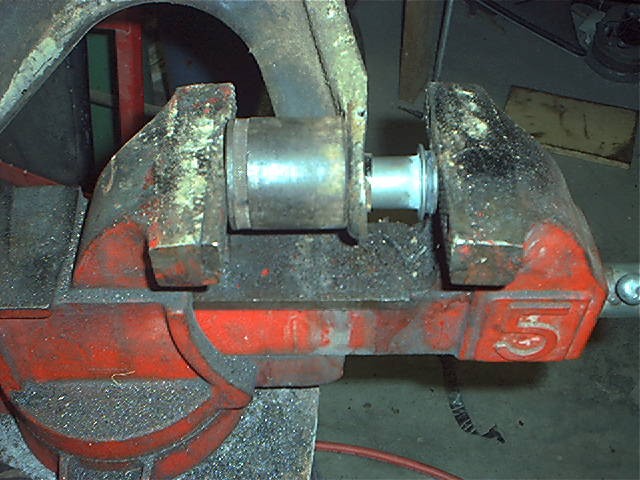
 To install the new bushing just slip it into a vice and crank it in.
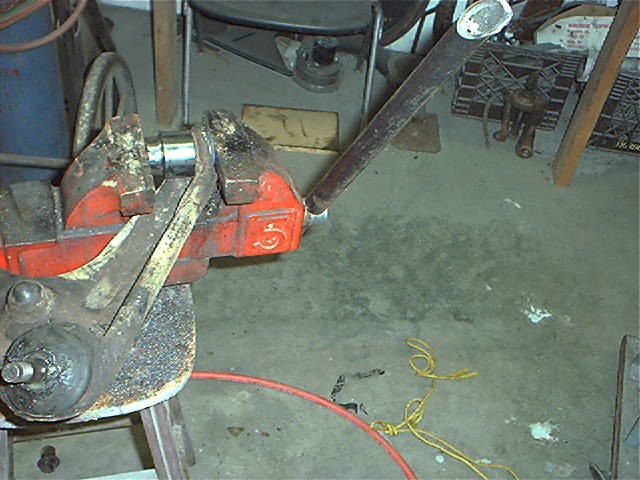
 Crank is a relative term. I had to put the great ceremonial cheater
bar on the vice handle to get enough leverage to get the bushing to slide in.
Crank is a relative term. I had to put the great ceremonial cheater
bar on the vice handle to get enough leverage to get the bushing to slide in.
Here we are, two new bushings. 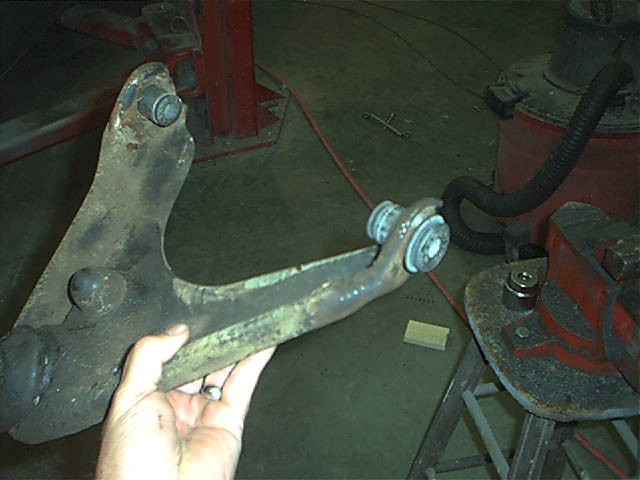 Reassembly is a simple matter of reinstalling the bolts. Be sure and use a
new cotter key on the ball joint. Again, be careful of working with the
loaded torsion bar. You CAN be injured.
Reassembly is a simple matter of reinstalling the bolts. Be sure and use a
new cotter key on the ball joint. Again, be careful of working with the
loaded torsion bar. You CAN be injured.
No more squeaks! It probably took longer to figure out how to make a tool to remove the bushing than everything else. I did not do the other side but now what I've done it, I expect it would be 2 hours max.
Kerry
This page was last updated October 19, 2003. Send us your feedback, and come join the Imperial Mailing List - Online Car Club .
