Imperial Home Page -> Repair -> Wheels & Tires -> Conversion
This article was copied from the 300 Club's website with permission from the club and the author. There are many informative, technical articles on their site and we recommend that you visit them for additional information.
Also, read Dan and John's articles on how they converted their drum brakes to disc brakes.
 |
Try as I might, I just could not figure out a way to
position calipers and rotors to fit inside of the 14" wheels of my
300F without changing out the entire spindle system, which I did not
want to do. Also, I wanted to maintain the same or approximate tire
diameter so as not to change the speedometer and odometer readings any
more than they are now.
Therefore, I decided on 15" wheels to accommodate the discs. Also, I did not want to give up the beautiful F wheel covers. Thus, the necessity to modify 15" wheels to take the 14" wheel covers. |
|||||||||||
|
I have learned that
Stockton Wheel would convert my wheels for $175 each. They confirmed
this to me at their vending spot at Spring Fling. They would supply
the 15" wheels and the buyer would supply the 14" donor
wheels. I would assume that all shipping costs would be borne by the
buyer. I believed then that I could do it at less cost.
With the project
complete, I know that my total cost for doing 5 wheels is $158.16. A
breakdown is as follows. Of course someone else doing the same project
may have higher or lower costs depending upon whether they had to buy
wheels, had someone else do the cutting or did the welding by
themselves, etc. I had no wheels and had to hire out the welding but I
did do the cutting and shaping of the donor rims myself.
Wheels:
$85.56
It is a relatively
easy project. If you do it yourself, it will require about 1 to 3
hours per wheel to cut and prepare the rims from the donor 14"
wheels, depending upon the method you use to cut off the donor rims.
You may innovate and find a quicker method such as a plasma arc
cutter. I first armed myself with a very good quality hand jig saw (Skil)
and a goodly supply of blades. As it turned out, I went through about
15 bi-metal blades. So here is how the project goes.
Step 1. Obtain five
15" wheels and three 14" donor wheels. Since there are two
rims on each wheel, you only need three donor wheels. It also allows
for an extra rim in case you screw one up.
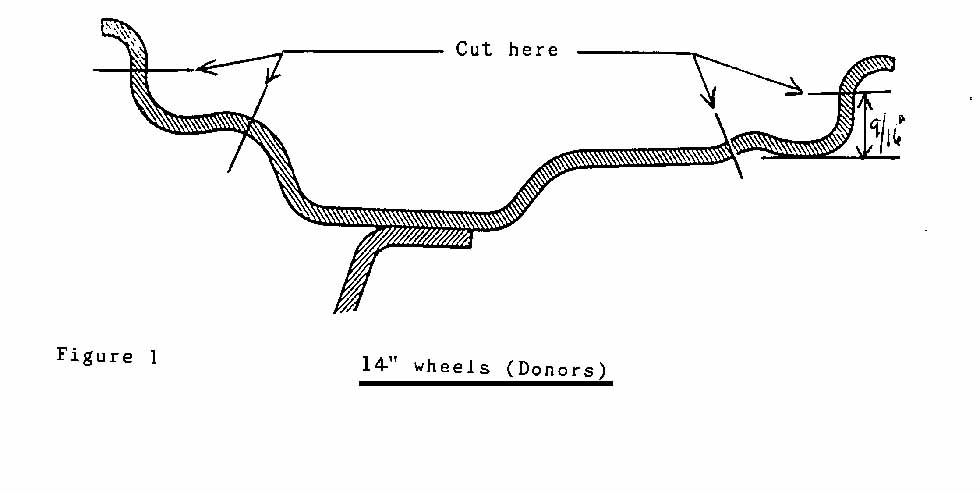
Step 2. Mark the lines
for cutting as shown in Figure 1.
Using a jig saw or if someone has a plasma arc cutter, cut out the
donor rims. I prefer the jig saw method, although it is more time
consuming, as I wanted to take no chances of warping the donor rims.
Step 3. After removing
the donor rims, grind the rough edges and cut and file smooth a V
notch for the valve stem to protrude through. I suggest you insert a
valve stem in one of the 15" wheels and place the donor rim in
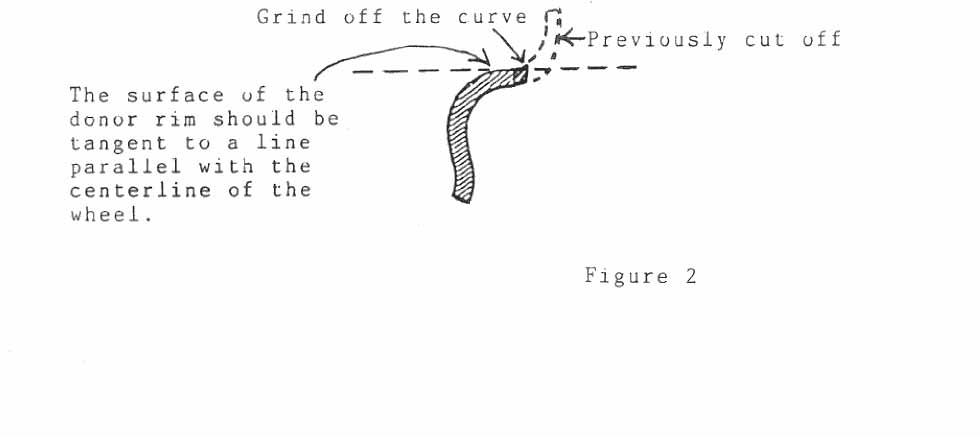
its place to make sure that you have enough clearance. Make sure you
grind off any small curve remaining on the outer circumference of the
rim as shown in Figure 2 as
you want the surface of the donor rim to
fit snugly against the wooden jig to be covered later. Since the outer
edge of the rim will be welded to the 15" rim, I decided to cut
drain holes in the outer circumference of each donor rim. Actually, I
cut 16 of them, each about 1" wide using the grindstone to cut
the holes at 22.5 degree intervals. Welding was to be done at the
edges between the drains.
|
|
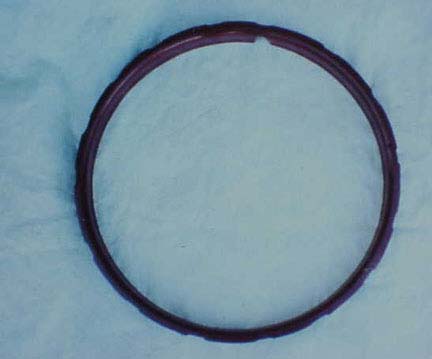
A view of a cut off rim from the outer side. |
 |
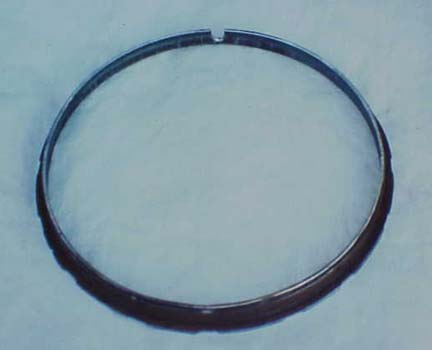 |
An inner view of the same rim. |
| A view of the 14" rim in the 15" wheel prior to welding. | 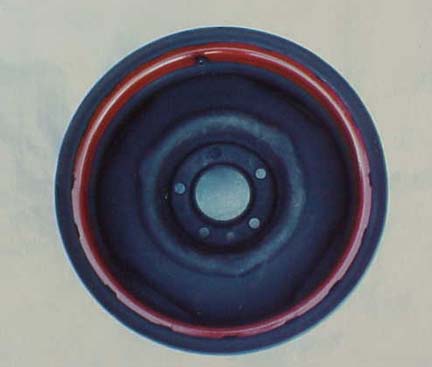 |
|
Step 4. I then made a
wooden jig to hold the donor rims in place while welding. This is a
must, otherwise, the donor rim may be welded in crooked and the wheel
cover may wobble as the wheel rotates. I made the jig using a %"
piece of pressed wood for the donor rim and 3/8" for the 15"
rim. The circumference has to be exactly the inside diameter of the
donor rim and fit very snugly. This I accomplished by drilling a
center hole and using a router with a circle making attachment. I fine
tuned the radius downward until I got a snug fit. The same was done
with the piece for the 15" rim. After both pieces were finished,
a center pin was placed through both pieces and they were screwed
together. I then cut notches out of the 3/8" piece at various
intervals for tack welding and a larger notch in both pieces where the
valve stem protrudes.
I made the wooden jig
after cutting and grinding the rims. However, in looking back, I
believe it would have been better to make the jig before doing the
grinding to fit the donor rim into the 15" wheel. This way, you
can place the donor rim into the jig and see how it fits into the
15" wheel. You can grind to fit accordingly. 1 simply eyeballed
my work and luckily the rims came out fine.
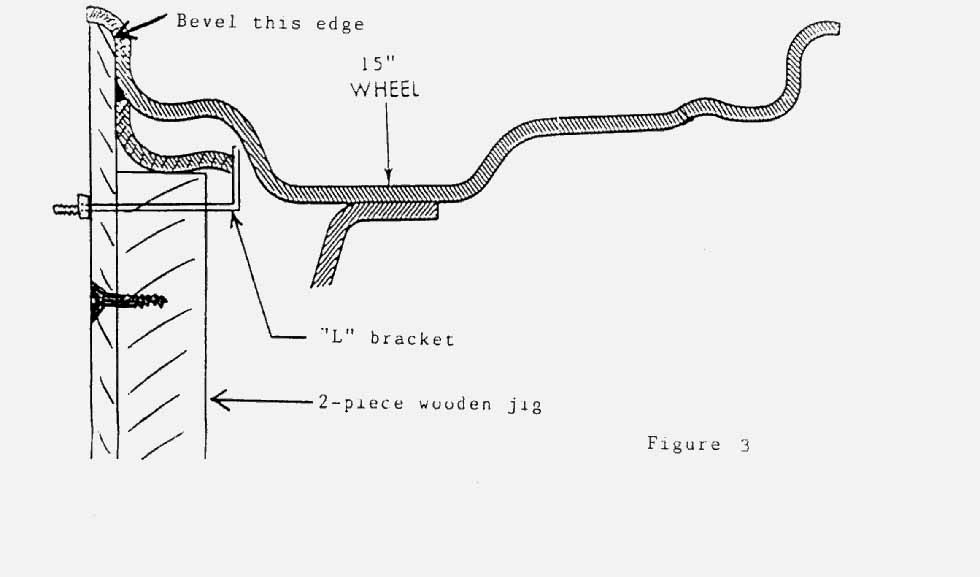
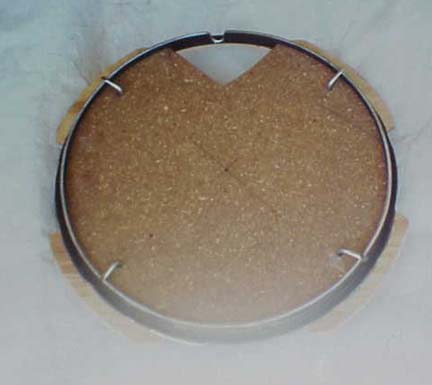
Step 5. As seen in Figure
3 the donor rim was placed on the jig and held in place by 4
"L" brackets. In order for the 3/8" piece to fit into
the 15" wheel properly, you may have to bevel the edge around the
circumference nearest the wheel to make it fit the curve and lay
snugly against the rim.
Step 6. After placing
the jig and donor rim into the 15" rim, welding can now take
place. I used 4 "C" clamps to ensure positive contact
between the jig and 15" wheel. Make sure the notch for the valve
stem is lined up properly. Actually, I suggest having a valve stem
installed in each wheel to make sure it is centered in the notch. I
selected the Heli arc welding process as it produces less heat and
there is less chance of warpage. The rims were tack welded together at
several locations and the jig removed. Welding was then finished. You
only need to weld between the drain holes if you so choose to have
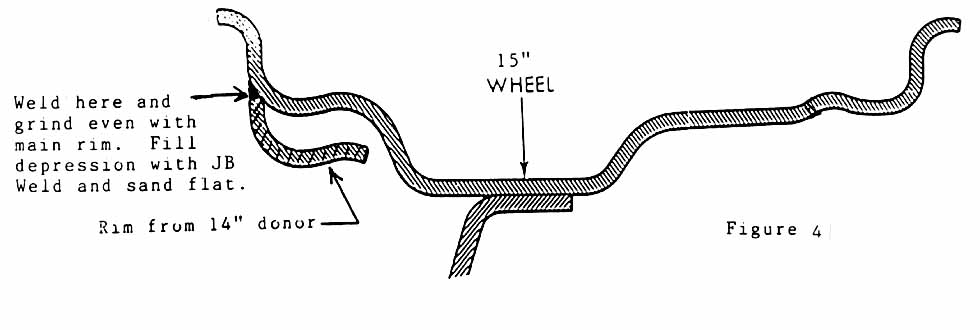
them. After welding is finished, take a grinder and grind the weld
beads flat to make an even surface between the 14" donor rims and
the 15" rims. (See Figure 4)
If after grinding, you do not have a smooth surface, you may want to
even it up using JB Weld as I did.
Perhaps cutting a
wider part from the donor wheel would allow the donor rim to be welded
on both sides but I decided to make it narrow and weld on one side
only. However, there is adequate surface for the tangs of the wheel
cover to engage and I left a portion of the curve behind it to help
with rigidity.
|
 |
Reverse side of the wooden jig I made to hold the rim in place for welding. Note the "L" brackets for securely holding the rim. |
| Front side of wooden jig. Notches were cut to allow for tack welding before removing jig. | 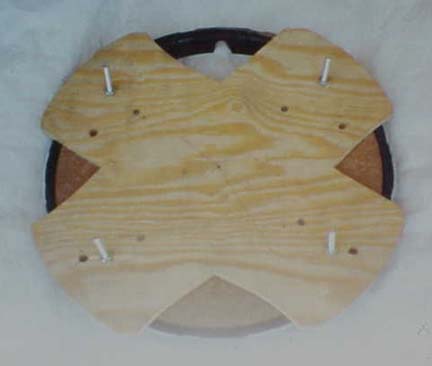 |
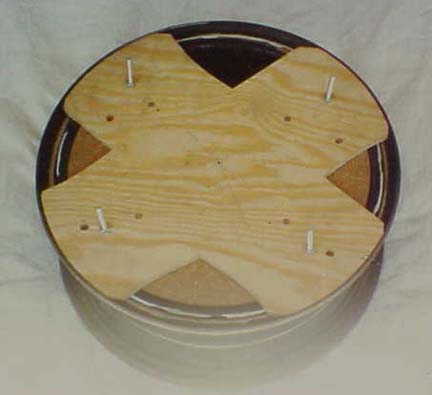 |
Jig and 14" rim in position in 15" wheel. Four "C" clamps were used to maintain position while tack welding. |
| The welds were ground smooth, JB Weld was used for finishing the surface and then painted. This photo shows a close-up of the finished product. There are 16 slots equally spaced around the circumference to permit drainage. Don't be fooled by the weights. The rims balanced out perfectly prior to mounting the tires. | 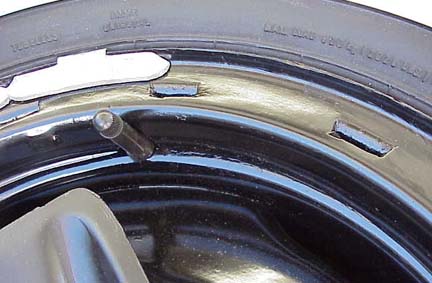 |
| Step 7. Since there
remains a cavity between the rims, I cleaned off the surfaces in this
cavity of both rims prior to welding. After the welding was done, I
taped over the drain holes and poured black rust resistant primer paint
into the cavity and turned the wheel until all of the surfaces of the
cavity were coated. I then drained the excess.
Step 8. Prepare and paint the wheels Step 10. Stand back and admire your handiwork
|
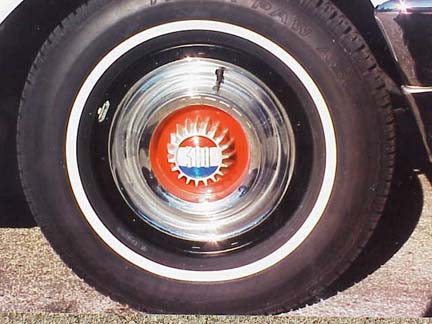 |
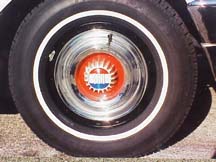
A view of the complete assembly. |
| Another view of the complete assembly. | 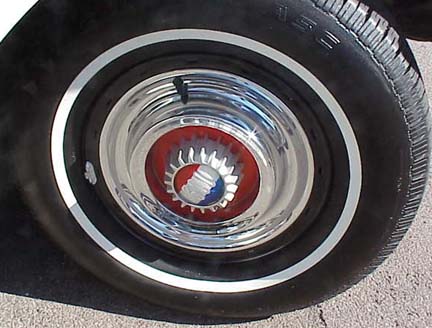 |
This page last updated November 17, 2003. Send us your feedback, and come join the Imperial Mailing List - Online Car Club