
Imperial Home Page -> Imperials by Year
-> 1957 -> Kerry's
Restoration
-> part 12
Katherine, Naked and Unafraid
Friday 1/16/98
Took the day off. As I suspected I could not get the rear axle bearing locally. By 8:30 I had checked with all my parts guys and gave up. It will be here Monday. Unfortunately, I leave for the Bay Area Sunday. The good news is that it's only 17 bucks. I had to pay 100 for a combined bearing and seal for my son's 64 Impala!
So Katherine can't roll yet. Thinking through my options, I decide to strip all the chrome, bumpers, and grill in order to begin the body work. The rest of the side molding came off very quickly. I loaded all my tools in a small roll around tray and dragged it along with me as I moved around the car. Small parts such as trim clips went in Zip Lock bags to be labeled with a permanent marker.
Boy, I can really tell the difference in quality in this car and my others. This old girl is BUILT!
As I worked my way up to the front fenders, I saw where Katherine had taken a lick or two. The bondo looks good under the paint but appears to be about 1/8 inch thick. I'll have to take the paint off and decide if I want to leave it or redo it. One interesting thing is that all the bolts still turned. I'm used to having to torch off these 40 year old fasteners. A little WD40 and these came right off. The only problem is when someone has done a repair because they seem to always use different size fasteners. You will be working along with a 7/16 socket and all of a sudden, some nut you can't see won't come off. After a few minutes of frustration, you realize it is 1/2 or 3/8 or (gag) metric!
Speaking of a rats nest. Here is a real live rats (mouse) nest I found on top of the headlight bucket. I wash my hands a lot and try not to breath a lot of dust when I'm stripping old cars.
All things aside, I had all the grill off by noon. The only problem I had was removing the trim around the headlight "eyebrow". I could not get the Phillips head screws to turn. Finally I removed the 3 bolts holding the headlight buckets and took them out as a unit. As soon as I did that, I could get under the screwdriver and the screws came right out. The little 3/8 nuts along the side came out pretty easy except for one that had rusted away. While I was wiggling the trim, a piece broke off. I hate pot metal. BOB, I'M GOING TO NEED SOME FRONT END CHROME!
I got to looking at my front bumpers. They are pretty bad. I will probably need new ones as these will take a lot of work to look good and probably not be worth it. Wheels began to turn, steam rose off my head...humm, that 59 in the junkyard had pretty decent chrome...maybe I should use the 59 grill and bumpers. Why, it would even look right since you really can't tell a 413 from a 440...the body's the same....humm...
After lunch, I drove back up to the junkyard and took my camera. I'll post the pictures when I finish this roll. It takes a long time to shoot a 36 exposure roll. I'll get less next time. I should have learned this lesson by now, I've had plenty of practice. What looks good in my memory looks like crap in person. The 59 is really pretty sad. Rust in the lower panels. The grill teeth have rust in the chrome. The bumpers aren't any better than mine. And it's still sitting in the mud. Dang it's cold too. Lets go home. I stopped at the owners house and he actually offered to come down but I didn't stay to haggle. I just don't need what is good on it and what it has good, I don't need. GOT ANY BUMPERS BOB?

I did wander down in his yard and look over a car I've thought about buying for several years. It's a 58 Chrysler 2 door Hardtop. The floors are rusty and the interior is shot, glass is fogged but I LOVE the looks. I could fix the floors easy. Get a 440 and Torqueflight cheap. Body really isn't that bad. Why I bet I could..... Stop it Kerry, you have enough projects already.
I hate it when I'm right sometimes.
I sure do hate to see all the neat old cars just rot away. My wife tells me I can't save them all. I guess she's right as usual.
When I got home, I took the rear bumper off. Contrary to the 5 pieces in the front bumper assembly, the rear is ONE BIG PIECE! Heavy too! I had to take the Sawzall to my first bolt on the rear bumper. Someone had replaced one of the bumper bolts and instead of welding the nut on the back of the frame, they welded a bolt on. The bumper would not come off without taking off another bracket which, of course, could not be reached by human hands. 60 seconds of a 20 TPI bi-metal blade removed the problem and the bumper fell off on my shoulder. Better there than my feet. I wrapped masking tape around all the chrome trim and put it in a save corner in a storage room. I wouldn't want anything to fall and bend any of it. I'll put the baggies of small stuff with them.
I carted all the bumpers outside and stacked them against the inside of the fence around my shop. On some boards not on the dirt. They are rusty enough already. The fence protects my neighbors from having to look at all my neat junk. Some people have no appreciation for the finer things of life! Go figure!
Next it was time to empty the trunk. The guy I bought the car from, threw in some disk brake assemblies he said would fit. As I pulled them out of the trunk, I looked and they do look like they will fit but I'll save that project for Version 2.0 (or 5.5).
There was a bumper jack in the car but I don't think it's the right one for the car. I'll ask Ray sometime. Bunch of junk in the trunk. Interesting enough the cardboard panels are savable. I'll have to do some stiffening with some backer material. I just thought that Formica might be a good backer material to glue to...humm..but that's WAY down the road. I put all the stuff I want to keep on a shelf out of the way. I'm cluttered enough without tripping over anything else. I found way back by the back-seat (this is a HUGE trunk!), the metal cover for the spare tire. The trunk has some rot around the back end. Some I'll replace and some I'll probably POR15 and fiberglass it.
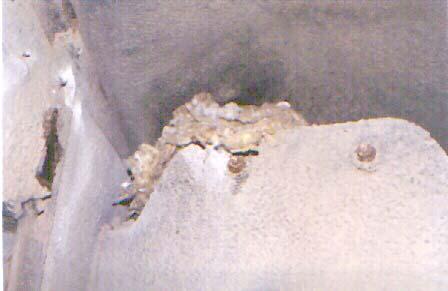
Wait till you see the body work that someone previously did on the rear quarter. Talk about a crappy job. Half an inch of bondo over screen wire over rust...real quality work. I wish I could start sandblasting but don't want to do that in the shop and since she isn't rolling...
The gas tank is definitely damp with gas around the epoxy patch. It's also dented pretty bad directly under the sending unit hole. I might be able to pound out some of the dents. While it was on my mind, I called my Mr. Peterson, my radiator guy, and asked if he did gas tanks. He replied, "Only when I can't avoid it." I told him I was bringing mine in in a couple of weeks. He said he could fix it if the holes weren't too big. He just solders them up, no patching. Got to be better than Epoxy however.
Just a little more trim on the trunk and Flytesweep and I'll be ready to tackle the roof and window chrome. I'll work on that tomorrow.
1/17/98
Got in the shop about 8:30. Most of the trim around the glass came off pretty quick. MUCH easier than my Impala.
The headliner was one of the first things to go. Since it was very dry rotted, it just pulled off where it was glued. When I popped out the bows, it just dropped down, along with mouse nests, insulation, and all sorts of other stuff I would rather not think I breathed in for a few hours. With the headliner out of the way, I could remove the roof band. I LOVE the putty around the roof and rear trim bolts. Never see that in a lesser automobile. There have been very few leaks at the bolts. In fact just one rusty screw.
The metal under the flytesweep stainless was a real mess.
Soundproofing out the wazoo! Some of the nuts were hard to reach. Especially the one bolt that comes in at the corner of roof where it meets the rear fender. One came out finally and one broke off.. I did have to drill out one screw and use an impact driver to get several others but everything came out fairly quick.
The lower trim on the backlight comes has bolts that go into the trunk so I had to climb in and take the putty off. I could not help but notice the enormity of the trunk. Talk about smuggling a crew into a drive-in! I was careful to cover the latch so the trunk would not close and lock me in. I also made sure I knew how the latch worked so if something did happen I could let myself out.
There are only two things left to take off, the fresh air vent between the windshield wipers and the interior door panels. HOW THE HECK DO YOU GET THE WINDOW CRANKS OFF? The manual shows a tool which I don't have. I tried my trusty universal window crank remover but no luck. Any ideas? I hope I don't have to destroy them to get them off! I hoping not to have to remove the door glass. When I did on my Impala it was a royal pain to get them back in. I'll just mask them well and go for it if I can.
I am also not going to pull the front or rear glass. The rubber is in good shape and I don't want to risk breaking it. Speaking of breaking windshields, I was VERY careful prying off the lower windshield molding, on the Impala, I was prying against the glass (not even very hard) and CRACK! The good news is that Impala windshields are only $175, installed. I expect the Imperial is much more if it is even still available.
Yesterday I ordered the rubber and fasteners catalog from Gary Goers. Hopefully it will be here when I am able to work on her again.
I finally got the rear seat out. It was stuck at the top and when I pulled the 3 bolts out at the bottom it would not slide up. Finally when one of my Sons put his weight into it, it slid up and out.
The fabric in the rear seat is pretty good. Dirty but good, I wonder if I can clean it. It has a neat gold thread in it.

The front seat was something else. It is a power seat of unknown condition but I bet it weighs 125 lbs. This car is built like a tank! I am amazed. I may be forever spoiled on lesser automobiles. The only trouble we had was getting hung up by the seatbelts. I had forgotten to take them out. No one ever answered my query about whether belts were standard or optional in 57. Perhaps they were an even later add on.
The doors and rear seat still have the original cloth inserts. It is a white and black weave with gold threads. It's very badly stained but otherwise solid. I wonder if it can be cleaned? Any suggestions. At any rate, I will need some material. If anyone has a source I'd appreciate it.
Katherine is getting pretty naked but seems to be cooperating. She must be anticipated her makeover. I am. If she was rolling and I wasn't getting on a plane, I'd sandblast tomorrow but it will have to wait a few weeks. I need to start thinking about a color.
I've pretty much decided to get dual headlights. As unusual as my big old singles are, they just don't turn me on. Any ideas what they are worth? They are in really nice shape.
This page was last updated October 19, 2003. Send us your feedback, and come join the Imperial Mailing List - Online Car Club
