
Imperial Home Page -> Imperials by Year
-> 1957 -> Kerry's
Restoration
-> part 16
I've been traveling a lot and have just taken a new assignment which will keep the travel in the picture so activity the Imperial with slow down. I also had a disk crash and of course lost a bunch of stuff so I had to go to the web site to check out where I left off. I was surprised to learn it was March 8. But then, not a lot has happened since then.
When I stopped before, I had just gotten the transmission case from Bob Hoffmeister. I took this to my tranny guy who rebuilt it for $200. A rebuilt torque converter was another $100. They are still sitting on the floor in the shop.
Originally, I was going to get Katherine running before I started on the bodywork but when I had all the trouble with transmissions, I started working on the body and now I have to finish that before it makes sense to put in the motor and transmission. At the very least, I need to decide what color to paint the engine compartment, pull the old trans, and clean and paint the engine compartment. Then I should be able to assemble the 62 pushbutton trans with the parking brake on my 440 and drop it in. This way, I at least can get the car under power to move it around and should be able to mask off the engine compartment to keep it clean. I hate to paint engine compartments when the engine is in the car. Anyway that is the plan. I don't have an time estimate on this but probably should try for this summer.
I think I may have mentioned earlier that I was taking all the paint and rust off with a 80 grit disk in my big sander/grinder. It works pretty good and the Imperial sheet metal is so thick there is no warpage due to heat buildup like lesser cars. Using this approach and 180 grits in a DA air sander, I got almost all the paint off. Then I began to work on all the bondo. The old girl had been hit on the passenger side and really worked over by some "body men". While the body LOOKED straight, there was bondo over 1" thick in spots. Grinding all the bondo off was an interesting exercise in creating a mess in the shop. Bondo dust turns to talcum power when you sand it off. What a mess. In addition, there is a LOT more cancer than I knew.

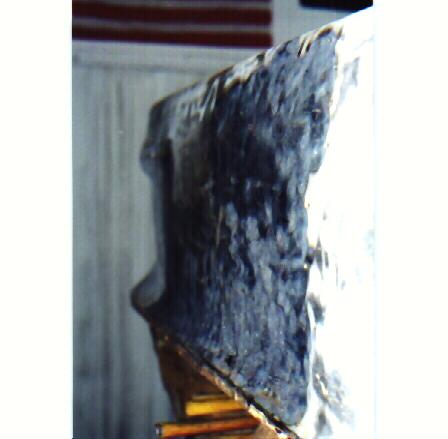
When I got to the rear fender I really got discouraged. After I ground off at LEAST a gallon of bondo, I saw that the fender was a real mess. Pushed in about 1 inch and large dents from top to bottom on both sides of the fin. In some places the metal had stretched to the point where it tore. There are at least 2 places where there are 2-3 inch rips in the metal.
If you have ever seen the rear fender on a 57 two door, it is one huge piece of metal. Mine was one huge piece of messed up metal and it was way beyond my experience. I have several photos of this fender.
Normally, I am not shy about trying something. After all what is the worst that can happen, I mess it up and have to fix it. However, the thought of this fender and how bad it was, and how bad it could be really made me pause. For several months in fact. Periodically, I would go out and look at it or do some little thing or the other on the car. Mainly deluding myself that I was not stalling....but I was.
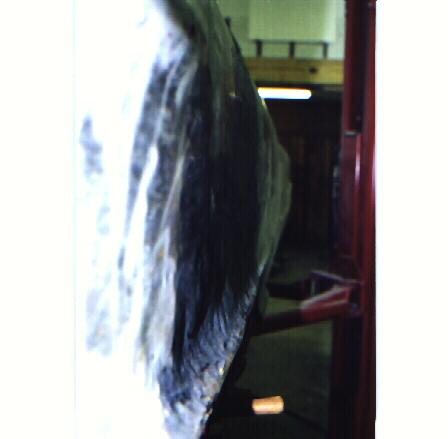
A few weeks ago I decided I had to get the bondo out of all the dents. Not wanting to put the wheels and push her outside, I made a tent out of plastic and sandblasted in the shop. It made a mess but was not TOO bad. Definitely saved a lot of time over the hassle of pushing her in and out. With the bondo off, it looked even worse. Under several of the deepest dents were holes where the slide hammer was screwed in. I hate to think about how bad it was considering how bad it is now. I've wondered several times what happened to the car. It almost looks like it rolled up on the side. There are dents on both sides and the top (??) of the fin. I can't imagine how it happened. If only the old girl could talk...

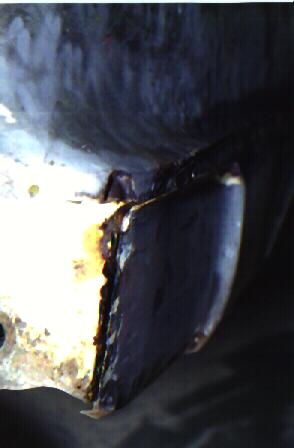
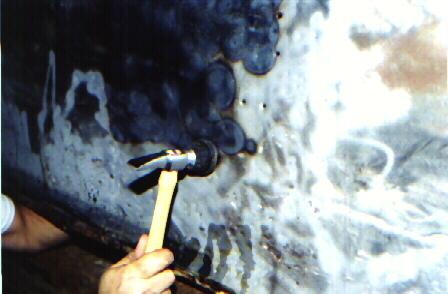
Last week, I finally began to get serious. I felt the first thing was to try to get the seam line straight. As you will be able to see in the photo, the trim line where the stainless goes is about 1 inch in from the rear bumper to the center of the rear wheel well. One bad thing about this thick metal is that it doesn't move easily. Traditional hammer and dolly work had NO effect other than make me tired. Finally, I took a piece of 1" angle iron, drilled some holes in it and bolted it through the trim clip holes to the fender. By tightening the bolts, I pulled the fender out as straight as could be. Optimist that I am, I thought, "..maybe if I heat the metal, it will take a set and stay out...". So I fired up the torch and made a strip the length of the angle iron (4 feet) red hot. All sorts of popping and stuff, not to mention the undercoating burning off the inside of the fender. I had, at least, scraped off all I could get to. After tapping on the hot metal in hopes of making it set and quenching it with water, I loosened the bolts. Of course, the darn thing went right back where it started. Frustrated, I turned off the lights and went to the house.
Saturday morning was beautiful. Some smoke from the fires in Mexico but otherwise very nice. The local AACA was having a car show so I went in early to take a look and have a chat with my friend Ray (the other 57 Imperial in town). Sure enough, Ray was at the concession stand selling food (his normal post). He had driven his 57 but was not having it judged. However there was a beautiful 57 New Yorker that looked nearly perfect. 34000 original miles!!!!!
Ray did not offer any suggestions about the fender so I hopped back into my sons 64 Impala and came home.
One problem with the 57 is its size. I'm 6'3" with correspondingly long arms and I could not reach over the fin and work the hammer and dolly effectively. Couple that with the big dent and badly welded rear quarter and I decided to take the replacement patch panel off. This turned out to be easier than it looked. The original fender was put together in 2 pieces. The lower half was welded inside the upper and a very small angle brace was welded inside them both. When the repair was done, the new lower quarter was gas welded (in spots) OUTSIDE the seam. This actually made it fairly easy to grind the welds off. The biggest problem was the splash panels under the car. Even with it on the lift, it was hard to get to. After about 15 minutes with dirt and dust in my face, I broke out the air chisel and cut the welds out.
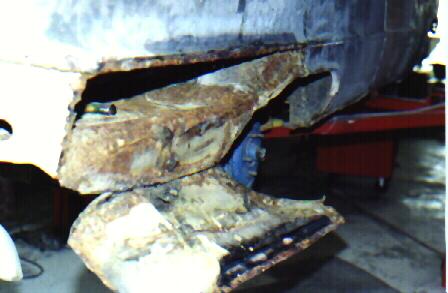
What a difference! There is about a 3 inch gap between the bottom of the upper fin and the floor of the trunk. Perfect for laying all my hammers and dollies. Now that I could get to it, I tried to massage the metal back into shape with traditional hammer and dolly work. I'm sure that someone who really knew what they were doing could have made this work but today at least, that was not me.

The problem with most accident damage is that the metal has been stretched by the impact. Where before you may have had a square foot of metal, now you have more and the shape gets weird. The trick is to shrink the metal. There are two ways to do this. Cold hammer and dolly will eventually work but with all the metal I had to shrink and the thickness of the Imperial sheetmetal, I decided I needed a faster way. Out with the torch again.
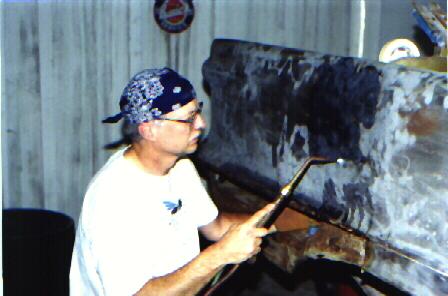
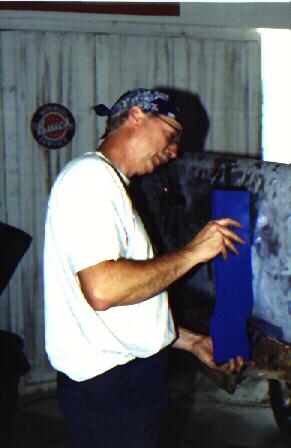
If you take your torch and hold it on the metal, it will expand and either go toward you if it is bowed out or away if it is bowed in. If you then hammer and dolly it while it is hot, the metal will shrink back to its natural shape. The trick is to not let it go back to is ultimate natural state which was a flat sheet, or even more natural, a pool of molten stuff on your shoe. (This is not really a problem with Imperial sheetmetal because it is so thick it is nearly impossible to melt.) If you continue to do penny size spots the metal can be shaped back the way you want it. Periodically take a wet rag and cool off the metal or it will heat the panel and cause further warping. Note, a wet rag applied to previously red hot metal creates steam and will burn the ---- out of your hands, be careful.
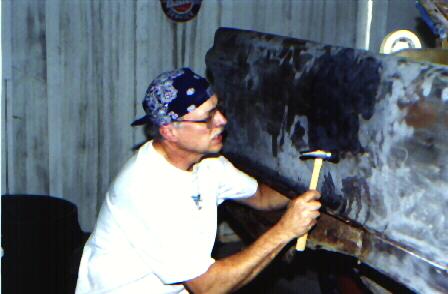
I'm not hitting the panel as hard as my expression looks. I had just burned my hand on the back side.
Getting better and better.
After about 6 hours yesterday and 4 more today, the panel is much better. Its not very pretty and certainly not smooth but it's a darn sight closer to where the paint will be than it was before. A better metal man could probably get it down to near metal finishing but I'm going to be content if I can get the seam straight and no more than 1/4 inch of filler. For the most part it looks like it will just take a skim coat of filler.
I decided to put the lower quarter back on right so I trimmed the excess off and using an air flanger, put a 1/16 offset at the weld line and fitted it under the upper piece. It did not really line up tight but when I put a couple of bolts with large washers through the trim clip holes it pulled up very nice and the trim line is STRAIGHT! Thank you Lord!
I decided not to get out the Mig welder because I am tired. All the traveling has made me a wuss. I've got to get back in some kind of shape. I'm in town for the next couple of weeks and plan on welding in the quarter and starting on the door next week. I may pull the door so I can get to it better. It also has a spot where the bondo was over 1 inch thick but it is no where near as intimidating as that 7 foot long fender. The front fender should not be a real problem. Its just about 1' square. The hard part is that I have to get all the bondo out of the low spots. If its pretty, I may put the wheels on her and push her outside to sandblast the bondo out. If not, I will rig a tent again and do it in the shop.
Kerry
This page was last updated October 19, 2003. Send us your feedback, and come join the Imperial Mailing List - Online Car Club
