Imperial Home -> Imperials by Year -> 1961 -> Disc Brake Conversion
|
I have owned my LeBaron since 1998 and in the last seven years I have turned it from a creaking mechanical wreck into a reliable daily driver. It has its blemishes and it would never win a concours prize but that's not what I own it for. If it was perfect I would never dare drive it. As it is, I have driven the Imp all over the UK and even made a trip in it to the south of France where I upstaged all those flash Ferraris and other exotica in front of the casino in Monte Carlo and at the film festival in Cannes.
I solved the costly gasoline problem by converting the car to run on propane. (You can read about that job elsewhere on this website) The brake problem took me a lot longer to deal with. Partly this was because the old brakes were useable even if they were not up to modern standards and partly because I was not aware that you could get a conversion kit for an Imperial Recently I came across AAJ Brakes on the internet and was surprised to see that they appeared to cover Imperials. I called Roger, the guy who runs the business, and he told me he could provide me with a conversion kit. He assured me that the rotors had the right bolt pattern and that it would work well. Speaking to someone over the phone still has advantages over e.mail. I got a good feeling about Roger. I have dealt with guys like him in the past and I felt I could take his word that the kit was what it claimed to be. Nevertheless, before I went ahead and placed an order, I called a man I knew in the UK who had used an AAJ kit to convert his 1959 Chrysler 300. He was very positive about it so I went ahead and ordered the goods. Once the kit arrived, I set aside a few days to do the conversion. I prepared all the material I thought I would need. Spare brake pipe, brake pipe couplings, brake fluid, copper grease etc. After years of tinkering with the brakes on this car and my old Cadillac I have all the right tools. Things like a flaring kit and the right brake pipe spanners make all the difference.
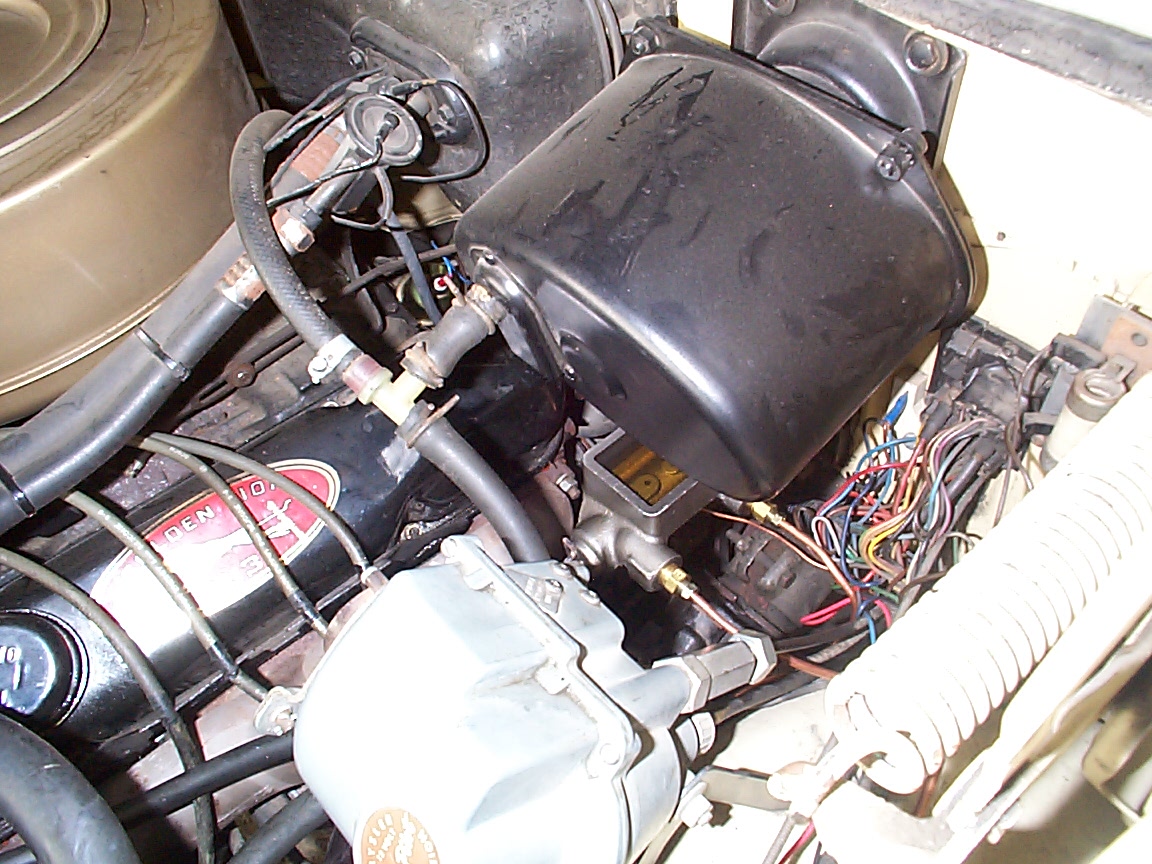
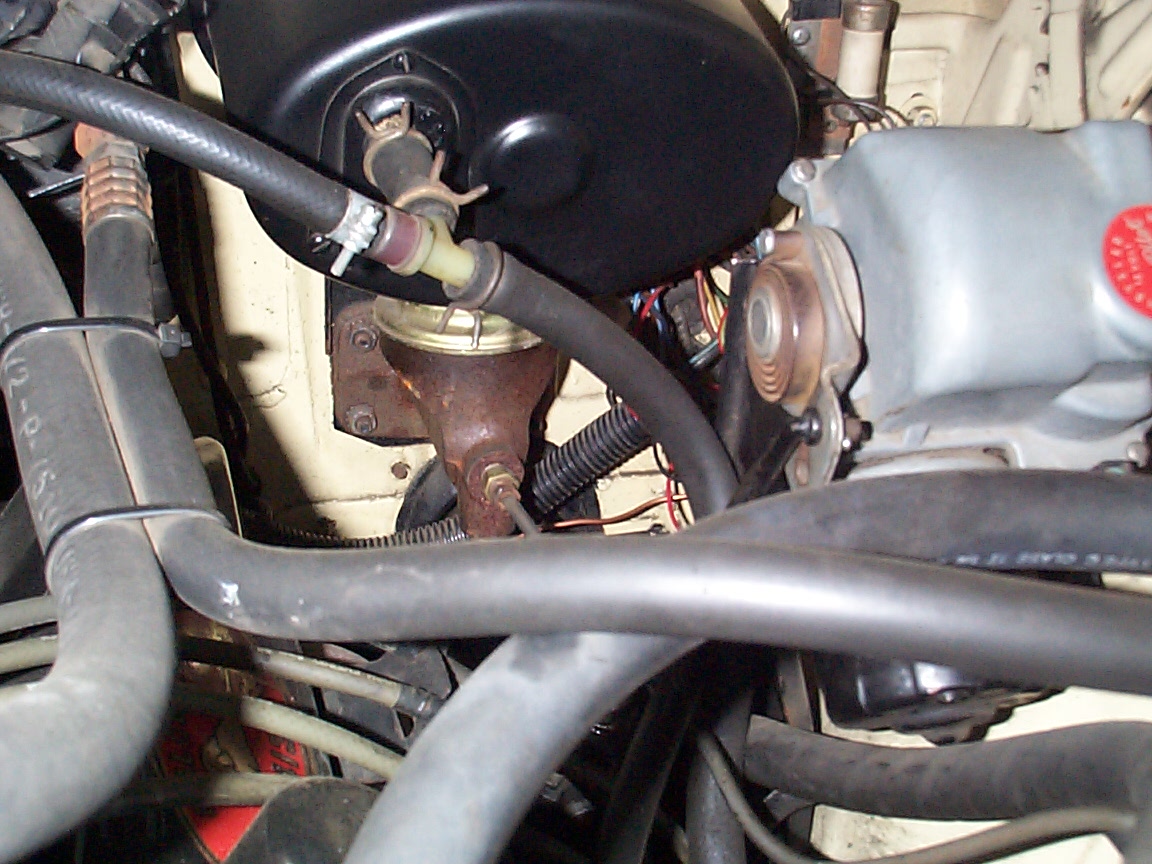
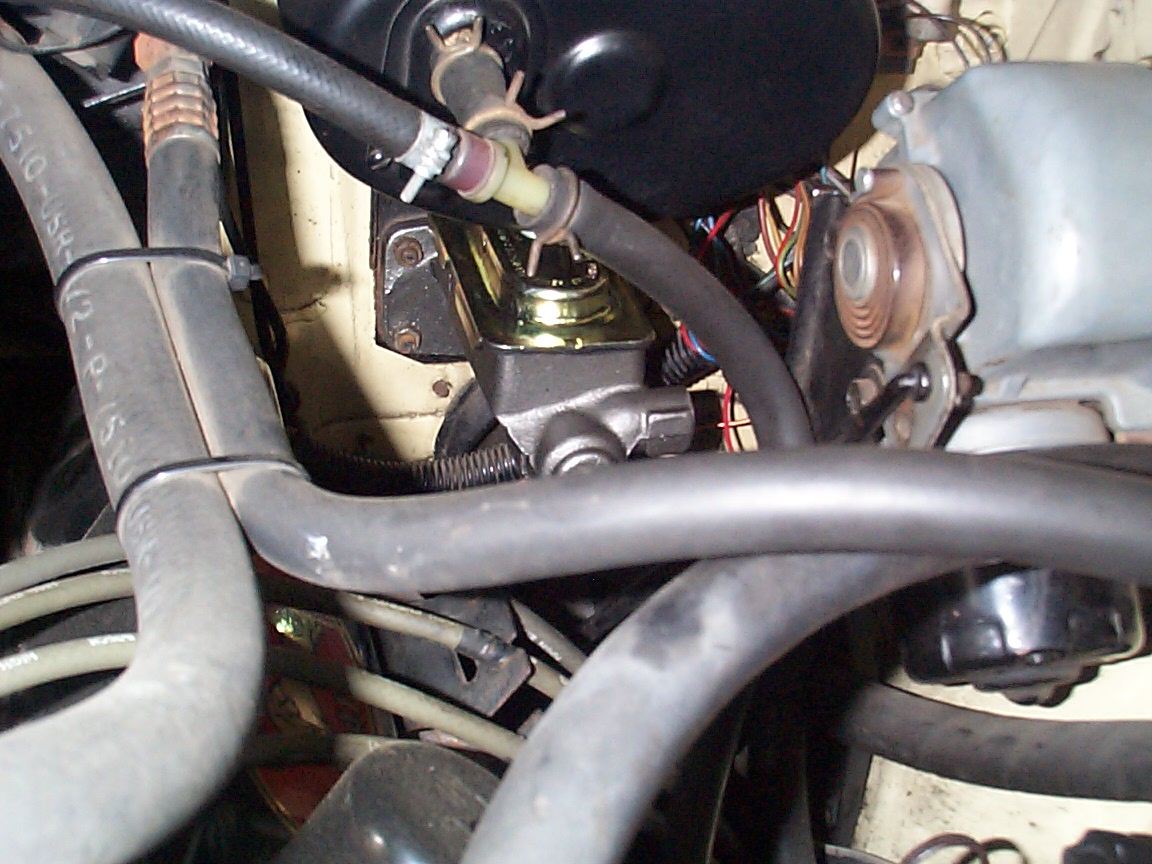
Next came the M/C itself. No problems here. The dual M/C provided in the kit is a simple bolt-on replacement for the original unit. If it wasn't for the notorious booster getting in the way, it would not take more than ten minutes to swap. Unfortunately, you cannot remove the booster and then swap the M/Cs because the booster bracket is sandwiched between the bulkhead and the M/C itself. Anyway, 25 minutes of fiddling around got the job done. Here are two pictures, before and after.
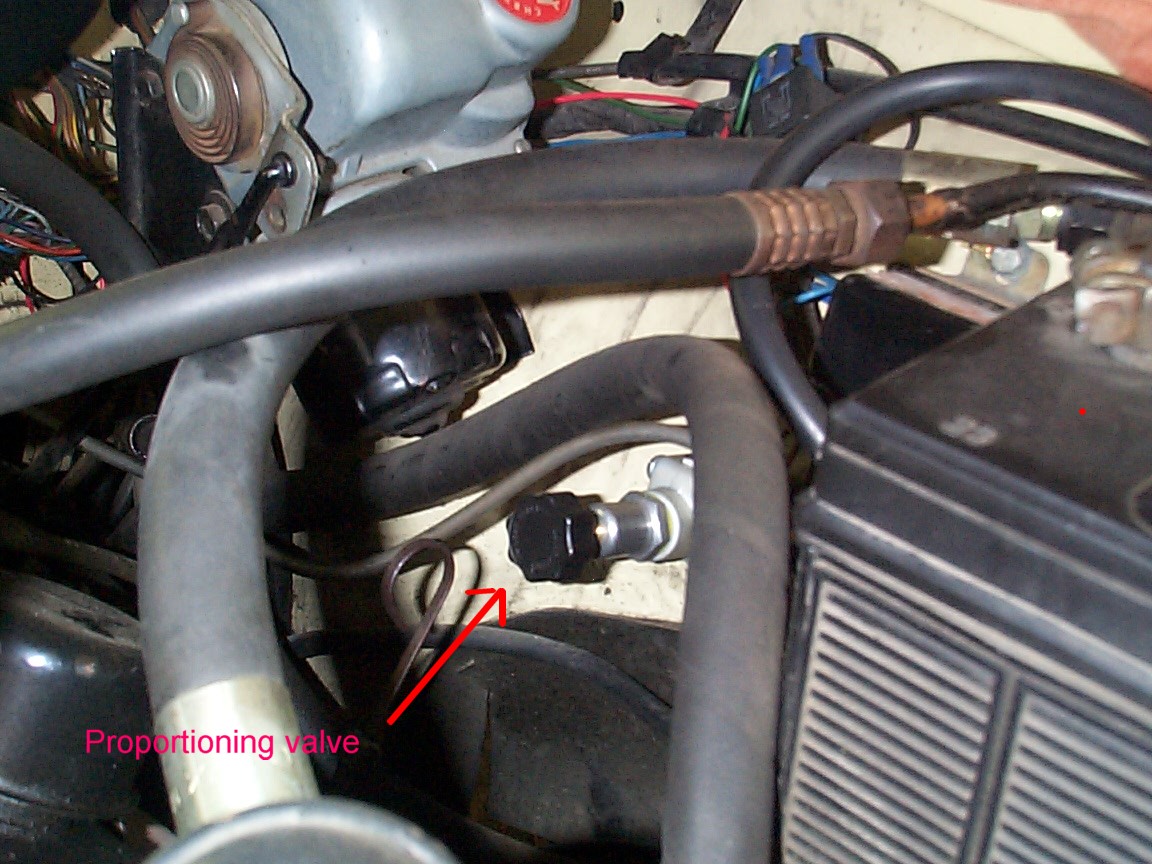
Now it was time to split the brake circuits fore and aft. This involved disconnecting the universal pipe from the original single M/C to the four way block on the front cross member, sealing the hole with a cap provided in the kit and then diverting the rear brake circuit though the proportioning valve and up to the rear chamber of the new M/C. Next, the front circuit.
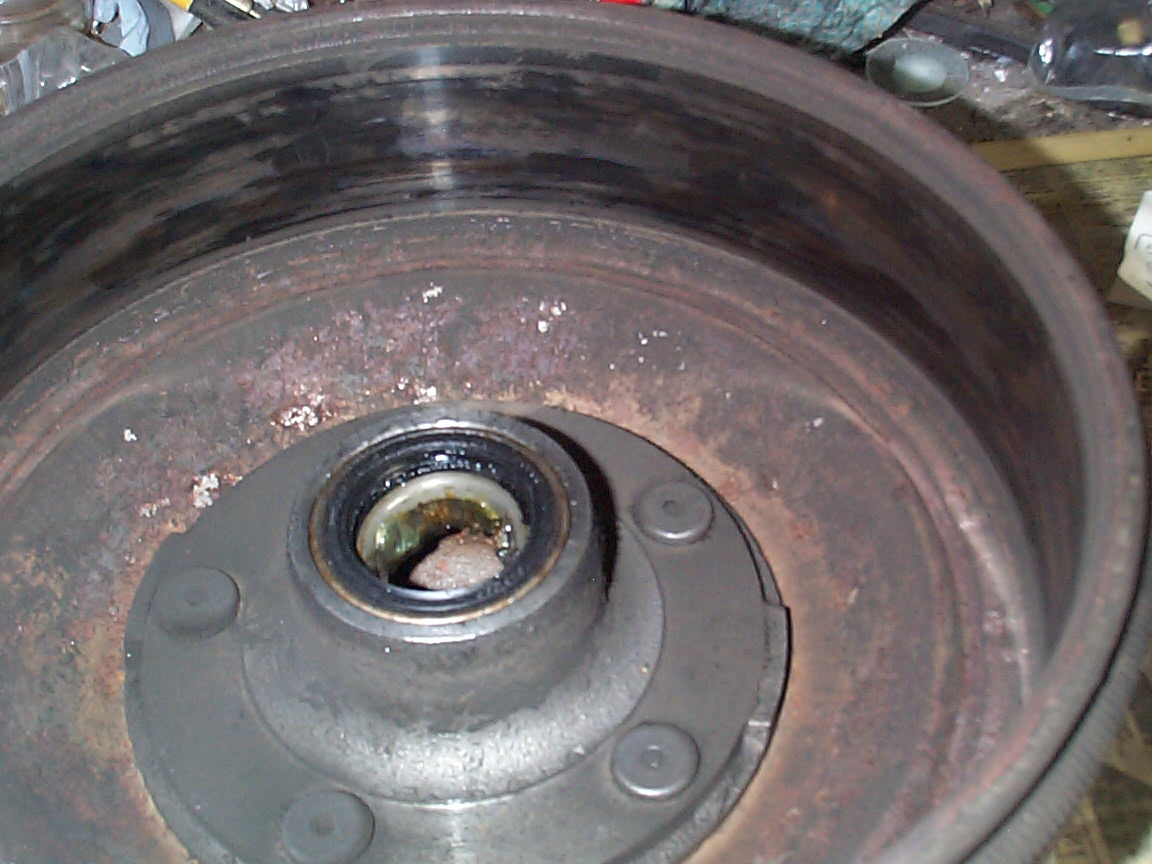
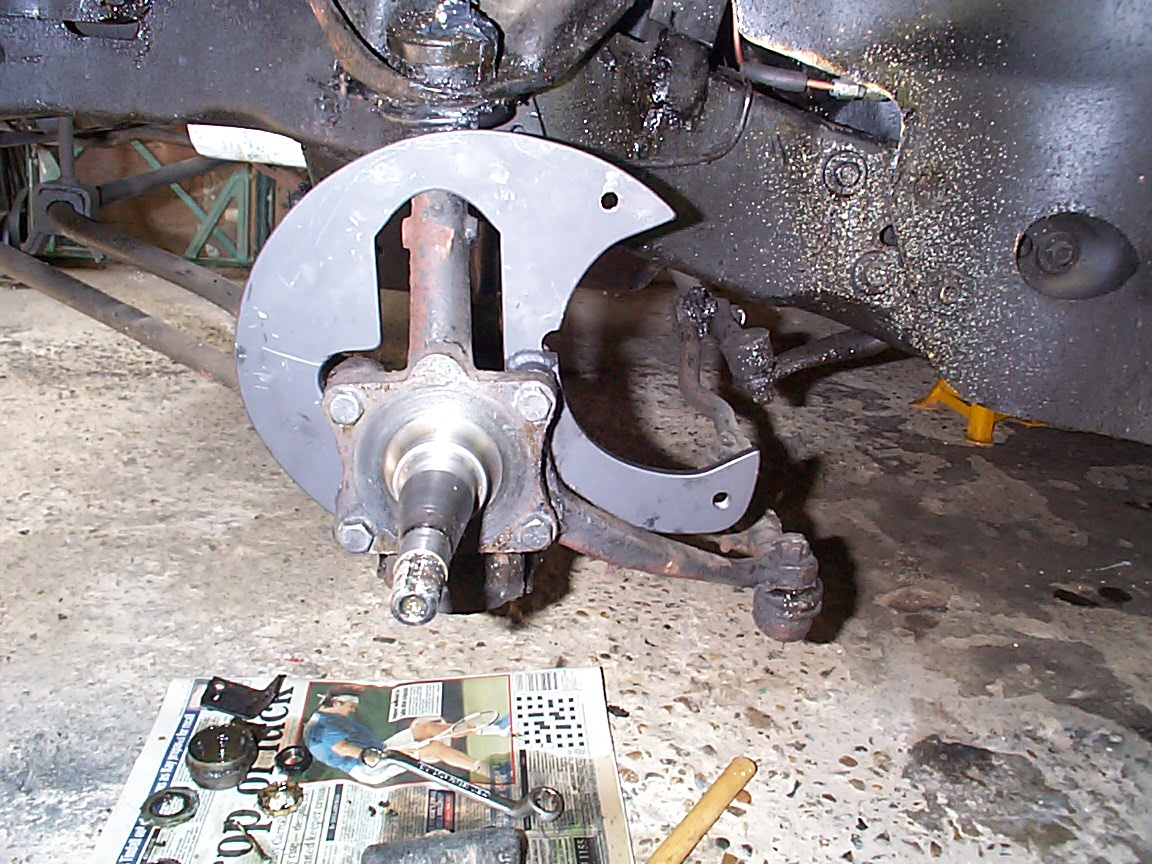
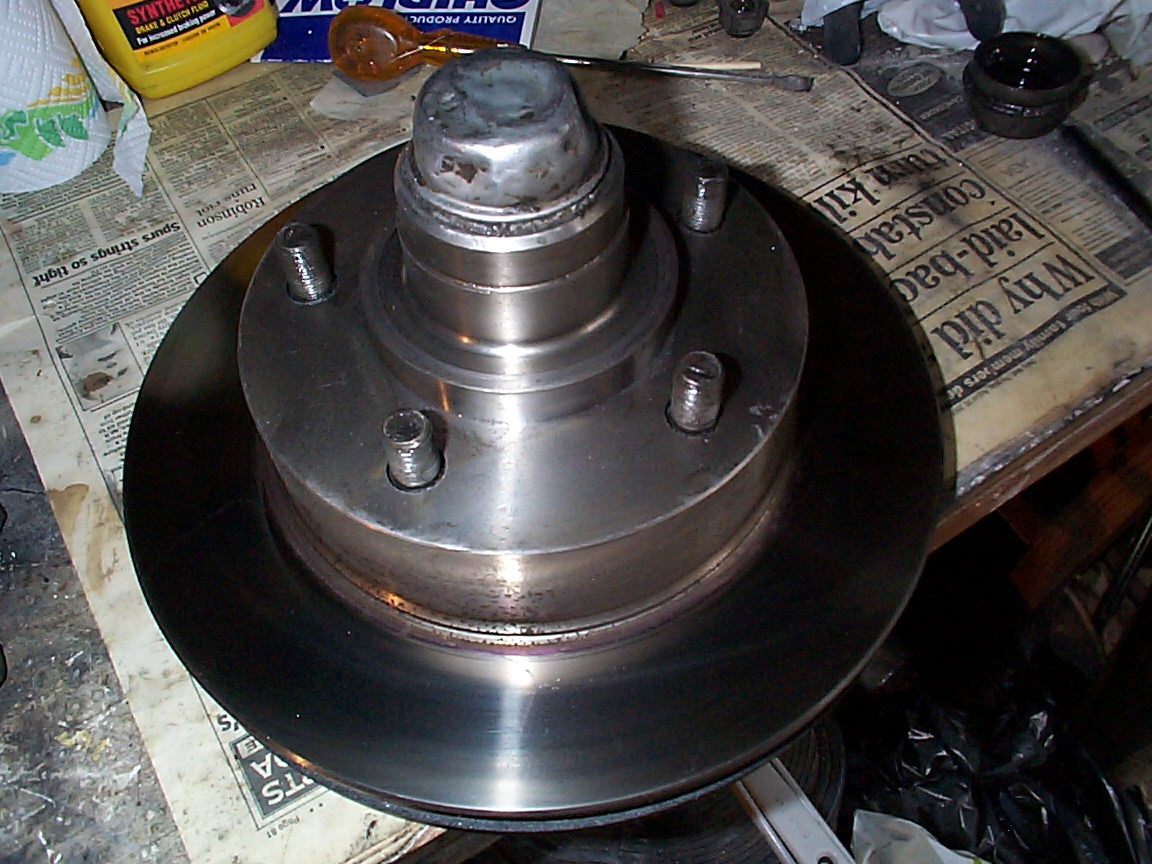
One more thing was needed to complete this stage. The piston cup on the new M/C is shallower than the old one. This means shortening the brake pedal push rod. Most Imperials of this age have an adjustable rod but mine did not, so before I fitted the new M/C, I marked the rod where it exited both the old and new cylinders. Then I cut the same distance between the marks off the end of the rod. The manual says that you should leave between a sixteenth and an eighth of an inch free play before the rod engages. When I had finished, I was spot on. Then, with my wife starring in the role of chief pedal pusher, I filled and bled the system. Finally, it was time to test the new brake circuits. I took the car out for a test drive. Although the brakes were no better at stopping the car than before, the feel of the pedal was improved. It responded earlier in the stroke than with the old cylinder and felt firmer. Most importantly, it was working properly so I knew I could proceed to the next stage the following day. Fitting the discs. I was expecting the fitting of the rotors and callipers to take some time but was surprised how simple it was. The kit supplies you with a bracket to hold the calliper, a pair of 12" rotors and a spacer which fits on the shoulder of the spindle. The only fiddly part of the operation was to get the rusty cotter pins out of the old bolts holding the steering arm and backing plate in place. A mixture of gentle persuasion followed by angry threats and curses eventually got them to see reason.
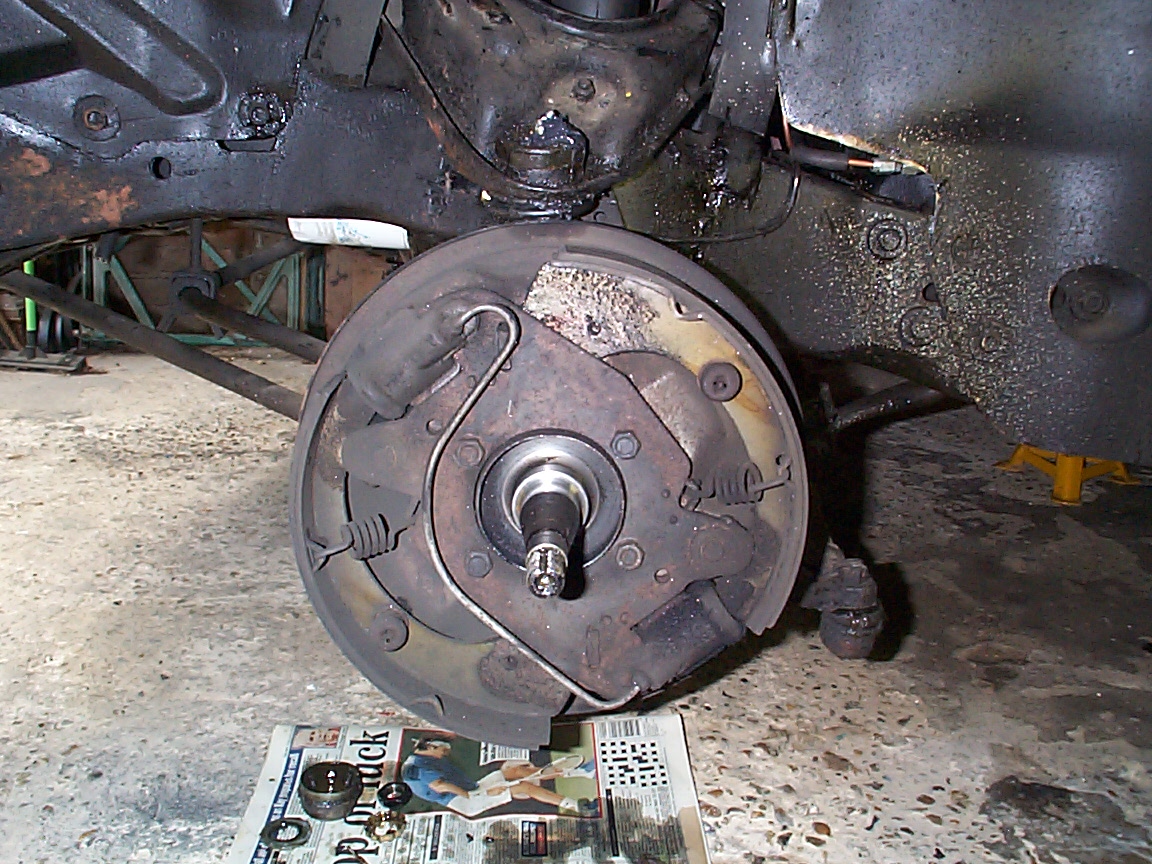
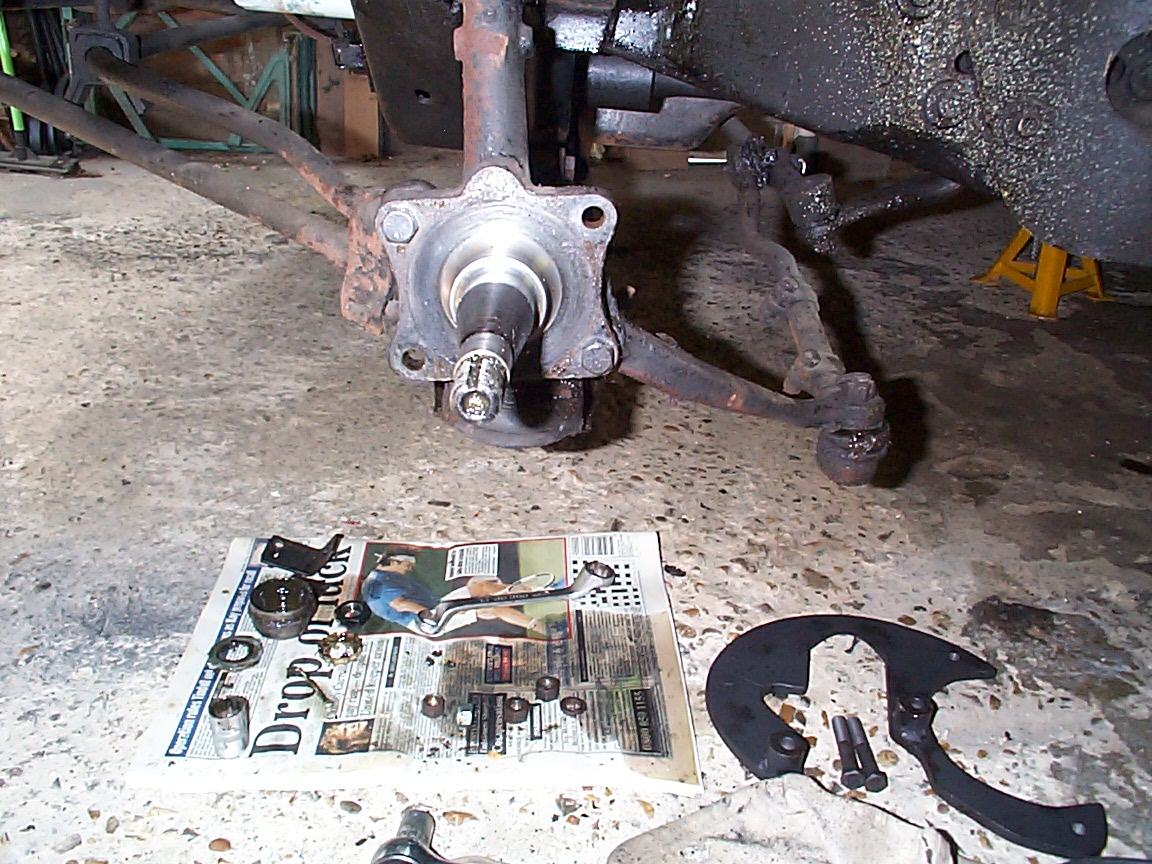
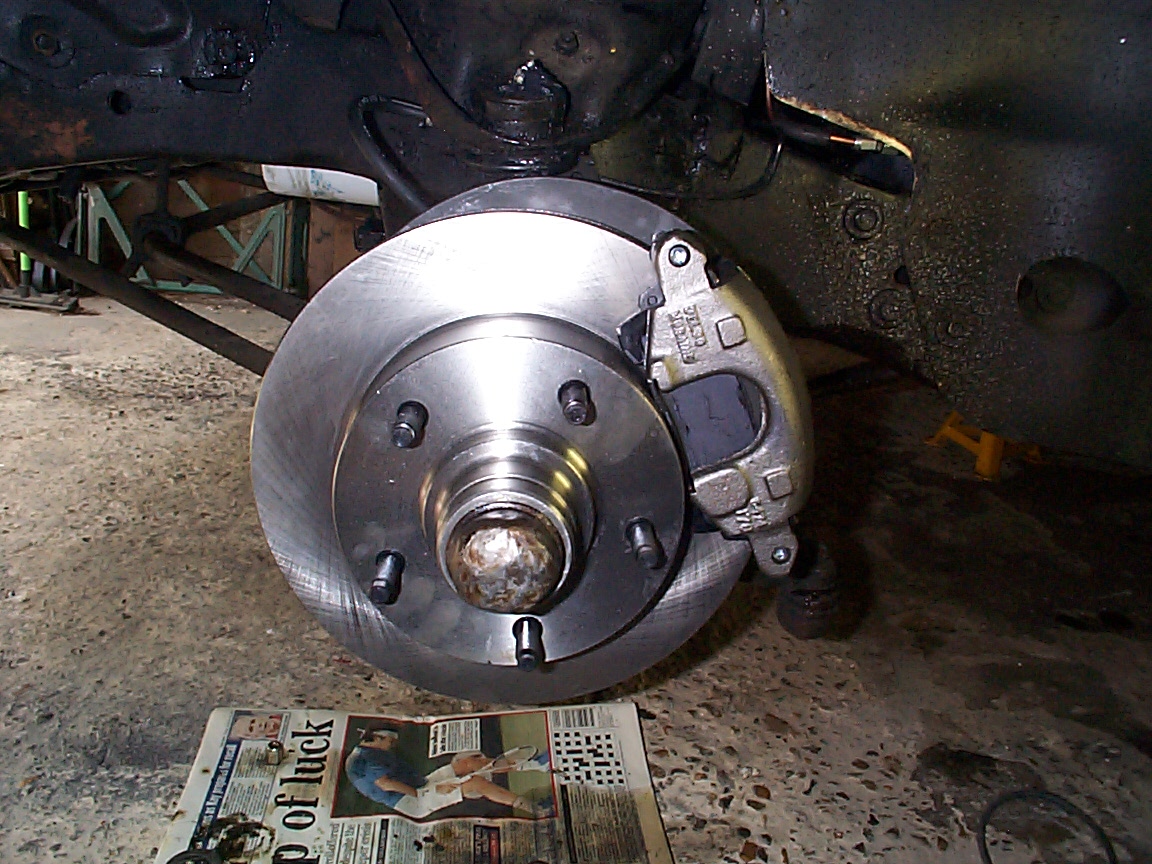
Once the backing plate was removed it took just a few minutes to refit the steering arm and attach the calliper bracket. All new nuts and bolts are provided.
At this point it was time to invite my long-suffering wife back to the garage and set her to pumping again. She likes this job almost as much as I enjoy vacuuming the carpets. The callipers bled very easily and before long I was ready to try out my new brakes.
To begin with, the car was very squirrelly. Pulling sharply to the left and swinging its tail about when I braked hard. Also, I could not lock the wheels and braking distances were no better than before. The pedal felt good though. Far more sensitive and responsive than ever before. I put the unevenness and poor stopping down to the new rotors and pads. I felt they needed bedding in. I set the proportioning valve to give a bias to the front brakes which calmed the rear end problems to some extent. but at this point I was beginning to wonder if I had wasted my money.
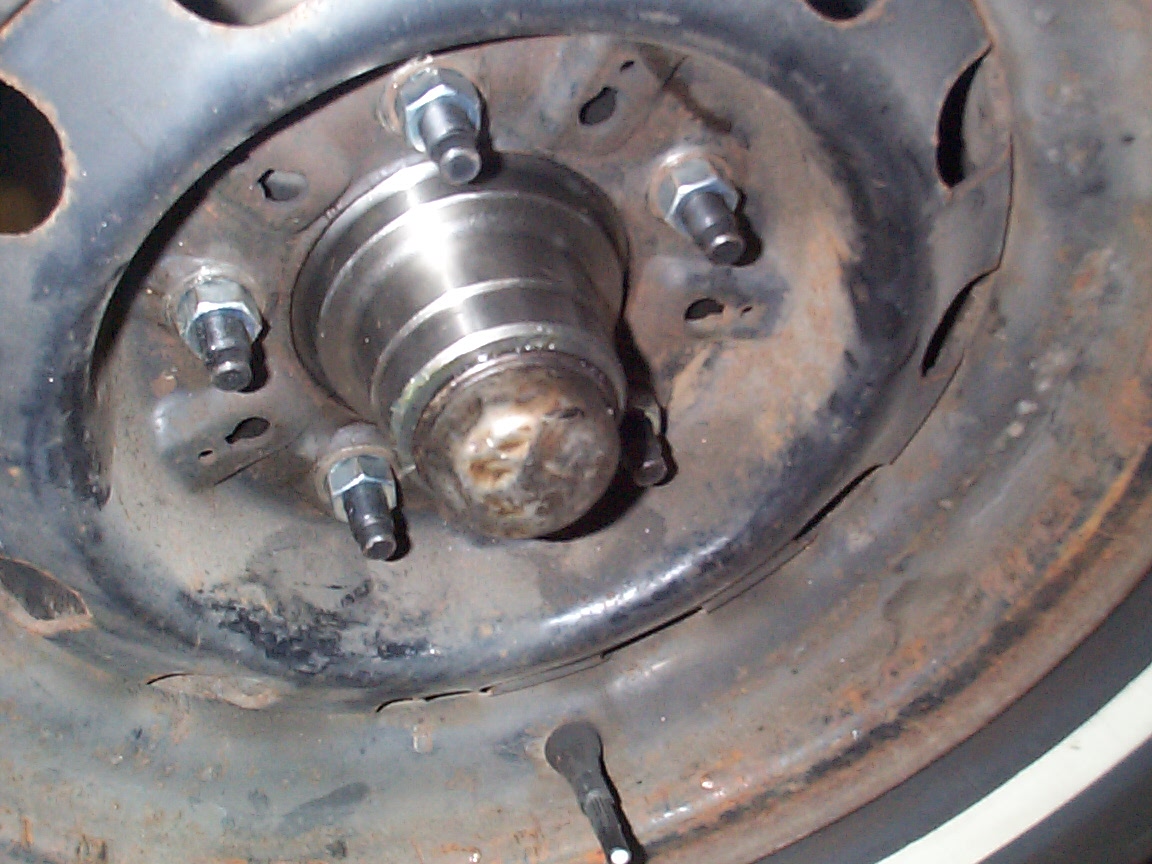
The next day I had to make an eighty mile round trip so I decided to use the Imperial and get those brakes worn in. I was right. By the time I got back home they were working much better. The car was stopping in a straight line and the braking distances were getting shorter all the time. By now I could lock the wheels if I wanted. A couple of days more driving and this is the greatest compliment I can pay the new brakes: I don't notice them. I use them as if I were driving a modern car. I no longer feel I have to leave extra distance between me and the car in front just in case of an emergency stop. OK. That's what is good about the new brakes. Now, here is what I don't like. Although the brakes work fine and I can lock the wheels before it happens, I can push the pedal right to the floor when the booster is operating.. I am sure there is no air left in the system and the push rod is not too short. It has been suggested to me by another OIC member who is much more knowledgeable than me, that the root of the problem may be the M/C. Due to limited space, the only unit that will fit has relatively small chambers and is probably really designed for drum brakes. Disc brake units usually have a larger capacity. Another concern is that the studs and lug nuts in the new rotors were a little flimsy and thinner compared with the original Imperial units. Worse still, the hub was smaller so that the hole in the wheel would not centre it on the rotor. Only the lug nuts were holding it in place.
So, there it is. I appreciate that there are those of you who will demand total originality from your cars. This is certainly not the project for you. However, If, like me, you think an upgrade to your brakes would make driving your old Imp safer or more enjoyable then it is well worth considering. I definitely feel more confident when I am driving the Imp then ever before. Bear in mind also that this is an easily reversible alteration.
Tony V. |
This page was last updated 5 February 2006. Send us your feedback, and come join the Imperial Mailing List - Online Car Club