Imperial Home Page -> Repair -> Body & Paint -> Paint & Body 101 -> Part 13
Rust repair and body work
Went through a lack of motivation and only put in about 6 hours in the remainder of last week. Finished the hood, fender skirts, door and fender tops and decklid. I tried to fix a small problem on the upper right front fender and ended up messing it up. Really frustrating but completely my fault. Hint: When reinstalling a hood, be careful with the socket handle......&^*(%##)
Monday march 3,
Resprayed the fender top. FINALLY came out fine. It was warm and clear so I took the car outside and cleaned up all the door jambs ready for paint tomorrow.
About 4 hours total today. 2 on the paint and 2 on the jambs. Also went into town and picked up the 'cat whiskers' for the windows and also ordered the windlace for the interior trim. Should be in before I'm ready for it. I also ordered the door rubber from JC Whitney. According to their catalog, it looks to be correct. I don't have time to wait on Gary Goers but may order some from him if the JC Whitney stuff doesn't look 'right'. Some bumpers and stuff will just have to wait until I can pick them up at Carlisle this summer. I need to remember to pick up as much rubber stuff as I can this summer while there. The 68 convertible will be MY next car but I may end up doing 66 300's again for Robert Soule and Jeff Carrothers first. I should get good on removal of that particular trim.....
Some more conversations with the paint Doctor, Randy Ferguson:
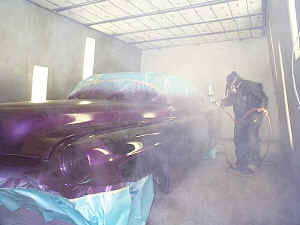
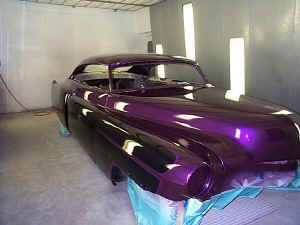
Hi Randy,It's looking good! Got the top done. A few runs but I'm learning the technique. I did not realize the paint would self level as much as it did and put the last couple coats on a little too wet. At least I can avoid that on the rest of the car.
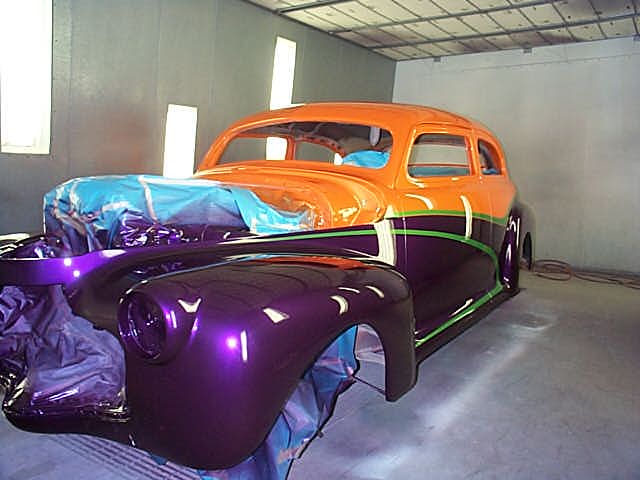
Question: Since the hood is already off the car and the decklid can be removed in a couple minutes, what do you think about painting them off the car instead of mounted? My concern is making sure the base 'matches' but the top came out nice and even so I'm thinking I can do it ok as long as I paint the final coat in the same order, ie spray one fender, move to the hood, and then do the other fender. Sure would make it easier to reach. BIG car!Hi Kerry,
So... You bought one of the cans with a run, eh!!! What pressure are you spraying at?? You want to reach the point right in between orange peel and run, which is a very fine line. I've not used the Omni clear, but I've heard from several sources that it smells and sprays just like the old PPG 2020 clear, which is some of the best stuff I ever sprayed. If it is in fact the same, the fine line just got a lot finer!!! Mostly toward the edge of run!! It flows out awesome though.If it makes your job easier, by all means, remove the deck lid. I never suggest doing this, because some guys will start panel painting everything, and get in big trouble. Some folks think you can paint each piece separate on different days and conditions as long as the paint is all out of the same can, This could not be further from the truth. If you paint the parts in question at the same time, I doubt you will have any problem. You don't even need to keep the sequence in order if you don't want when doing it this way. The main thing is to just make sure that you do it all at the same time. Everything imaginable effects color match. So use good logic and you'll be fine. Just as an example, I went to a PPG color adjustment class last year. We were all given enough paint to spray a 16"x16" panel. There were about 20 of us and a quart of paint was more than enough to go around. We used our own guns, with our preferred set-ups and with-in 20 minutes, we all had our panels sprayed with color and clear. After the panels were dry, they were brought into the classroom for evaluation. When the panels were spread apart approximately 12", they all looked the same, but butted end to end, no two matched.The only difference was the painter, the guns and the spray pressures used. Nothing else changed. One guy even sprayed two panels and they were considerably different. The only thing he did to change it was bump up the air pressure by about 2psi at the gun.You can usually get by with panel painting when spraying solid colors, but metallics is a different story altogether. I think you'll be fine though. If it were me, I'd probably paint them separate too if I had the space. That's a big limitation when spraying in a booth though, because there is no room to spread out parts and still have the car in the booth, at least not without a super sized booth.Practice on an old panel some before spraying more of the clear to get the hang of it. Don't use the car to practice on. These base/clears are great, but if you sand through while trying to remove a run, you're face with a sometimes difficult repair procedure. Take your time and always monitor the clear coat closely to determine when it's ready for the next coat. I imagine you're trying to rush it. Use the urethane "touch test" when spraying clear. At the wettest point of the first coat (normally where you stopped spraying) as close to the panel as you can get, on the masking paper, touch it with your finger and pull away slowly. This can be done about 5 minutes after the first coat is applied. If it is too wet for the next coat, it will still be in the liquid state. Keep monitoring this aver couple minutes, until it starts to 'string' as you pull your finger away. Be sure to check in a different spot each time, or you won't get a good reading. Once it's reached the point of stringing, about another 5-10 minutes will give it enough time to properly flash for the following coat. The clear should not string at all, but rather be sticky when you touch it. If it strings, it's still flowing, and is still too soon for the next coat. Follow this procedure between each coat of clear, and you should get less runs.Yeah, I got the run and sag both. Must have been an unadvertised special...I only ordered the runs. Yes it is a fine line but after reading your post I realize what I did. I sprayed when it stringed, not 15 minutes later. Also I knew I was putting the last coat on wetbut did not realize how wet or that the previous coats were still moving. It really flowed out nice and looks great. I can fix the runs and sags with no problem. I'm learning thanks to your great advice
There are no rules as to how long you need to wait after the clear strings. Under normal conditions, about 5 minutes after it hits the stringy point is good, but shop conditions and materials selection will vary these times. I'm almost always in a booth anymore, so things move along a lot faster, due to the air flow and heat control. I do not like fast setting products, as they tend to lose their gloss, so I opt for some of the slower stuff still available. One of the biggest problems for me anymore is doing work in my home shop, where I don't have a booth. I'm used to the faster pace of spraying in the booth and it forces me to have to slow down and extend flash times. All the same rules apply, but it's hard to stand around and watch paint dry!! Don't worry about the manufactureres suggested flash times, they are only put in place as a guideline.Got any tips to share on how you color sand and buff? Hopefully I'd doing it right but then I thought I was blocking correctly too.Hi Kerry,Why did you start, before asking questions?!?!?!?! I'm just messin' with ya!!
It's a long, drawn out process, but the end results are well worth the time and effort. I suggest doing ONE PANEL AT A TIME!!!!!!!! Today's urethanes get extremely hard when opened up for extended periods of time. To help eliminate this problem do one panel, start to finish, before moving on to the next. When you cut through the surface of the clear coat with sandpaper, the paint starts gatting hard immediately. My first step is to mask off the panel being done to eliminate sanding sludge and buffing compound getting into areas that will be hard to clean up. The next step is to go over the panel with a tack rag, removing any dirt that might be present. A small dirt nib between the freshly painted panel and the sandpaper will cause lots of damage. Start with a clean bucket of warm, soapy water and soak a couple sheets each of 1200, 1500 and 2000 grit sandpaper. By soaking it in the water for about 15 minutes, it will soften the paper and help prevent it from digging in on the edges. I find the 3M rubber squeegies and the soft sanding pads work well to wrap the paper around for a block. Starting with the 1200 grit, I remove the orange peel, but go no further. Always keep the panel wet as you sand. This will lubricate the paper and make it cut better and last longer. It doesn't take any pressure to make the sandpaper work, so just allow it do the work for you and concentrate on sanding in a nice, uniform pattern. Applying too much pressure will also cause the edges of the paper to cut too deep into the fresh paint and you will have a tough time getting rid of those lines. The rubber squeegie works well for removing the excess water quickly to monitor your progress. Once the orange peel and minor surface imperfections are removed, switch to the 1500 grit paper. This will further refine the surface and remove the 1200 grit scratches and any slight blemishes left from the first step. You now move on to the 2000 grit paper and sand out the 1500 grit scratches. Remember to stay off body feature lines and be gentle on panel edges throughout the entire process. You will be able to tell when the paint is getting about ready for buffing, as it will get to the point that the sandpaper just glides over the surface, rather than having a slight drag. It will take a little longer to get through the 1500 grit scratches than you might think, but be careful not to sand too long. Leaving as much material on the vehicle as possible is a good thing. Once you're confident you have sanded the panel as slick as possible, dry it off good and tack once more, to insure all traces of dust is gone.
You can use either a wool pad or foam. I use a 3M backing pad on my buffer that allows for quick change buffing pads. I strongly suggest using a designated pad for each step. I've found that on fresh paint, a foam pad works fine for the first step, but if it has set for a few days and is getting pretty hard, a wool pad works best. This is for the first step only, all following steps will be done with a foam pad. The first step is to buff the panel to a mirror finish (or so you will think) with 3M 05711 liquid rubbing compound. After I am happy with the results, I will place a small amount on a rag and hand rub the panel quickly. This will remove most, if not all of the remaining compound left on the panel. The panel should be free from all traces of the compound before moving to the next step. Switch from the buffing pad to a finishing pad now (it should be gray in color, I'll get product #'s for you later). The next step is buff the panel with 3M Foam polishing pad glaze 05995 or 05996. One is designed for light colors the other for dark, though I'm not sure it makes much difference, really. This step will brighten the finish and leave you with really nice looking surface. The glaze will help fill any minute scratches and swirl marks, again, upon completion of this step, rub it down with a tiny bit of the glaze on a rag to remove any sludge left behind. It's time to change to another clean finishing pad and go over the panel with 3M 05928 Finesse-It II finishing material. This will really bring out a nice shine. This is also one step you don't want to skip. It really does make a difference. All traces of sand scratches and swirl marks should be gone now. If not, keep after them until they are gone. A quick rub down by hand again and we'll finish this up. Next, and final step, is to hand rub the panel, using a cotton cloth and 3M Hand Glaze. I used to use a wipe on--wipe off technique, but have since found it better to keep rubbing until the glaze has worked itself into the finish and has naturally dried, leaving behind no trace of residue. I will then take a clean, dry cotton cloth and rub over the panel very lightly, just remove anything that possibly is left behind. The panel should now literally look like a sheet of glass. A perfect mirror reflection should be present. I'll attach a picture I think I have stored away.
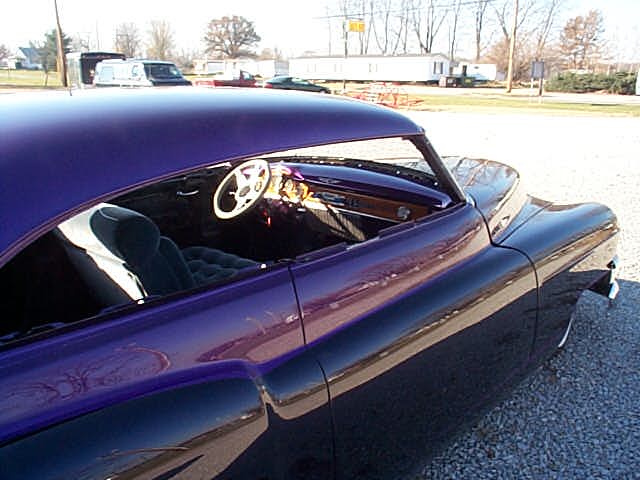
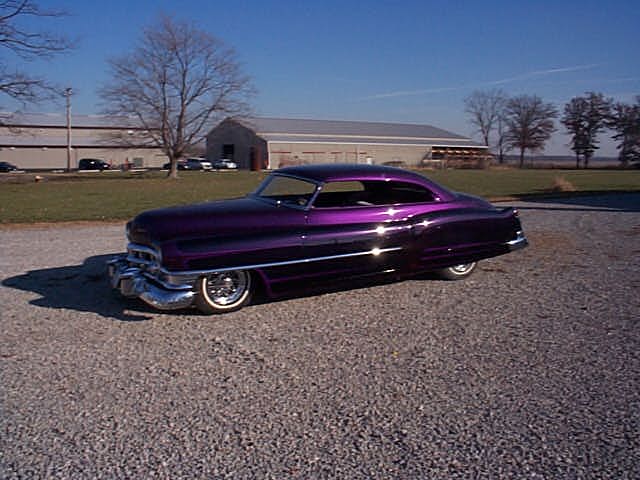
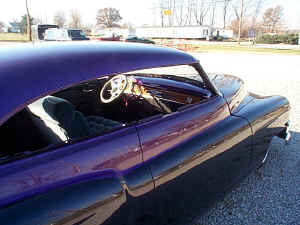
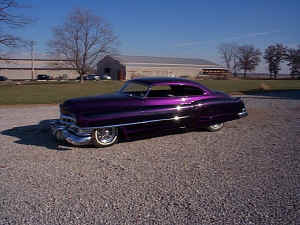
Randy, those photos are GORGEOUS! I'll put them in my saga. (Note to reader: If there was any doubt that Randy knows his stuff, these photos should remove it.!)
 Thanks again for the great advice. I'm not too far off track. Do you run a hose over the surface while sanding or just keep dipping the block and paper in the warm soapy water?This job will not be a great as I'd like it because I have some orange peel in the base coat. Looks pretty good anyway. For the next job, is it acceptable to wet sand the base with 1000 grit, wipe down with something, then clear to make sure it is smooth? If so, what would you wipe with?Hi Kerry,
I use a wet sponge or cotton cloth soaked with the warm, soapy water and just let it run down the panel as I sand. Just enough to keep it wet is fine. You can also dip the sandpaper in the bucket frequently to keep it clean.
Unfortunately, you can't sand the base and go directly to clear, what you can do is reach full coverage, wet sand the base with 1200 grit, wipe with a final wash solvent (PPG DX320) apply two very even coats of base and clear over that. If you go direct to clear without re-coating the base, the sandscratches will be very evident. It just doesn't work. It would be great if it did though!!! On the Barracuda I'm working on, I'm spraying the sealer and two coats of paint (black), sanding out all imperfections, applying one coat of base and shooting the clear. I have some artwork to do on the sides, so I have to do that before clear of coarse, but you get the idea. On solid colors, one coat will usually suffice, but on metallics, it takes two coats after sanding the get the flake to look right.
Usually, you are the only one who notices the peel in the base, because no-one else gets that close....except me!!!!!
A couple more things that came to mind that I left out. The cheapie squirt bottles that Wal-Mart sells for like $.99 works good to keep the panel wet while sanding too. They spray a fine mist if set right.
Also, I failed to mention that a buffer should run at about 1500 rpm. I use a Makita variable speed buffer at work, and the slowest setting on it is 1500, which is about right. I use an air polisher in my own shop, and it runs too fast for my liking. When I get rich I'll buy a good electric buffer!!Randy
By the way, I discovered and verified that base coat mixed with reducer 'keeps' nearly forever if kept in a sealed jar. I had a have gun full on two occasions and kept it in a glass coffee jar. Good thing I did because I used it to respray the hood and fender top. Color match was perfect. It might not keep 'forever' but it certainly lasted the length of my paint job.
 Here is a shot of the hood before buffing. Should be shine free.
Any shiny spots indicate low spots or orange peel still to be sanded down.
Here is a shot of the hood before buffing. Should be shine free.
Any shiny spots indicate low spots or orange peel still to be sanded down. 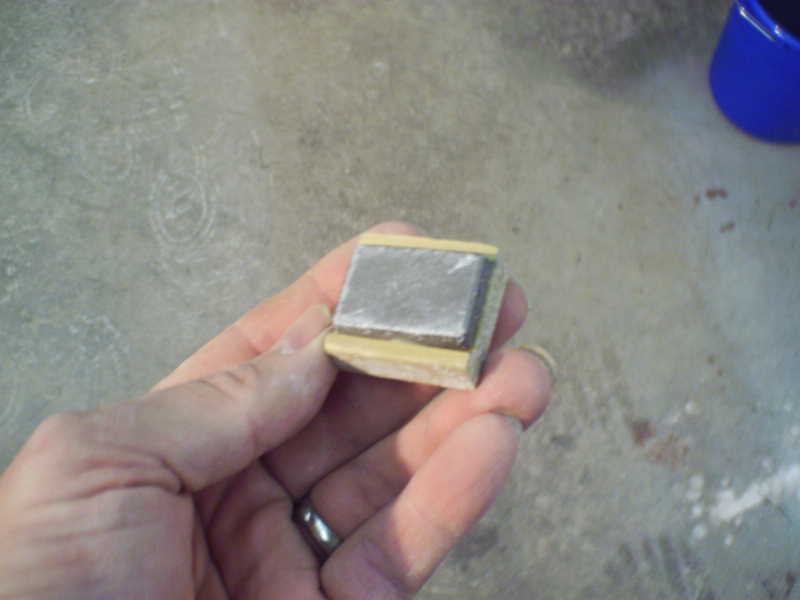 This is the nib file I mentioned earlier. You basically rub it across the
panel and it removes the nibs and trash prior to sanding. You can also use
it for runs but it's slower than a razor blade. Doesn't dig in though so
it's a tradeoff.
This is the nib file I mentioned earlier. You basically rub it across the
panel and it removes the nibs and trash prior to sanding. You can also use
it for runs but it's slower than a razor blade. Doesn't dig in though so
it's a tradeoff. 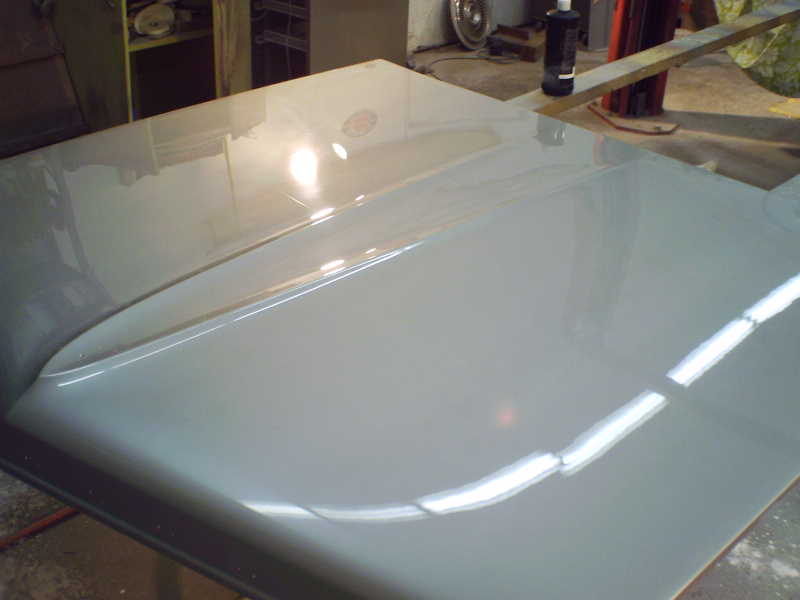 Heres the hood after buffing. Looking GOOD!!!
 Time to do the jambs. I'll be using straight urethane for this, not
base/clear.
Time to do the jambs. I'll be using straight urethane for this, not
base/clear. It was sunny and warm yesterday so I plulled it outside and washed the jambs
with warm soapy water and scuffed them with a gray scotchbrite pad so the paint
would 'stick'
It was sunny and warm yesterday so I plulled it outside and washed the jambs
with warm soapy water and scuffed them with a gray scotchbrite pad so the paint
would 'stick'
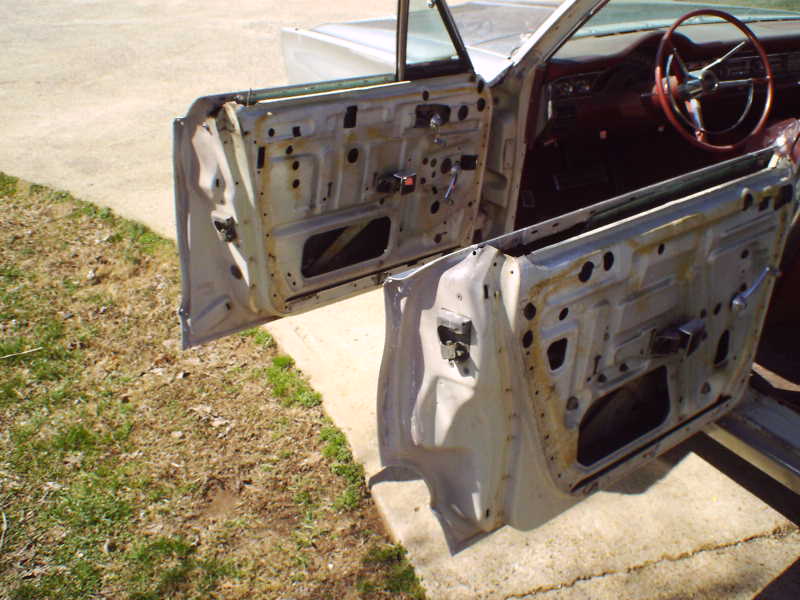
Tuesday March 2
It was warm again today and I wanted to get this over with so I hit it
pretty hard. I first masked off everything I did not want overspray on.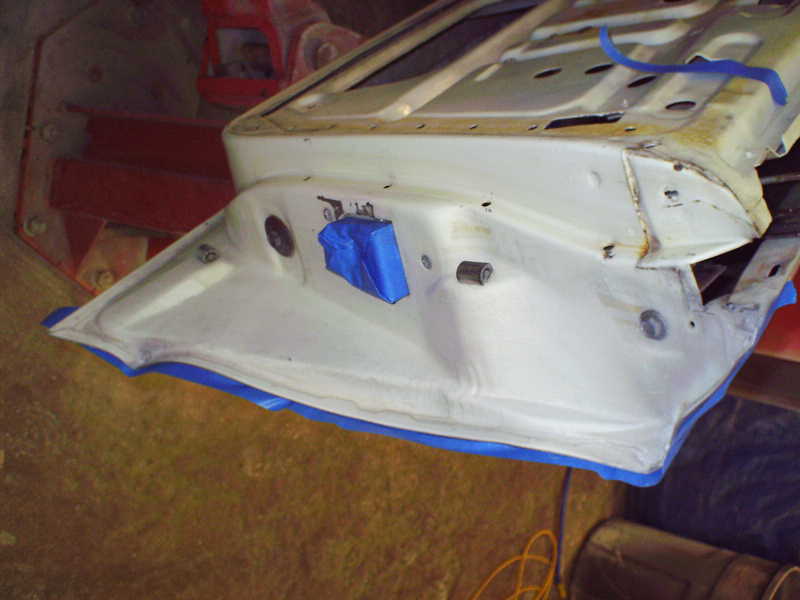
 Then I draped my plastic sheeting over everything. Inside and outside door
panels.
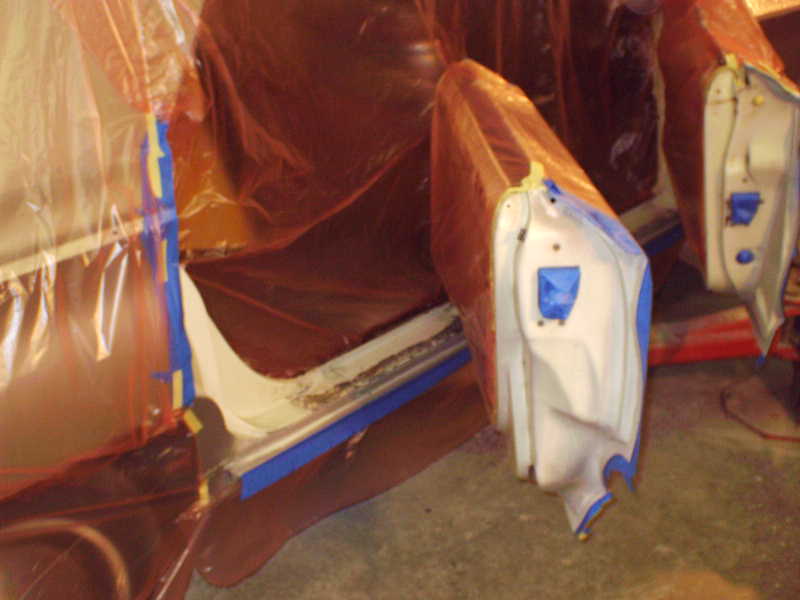
Then I draped my plastic sheeting over everything. Inside and outside door
panels. 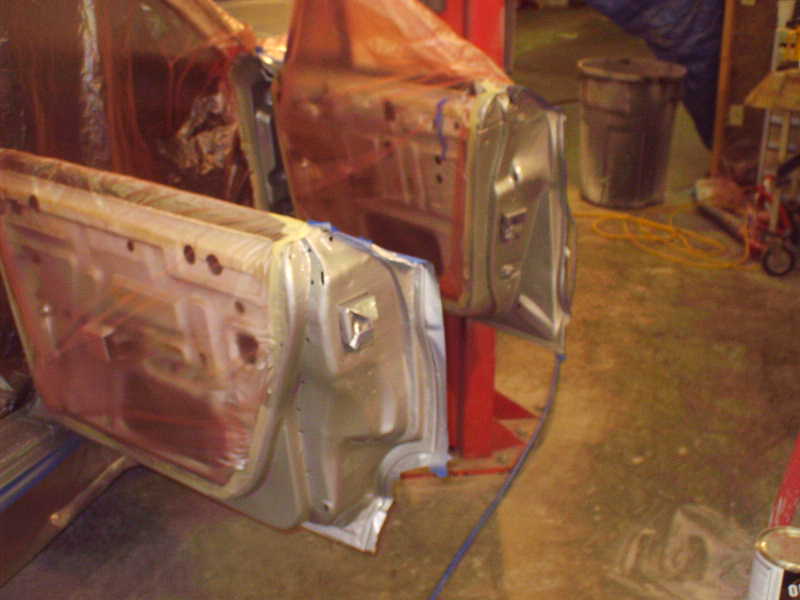 After three coats of paint it's done!
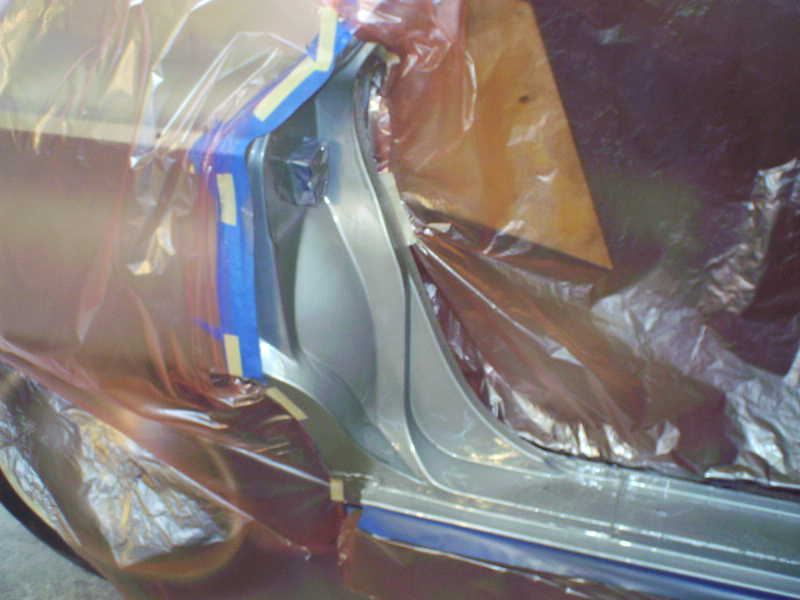 Tomorrow
I'll pull the plastic and tape off and start sanding/buffing the sides.
The end is in sight! Somewhere.
Tomorrow
I'll pull the plastic and tape off and start sanding/buffing the sides.
The end is in sight! Somewhere.
Total hours today was only 4. I played with my metalshaping tools the rest of the day. Still need to work on my taxes some more but 60 degree days are just too good to pass up. I'm babysitting the grandson Thursday and Friday so this will be a short week.
This page was last updated October 1, 2003. Send us your feedback, and come join the Imperial Mailing List - Online Car Club