
Imperial Home Page -> Imperials by Year
-> 1957 -> Kerry's
Restoration
-> part 24
part 24 of ?? --January 29, 1999 - Migs, Kittty Hair, & Bondo
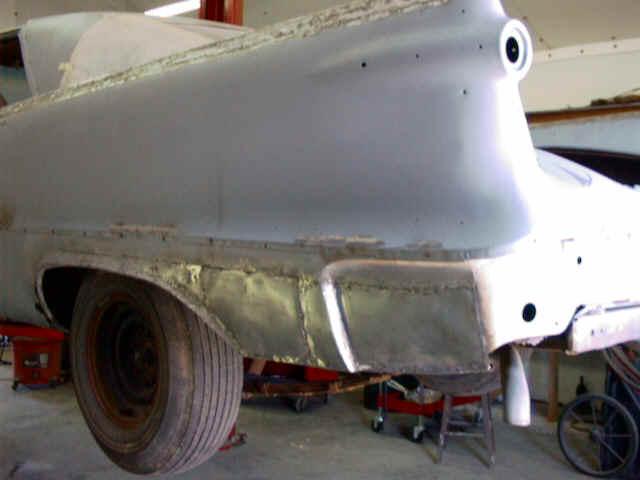
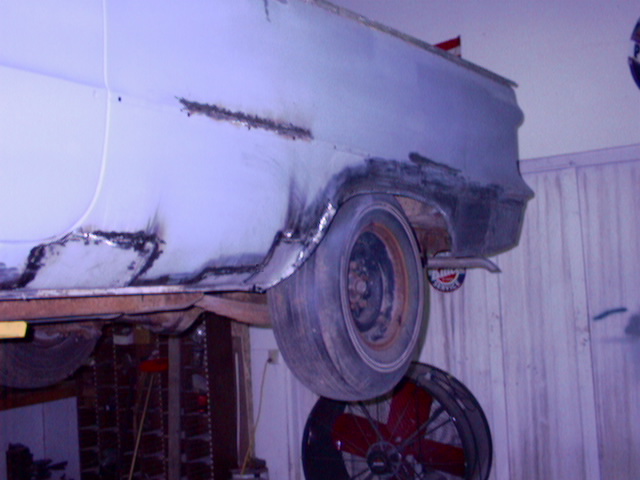
Remember I said last time that this was slow work and it is. However, I have been making steady progress. The wheel arch and rear quarter are finished and if I must say so myself, came out pretty darn good for a first timer. Remember, I have never done anything this major or intricate before. peri
A chapter or two back I mentioned that an Air Cutoff tool was handy for cutting out panels. It is but on Imperial sheet metal (20 gauge) it is slow going. Some time back, I bought a set of air chisel attachment and put them up where I would be able to quickly find them. After spending a few minutes with the cutoff tool, I had a flash that I had this panel cutter attachment. Since I knew exactly where they should be, it only took me 45 minutes to find them hidden in a place I would have never thought to look. I promise you, one of these days I'm going to stop for a month or so and get organized. But it wouldn't help, I'm just that way.
Anyway, this thing works great. Quick and plenty clean enough for welding in a patch panel.

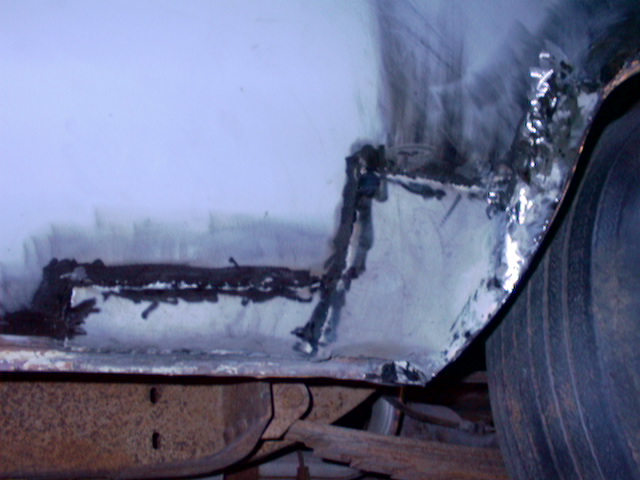
The flat blade is good for busting out the spot welds. This particular panel wraps around and is welded at the bottom to the rocker. This car has almost a "frame" behind the rocker panel. It is at least 1/16 inch metal and the rocker panel curves around it and is spot welded every 2 inches. If you look VERY closely at the lower right, you can see the drainage "hole." This allows the water that runs down inside the windows to drain out. Mine are all clear which is probably why there was very little rust in the rockers. Normally they are plugged and the water caused the skins to rot out.
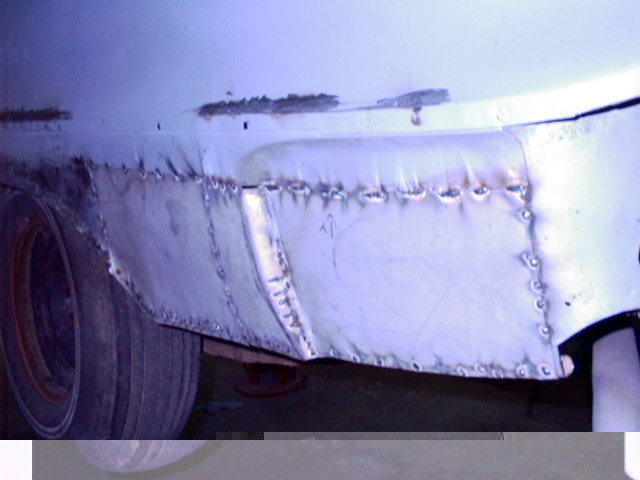
A couple of patch panels, some gentle curving with the panel bag and the front lip is finished.
On to the rear quarter. This was much more of a challenge because there was really nothing to start from. I cut the whole thing off about 2 inches below the trim line and used 3 separate patches. I also completed formed another piece of conduit to be the bottom lip after carefully measuring and evaluating how the other side looks. Remember the passenger side has a "new" replacement panel already in place. The only hard part was the inset for the rear bumper. This was a very interest and complex shape and took me 15 minutes to curve, stretch, bend, cuss, etc. before I got it in place.
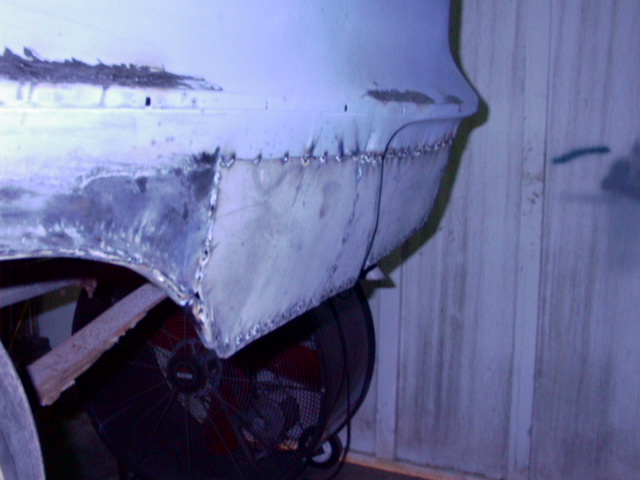
And here is the finished work. I would not call this metal finishing and a true metal guy would barf at this but I'm satisfied. A little filler and it will look fine.
I still have to rebuild the inner fender liners but that does not have to be "pretty".
I learned something in the middle of this. When I bought my MIG welder a few years ago, I came with a spool of .030 wire which is more or less the standard. Read that, "..that's what all the body shops use..." But then they know what they are doing. Sometimes anyway. The problem I had was burn through. As careful as I was, sometimes it would just melt a hole. Then I had to fill the hole with weldment and grind it down. This cause me to make lots of spot welds which sometimes had pretty good buildup and looked like crap. The grinding down was really the problem. MIG wire is HARD!! VERY HARD!! Probably the hardest thing you will ever lay a grinder to. Years ago, I had read an article about something called "Easy Grind" wire by ESAB. Supposedly this wire was much easier to grind and therefore the grinding created much less heat and distortion. I looked at my favorite welding houses and they said they had never heard of it and besides, what they has was "...what all the body shops used..."
About halfway through this repair, my torch tip got pretty bad so I went to my plastic cabinet where I keep my welding parts to get a new one. Digging through the drawer I noticed some .023 tips. LIGHT BULB!!! Smaller wire might not burn through as bad, I thought. About 15 minutes later I ran out of wire anyway so the next day I went in to buy some wire. I was going to try get a 1 LB spool of "23" and try it. When I went over to the shelf and picked up the wire it said "ESAB Easy Grind". The counter guy I deal with was surprised because he was the person who had told me he had never heard of it. Turns out this single spool came as repayment of a spool he had loaned another shop. I bought the spool from him and then went to the source and bought some more.
The smaller wire is MUCH better! MUCH! Now I can actually lay a bead instead of bubble gums (a highly technical welding term for crappy welding). On top of that, it does grind MUCH easier. I will switch back to regular 30 wire when I do chassis stuff but for body work this is the way to go.
Kitty Hair is the brand name for a fiber glass reinforced body filler. Other brands have the same stuff. It comes in long and short strand and I chose the long for some reason. I think it should be a little stronger. I am using Kitty Hair in spots where I have the most filler work to do. At the worst spot this will be about 1/4 inch which is the maximum you should EVER have. Remember the filler was over 1 inch deep in some spots on this car.
Various articles have confused me about filler over primer or filler over metal but I believe that filler over clean bare metal is best so I cleaned the work with a wire brush in a small grinder, wiped it down with a tack rag and began laying in the filler. Kitty hair cannot be leveled with a cheese grater file like normal bondo so if you do not have access to a grinder you will regret using it. It gets pretty hard. I'll have some photos in the next chapter.
In previous cars, I have had some paint problems attributed to outgassing of various fillers and paints after I had put some type of topcoat that would not let the gas permeate. I am determined to avoid this and will begin the filler work when I finish a section and allow it plenty of time to harden, shrink, and outgas before I put a primer on it.
Kerry
This page was last updated October 19, 2003. Send us your feedback, and come join the Imperial Mailing List - Online Car Club
