1. It Ain't Easy Bein' Green 2. Hot Wheels 3. Details, Details 4. Sound Blaster 5. Road Test 7. 2010 Snowball Rally 8. Engine Woe/Getting Even Chapter 6, Turning Corners
September 29, 2009The car has turned what may be the last substantial corner in its transformation from geriatric to body-builder.
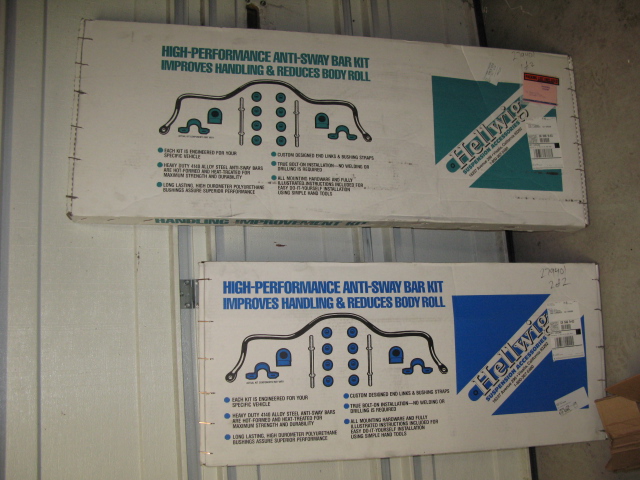
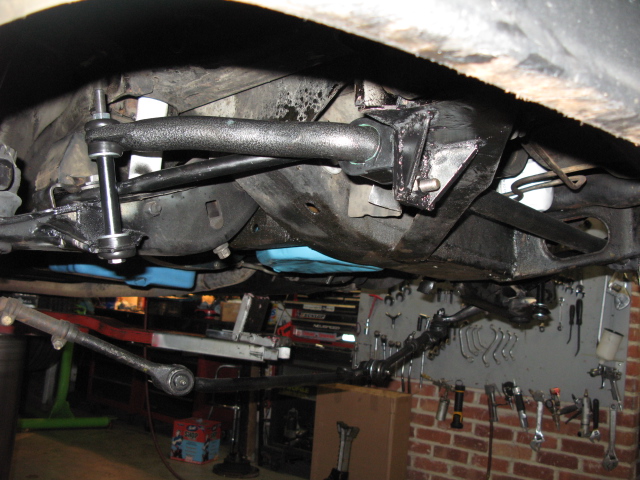
Just completed: Installation of the custom-fabricated anti-sway bars by Hellwig.
The car already has stiffer gas shocks and a rebuilt front end. The tires are sport-truck and designed to be very grippy on a larger vehicle. It was now time to make the car capable of using them without tilting over and rubbing them on the inside of the rear fender wells.
There was a 1973 Coupe on its way to the demo derby, and I snagged quite a few parts from it, including a door with no dent and the front sway bar. The spare bar was mailed to Hellwig and I provided them with dimensions of the "frame rails" that go under the axle hump in the rear of the car. It's a unibody, but they're present regardless.
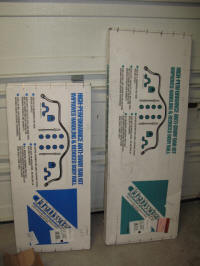
Several weeks later I got two large boxes containing the old bar and two new ones - a front and a rear.
I was told that the bars would be essentially the same diameter as what they're putting onto E-350 full size vans, which are lighter but more tippy with a higher center of gravity.
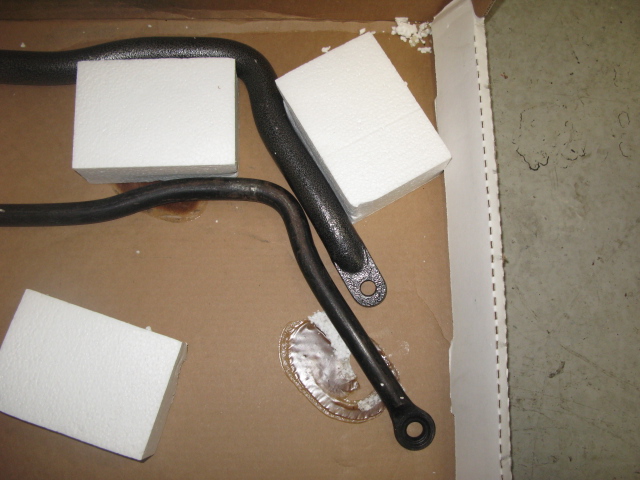
I under-estimated the diameter. The new bar was as thick as a baby's arm and was difficult to lift with one hand, and certainly not manageable without two hands and a firm grip.
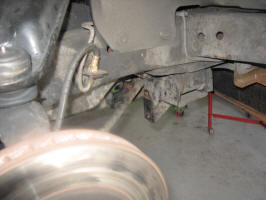
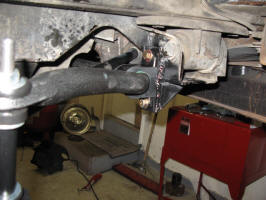
I was worried. The bar fit into the slots OK (my first concern - it looked pretty tight when I held it up to look). The "problem" was that the eyes looked like they were too far back. The increased diameter and the larger bracket/pivot bushings had the overall tip about 2 inches farther back than stock.
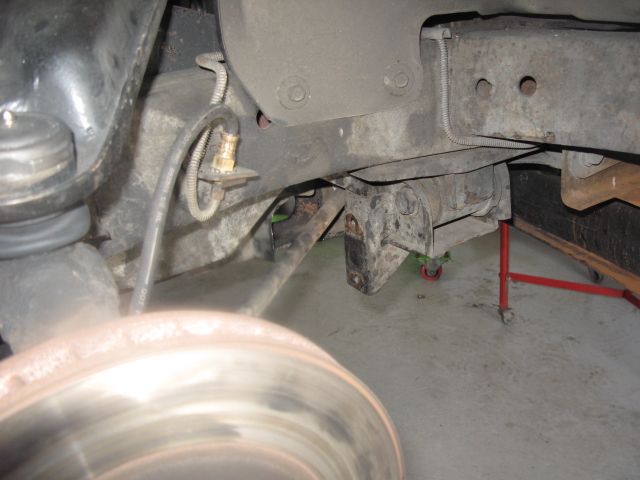
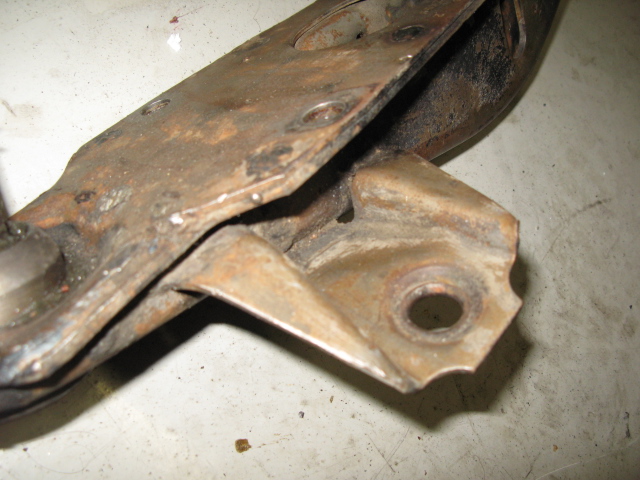
The original plan was to weld a plate on top of the existing vertical mounting location, which is on the lower front of the K member. It has two threaded holes that the U shaped pivot bracket/bushings use to mount the bar to the car's frame.
I was a little bit nervous about cutting the stock metal off, but decided to do so anyway, since I presumed that once it was cleared away, that I'd be able to build it up as needed - I was unable to line the bar up to see what would be needed until it was gone.
I used an electric 10,000rpm angle grinder with a super thin cutting disc and knocked out the brackets. Ground them down flush.
Once I got the bar in, it was obvious that more room would be needed inside of the mount point, so I cut away some of the boxing and folded it back out of the way.
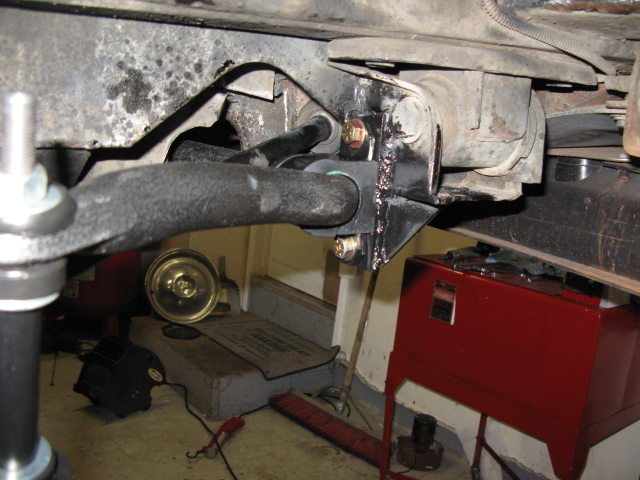
The solution was to weld 1/4" plate right on top of the now flattened area where the mounting bracket used to be. I used a pneumatic hammer to blow a hole in the metal, then welded nuts into the plates so that I would not have to hold the nuts (the upper would be inaccessible). With intense bead welding all the way around, as well as small triangular supports for the portion that hangs down, I'm pretty certain that this rig is now about 4 times stronger than what was there before.
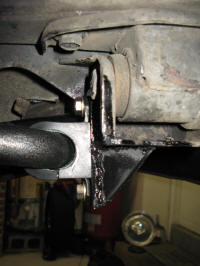
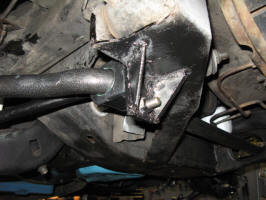
The mounting points on the car are OK, but the driver's side had some fatigue cracks on the end, and I don't want problems there, so I reinforced the control arm mounts by halving the length of metal which is cantelevered out in space.
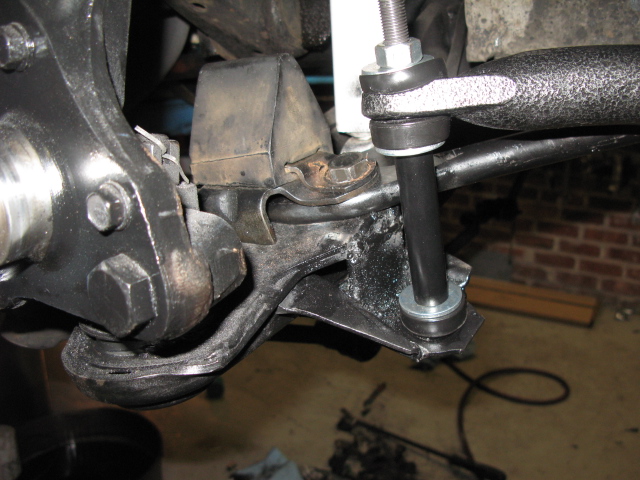
The sway bar mount points went from this:
To this:
Note that there's a large 1/4" square plate that ties the upper edge of the control arm to the lower, cantilevered mount point. To do this, I welded the nut for the strut rod in place before I put the plate in so that I wouldn't need to have access to the nut which is now covered by the plate.
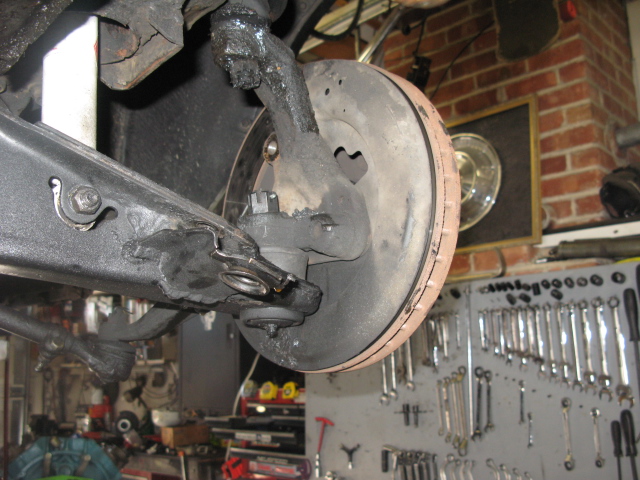
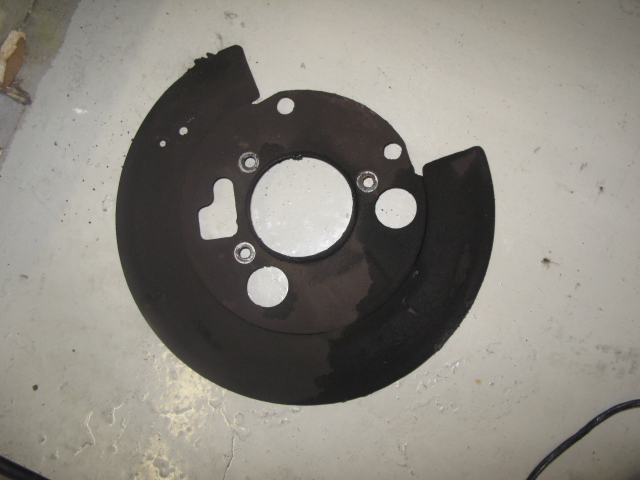
To do all of this, the rotors and calipers had to be removed, so as I re-assembled, I omitted the splash shields that cover the inward-facing surface of each rotor.
The cover looks like this, and covers the rotor almost completely:
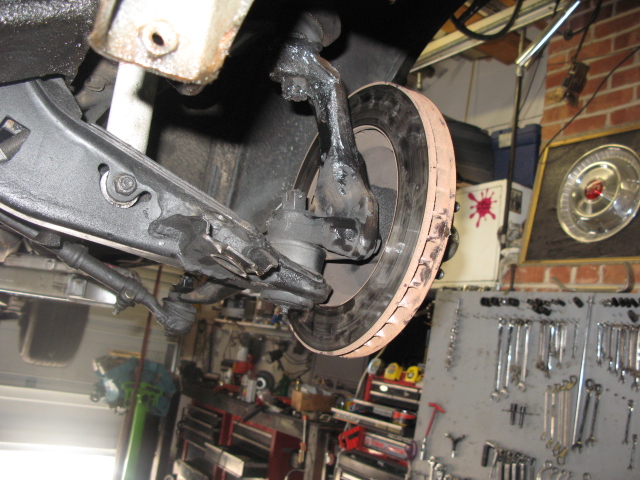
Now that they're back in, they look like this:
When I pulled things apart, I realized that the pads which I put in less than 3000 miles ago were worn down 50%. The brakes seemed soft and didn't like the abuse I am dishing out. Hopefully this will allow more cooling air to get to the rotors and better dissipate the heat I'm generating with the expanded capabilities of the car.
I'm starting to look at moving from my 12" rotors with single piston calipers to something from a modern vehicle, like a heavy duty pickup truck or something else - perhaps with drilled/slotted rotors. Will have to be cheap and practical. I am thinking that I can go against the trend and retrofit 1967 spindles to the car so that I can use the Budd hubs on the car. They have 5 bolts that allow one to remove the "hat" or rotor from the hub. Since that's how most modern rotors are made too, I think that it may not be a big deal to modify things and get multiple piston calipers and better, much larger rotors onto the front of the car.
More on that later. I need to go to the truck junkyard first.